Introduction
Before we begin talking about how to enable PPP on Ubuntu 22.04, let's briefly understand – What is PPP?
The Point-to-Point Protocol (PPP) is a communication protocol that enables the establishment of a direct connection between two devices over a network. It is often used to provide secure and reliable connections for various purposes, such as internet access, virtual private networks (VPNs), and telecommunications.
PPP offers features like encryption, error detection, and authentication, ensuring data integrity and privacy. Understanding the basics of PPP can help enhance network connectivity and optimize data transmission for businesses and individuals alike.
In this tutorial, you will enable PPP on Ubuntu 22.04. We will also address a few FAQs on how to enable PPP on Ubuntu 22.04.
Step 1: Check if PPP is Installed on Ubuntu 22.04
It's important to make sure PPP is installed on your Ubuntu system before you start using it. Ubuntu is typically pre-installed by default, so activating it usually doesn't require any additional steps. To be safe from any future problems, it's a good idea to double-check at all times.
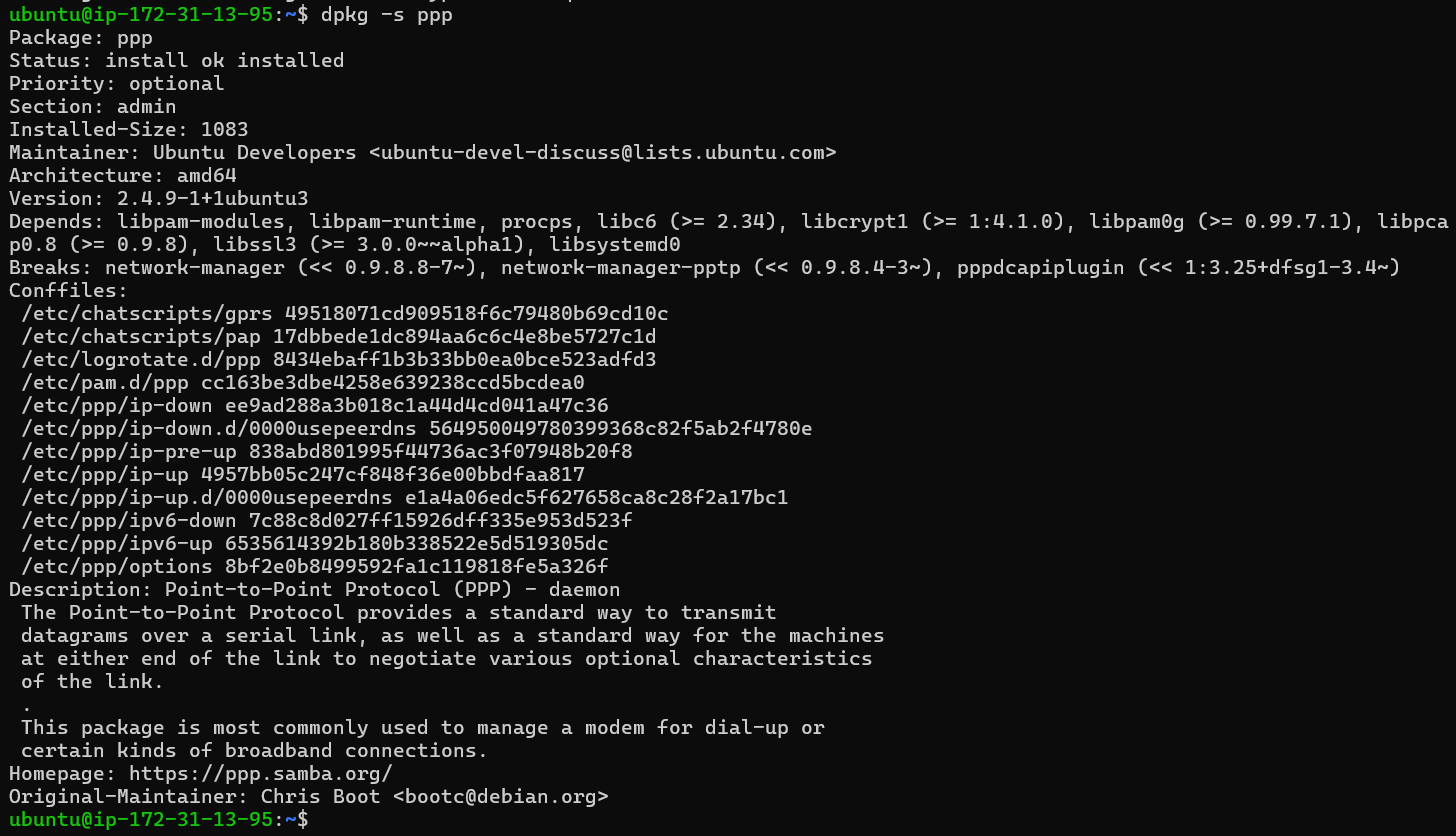
You must type the following command into the terminal to see if PPP is installed on your Ubuntu system:
dpkg -s ppp
This command searches your system's installed package list for the ppp package in particular. The terminal will produce an output similar to this if PPP is installed:
Package: ppp
Status: install ok installed
It means that PPP is not installed on your system if the terminal produces no output. In that case, installing PPP is a prerequisite for moving forward. In order to make sure that your system is prepared for the next steps and that there won't be any unforeseen problems when you begin using PPP, this step is essential.

Step 2: Install PPP on Ubuntu 22.04 (Situational)
On an Ubuntu system, PPP needs to be manually installed if it isn't already installed. This procedure is easy to follow and can be completed with the following command:
sudo apt install ppp
With this command, the system is told to download and install the PPP package and any necessary dependencies. You can begin utilizing PPPon your system after the installation is finished.
It's crucial to remember that installing PPP might require you to enable the universe repository first, depending on your system configuration and the version of Ubuntu you're using. The community maintains the free and open-source universe repository software. Thousands of programs that aren't in the official Ubuntu repositories are contained in it.
You can use the following command to enable the universe repository:
sudo add-apt-repository universe
By running this command, you can use the previous command to install PPP because it adds the universe repository to your system's software sources.
Step 3: Set Up PPP Connection on Ubuntu 22.04
Customizing your PPP connection settings is the next step after installing PPP on your Ubuntu system. In this step, you specify the username and password (as well as any other required network settings) that will be used to connect to your remote device or network.
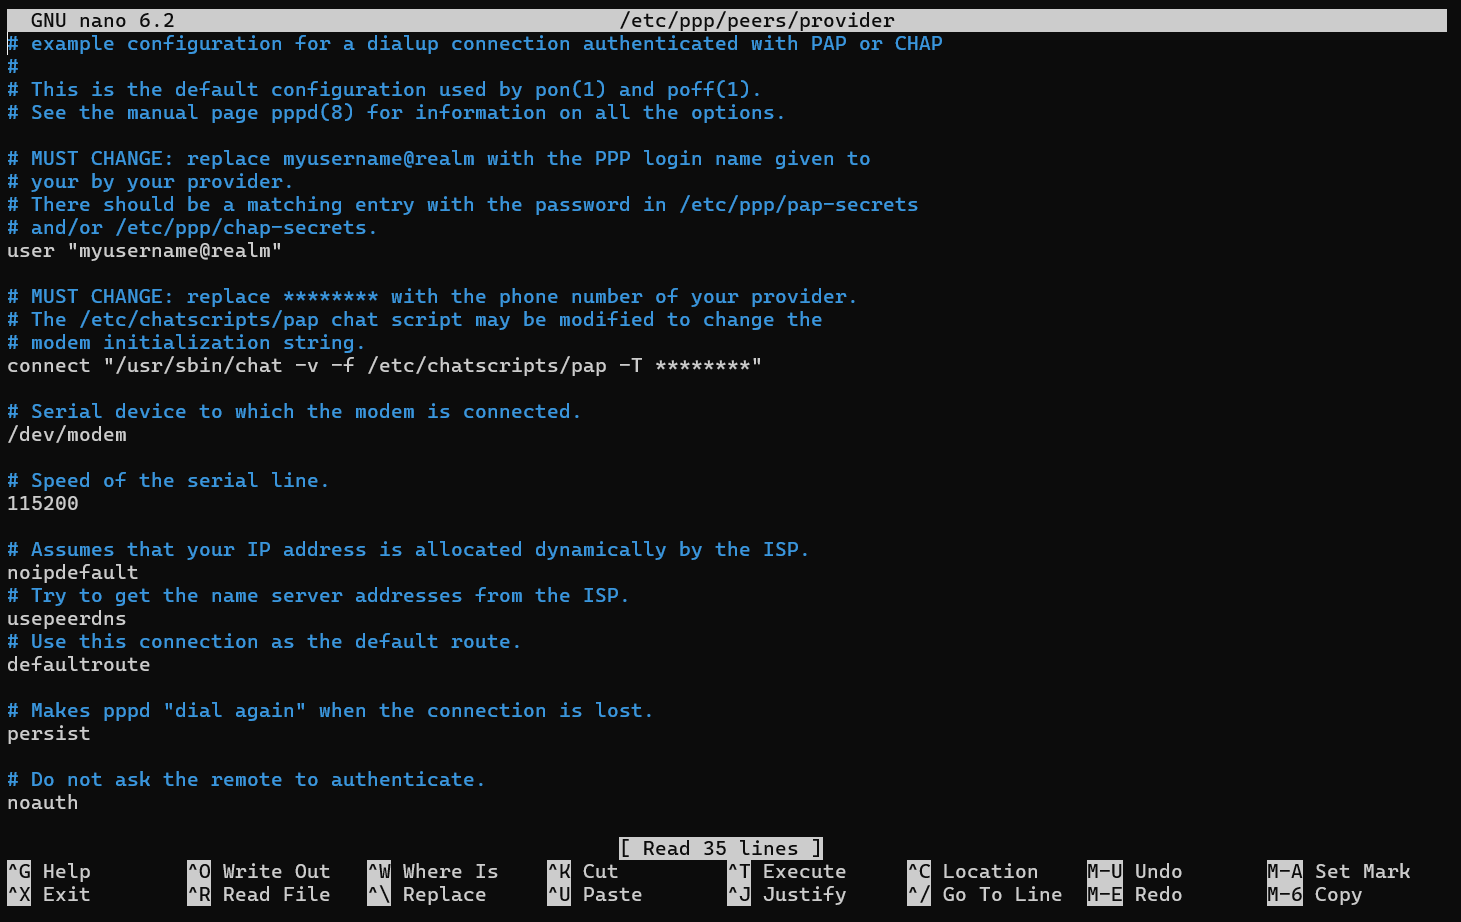
You must edit the /etc/ppp/peers/provider file in order to customize your PPP connection settings on Ubuntu. Your PPP connection's configuration settings are stored in this file. A sample configuration file is provided below:
# /etc/ppp/peers/provider

# Substitute "myusername" and "mypassword" with your actual login credentials

user myusername

password mypassword

# Indicate the serial device that you'll use for your PPP connection

/dev/ttyUSB0

# Indicate the baud rate for your serial connection

115200

# Activate debugging output to assist in troubleshooting connection issues

debug

# Activate compression to enhance network performance

nobsdcomp

nodeflate

# Indicate any additional network settings that are required, such as IP addresses or DNS servers

# For instance:

# connect "/usr/sbin/chat -v -f /etc/chatscripts/provider.chat"

# noipdefault

# defaultroute

# usepeerdns
You must change the following important configuration options in this file to meet your unique needs:
userandpassword: Enter your login information in place ofmyusernameandmypassword./dev/ttyUSB0: Indicate which serial device you want to use to establish your PPP connection. Depending on how your hardware is configured, this could change.115200: Depending on how your hardware is set up, this is the baud rate for your serial connection.debug: This turns on the debugging output, which is helpful when figuring out connection problems.nobsdcompandnodeflate: By using these settings, compression can be used to enhance network efficiency.connect,noipdefault,defaultroute,usepeerdns: These are extra network configurations, like DNS servers or IP addresses. Remove the comments and adjust these settings as necessary.
Once you have adjusted the PPP connection settings, close the text editor and save the file. You are now prepared to connect to your remote device or network via PPP and start a conversation.

Start and Use PPP Connection
You can start a PPP connection once PPP is installed and your connection parameters are adjusted to suit your requirements. The 'PPP on' command, or pon command, is used to accomplish this.
This is the fundamental syntax:
sudo pon provider
Replace "provider" in this command with the name of the configuration file (such as /etc/ppp/peers/provider) that you edited in the preceding step. Because this command needs administrative privileges, it must be run before the utility at startup.
Example Scenario: Connecting to a Data Center
To make things clearer, let's examine an example in more detail. Assume you are in charge of establishing remote connectivity between a data center and your place of business as an IT administrator. You have successfully installed PPP, set up your connection, and saved your configuration file under the name datacenter-link.
Initiating the Connection
The pon command and the configuration file name would be used to start the PPP connection, as in this example:
sudo pon datacenter-link
If you think of it like a switch, you are turning on your data center connectivity by using this command. At this point, Ubuntu will make an attempt to connect by using the datacenter-link configuration file's settings.
Verifying the Connection
You should to see an output verifying the connection once the command has been run. Double-checking is a good practice, though. To view your network interfaces and verify that a new PPP interface has been created, use the ifconfig command:
ifconfig
Search for a record that starts with ppp (ppp0, for example). The IP addresses that are linked to your local and distant devices ought to be shown, signifying that the connection is active.
Utilizing the Connection
You can start using your PPP connection now that it's active. On the network of the data center, for instance, you have access to shared resources like file servers and databases. You can set up your network settings to route traffic through this PPP connection if you're using it for web traffic.
Disconnecting PPP on Ubuntu
Similar to how you would use the pon command, you can use the poff command to disconnect. Consider it as turning the light switch to "Off":
sudo poff datacenter-link
Your PPP connection will be cut off as a result, and you won't be able to access the remote network via this connection going forward.
Ubuntu uses the configuration file's settings to try and establish your PPP connection when you run the pon command. The output that confirms the establishment of your PPP connection and shows the IP addresses assigned to your local and remote devices should appear if everything is configured correctly.
PPP off is an acronym for the command that you can use to cut off your PPP connection. This is the fundamental syntax:
sudo poff provider
Once more, substitute the name of your configuration file for "provider". Ubuntu disconnects your PPP connection and releases all related network resources when you run this command.
FAQs to Enable PPP on Ubuntu 22.04
How do I check if PPP is already enabled on my Ubuntu 22.04 system?
In the terminal, type sudo pppoeconf. If PPP is already enabled, you will see a prompt indicating an active connection. If not, it will guide you through the setup process.
Is PPP enabled by default on Ubuntu 22.04?
No, PPP is not enabled by default on Ubuntu 22.04. You need to install the PPP package manually and configure it for your specific requirements.
How can I configure PPP settings on Ubuntu 22.04?
After installing the ppp package, modify the configuration file located at /etc/ppp/options. Customize the settings such as authentication, encryption, and DNS addresses according to your needs.
How do I establish a PPP connection on Ubuntu 22.04?
To establish a PPP connection, run the command sudo pon <connectionname>. Replace <connectionname> with the name you assigned to your connection during the configuration process.
How can I disable or stop a PPP connection on Ubuntu 22.04?
To stop an active PPP connection, use the command sudo poff <connectionname>. Replace <connectionname> with the name of the established connection.
Can I use Network Manager to manage my PPP connections on Ubuntu 22.04?
Yes, Ubuntu 22.04 includes Network Manager, which can manage PPP connections. You can find it in the system tray or by searching for "Network" in the Ubuntu menu.
What authentication methods does PPP support on Ubuntu 22.04?
PPP on Ubuntu 22.04 supports various authentication methods such as PAP (Password Authentication Protocol) and CHAP (Challenge-Handshake Authentication Protocol).
Conclusion
We hope this tutorial helped you understand how to enable PPP on Ubuntu 22.04.
If you have any queries, please leave a comment below, and we’ll be happy to respond to them for sure.

