
Introduction
Before we begin talking about how to forward ports with Iptables on Linux, let's briefly understand – What is an Iptables?
Iptables is a powerful firewall utility for Linux systems. It allows you to manage and control the incoming and outgoing network traffic on your server. With Iptables, you can set up rules and filters to block or allow certain connections, protect your system from malicious activities, and create secure networks.
In this tutorial, you will learn how to forward ports using Iptables on Linux. We will also address a few FAQs on how to forward ports with Iptables on Linux.
Prerequisites
- Two Linux systems with internet connectivity that are linked to the same private network.
- Both systems have administrative privileges.
Iptables Port Forwarding
In order to protect the infrastructure supporting online applications, the proxy firewall is crucial. The application serves as a gateway to defend the internal network from attacks from the outside and is installed on a proxy server with a dedicated public IP.
Step 1: Set up Web Server
The steps for setting up a basic Iptables-based firewall that manages network traffic to and from a web server are described in the sections below. Create an example Nginx web server that only permits access from a private IP address by following the procedures listed below.
Gather Web Server Network Interface Details
Access the web server's console and carry out the following actions:
1) Use the following command to view a list of IPv4 connections that are available.
ip -4 addr show scope global
The output of the ip command lists the IP addresses and available network interfaces.

The system's public (bond0.3) and private (bond0.10) network interfaces and IP addresses are displayed in the output.
3) Note the names of the interfaces and their corresponding IP addresses.
Set up Nginx
To install and set up Nginx on your web server, follow these steps:
1) Use the package manager included with your Linux distribution to update the web server's repository information. The instruction utilises APT.
sudo apt update
2) Install the package for the Nginx web server.
sudo apt install nginx
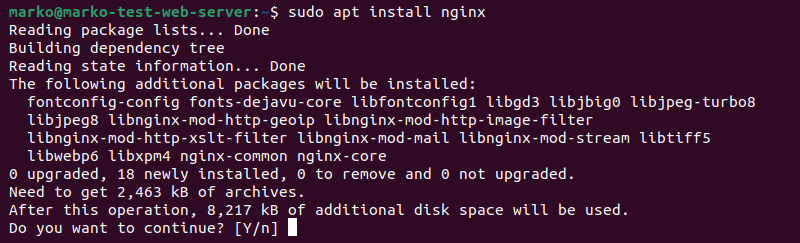
Input Y, hit Enter, and watch as the installation is completed.
3) Open the configuration file for the default Nginx server block using a text editor like Nano or Vim.
sudo nano /etc/nginx/sites-enabled/default
4) Look in the file for the server section. The information inside should mirror the following:
server {
    listen 80 default_server;
    listen [::]:80 default_server ipv6only=on;
5) Before the port number in the section's first line, include the server's private IP address.
listen [web-server-private-ip]:80 default_server;
The second line should be deleted because it discusses an IPv6 address that is not discussed in this tutorial. The server section is shown in the sample that follows after editing.
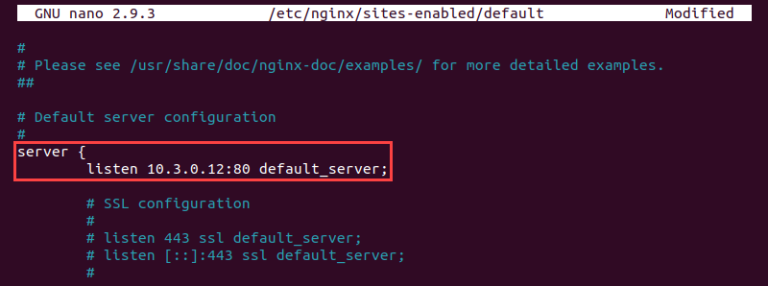
Save the file, then exit.
6) Type the following to check the Nginx configuration's syntax:
sudo nginx -t
Any syntax problems are shown by Nginx. Nginx output looks like this when there are no errors:

7) To implement the updated configuration, restart Nginx.
sudo systemctl restart nginx
Test Web Server Configuration
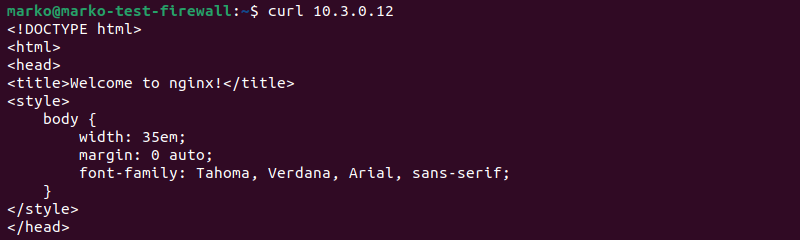
Use the curl command to verify that the Nginx server is functioning as planned. Execute the following command from a different computer connected to the same private network:
curl [web-server-private-ip]
The HTML data from the Nginx welcome page is displayed in the output.
Use curl with the web server's public IP address to verify that it does not allow connections from the public network.
curl [web-server-public-ip]
Because it is set up to only accept requests from the private network, Nginx rejects the connection.

Step 2: Set up Firewall
On a different system, construct a proxy firewall after configuring the web server. An example of how to set up a firewall with fundamental Iptables rules is provided below.
Gather Firewall Network Interface Details
On the additional computer that will serve as a firewall:
1) Use the following command to view the available IPv4 network interfaces:
ip -4 addr show scope global
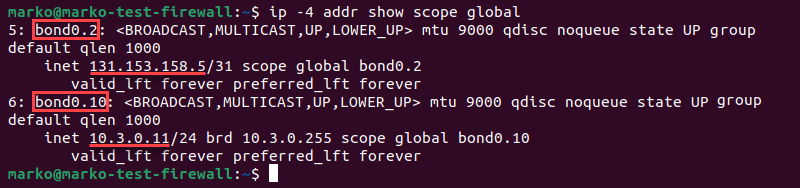
2) Find and record the IP addresses for the public and private network interfaces. In this instance, bond0.2 with IP 131.153.158 serves as the public interface, and bond0.10 with IP 10.3.0.11 serves as the secret interface.
Install Persistent Firewall Package
1) Repository data on the firewall system should be updated.
sudo apt update
2) Install the package iptables-persistent.
sudo apt install iptables-persistent
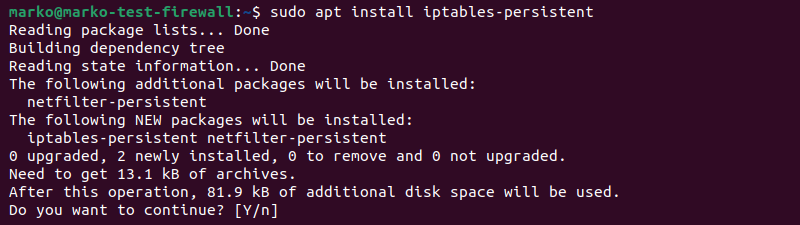
To begin the installation, enter Y and then click Enter.
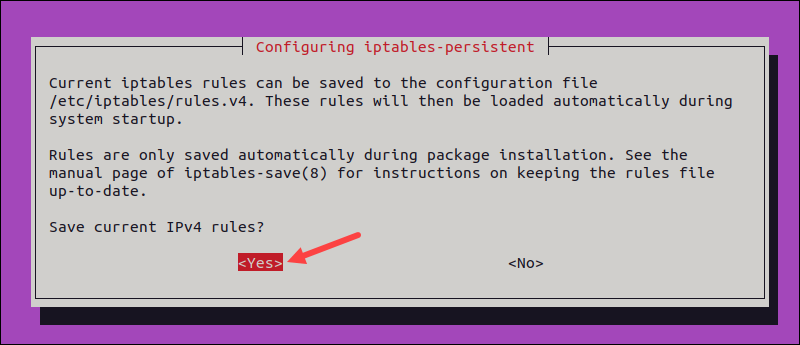
3) Choose Yes to save the current iptables rules when requested.
Set up Basic IPv4 Rules
Edit the firewall server's settings after installing the persistent firewall to add some fundamental IPv4 rules.
1) To add the rules, open the rules.v4 file in a text editor.
sudo nano /etc/iptables/rules.v4
2) An example configuration is shown below, and the comments provide details on each part.
*filter
# Drop incoming and forwarding packets; allow outgoing packets
:INPUT DROP [0:0]
:FORWARD DROP [0:0]
:OUTPUT ACCEPT [0:0]
# Custom protocol-specific rules
:UDP - [0:0]
# Write UDP rules here
:TCP - [0:0]
# Write TCP rules here
:ICMP - [0:0]
# Write ICMP rules here
# Accept SSH TCP traffic
-A TCP -p tcp --dport 22 -j ACCEPT
# Acceptance policy
-A INPUT -m conntrack --ctstate ESTABLISHED,RELATED -j ACCEPT
-A INPUT -i lo -j ACCEPT
# Drop a packet if it is invalid
-A INPUT -m conntrack --ctstate INVALID -j DROP
# Pass traffic to protocol-specific chains
# Allow only new TCP connections established with new SYN packets
-A INPUT -p udp -m conntrack --ctstate NEW -j UDP
-A INPUT -p tcp --syn -m conntrack --ctstate NEW -j TCP
-A INPUT -p icmp -m conntrack --ctstate NEW -j ICMP
# Reject anything that reached this point
-A INPUT -p udp -j REJECT --reject-with icmp-port-unreachable
-A INPUT -p tcp -j REJECT --reject-with tcp-reset
-A INPUT -j REJECT --reject-with icmp-proto-unreachable
# Commit the changes
COMMIT
*raw
:PREROUTING ACCEPT [0:0]
:OUTPUT ACCEPT [0:0]
COMMIT
*nat
:PREROUTING ACCEPT [0:0]
:INPUT ACCEPT [0:0]
:OUTPUT ACCEPT [0:0]
:POSTROUTING ACCEPT [0:0]
COMMIT
*security
:INPUT ACCEPT [0:0]
:FORWARD ACCEPT [0:0]
:OUTPUT ACCEPT [0:0]
COMMIT
*mangle
:PREROUTING ACCEPT [0:0]
:INPUT ACCEPT [0:0]
:FORWARD ACCEPT [0:0]
:OUTPUT ACCEPT [0:0]
:POSTROUTING ACCEPT [0:0]
COMMIT
Save the file and exit.
3) Type the following to check syntax of the rules.v4:
sudo iptables-restore -t /etc/iptables/rules.v4
If there are no syntax mistakes, the command doesn't print anything.
4) Use the following command to apply the firewall configuration:
sudo service netfilter-persistent reload

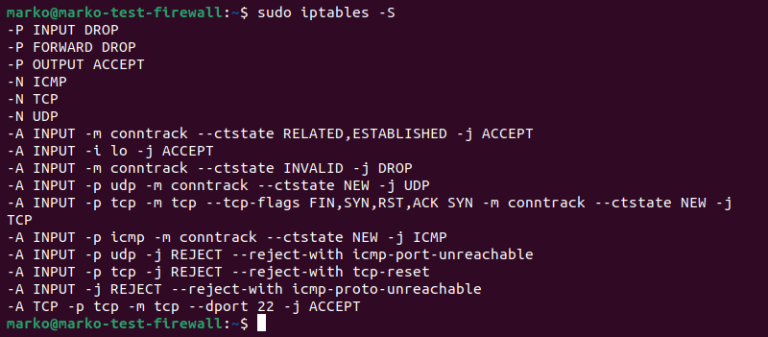
5) To ensure that the modifications have been correctly implemented, print the rules that are currently in effect.
sudo iptables -S
The rules set up in the rules.v4 file are displayed in the output.
Set up Basic IPv6 Rules
Ip6tables, a companion program to Iptables, is used to configure IPv6 packet rules. While only building an IPv4 firewall with Iptables is covered in this tutorial, the next section demonstrates how to obstruct all IPv6 traffic.
1) Launch a text editor and open the rules.v6 file.
sudo nano /etc/iptables/rules.v6
2) Ip6tables should be told to close all connections.
*filter
:INPUT DROP [0:0]
:FORWARD DROP [0:0]
:OUTPUT DROP [0:0]
COMMIT
*raw
:PREROUTING DROP [0:0]
:OUTPUT DROP [0:0]
COMMIT
*nat
:PREROUTING DROP [0:0]
:INPUT DROP [0:0]
:OUTPUT DROP [0:0]
:POSTROUTING DROP [0:0]
COMMIT
*security
:INPUT DROP [0:0]
:FORWARD DROP [0:0]
:OUTPUT DROP [0:0]
COMMIT
*mangle
:PREROUTING DROP [0:0]
:INPUT DROP [0:0]
:FORWARD DROP [0:0]
:OUTPUT DROP [0:0]
:POSTROUTING DROP [0:0]
COMMIT
Save the file, and close it.
3) Verify the syntax of the configuration.
sudo ip6tables-restore -t /etc/iptables/rules.v6
4) Use the new IPv6 guidelines.
sudo service netfilter-persistent reload
To verify that the new configuration is in effect, use the following ip6tables command to list the rules.
sudo ip6tables -S

Step 3: Set up Port Forwarding
Once the web server and proxy firewall have been configured, you can define custom forwarding rules that will:
- By using the firewall's public IP address, accept traffic requests.
- Send the packets to the private interface of the firewall.
- Send the packets through the private network to the web server.
- Accept and send the web server's traffic to the internet.
Enable Forwarding in Kernel
To use packet forwarding, the system needs to be told to allow it. Type the following to make forwarding available for the current session.
echo 1 | sudo tee /proc/sys/net/ipv4/ip_forward

To permanently enable packet forwarding, follow the steps below.
1) With a text editor, open the sysctl.conf file.
sudo nano /etc/sysctl.conf
2) Track down the following line:
# net.ipv4.ip_forward=1
3) Remove the initial # sign to uncomment the line.
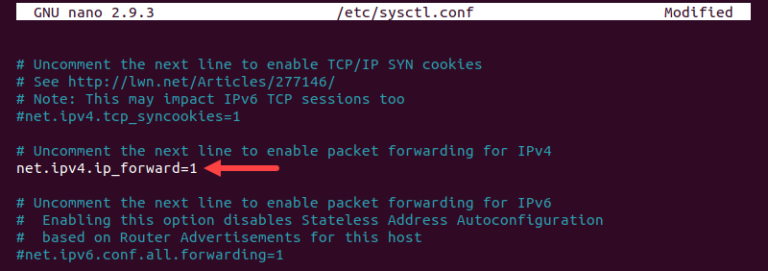
Save and close the file.
4) Use sysctl to load the new file configuration:
sudo sysctl -p

5) Apply all system modifications.
sudo sysctl --system
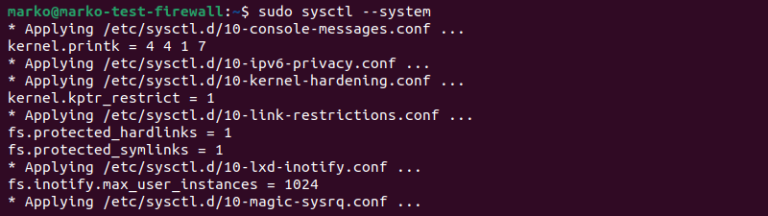
The system can now forward packets.
Provide Forwarding Rules
Add the forwarding rules to the rules.v4 file to specify them. As an alternative, use the command line and the following syntax:
sudo iptables [rule]
To properly configure the firewall to forward packets to and from the web server, use the following rules:
1) Permit connections from the public interface to the port 80 to be made and pass them to the private interface:
sudo iptables -A FORWARD -i [firewall-public-interface] -o [firewall-private-interface] -p tcp --syn --dport 80 -m conntrack --ctstate NEW -j ACCEPT
The rule appears as follows when applied to the parameters from our example:
sudo iptables -A FORWARD -i bond0.2 -o bond0.10 -p tcp --syn --dport 80 -m conntrack --ctstate NEW -j ACCEPT
2) Permit public to private interface packet traffic that is tagged as ESTABLISHED and RELATED.
sudo iptables -A FORWARD -i [firewall-public-interface] -o [firewall-private-interface] -m conntrack --ctstate ESTABLISHED,RELATED -j ACCEPT
For example:
sudo iptables -A FORWARD -i bond0.2 -o bond0.10 -m conntrack --ctstate ESTABLISHED,RELATED -j ACCEPT
3) Let the same traffic to flow back and forth between the private and public interfaces.
sudo iptables -A FORWARD -i [firewall-private-interface] -o [firewall-public-interface] -m conntrack --ctstate ESTABLISHED,RELATED -j ACCEPT
With the example parameters:
sudo iptables -A FORWARD -i bond0.10 -o bond0.2 -m conntrack --ctstate ESTABLISHED,RELATED -j ACCEPT
Provide NAT Rules
NAT rules instruct Iptables on how to modify the packets to allow for proper network routing. With just two NAT rules, simple port forwarding may be accomplished.
1) Modify the packet's destination address, moving it from the public interface of the firewall to the private interface of the web server.
sudo iptables -t nat -A PREROUTING -i [firewall-public-interface] -p tcp --dport 80 -j DNAT --to-destination [web-server-private-ip]
The command appears as follows when using the article's example web server data.
sudo iptables -t nat -A PREROUTING -i bond0.2 -p tcp --dport 80 -j DNAT --to-destination 10.3.0.12
2) Change the packet's source address to the firewall's private IP address. In this manner, the packet is sent from the web server to the firewall, which then transmits it to the source.
sudo iptables -t nat -A POSTROUTING -o [firewall-private-interface] -p tcp --dport 80 -d [web-server-private-ip] -j SNAT --to-source [firewall-private-ip]
The command appears as follows when using the example parameters:
sudo iptables -t nat -A POSTROUTING -o bond0.10 -p tcp --dport 80 -d 10.3.0.12 -j SNAT --to-source 10.3.0.11
3) To save all the Iptables rules, enter the command below.
sudo service netfilter-persistent save
Test Firewall Configuration
Send a request to the proxy firewall's public IP address using curl on a different machine to test the final firewall configuration.
curl [firewall-public-ip]
The output demonstrates that the Nginx page served by the web server was successfully passed by the firewall to the web browser.

FAQs to Forward Ports With Iptables on Linux
Why would I need to forward ports with Iptables?
Port forwarding with Iptables is useful when you want to expose a specific service or application running on a Linux server to the outside world, allowing external devices to communicate with it.
How do I check if port forwarding is already set up?
You can use the command iptables -t nat -L to list the currently configured port forwarding rules.
Can I forward multiple ports using a single Iptables rule?
Yes, you can forward multiple ports by specifying multiple rules or by using port ranges in a single rule.
Are there any security concerns with port forwarding?
Yes, port forwarding can expose your system to potential security risks. Ensure to configure appropriate firewall rules and only forward ports that are necessary.
Can I forward ports for both TCP and UDP protocols?
Yes, you can forward ports for both TCP and UDP protocols by defining separate rules for each protocol.
Will port forwarding affect existing network connections?
No, existing network connections will not be impacted by newly configured port forwarding rules.
Are there any alternatives to Iptables for port forwarding on Linux?
Yes, other tools like UFW (Uncomplicated Firewall) and Firewalld also provide port forwarding capabilities on Linux systems.
Conclusion
You should to be able to build a basic Iptables-based firewall and utilise port forwarding to direct traffic to and from a web server after reading this article. If you have any suggestions or queries, kindly leave them in the comments section.