
Introduction
Choose a different version or distribution
Before we begin talking about how to install Drone on Ubuntu 22.04, let’s briefly understand - What is Drone?
The drone is a container-native, open-source CI/CD Platform written in GO. The configuration files it works with include YAML, JSON, JSONNet, or Starlark. These define multiple build pipelines consisting of numerous steps.
The drone can be integrated with a number of source code managers and three SCMs: GitHub (cloud/enterprise), BitBucket (cloud/server), and Gitea. In general, each provider supports all Drone functionalities.
Drone supports various runners in executing jobs. Configuration formats, features, and execution environments of the runners are different hence they are not interchangeable.
The two container-based runners are:
- The Docker Runner is the most stable and popularly used runner which executes each build step in a fresh container.
- The Kubernetes runner is a newer (but slightly experimental) option. It has a similar syntax to that of Docker Runner and can integrate with Kubernetes.
Second, we have the two containers which run commands directly without isolation between repositories or builds.
- Exec runner as the name suggests executes commands directly on the host. It does not provide isolation between builds. It should only be used with trusted repositories that are not suitable for running within Docker.
- The SSH runner is almost like the Exec runner, but it runs commands over SSH on a host separate from the one running it.
Third, are two runners that run build steps in a cloud-based virtual machine. Most suitable for workloads that need to run directly on a host, but are still isolated from each other:
- The DigitalOcean runner makes a new Droplet for each build and runs commands within it. If you only need the scaling features, you can still use the Docker runner but with the auto-scale enabled.
- The MacStadium runner helps to execute builds on macOS machines in the cloud. This option is only useful for specialized workloads.
In this tutorial, you will install Drone on Ubuntu 22.04. We will also answer a few queries related to Drone Installation.
Advantages of Drone
- Container-native: Drone utilizes containers for build and deployment, ensuring consistent and reliable results across different environments.
- Open-source: Being an open-source platform, Drone offers flexibility, customization, and an active community for support and contributions.
- CI/CD: Drone provides continuous integration and deployment capabilities, automating the build, test, and delivery processes for greater efficiency.
- Written in Go: Built using the Go programming language, Drone offers speed, efficiency, and easy scalability for large-scale projects.
- Extensibility: Drone's plugin architecture allows easy integration with popular tools, enabling seamless workflows and adaptability to project requirements.
Prerequisites
You should have the following in order to complete this tutorial:
- An Ubuntu 22.04 server with a minimum of 1GB RAM, 2GB free disk space, and a non-root user with
sudoprivileges. - A domain (or subdomain) with an available A record pointed at your server’s IP.
- Docker set up on the server.
- A GitHub account.
Step 1 - Creating GitHub Account
You need to have an OAuth application for GitHub since that is what Drone uses to access code, authenticate users, and add webhooks to receive events.
1) Log in to your GitHub account and initiate setting up an OAuth application. Then, go to the user menu on the top right and click on Settings --> Developer Settings category --> OAuth Applications. You can alternatively navigate to GitHub's Developer Settings Page.
2) Now, click on the New OAuth Application button in the upper right corner to see a blank form.
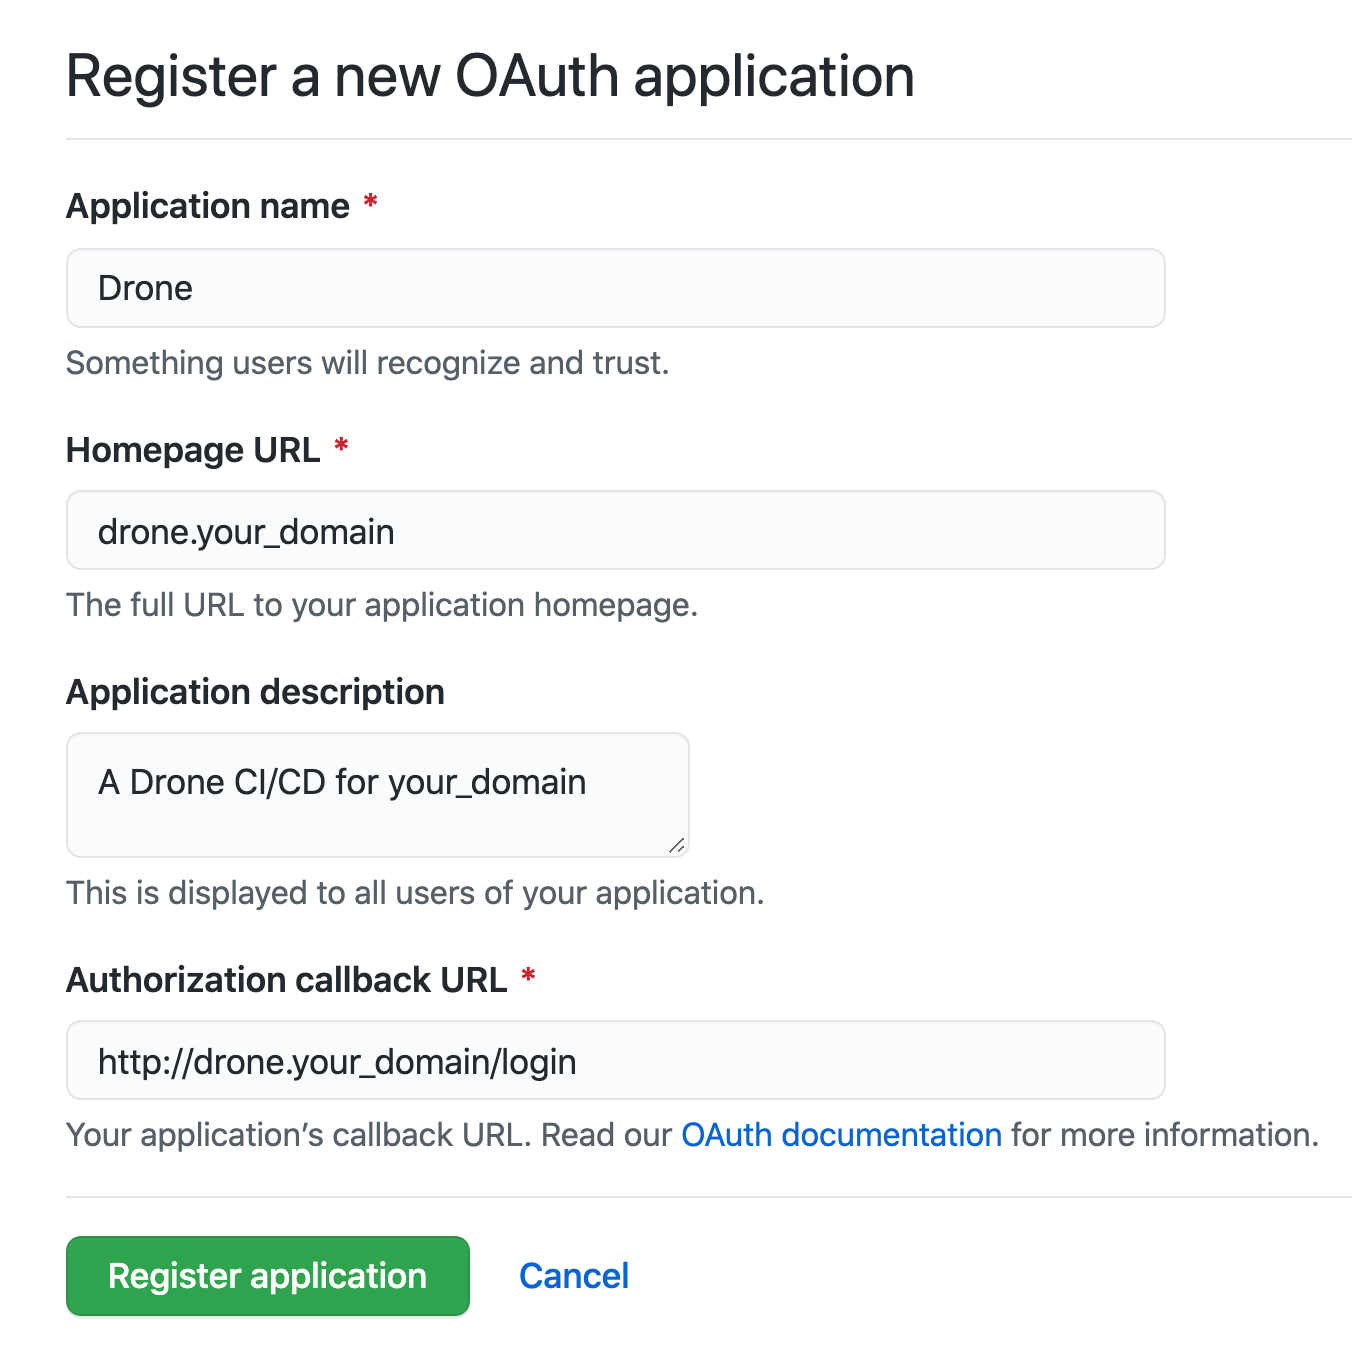
3) You can use Drone as your applicant name. Then, replace drone.your_domain with your own domain name or IP address, add a brief description of your application, and finally, add drone.your_domain/login for the authorization callback URL.
4) Then go to Register Application which will reveal a dashboard containing all the information about the application. Now, copy the Client ID and Client Secret and paste them wherever you find your_github_client_id and your_github_client_secret.
Step 2 - Creating the Drone Configuration
1) Use the opensslcommand to authenticate runners with the main Drone instances by generating a shared secret. This is the initiation of configuring Docker to build your Drone Server.
openssl rand -hex 16
2) The openssl command will produce a 16-digit hexadecimal number which will resemble the output below:
Output

918...46c74b143a1719594d010ad24
3) Copy the number you get and replace your_rpc_secret with that number in the next command.
4) Next, create the Drone configuration file. If you leverage the tee command to split the command’s output to your console while also appending it to Drone’s configuration file, it saves you continuous opening and closing of the configuration file.
5) In the following command, replace drone.your_domain with your domain. Also, replace your_github_client_id and your_github_client_secret with your GitHub OAuth credentials. Finally, replace your_rpc_secret with the output from your openssl command. Lastly, replace johny_the_shark with your GitHub username.
cat << 'EOF' | sudo tee /etc/drone
DRONE_SERVER_HOST=drone.your_domain
DRONE_SERVER_PROTO=https
DRONE_GITHUB_CLIENT_ID=your_github_client_id
DRONE_GITHUB_CLIENT_SECRET=your_github_client_secret
DRONE_RPC_SECRET=your_rpc_secret
DRONE_USER_CREATE=username:johny_the_shark,admin:true
EOF
6) The command makes use of Heredoc, which uses the << redirection operator with an arbitrary word. Here EOF is used to refer to the end-of-file. This allows entering a multiple-line input terminating with EOF, a word of the user's choice. The quotes around EOF files work the same way they do with literals. In this case, this serves the purpose of adding lines to a file. The first Drone configurations are being added here and ended with EOF. The input gets redirected to the cat command, and the output of the cat command is piped to the tee command via the | pipe operator. This is why Heredocs are a great way to append or create a text file fast.
7) In order to prevent random users from logging in and accessing your Drone server, you need to limit registration to specified usernames or organizations. In case you need to add users, you have to replace users in the following command with a list of users (separated by commas).
echo 'DRONE_USER_FILTER=users' | sudo tee -a /etc/drone
User must be a member of an approved organization then remove DRONE_USER_FILTER entry from /etc/drone file.8) You need to enable Let's Encrypt for HTTPS in case you are not using an external load balancer or SSL proxy.
echo 'DRONE_TLS_AUTOCERT=true' | sudo tee -a /etc/drone
IP address then you can skip DRONE_TLS_AUTOCERT entry.9) tee command now includes the -a switch, which instructs tee to append, and not overwrite, this output to your Drone configuration file.
Step 3 - Storing Build Logs Externally (Optional)
1) The volume can increase to multiple Gigabytes for heavily used installations. Though these logs are stored on the server's database, you can choose to use external storage for performance, scalability, and stability. You can choose to modify this step and use another S-3 compatible storage service or skip this step as mentioned initially.
2) After making sure that all the prerequisites are met, Copy the Spaces Access key to your clipboard and then update your configuration file with the following command:
cat << 'EOF' | sudo tee -a /etc/drone
DRONE_S3_ENDPOINT=your_s3_endpoint
DRONE_S3_BUCKET=your_s3_bucket_name
AWS_ACCESS_KEY_ID=your_s3_access_key
AWS_SECRET_ACCESS_KEY=your_s3_secret_key
EOF
3) You need to replace your_s3_endpoint with the URL of your Space, your_s3_bucket_name with the name of the Space you created, your_s3_access_key with your access key. The first two panels can be found by going to the Control Panel --> Manage menu button --> Spaces --> Choosing your space.
The Spaces Access Key can be retrieved by clicking on the Account menu button --> API button --> Scrolling down to find the Spaces section. In case you have misplaced your secret key, you'll have to generate a new access key.
4) Run a cat command now that the drone configuration file is complete:
cat /etc/drone
On the basis of your choices, the Output will look like the one given below:
Output

DRONE_SERVER_HOST=drone.your_domain
DRONE_SERVER_PROTO=https
DRONE_GITHUB_CLIENT_ID=your_github_client_id
DRONE_GITHUB_CLIENT_SECRET=your_github_client_secret
DRONE_RPC_SECRET=your_rpc_secret
DRONE_USER_CREATE=username:johny_the_shark,admin:true
DRONE_USER_FILTER=the_shark_org
DRONE_TLS_AUTOCERT=true
DRONE_S3_ENDPOINT=your_s3_endpoint
DRONE_S3_BUCKET=your_s3_bucket
AWS_ACCESS_KEY_ID=your_s3_access_key
AWS_SECRET_ACCESS_KEY=your_s3_secret_key
You can start your Drone server once you have confirmed that the configuration file is complete.
Step 4 - Installing and Starting Drone
1) Now, pull the Docker image:
docker pull drone/drone:2
2) Then, set up a volume to store the SQLite database:
docker volume create drone-data
3) Then, start the server after setting restart on boot and forwarding on port 80 and 443:
docker run --name=drone --detach=true --restart=always --env-file=/etc/drone --volume=drone-data --publish=80:80 --publish=443:443 drone/drone:2
4) In case you have ufw and only allowed OpenSSH enabled on your firewall, you'll need to open ports 80 and 443:
sudo ufw allow 80
sudo ufw allow 443
5) Then, reload ufw and check the status of updates:
sudo ufw reload
sudo ufw status
6) You shall receive a similar output:
Output

Status: active

To                         Action      From
--                         ------      ----
OpenSSH                    ALLOW       Anywhere
80                         ALLOW       Anywhere
443                        ALLOW       Anywhere
OpenSSH (v6)               ALLOW       Anywhere (v6)
80 (v6)                    ALLOW       Anywhere (v6)
443 (v6)                   ALLOW       Anywhere (v6)
7) Visit https://drone.your_domain, enter your GitHub credentials then authorize your new application when prompted. You'll see that your Drone server is now Live:
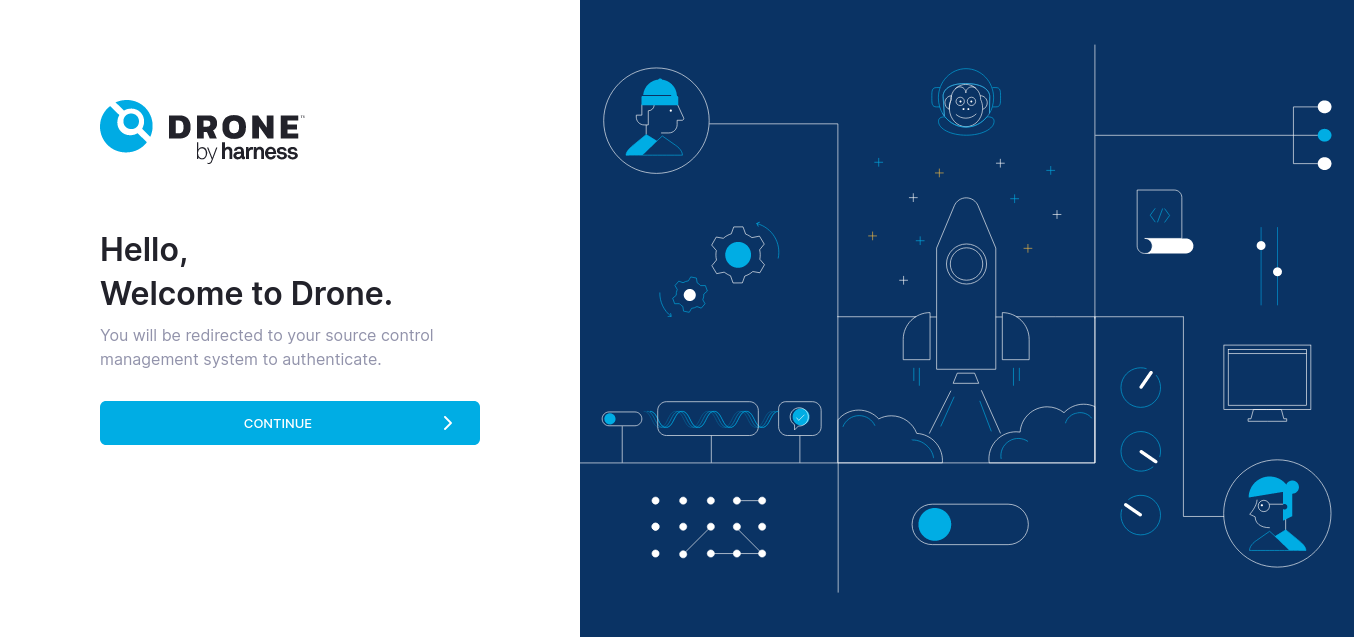
After authenticating, proceed with registration.

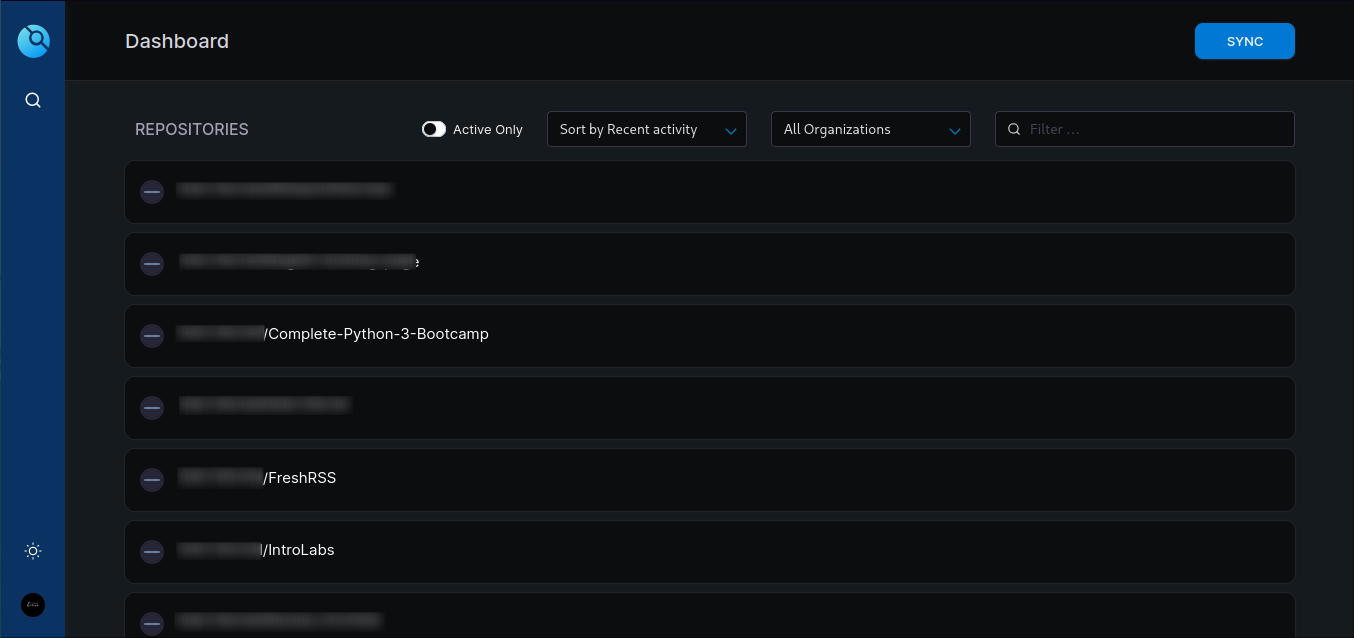
After you have registered successfully, You will see your dashboard like below.
Step 5 - Installing the Docker Runner (Optional)
1) You can choose to go about setting up a runner with the help of the First Option or the second Option. Otherwise, continue with installing a Docker Image.
To begin, pull the Docker image for the runner:
docker pull drone/drone-runner-docker:1
2) Then, start the runner. Replace drone.your_domain and your_rpc_secret with your own values. You may choose to change the DRONE_RUNNER_CAPACITY in order to increase the number of pipelines executed at once. But be careful of your system specifications.
docker run --name drone-runner --detach --restart=always --volume=/var/run/docker.sock:/var/run/docker.sock -e DRONE_RPC_PROTO=https -e DRONE_RPC_HOST=drone.your_domain -e DRONE_RPC_SECRET=your_rpc_secret -e DRONE_RUNNER_CAPACITY=1 -e DRONE_RUNNER_NAME=${HOSTNAME} drone/drone-runner-docker:1
3) Check whether the runner started successfully:
docker logs drone-runner
4) The following output should be obtained:
Output

time="2023-07-26T13:35:18Z" level=info msg="starting the server" addr=":3000"
time="2023-07-26T13:35:18Z" level=info msg="successfully pinged the remote server"
time="2023-07-26T13:35:18Z" level=info msg="polling the remote server" arch=amd64 capacity=1 endpoint="http://18.233.168.167" kind=pipeline os=linux type=docker
In case you need to change the runner's configuration or secret, repeat the step after deleting your container with docker rm drone-runner.
Step 6 - Creating a YAML Pipeline
You can test your Drone installation with the help of a YAML pipeline.
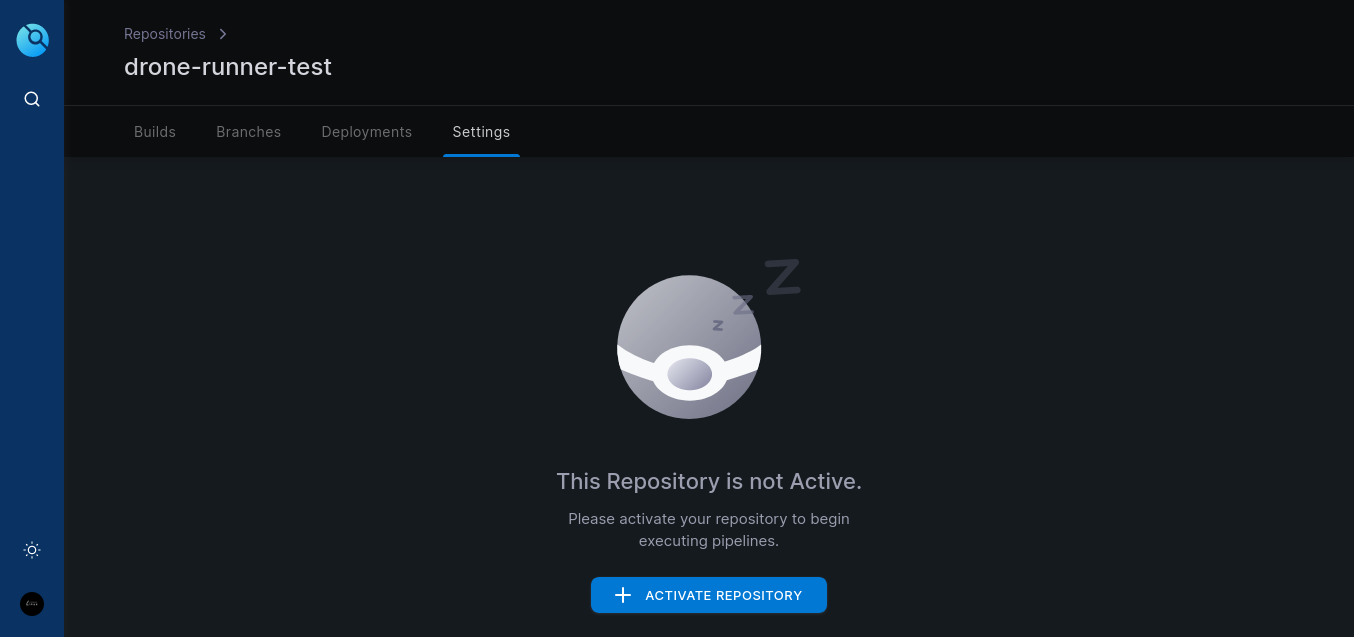
1) For this, you need to start by creating a new repository on GitHub. Then, from your GitHub profile bug go to Repositories --> New. Then give a new name to your new repository and click on the Create Repository button. Next, from your Drone server hit SYNC and refresh the page, you'll see the newly created repository. Hit the Activate button beside it.
2) Then, create a new file .drone.yml. You can either go about this with the help of GitHub or use the git command. On GitHub go to Repositories then select the new repository. Next, click Add file --> Create New file then name it .drone.yaml and then add the following:
name: drone-test
kind: pipeline
type: docker

steps:
- name: test
  image: alpine
  commands:
  - echo "It worked!"
3) Now the Commit new file at the bottom page. In the case of the command line, commit and push your changes.
4) Make sure that the runners are set up correctly. The logs for the runner can be viewed with the help of docker logs drone-runner and the logs for the autoscale with docker logs drone-autoscaler.
In case you are using the auto scaler it will take up to a minute to load the screen, the log message would read starting the server.
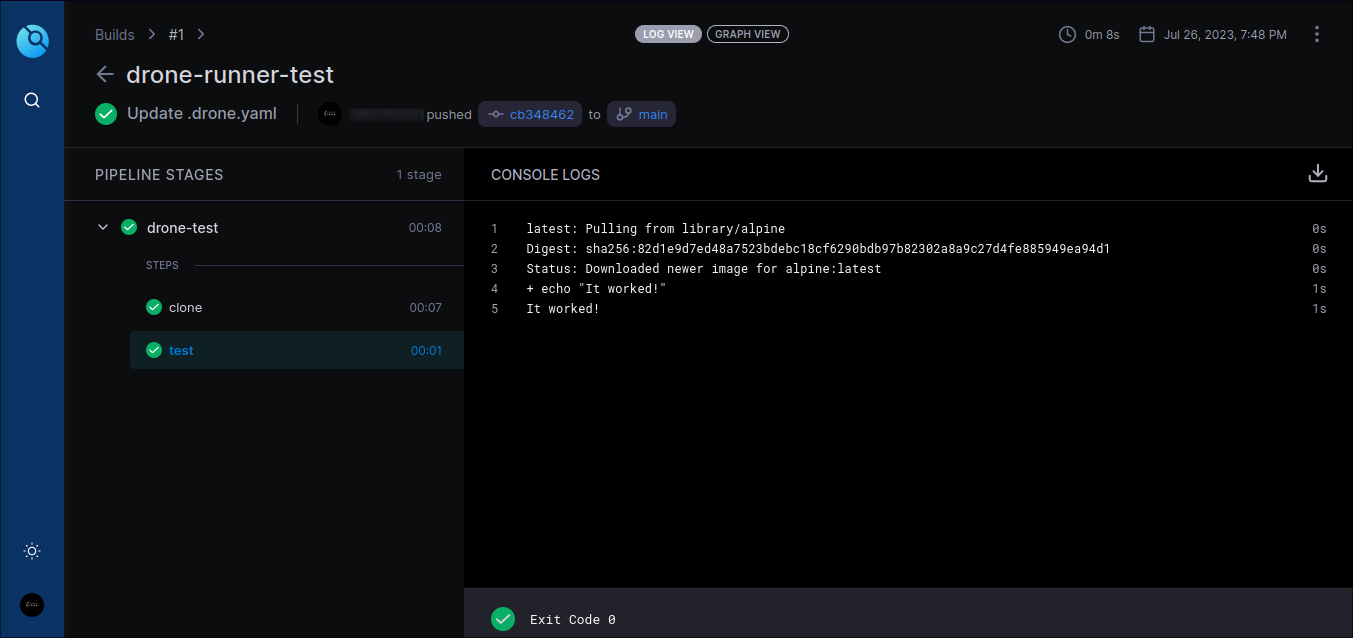
You will then see It worked! in the logs for the test stage of the drone-test pipeline. Make sure that the S3 credentials and bucket names are correct. You can even use docker logs drone in order to see the Drone's logs for information.
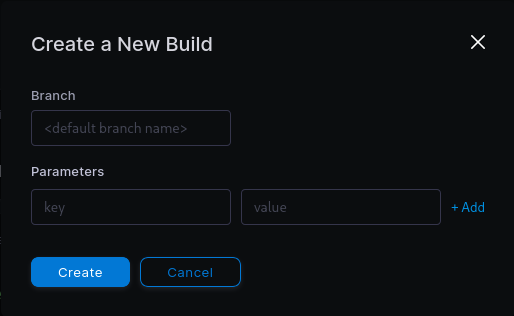
5) Now, after syncing click on create build and enter the branch for build, and click on create.
After the build is finished, you will see page something like this.
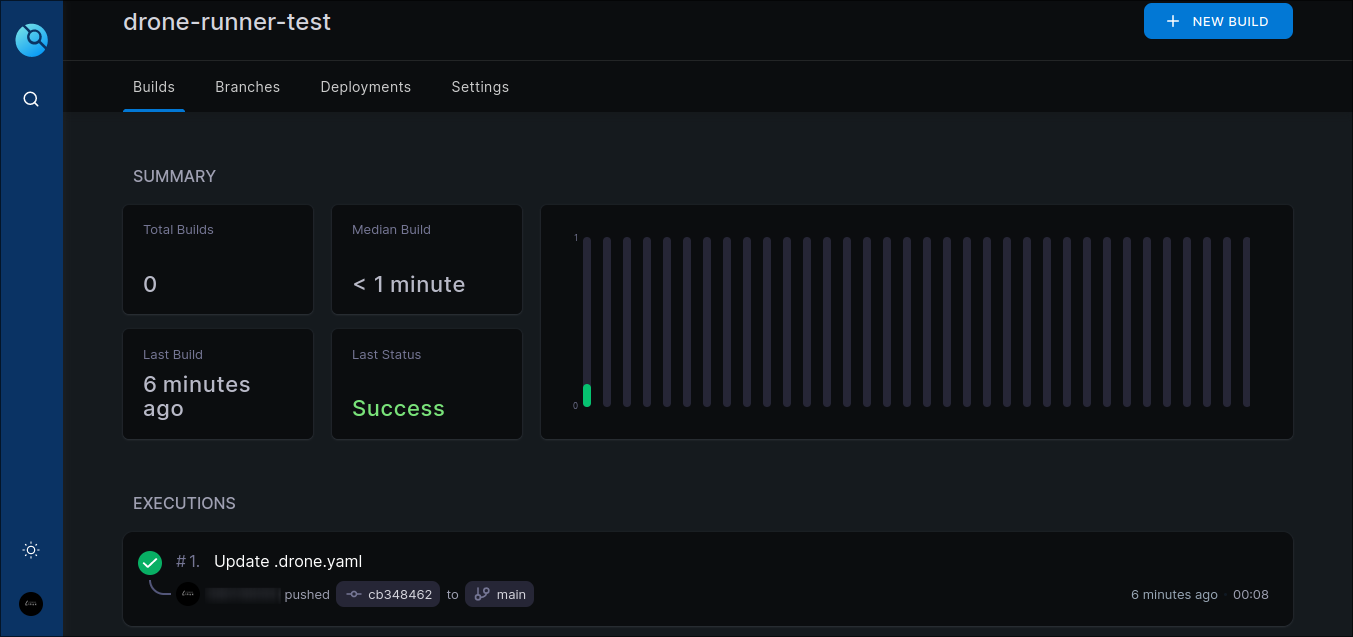
You can click on the vertical bar with green color to check the logs.
Setting up and installing Drone server to handle your CI/CD workflow is now completed.
FAQs to Install Drone on Ubuntu 22.04
1) How does the go test and go build commands executed?
These commands are executed inside the golang Docker container downloaded at runtime from DockerHub.
kind: pipeline
name: default

steps:
- name: test
  image: golang
  commands:
  - go test
  - go build
2) Can one test multiple versions?
You can use Drone’s multi-pipeline feature to concurrently test against multiple versions of Go. This is equivalent to matrix capabilities found in other continuous integration systems.
---
kind: pipeline
name: go-1-11

steps:
- name: test
  image: golang:1.11
  commands:
  - go get
  - go test

---
kind: pipeline
name: go-1-10

steps:
- name: test
  image: golang:1.10
  commands:
  - go get
  - go test

...
FAQs to Install and Configure Drone on Ubuntu 22.04
How do I start and stop the Drone service on Ubuntu 22.04?
After the installation, start the Drone service by executing the drone-server command. Use drone-server --stop to stop the service.
How can I access the Drone web interface on Ubuntu?
By default, Drone runs on port 80. Open a web browser and go to http://your-server-ip. You'll be prompted to authorize the application with your Git provider.
Can I integrate Drone with my Git provider on Ubuntu?
Yes, Drone supports integration with various Git providers like GitHub, GitLab, and Bitbucket. You can configure the integration by providing the required credentials in the .drone.yml file.
What configurations do I need to modify in Drone after installation?
You will need to configure Drone by setting environment variables, such as the database connection details and authentication methods, in the .env file provided with the installation.
How do I set up user authentication and access control in Drone?
Drone supports various authentication methods, including OAuth, GitHub, GitLab, and Bitbucket. You can configure them in the .env file and enable access control through the Drone user interface.
How can I troubleshoot issues during the installation or configuration of Drone?
If you encounter any issues, it is recommended to check the Drone documentation and community forums, as they provide valuable troubleshooting tips. You can also seek assistance from the active Drone community.
Can I integrate Drone with my existing CI/CD tools and services?
Yes, Drone offers various plugins and extensions that allow easy integration with popular CI/CD tools, such as Jenkins, Slack, and AWS, providing flexibility to fit into your existing workflow.
Conclusion
We hope this detailed guide helped you understand how to install, configure, and modify a Drone. To learn more about Drone installation, check out the official Drone Installation Documentation.
If you have any queries, please leave a comment below and we’ll be happy to respond to them for sure.