
Choose a different version or distribution
Introduction
Before we begin talking about how to install GitLab on Ubuntu 22.04, let’s briefly understand - What is GitLab?
GitLab is a popular web-based platform used for managing and tracking source code repositories. It enables software developers to collaborate efficiently, track changes, and work together on projects. GitLab provides a centralized location for storing code, making it easy to manage versions and revisions.
With its user-friendly interface and powerful features, GitLab simplifies the development process and enhances teamwork. Whether you are a beginner or an experienced developer, GitLab is an indispensable tool for effective code management.
In this tutorial, you'll install and configure GitLab on Ubuntu 22.04. We will also address a few FAQs on how to install GitLab on Ubuntu 22.04.
Advantages of GitLab
- Collaboration: GitLab allows teams to work together seamlessly on projects, facilitating efficient collaboration and code review.
- Version Control: With GitLab, developers can easily track changes, manage versions, and revert to previous states of the codebase.
- Continuous Integration/Continuous Deployment (CI/CD): GitLab provides integrated CI/CD pipelines, automating the build, testing, and deployment processes.
- Issue Tracking: GitLab offers robust issue tracking capabilities, enabling teams to manage and prioritize tasks effectively.
- Open-source and Self-hosted Options: GitLab offers both cloud-hosted and self-hosted options, giving teams flexibility and control over their code repositories.
Prerequisites to Install and Configure GitLab on Ubuntu 22.04
- An Ubuntu 22.04 server with a non-root sudo user and a basic firewall.
The GitLab hardware requirements recommend:
- 2 cores
- 8GB of RAM
- Domain name pointed at your server. We'll use the domain name example.com.
Step 1 – Install the Dependencies
1) Firstly, refresh the apt local package index and then install the dependencies with the help of the following command:
sudo apt update
sudo apt install ca-certificates curl openssh-server postfix
2) Now, for postfix installation, you can install Postfix using the below commands, or you can use a mail service such as SendGrid, MailChimp, MailGun, or SES.
debconf-set-selections <<< "postfix postfix/mailname string $(hostname -f)"
debconf-set-selections <<< "postfix postfix/main_mailer_type string 'Internet Site'"
sudo apt install postfix
Step 2 – Install GitLab
1) Now, we can move on to installing GitLab. For this, move to the /tmp directory then download the installation script.
cd /tmp
curl -LO https://packages.gitlab.com/install/repositories/gitlab/gitlab-ce/script.deb.sh
2) Hosted version of the script can be found here, check the script and ensure what all actions it can take:
less /tmp/script.deb.sh
3) Now that you are satisfied with the contents of the script, you can run the installer:
sudo bash /tmp/script.deb.sh
4) The script sets up your system to use GitLab repositories. This way, you can manage GitLab with the same package management tools which you use to run other packages on your system. Post this, install GitLab with apt:
sudo apt install gitlab-ce
Step 3 – Configure the Firewall Rules
1) You might want to change the settings of your ufw enabled firewall. This needs to be done so that GitLab or its functions are not hindered by the firewall.
You can check the status of your firewall with the help of:
sudo ufw status
Output

Status: active

To                         Action      From
--                         ------      ----
OpenSSH                    ALLOW       Anywhere
OpenSSH (v6)               ALLOW       Anywhere (v6)
2) The above output shows that SSH traffic is allowed. For GitLab, you need to allow HTTP access since it is a web application. GitLab can request a free TLS/SSL from Let's Encrypt, thus we'll make use of this ability.
3) Port mapping protocols for HTTP and HTTPS are available in /etc/services file. If OpenSSH traffic is not enabled, you can allow the traffic now:
sudo ufw allow http
sudo ufw allow https
sudo ufw allow OpenSSH
4) Now check the ufw status services again, you should see the following output:
sudo ufw status
Output

Status: active

To                         Action      From
--                         ------      ----
OpenSSH                    ALLOW       Anywhere
80/tcp                     ALLOW       Anywhere
443/tcp                    ALLOW       Anywhere
OpenSSH (v6)               ALLOW       Anywhere (v6)
80/tcp (v6)                ALLOW       Anywhere (v6)
443/tcp (v6)               ALLOW       Anywhere (v6)
This indicates that GitLab will be accessible post configuration of the application.
Step 4 - Edit the GitLab Configuration File
1) You now need to update the configuration file and run a reconfiguration command. For that, open GitLab's configuration file:
sudo nano /etc/gitlab/gitlab.rb
2) Update the external_url configuration line at the top to match yours. Change http to https so that GitLab can automatically redirect users to the site protected by the Let’s Encrypt certificate:
##! For more details on configuring external_url see:
##! https://docs.gitlab.com/omnibus/settings/configuration.html#configuring-the-external-url-for-gitlab
external_url 'https://example.com'
3) Next, use the letsencrypt['contact_emails'] setting. Here you can provide the list of emails where you will get the notification if any issue is found:
letsencrypt['contact_emails'] = ['[email protected]']
4) Save it and close the file. Then, run the following command in order to reconfigure GitLab:
sudo gitlab-ctl reconfigure
5) Not only this process will initialize GitLab to use information about the server but also configure a Let's Encrypt certificate for your domain. This is an automated process, hence there will be no prompts.
Step 5 - Perform Initial Configuration through the Web Interface
Logging in for the first time
You need to visit the domain name of your GitLab server in the web browser:
This will reveal the GitLab login screen.
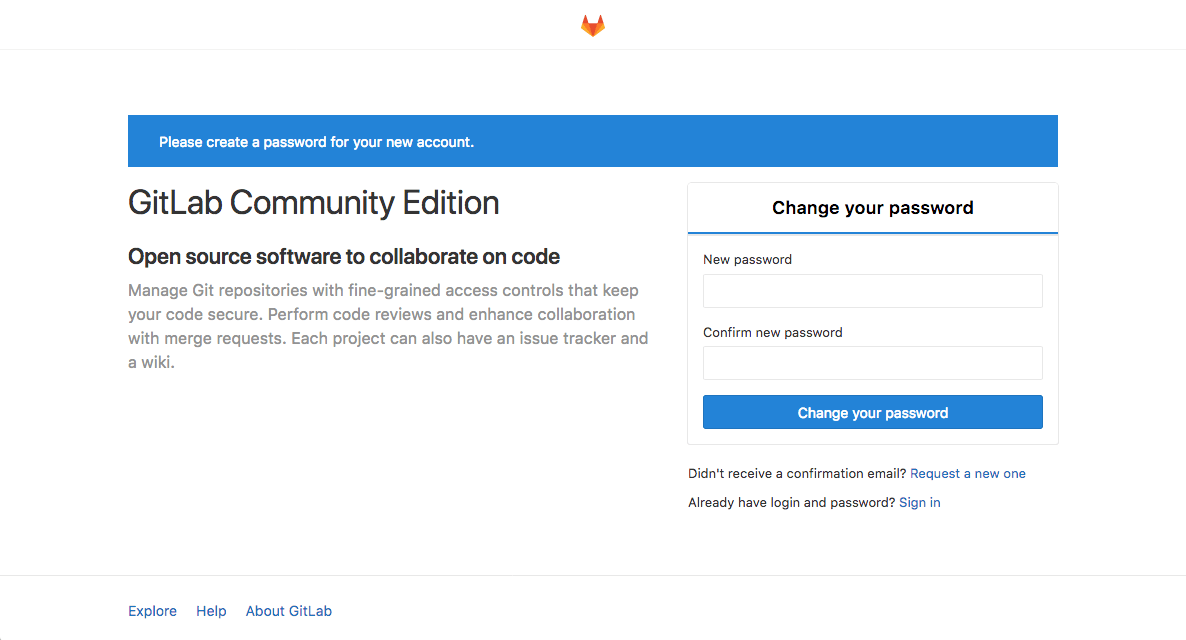
1) Fill in the required details in the prompt, then click on Change Password when finished.
2) You'll be redirected back to the login page:
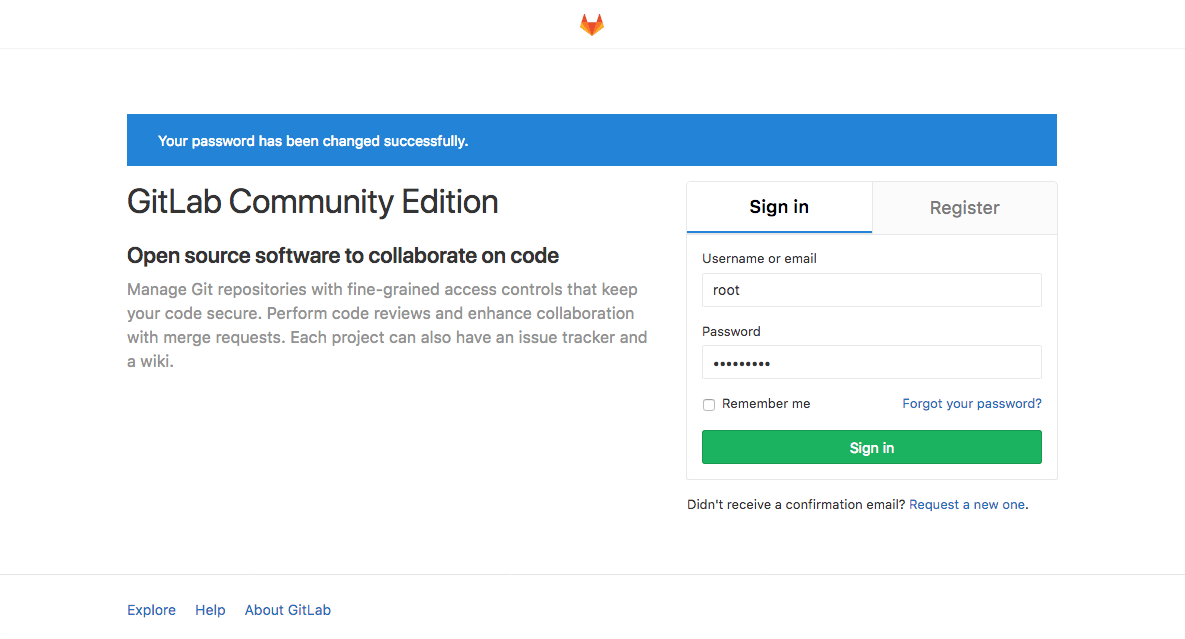
3) The credentials for the login are:
- Username: root
- Password: [the password you set]
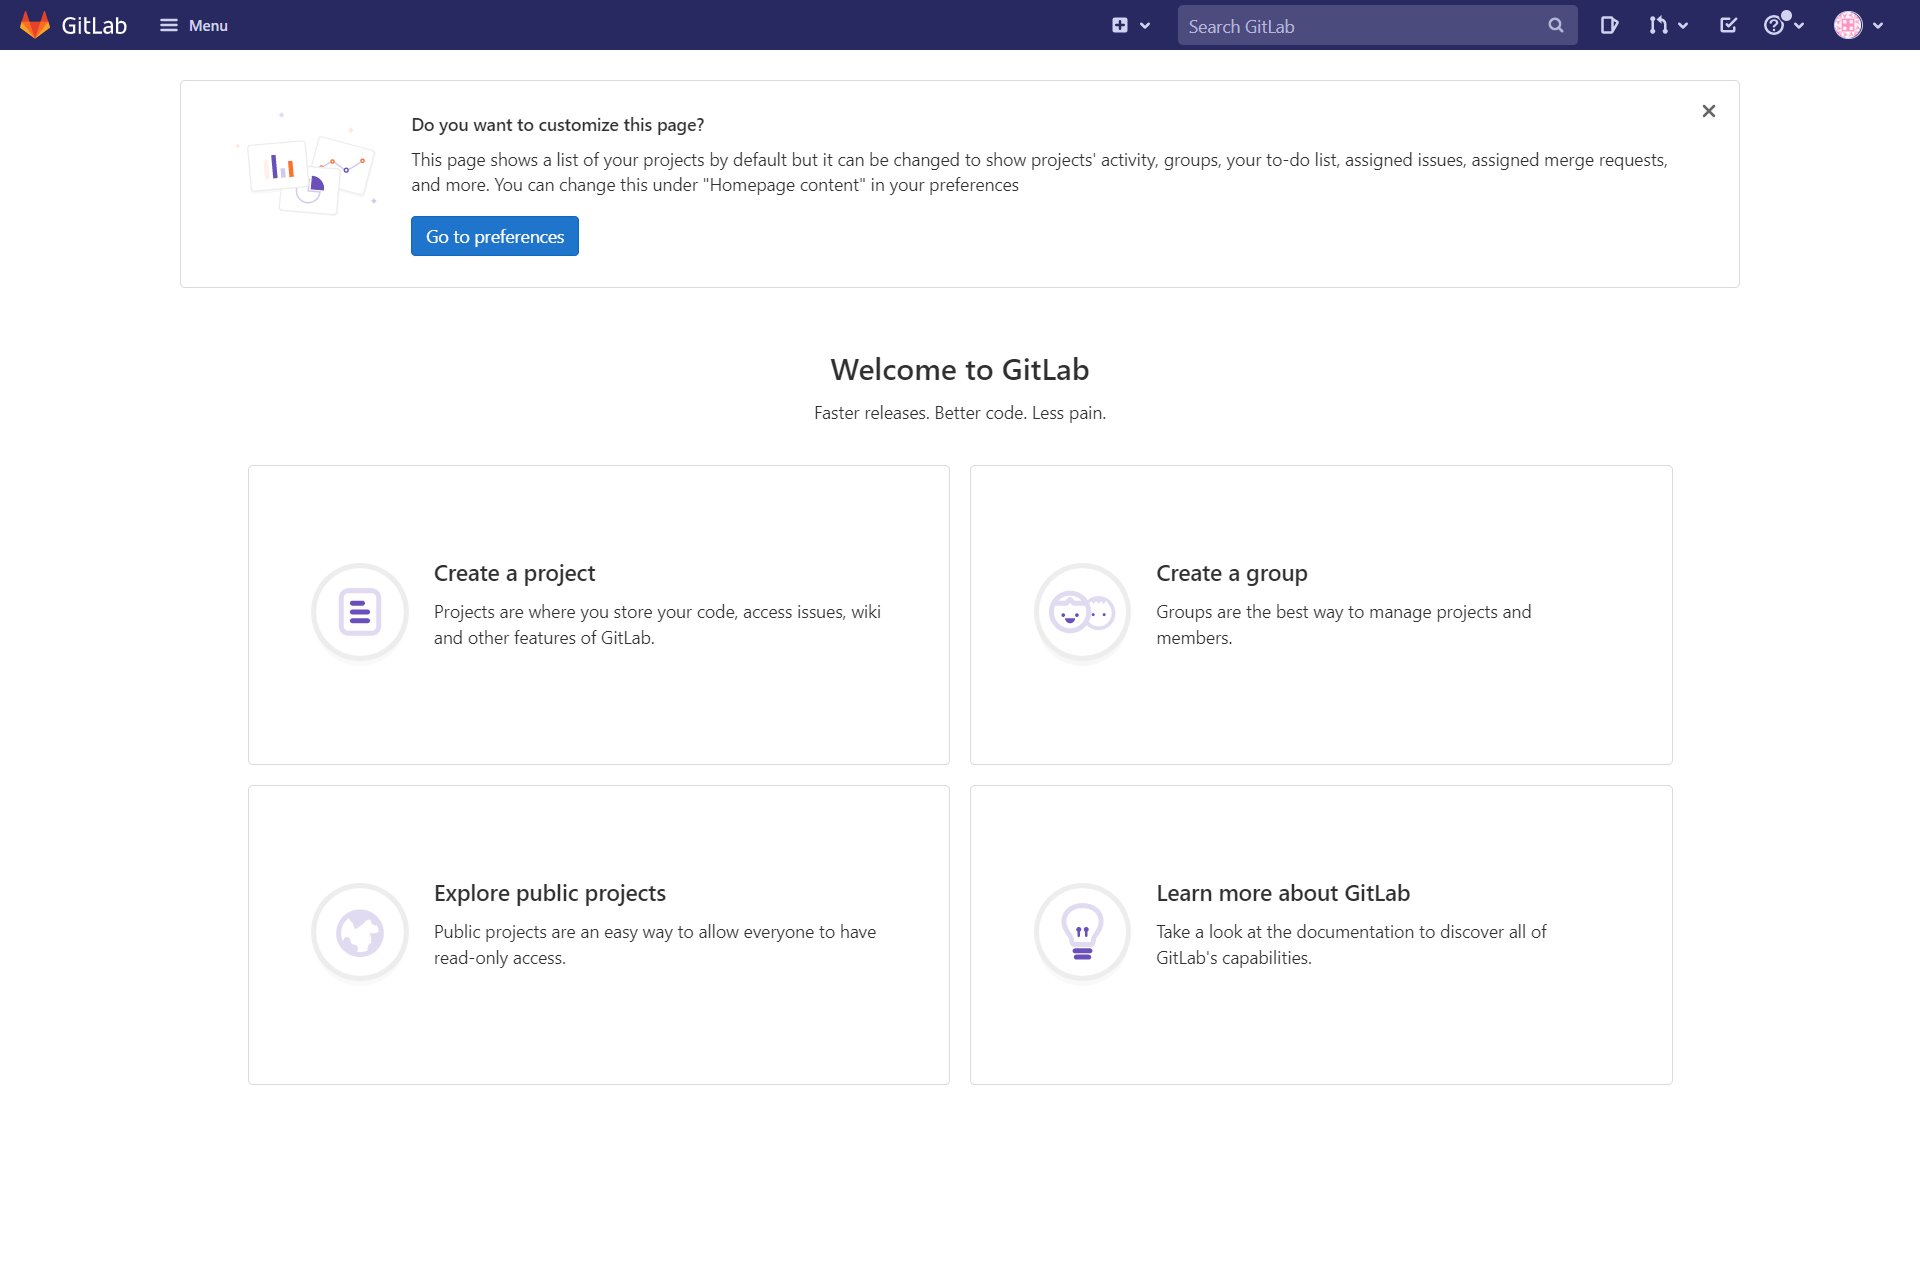
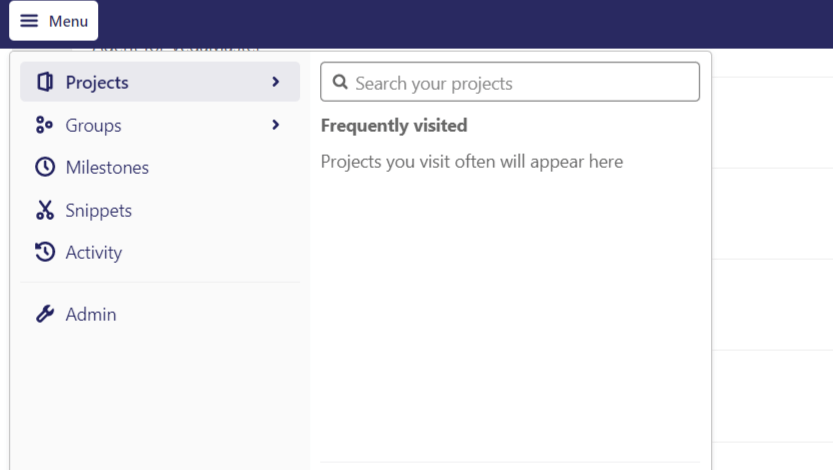
4) Fill in these values and then click on Sign in. You'll then be taken to the GitLab landing page. This page prompts you to begin adding projects:
Adjusting Profile Settings
1) Go to the upper right corner of the interface, from the dropdown, and select Edit Profile.
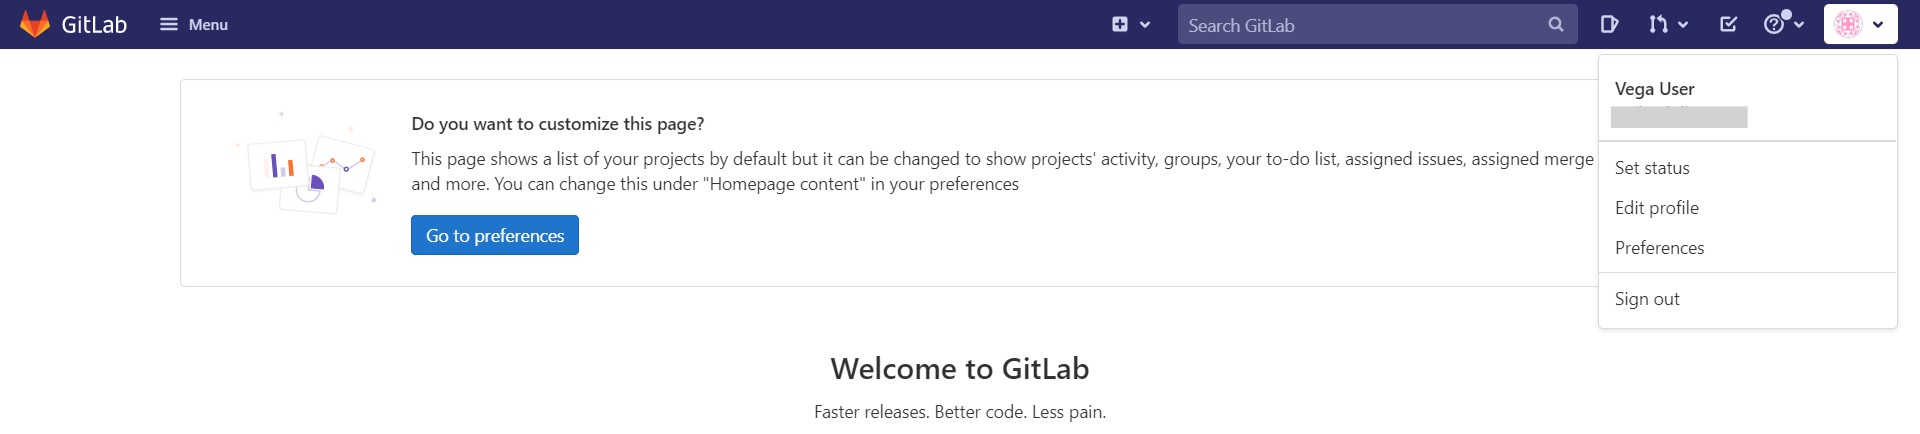
2) You'll be redirected to the Profile section of the settings:
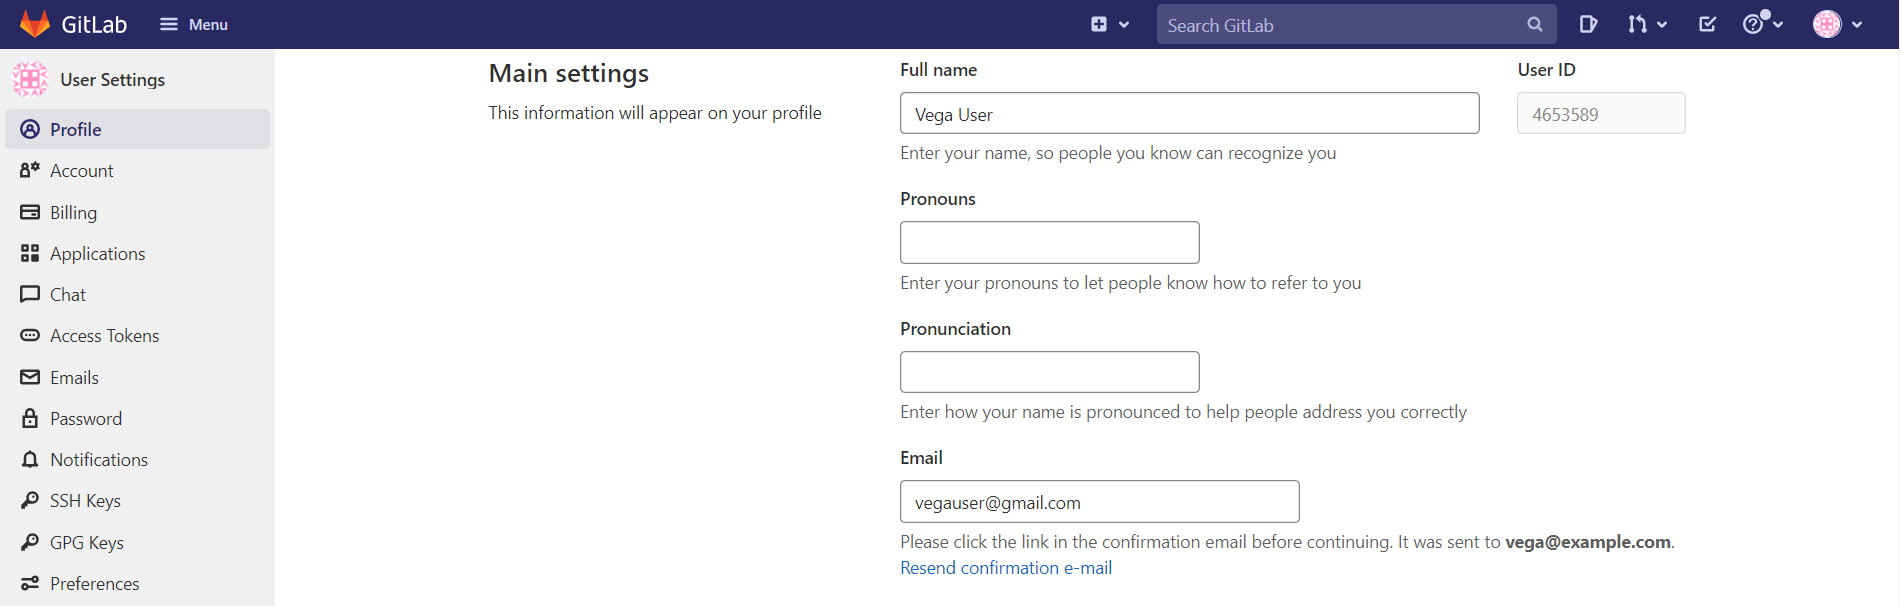
3) Change the Name and Email address from Administrator and [email protected] as per your liking. The name you select will be visible to users while the email id will be used for various Git operations like avatar detection, etc.
Choose the Update Profile settings button when done.

4) You will then receive a confirmation mail on the email id provided. Follow the steps mentioned in the mail to confirm your account.
Changing your Account Name
1) Click on the Account option on the left menu bar:
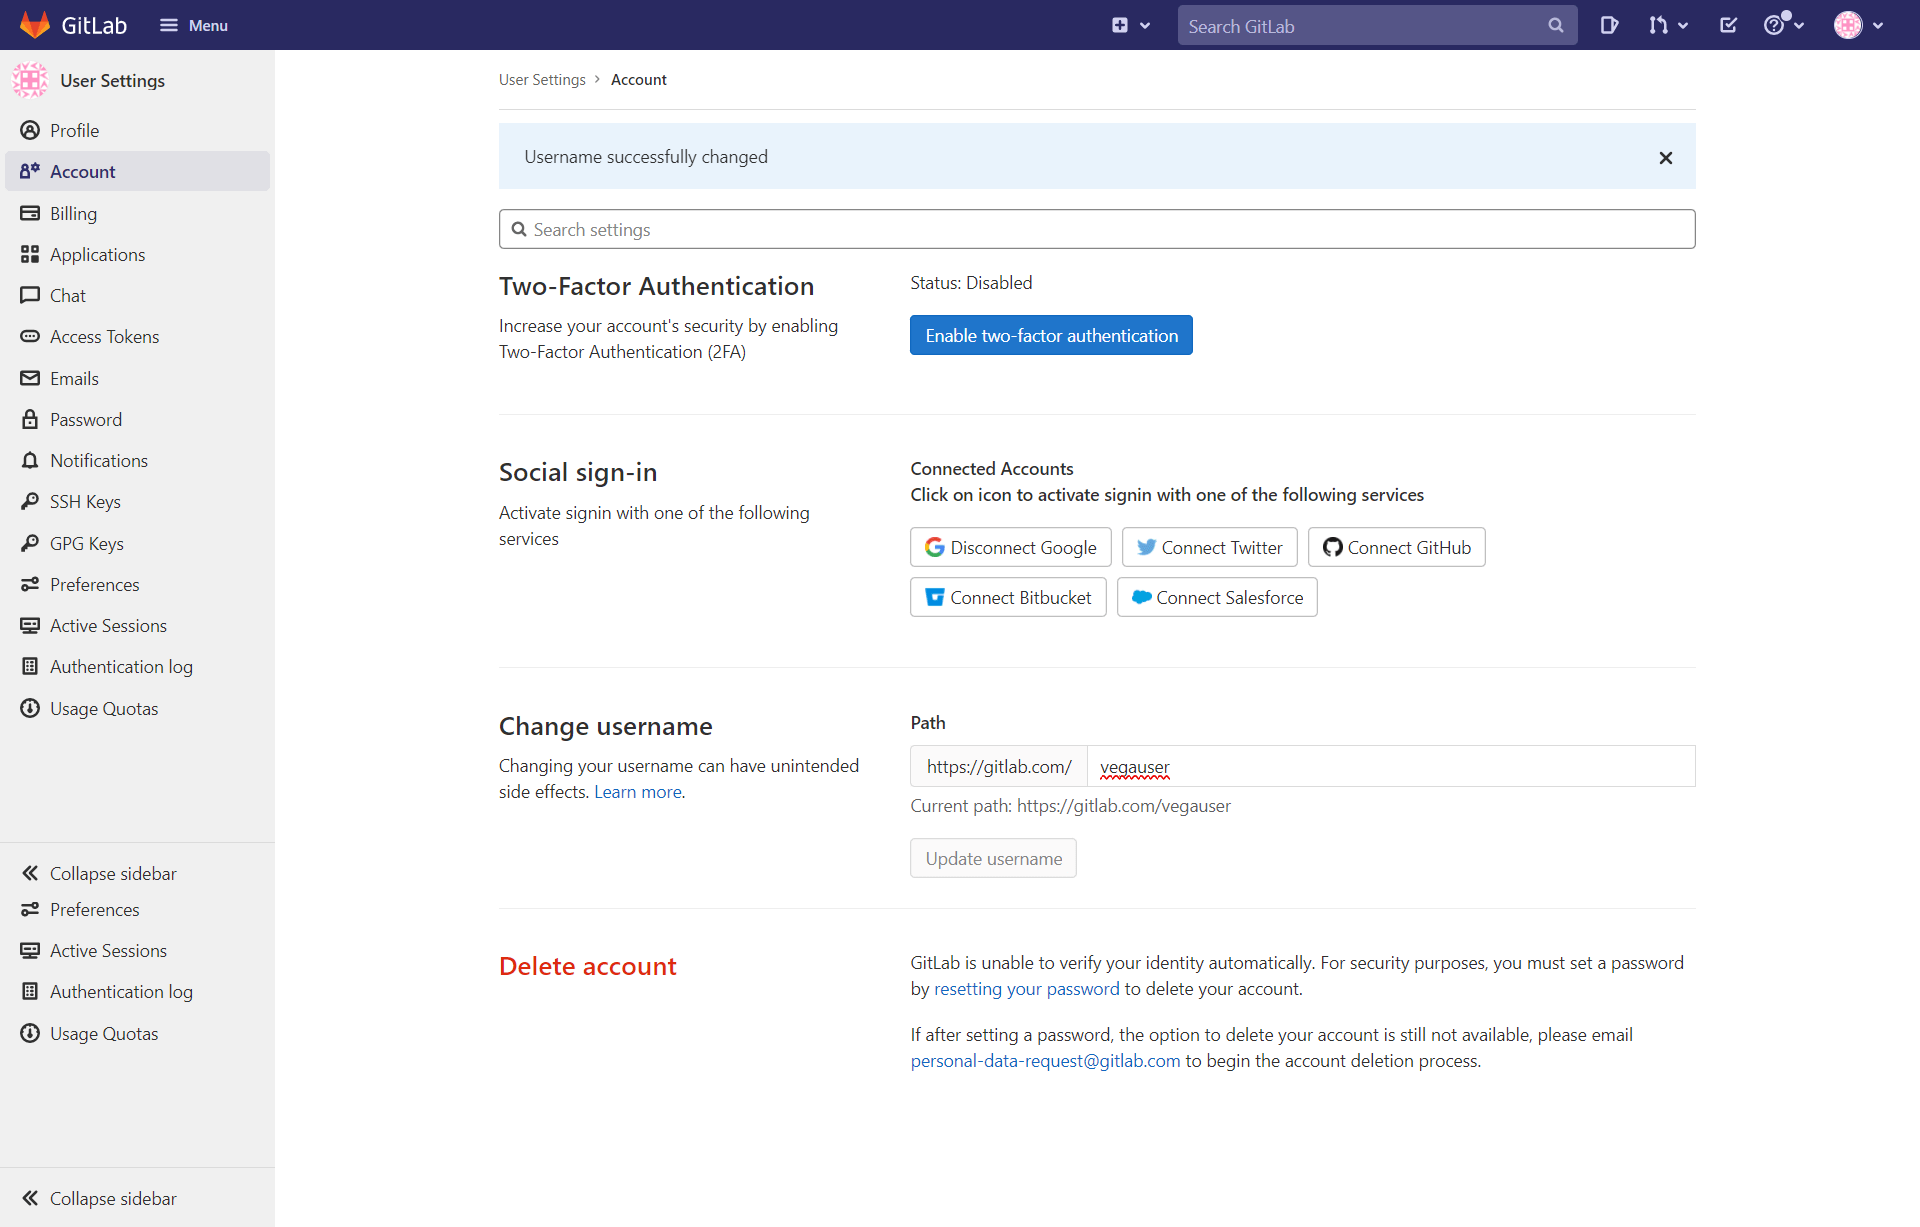
2) You can find your API configuration here. You can even configure two-factor authentication. However, you need to select the Change username section.
Changing a known account name is the best option, therefore the default administrative account root should be renamed. Now, replace root with a name of your choice.

3) Then, click the Update username button:

Adding an SSH Key to your account
1) Using SSH keys with Git makes it much easier to interact with GitLab projects. For this, you need to add a public SSH key to your GitLab account.
2) You can view the already available SSH key pair on your local computer, with the help of the following command:
cat ~/.ssh/id_rsa.pub
3) You shall see the following output:
Output

ssh-rsa AAAAB3NzaC1yc2EAAAADAQABAAABAQDMuyMtMl6aWwqBCvQx7YXvZd7bCFVDsyln3yh5/8Pu23LW88VXfJgsBvhZZ9W0rPBGYyzE/TDzwwITvVQcKrwQrvQlYxTVbqZQDlmsC41HnwDfGFXg+QouZemQ2YgMeHfBzy+w26/gg480nC2PPNd0OG79+e7gFVrTL79JA/MyePBugvYqOAbl30h7M1a7EHP3IV5DQUQg4YUq49v4d3AvM0aia4EUowJs0P/j83nsZt8yiE2JEYR03kDgT/qziPK7LnVFqpFDSPC3MR3b8B354E9Af4C/JHgvglv2tsxOyvKupyZonbyr68CqSorO2rAwY/jWFEiArIaVuDiR9YM5 sammy@mydesktop
4) Copy this text and then go back to the Profile settings page of GitLab's web interface.
But, in case you get the following output:
Output
cat: /home/sammy/.ssh/id_rsa.pub: No such file or directory
5) You then have to create an SSH key with the help of the following command:
ssh-keygen
6) Accept the defaults, you can also choose to secure the key with a password.
Output

Generating public/private rsa key pair.
Enter file in which to save the key (/home/sammy/.ssh/id_rsa):
Enter passphrase (empty for no passphrase):
Enter same passphrase again:
Your identification has been saved in /home/sammy/.ssh/id_rsa.
Your public key has been saved in /home/sammy/.ssh/id_rsa.pub.
The key fingerprint is:
SHA256:I8v5/M5xOicZRZq/XRcSBNxTQV2BZszjlWaIHi5chc0 [email protected]
The key's randomart image is:
+---[RSA 2048]----+
|          ..%o==B|
|           *.E =.|
|        . ++= B  |
|         ooo.o . |
|      . S .o  . .|
|     . + .. .   o|
|      +   .o.o ..|
|       o .++o .  |
|        oo=+     |
+----[SHA256]-----+
7) You can then, display your public key using:
cat ~/.ssh/id_rsa.pub
Output

ssh-rsa AAAAB3NzaC1yc2EAAAADAQABAAABAQDMuyMtMl6aWwqBCvQx7YXvZd7bCFVDsyln3yh5/8Pu23LW88VXfJgsBvhZZ9W0rPBGYyzE/TDzwwITvVQcKrwQrvQlYxTVbqZQDlmsC41HnwDfGFXg+QouZemQ2YgMeHfBzy+w26/gg480nC2PPNd0OG79+e7gFVrTL79JA/MyePBugvYqOAbl30h7M1a7EHP3IV5DQUQg4YUq49v4d3AvM0aia4EUowJs0P/j83nsZt8yiE2JEYR03kDgT/qziPK7LnVFqpFDSPC3MR3b8B354E9Af4C/JHgvglv2tsxOyvKupyZonbyr68CqSorO2rAwY/jWFEiArIaVuDiR9YM5 sammy@mydesktop
8) Copy the output text you obtain, go back to the profile Settings in GitLab's web interface.
Select the SSH Keys on the left menu:
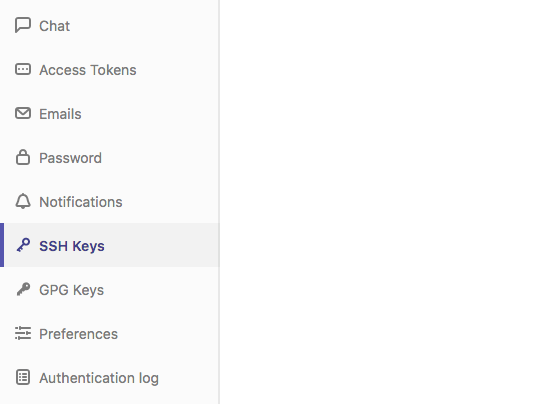
9) Paste the copied text, give it a descriptive title, and then hit Add Key:

You can now manage GitLab projects and repositories from your local system without having to share your GitLab credentials.
Step 6 – Restrict or Disable Public Sign-ups
1) Anyone can sign up for an account on your GitLab instance. It is fine until you are looking to host it publically. If you want to make it private, then there are setting which allow you to make it public.
2) On the page that follows, select Settings.
3) You will be directed to the Global settings page, where you can decide whether new users can sign up and their level of access.
Disabling Sign-ups
1) The Sign-up Restrictions section helps in disabling sign-ups completely (Manually creating accounts is still possible).
You just need to deselect the Sign Up enabled check box:
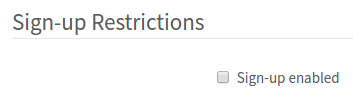
2) Scroll down and select Save changes, this shall remove the sign-up section from the GitLab landing page.

Restricting Sign-ups By Domain
1) You can even restrict sign-ups on the basis of the domains instead of completely disabling them. This is a good idea for an organization that provides different domains for different emails.
2) Select Send Confirmation email on the sign-up box in the Sign-up Restrictions. This allows users to log in once they've confirmed their email.
3) Then, add your domain to the Whitelisted domains for sign-ups box, one domain per line. You may use an asterisk (*) to specify wildcard domains:
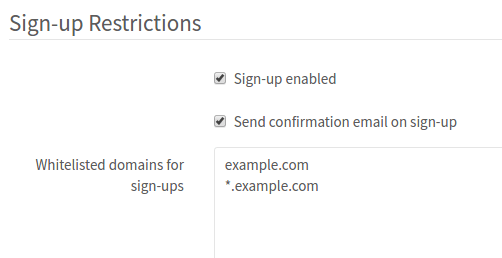
4) Scroll down and select Save changes, this shall remove the sign-up section from the GitLab landing page.
Restricting Project Creation
1) New users are allowed to create up to 10 projects by default. You can allow users to log in for visibility and participation but restrict them from creating anything with the help of the Account and Limit Settings section.
2) You can change the Default projects limit to 0 and hence completely disable other users to create anything.
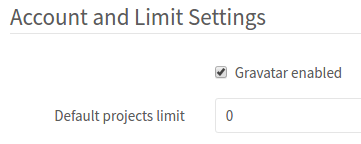
3) New users can still be added manually to projects and have access to internal or public projects created by other users.
4) Scroll down and select Save changes, this will allow new users to create accounts but not projects,
Renewing Let's Encrypt Certificates
1) GitLab updates the Let's Encrypt Certificates after midnight of every fourth day, with the exact moment based on your external_url. These settings can be modified in the /etc/gitlab/gitlab.rb file. For instance, if you wish to update it every 7th day at 11:00, you could use:
letsencrypt['auto_renew_hour'] = "11"
letsencrypt['auto_renew_minute'] = "00"
letsencrypt['auto_renew_day_of_month'] = "*/7"
2) By adding an additional setting /etc/gitlab/gitlab.rb, you can disable auto-renewal. But with auto-renewals in place, you won't have to worry about service interruptions.
letsencrypt['auto_renew'] = false
FAQs to Install and Configure GitLab on Ubuntu 22.04
What are the system requirements for installing GitLab on Ubuntu 22.04?
GitLab recommends a machine with at least 4GB of RAM and 2 CPU cores to ensure smooth performance.
Can I install GitLab on a remote server?
Yes, you can install GitLab on a remote server. Ensure that you have SSH access to the server and follow the installation instructions accordingly.
How can I secure my GitLab installation with HTTPS?
To secure your GitLab installation with HTTPS, you need to obtain an SSL certificate and configure it with your web server. GitLab provides detailed documentation on how to enable HTTPS.
Can I integrate GitLab with external authentication providers?
Yes, GitLab supports integration with external authentication providers like LDAP, Active Directory, and OAuth. You can configure these integrations in the GitLab administration settings.
How can I backup and restore my GitLab data?
GitLab provides tools and documentation for backing up and restoring your data. It's important to regularly perform backups to avoid data loss.
Can I customize the appearance and branding of my GitLab instance?
Yes, GitLab allows you to customize the appearance and branding by modifying the CSS and HTML files. However, be cautious when making changes to ensure compatibility with future updates.
Conclusion
We hope this detailed guide helped you to understand how to install GitLab on Ubuntu 22.04 server. To learn more about GitLab installation on Ubuntu 22.04 server, check out the official GitLab installation document.
If you have any queries, please leave a comment below, and we’ll be happy to respond to them for sure.