
Choose a different version or distribution
Introduction
Before we begin talking about how to install and configure Graphite on Ubuntu 20.04, let’s briefly understand - What is Graphite?
Graphite is an open-source monitoring tool for time-series data. It allows organizations to track and analyze metrics related to system performance, applications, and devices. With its versatile features, Graphite helps businesses gain valuable insights, optimize resources, and make data-driven decisions.
Graphite's user-friendly interface and flexibility make it a popular choice among developers and operations teams. By effectively monitoring and analyzing data, Graphite enables organizations to improve their systems and achieve better overall performance. Explore more about Graphite at graphiteapp.org.
In this tutorial, you will install and configure Graphite on Ubuntu 20.04. We will also answer some FAQs relating to Graphite installation.
Advantages of Graphite
- Powerful Monitoring: Graphite empowers real-time monitoring and analysis of time-series data, enabling businesses to gain valuable insights into system performance.
- Data Visualization: With its intuitive interface, Graphite provides interactive graphs and charts, making it easier to visualize and understand complex metrics.
- Scalability: Graphite can handle large-scale data sets and is highly scalable, allowing businesses to monitor and analyze an extensive range of metrics.
- Flexible Configuration: Graphite offers customizable dashboards, graphs, and alerts, providing the flexibility to adapt to specific monitoring needs.
- Open-Source Community: With a thriving open-source community, Graphite benefits from continuous development, improvements, and the availability of numerous plugins for enhanced functionality.
Step 1 - Update the System and installed packages
sudo apt-get update
sudo apt-get upgrade -y
Step 2 - Install Docker Engine
Install Docker and confirm that the service is running.
sudo apt install docker.io -y
Before proceeding confirm if the service is running.
systemctl status docker
Output

● docker.service - Docker Application Container Engine
     Loaded: loaded (/lib/systemd/system/docker.service; enabled; vendor preset: enabled)
     Active: active (running) since Wed 2023-06-28 08:01:32 UTC; 11s ago
TriggeredBy: ● docker.socket
       Docs: https://docs.docker.com
   Main PID: 24262 (dockerd)
      Tasks: 8
     Memory: 23.5M
     CGroup: /system.slice/docker.service
             └─24262 /usr/bin/dockerd -H fd:// --containerd=/run/containerd/containerd.sock
Step 3 - Install Graphite and Statsd container
1) Now you have to start a Docker container for Graphite and Statsd. You can use the official Docker repo for the Graphite site.
2) Now, you need to make directories on the host system for persistent data storage.
sudo mkdir -p /data/graphite/{statsd,configs,data}
3) Though Graphite and Statsd can be a bit complex to set up, the Docker image can get you running and collecting stats in no time.
sudo docker run -d \
 --name graphite \
 --restart=always \
 -p 80:80 \
 -p 2003-2004:2003-2004 \
 -p 2023-2024:2023-2024 \
 -p 8125:8125/udp \
 -p 8126:8126 \
 -v /data/graphite/configs:/opt/graphite/conf \
 -v /data/graphite/data:/opt/graphite/storage \
 -v /data/graphite/statsd:/opt/statsd \
 graphiteapp/graphite-statsd
4) The installation may take some time, once it is done, you will be able to see the docker container running.
sudo docker ps
Output

CONTAINER ID   IMAGE                         COMMAND         CREATED         STATUS         PORTS                                                                                                                                                                                                                                                                                      NAMES
14fac8dd7d30   graphiteapp/graphite-statsd   "/entrypoint"   5 seconds ago   Up 3 seconds   0.0.0.0:80->80/tcp, :::80->80/tcp, 0.0.0.0:2003-2004->2003-2004/tcp, :::2003-2004->2003-2004/tcp, 2013-2014/tcp, 8080/tcp, 0.0.0.0:2023-2024->2023-2024/tcp, :::2023-2024->2023-2024/tcp, 0.0.0.0:8126->8126/tcp, :::8126->8126/tcp, 8125/tcp, 0.0.0.0:8125->8125/udp, :::8125->8125/udp   graphite
5) Docker container named: Graphite has now been started. Now you can freely remap the container port to any host port in case the corresponding port is occupied on the host.
Included Components
- Nginx – reverse proxies the graphite dashboard
- Graphite – front-end dashboard
- Carbon – back-end
- Statsd – UDP-based back-end proxy
The default settings have Statsd listening on UDP port 8125. If you want to listen to the TCP port 8125, you have to set the environment variable STATSD_INTERFACE to tcp while running the container.
Step 4 - Accessing the Graphite Web interface
1) Next, access the Graphite Dashboard by using the server IP address or port number and the port mapped on the host to container port 80.
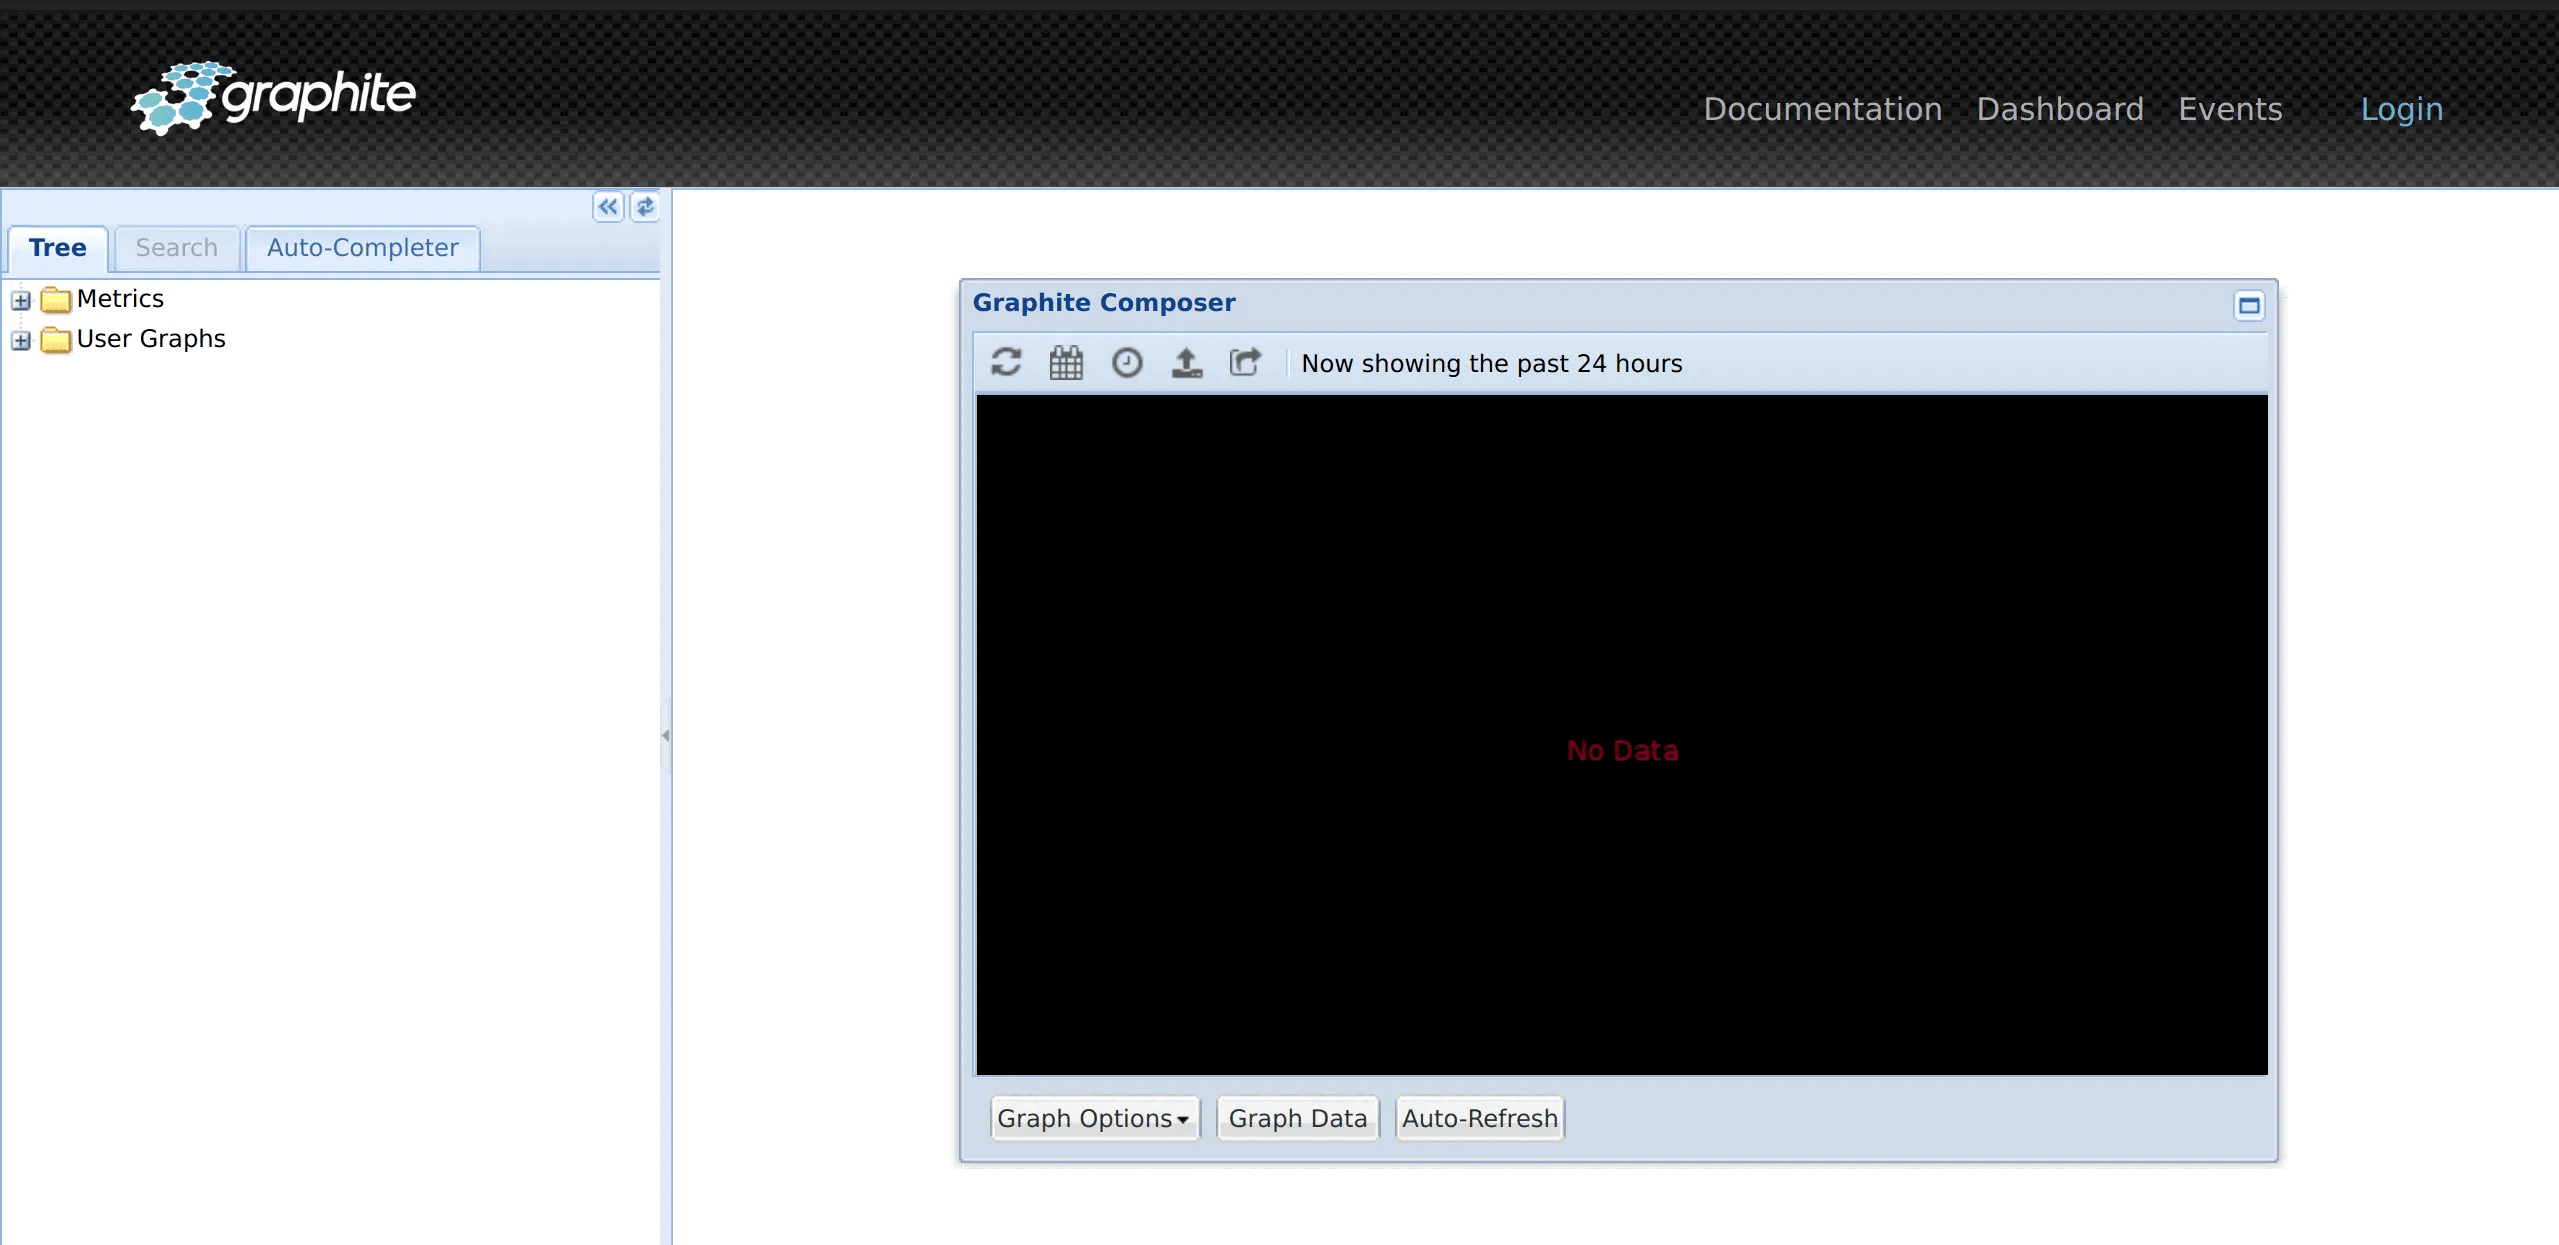
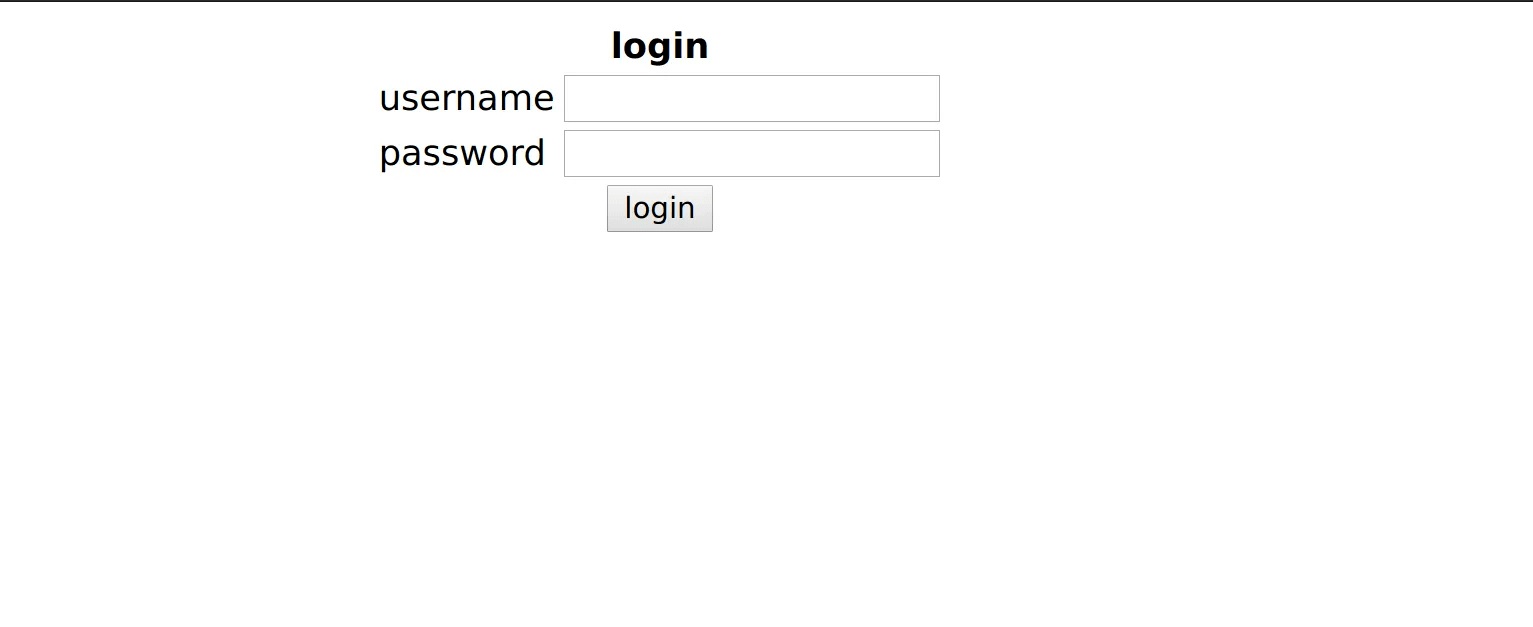
2) The default login credentials are as follows:
Username: root
Password: root
3) Change the login credentials post the first login at http://ip-address/admin/password_change/
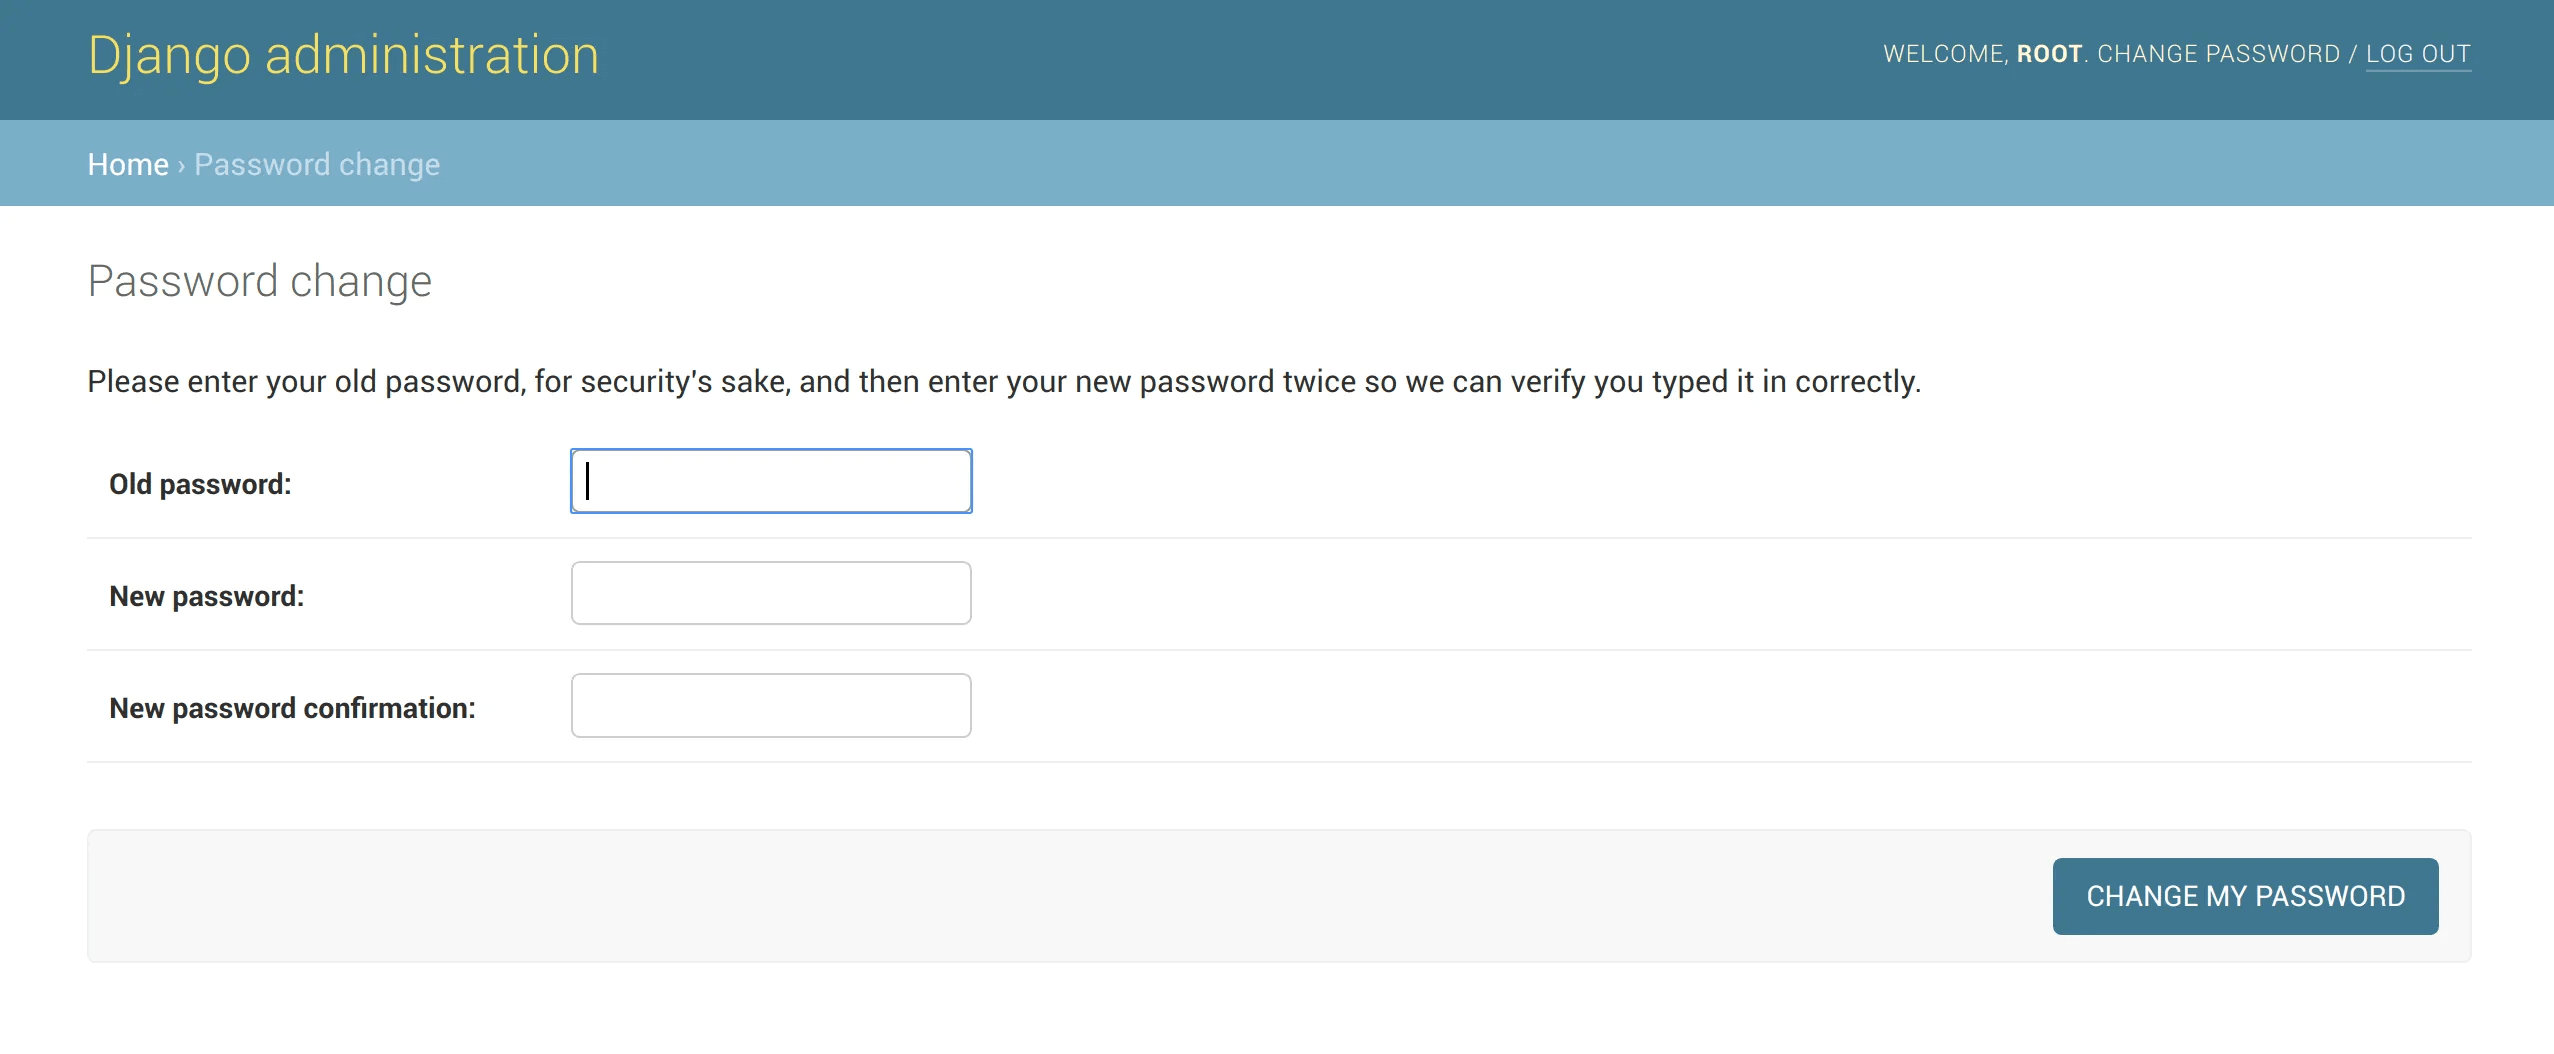
4) Put in the desired root password.
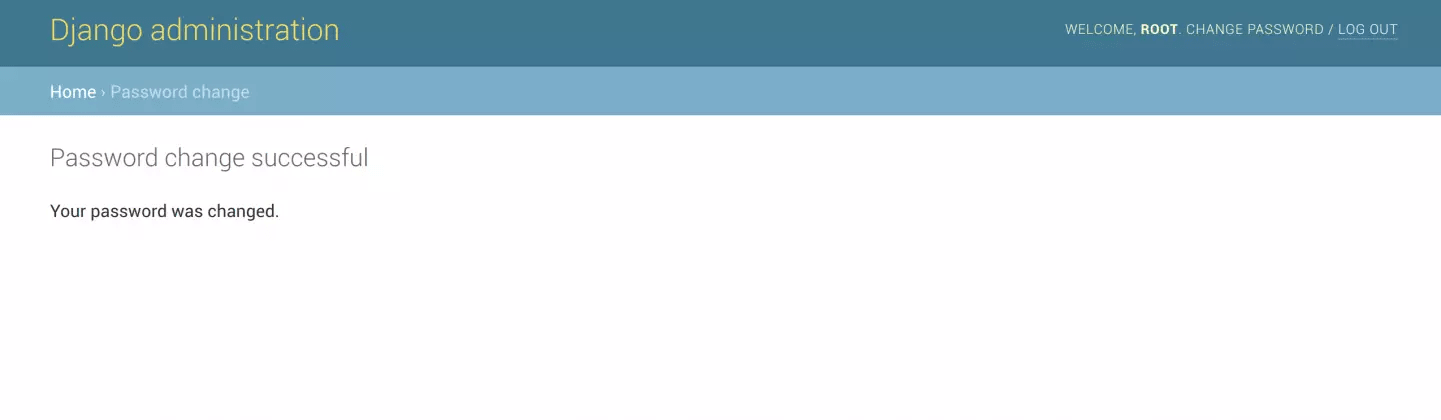
5) Log out and log in again to confirm the password change.
FAQs to Install and Configure Graphite on Ubuntu 20.04
What is Carbon and why is it required?
Carbon is one of the essential components of Graphite. It is responsible for collecting and storing the time-series data sent by applications and devices for monitoring purposes.
How to configure Carbon in Graphite?
To configure Carbon in Graphite:
- Edit carbon.conf: sudo nano /etc/carbon/carbon.conf
- Specify details like storage schemas, retention policies, and caches.
- Restart the carbon service: sudo service carbon-cache restart
What is Graphite-Web and how to configure it?
Graphite-Web is the web interface used to visualize and explore the stored metrics. To configure Graphite-Web:
- Edit local_settings.py: sudo nano /etc/graphite/local_settings.py
- Configure the database settings, allowed hosts, and authentication methods.
- Restart the Graphite-Web service: sudo service apache2 restart
How to send data to Graphite?
You can send data to Graphite using various methods:
- Use the
carbon-cachecommand-line tool to push data directly to Carbon. - Utilize Graphite's built-in network protocols, such as Pickle or Plaintext.
- Employ available libraries or APIs, like StatsD or the Python
graphite-api, for data aggregation and transmission.
How to visualize data in Graphite?
To visualize data in Graphite:
- Access the Graphite-Web interface via your browser.
- Choose a metric and specify the time range.
- Graphite will generate the visual representation of the selected metric.
How to set up data retention in Graphite?
To set up data retention in Graphite:
- Edit storage-schemas.conf: sudo nano /etc/carbon/storage-schemas.conf
- Define retention policies based on data resolution and duration.
- Restart the carbon-cache service: sudo service carbon-cache restart.
How to secure Graphite-Web with SSL?
To secure Graphite-Web with SSL:
- Obtain an SSL certificate and key.
- Configure the Apache virtual host file for Graphite-Web to use SSL.
- Restart the Apache service: sudo service apache2 restart
How to troubleshoot common issues with Graphite?
If you encounter issues with Graphite:
- Check the log files located in /var/log/carbon/ and /var/log/apache2/ for error messages.
- Ensure the configuration files are correct.
- Restart the necessary services.
- Consult the Graphite documentation or community for further assistance.
Conclusion
We hope this detailed guide helped you understand how to install and configure Graphite on Ubuntu 20.04. To learn more about Graphite installation on Ubuntu 20.04 server, check out the official Graphite installation document.
If you have any queries, please leave a comment below and we’ll be happy to respond to them for sure.