
Choose a different version or distribution
Introduction
Before we begin talking about how to install Strapi for Production on Ubuntu 22.04, let's briefly understand – What is Strapi?
Strapi is a powerful open-source headless content management system (CMS) that enables developers to build and manage content-rich websites and applications. It offers a flexible and customizable platform with a user-friendly interface, making it easy to create, edit, and publish digital content.
With its API-first approach, Strapi allows developers to integrate with any front-end technology, making it suitable for various projects. It provides features like user authentication, role-based access control, and content versioning, ensuring security and collaboration. Strapi's extensible plugin system and community support further enhance its capabilities, making it a popular choice for developers worldwide.
In this tutorial, we will walk you through the process of installing Strapi and configuring a production environment to begin creating content. We will also address a few FAQs on how to install Strapi on Ubuntu 22.04.
Advantages of Strapi
- Flexibility: Strapi offers a flexible and customizable platform, allowing developers to tailor their content management system according to their specific needs.
- Ease of Use: With a user-friendly interface, Strapi makes it simple to create, edit, and publish digital content, even for non-technical users.
- API-First Approach: Strapi's API-first architecture enables seamless integration with any front-end technology, providing developers with versatility and scalability.
- Security and Collaboration: Strapi ensures security with features like user authentication, role-based access control, and content versioning, promoting secure collaboration among team members.
- Extensibility: Strapi's extensible plugin system allows developers to extend its functionalities and integrate additional features, expanding the platform's capabilities as per project requirements.
Prerequisites to Configure and Install Strapi for Production on Ubuntu 22.04
You'll need the following to complete this tutorial:
- A server running Ubuntu 22.04 setup.
- Strapi advises using a server with a minimum of 2 CPUs cores and 4 Gb of RAM.
This tutorial will presume that your server complies with the suggested hardware requirements.
- Your server has Node.js 16.xx installed.
- Use the PPA option to switch from version 18.xx to 16.xx. At the time of this writing, Strapi might not function properly with Node versions higher than 16. This tutorial uses Node v16.18.1 specifically.
- Install and set up Nginx as a reverse proxy.
- Use
http://localhost:1337as theapp_server_addresswhen setting up the application server's proxy address. - A domain name pointing to the public IP of your server. Your application server will act as a proxy using this setup with Nginx.
You are prepared to continue with the tutorial because your server is set up with version 16 of Node.js, Nginx, and Postgres.
Step 1 – Setting Up Your Postgres Database
Any project using Strapi needs a database. It currently supports PostgreSQL, MariaDB, MySQL, and SQlite. The minimum version specifications are listed in their official documentation. Strapi moreover anticipates a brand-new database. As a result, you cannot link to an existing database from your Strapi instance.
Let's start by creating a database:
sudo -i -u postgres createdb strapi-db
Next, make a user for your database:
sudo -i -u postgres createuser --interactive
Output
Enter name of role to add: sammy
Shall the new role be a superuser? (y/n) y
By default, PostgreSQL uses the Identification Protocol, often known as the ident authentication method, to verify your identity as a database user. PostgreSQL does this by using the client's Ubuntu username as the database username. This often results in better security, but it can also pose problems if you want to connect one of your databases to an external tool like Strapi. To fix this, give Strapi permission to connect to your database by setting a password for this PostgreSQL role.
Open the PostgreSQL prompt from your terminal:
sudo -u postgres psql
Update the user profile with a secure password of your choice using the PostgreSQL prompt:
ALTER USER sammy PASSWORD 'postgres_password';
By typing \q in your terminal, you can log out of your PostgreSQL user:
\q
Once you've generated your database and user credentials, you're ready to install Strapi.
Step 2 – Installing Strapi on Your Server
Use the following command to install Strapi on your server:
npx create-strapi-app@latest my-project
To continue with the installation, y must confirm.
You can visit an interactive installation after answering yes. Make sure your Database Username, and Password are updated accurately before selecting one of the following:
Output
? Choose your installation type Custom (manual settings)
? Choose your preferred language JavaScript
? Choose your default database client postgres
? Database name: strapi-db
? Host: 127.0.0.1
? Port: 5432
? Username: sammy
? Password: postgres_password
? Enable SSL connection: No
Because it will be configured and obtained with a Let's Encrypt certificate later in the course, the SSL connection is not active at this time. You can start installing Strapi after making your options.
You can begin building your Strapi project as soon as the installation is finished.
Make sure you are initially in the my-project directory:
cd my-project
Run the subsequent command next:
NODE_ENV=production npm run build
Output
> [email protected] build
> strapi build

Building your admin UI with production configuration...

✔ Webpack
  Compiled successfully in 35.44s

Admin UI built successfully
Your Strapi project, including the Strapi admin UI, will be built with this command.
Your Strapi server is now ready for testing. Start your Strapi server directly using the following command.
node /home/sammy/my-project/node_modules/.bin/strapi start
Output
[2022-11-21 13:54:24.671] info: The Users & Permissions plugin automatically generated a jwt secret and stored it in .env under the name JWT_SECRET.
Project information
┌────────────────────┬──────────────────────────────────────────────────┐
│ Time │ Mon Nov 21 2022 13:54:24 GMT+0000 (Coordinated … │
│ Launched in │ 1603 ms │
│ Environment │ development │
│ Process PID │ 4743 │
│ Version │ 4.5.4 (node v16.18.1) │
│ Edition │ Community │
└────────────────────┴──────────────────────────────────────────────────┘
Actions available
One more thing...
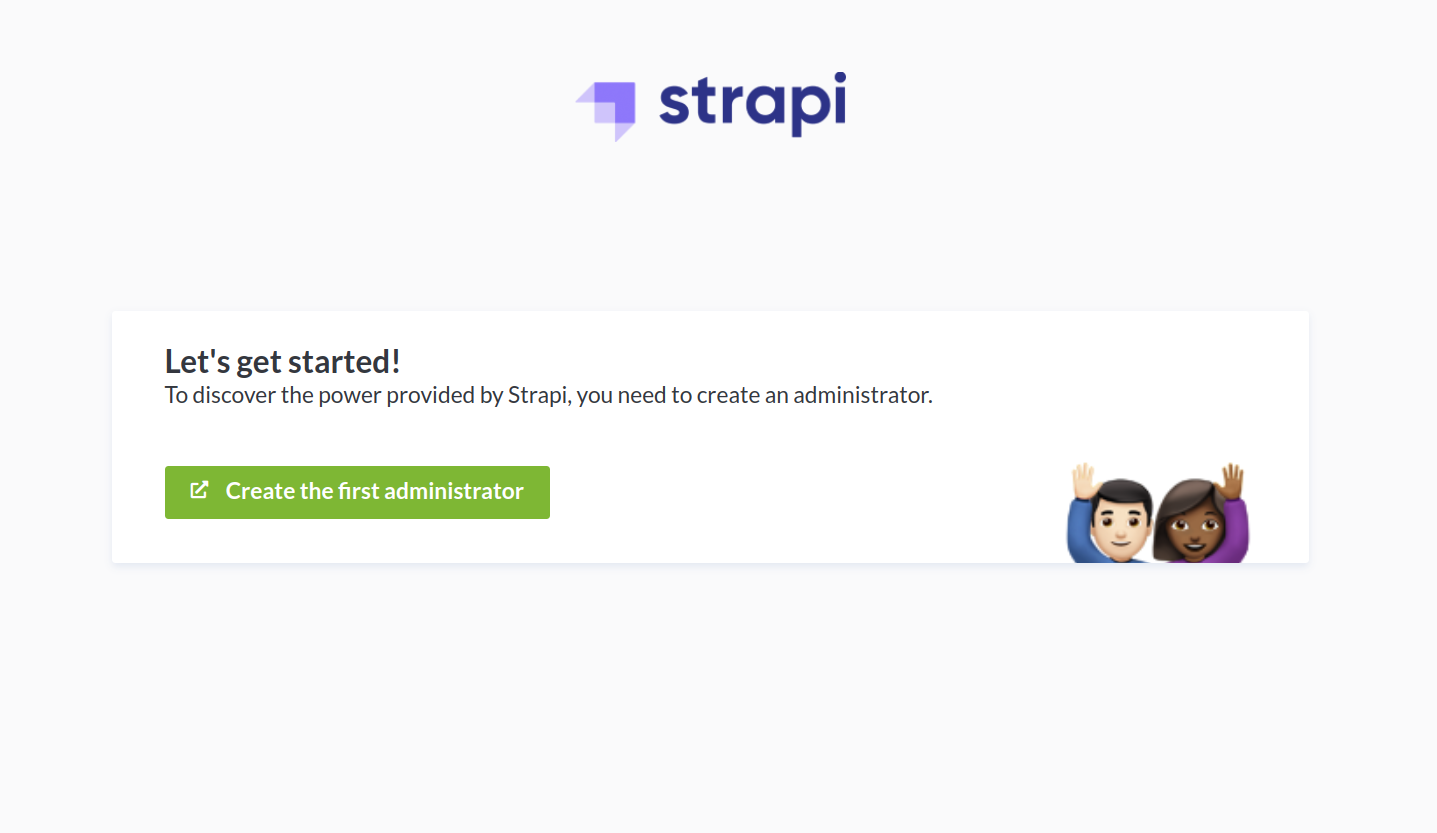
Create your first administrator 💻 by going to the administration panel at:
┌─────────────────────────────┐
│ http://localhost:1337/admin │
└─────────────────────────────┘
You set up Nginx as a reverse proxy to Strapi's default address of http://localhost:1337 if you adhered to the criteria. To view the default Strapi landing page in your browser, go to http://your domain:
The default configuration for this command is Strapi's development mode. Additionally, it depends on a process that shouldn't be used in production and is linked to a terminal command. The following step entails adding production parameters to PM2, a process manager.
To leave your server, type CTRL+C.
After installing Strapi, you are prepared to configure PM2 to operate your server as a service in the background.
Step 3 - Installing and Configuring PM2
You can use PM2 to control the server startup procedure rather than doing it yourself. Without having to manually start it up, PM2 helps to maintain your server's uptime.
First, check that you are listed first:
cd ~
Next, run the following command to install PM2:
sudo npm install pm2@latest -g
Finally, use your chosen text editor to generate a PM2 configuration file. In this illustration, nano is used.
sudo nano ecosystem.config.js
Make sure to alter the project directory name and location, as well as your database name, user, and password, before adding the following information to this file:
module.exports = {
  apps: [
    {
      name: 'strapi',
      cwd: '/home/sammy/my-project',
      script: 'npm',
      args: 'start',
      env: {
        NODE_ENV: 'production',
        DATABASE_HOST: 'localhost',
        DATABASE_PORT: '5432',
        DATABASE_NAME: 'strapi-db',
        DATABASE_USERNAME: 'sammy',
        DATABASE_PASSWORD: 'postgres_password',
      },
    },
  ],
};
Exit the file after making changes to the PM2 setup. Press CTRL+X, then Y, and ENTER to use nano.
Run your Strapi instance using the following command in the background:
pm2 start ecosystem.config.js
Output
[PM2][WARN] Applications strapi not running, starting...
[PM2] App [strapi] launched (1 instances)
┌─────┬───────────┬─────────────┬─────────┬─────────┬──────────┬────────┬──────┬───────────┬──────────┬──────────┬──────────┬──────────┐
│ id  │ name      │ namespace   │ version │ mode    │ pid      │ uptime │ ↺    │ status    │ cpu      │ mem      │ user     │ watching │
├─────┼───────────┼─────────────┼─────────┼─────────┼──────────┼────────┼──────┼───────────┼──────────┼──────────┼──────────┼──────────┤
│ 0   │ strapi    │ default     │ N/A     │ fork    │ 22608    │ 0s     │ 0    │ online    │ 0%       │ 30.3mb   │ sammy    │ disabled │
└─────┴───────────┴─────────────┴─────────┴─────────┴──────────┴────────┴──────┴───────────┴──────────┴──────────┴──────────┴──────────┘
If an application crashes or is terminated while operating under PM2, it restarts itself automatically. By using the upcoming subcommand, you can start up your Strapi instance:
pm2 startup
Output
[PM2] Init System found: systemd
[PM2] To setup the Startup Script, copy/paste the following command:
sudo env PATH=$PATH:/usr/bin /usr/lib/node_modules/pm2/bin/pm2 startup systemd -u sammy --hp /home/sammy
By doing this, a starting script that will run PM2 and its controlled processes when the server boots is generated and configured.
Next, duplicate and run the command you were given in the output, substituting your username for sammy:
sudo env PATH=$PATH:/usr/bin /usr/lib/node_modules/pm2/bin/pm2 startup systemd -u sammy --hp /home/sammy
Save the PM2 process list after that.
pm2 save
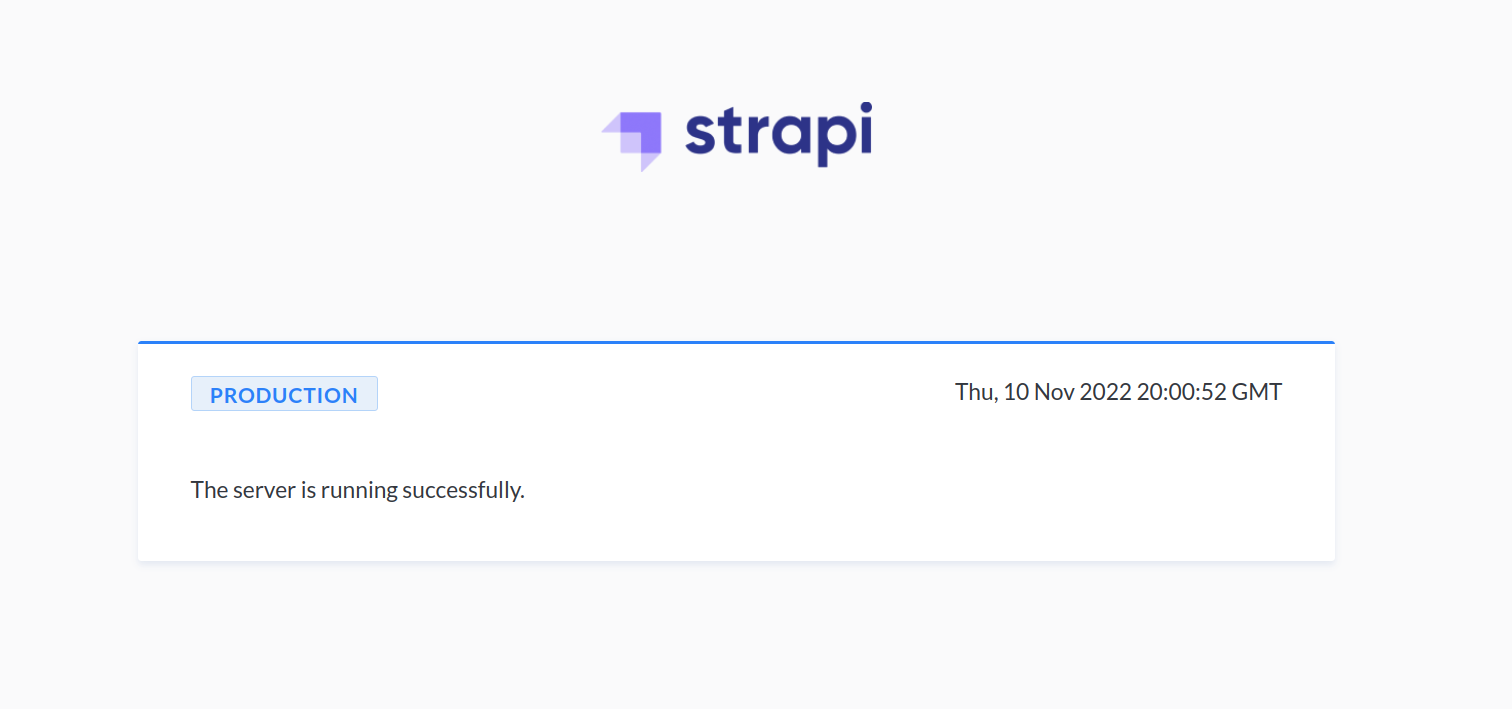
The PM2 service is now active on your server. Returning to http://your domain, you'll see that Strapi is currently operating in production mode:
You can complete protecting your Strapi instance while PM2 continues to run your server in the background.
Step 4 - Securing Strapi with Let’s Encrypt
You may have observed that the URL, which is denoted by http:// rather than https://, is an insecure connection when you travelled to your site to view the Strapi landing page.
Enter the next command to secure your Strapi instance with Let's Encrypt:
sudo snap install --classic certbot
By entering certbot you may add the certbot command from the snap install directory to your path and execute it:
sudo ln -s /snap/bin/certbot /usr/bin/certbot
Next, enable the Nginx Full profile and HTTPS traffic:
sudo ufw allow 'Nginx Full'
Remove the extra Nginx HTTP profile allowance:
sudo ufw delete allow 'Nginx HTTP'
Finally, enter your domain address in the Nginx plugin to get the certificate:
sudo certbot --nginx -d your_domain -d www.your_domain
You are requested to input your email address and confirm your acceptance of the terms of service when you run the command. You have the option of joining or leaving an email list.
Output
. . .
Successfully received certificate.
Certificate is saved at: /etc/letsencrypt/live/your_domain/fullchain.pem
Key is saved at: /etc/letsencrypt/live/your_domain/privkey.pem
This certificate expires on 2023-02-05.
These files will be updated when the certificate renews.
Certbot has set up a scheduled task to automatically renew this certificate in the background.

Deploying certificate
Successfully deployed certificate for your_domain to /etc/nginx/sites-enabled/your_domain
Successfully deployed certificate for www.your_domain /etc/nginx/sites-enabled/your_domain
Congratulations! You have successfully enabled HTTPS on https://your_domain and https://www.your_domain
. . .
Go to http://your domain to access it. You are automatically forwarded to your site's HTTPS version. Strapi is operating in production mode as well, as you can see:

To create your Strapi administrator account, go to https://your domain/admin now:
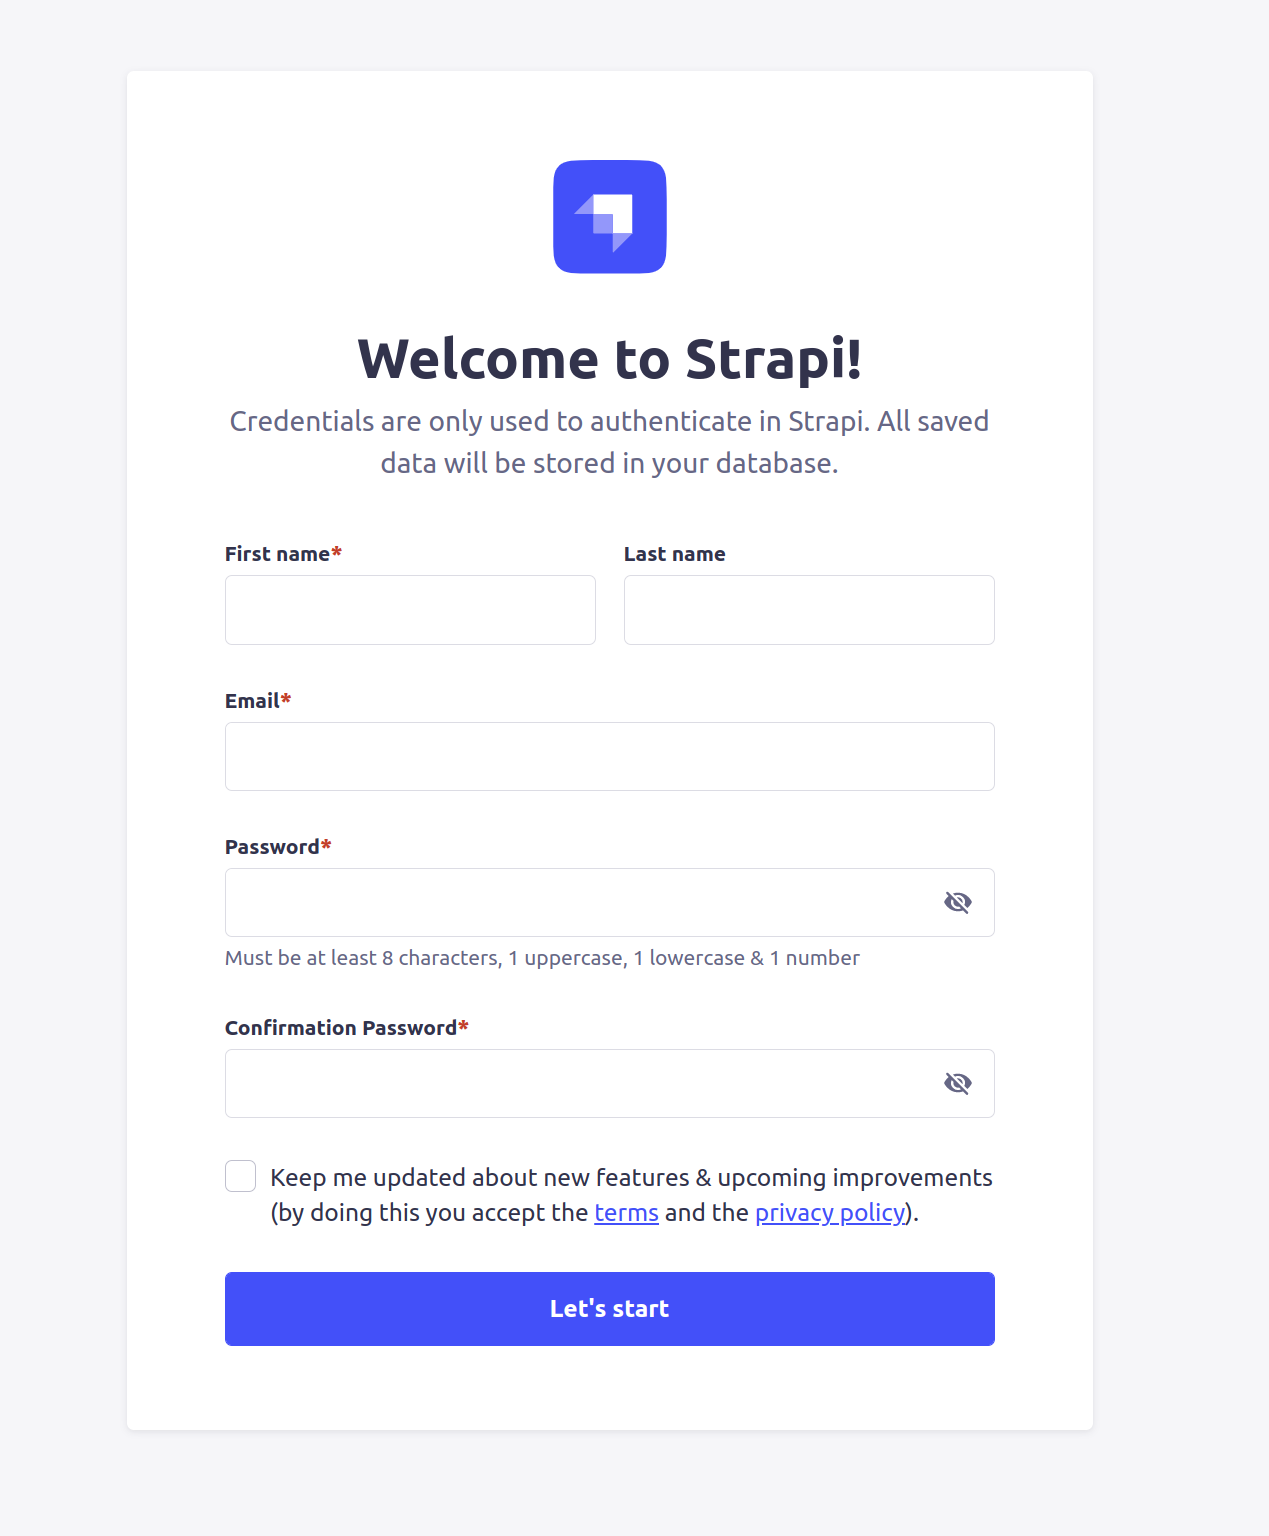
Your new credentials will allow you to access the administration dashboard.

You can start producing content for Strapi from the dashboard.
FAQs to Configure and Install Strapi for Production on Ubuntu 22.04
What are the system requirements for running Strapi on Ubuntu 22.04?
Strapi requires Node.js, a package manager like npm or yarn, and a database (such as MongoDB) to run on Ubuntu 22.04. Ensure your system meets these requirements.
Can I use a different database with Strapi?
Yes, Strapi supports various databases, including MongoDB, PostgreSQL, MySQL, SQLite, and others. You can choose the one that suits your project requirements.
Is Strapi suitable for production environments?
Absolutely! Strapi is designed to be used in production environments and offers features like scalability, security, and performance optimization to ensure reliable performance.
How can I configure Strapi for production on Ubuntu 22.04?
To configure Strapi for production, you can modify the environment variables, set up a production database, configure server settings, and optimize the deployment as per your specific needs.
Can I deploy Strapi on a cloud server?
Yes, you can deploy Strapi on cloud platforms like AWS, Google Cloud, or Azure. The installation process and configuration steps may vary, but the general principles remain the same.
How can I secure my Strapi installation on Ubuntu 22.04?
You can enhance the security of your Strapi installation by implementing measures such as using secure passwords, enabling SSL/TLS encryption, and configuring firewall rules.
Conclusion
Using a PostgreSQL database, you set up a production environment for Strapi in this tutorial. Also, you used a Nginx reverse proxy to serve your Strapi application and the PM2 process manager to keep your server up and running.
With the Strapi administration interface, you may begin producing content after configuring your Strapi server. Further information about setting up and configuring your Strapi application may be found at Strapi’s official documentation.
If you have any suggestions or queries, kindly leave them in the comments section.