
Choose a different version or distribution
Introduction
Before we begin talking about how to install phpMyAdmin on Ubuntu 20.04. Let’s briefly understand - What is phpMyAdmin?
phpMyAdmin is a popular web-based tool used for managing MySQL databases. It simplifies the process of creating, modifying, and deleting databases, tables, and fields. With its user-friendly interface, users can easily run SQL queries, import and export data, and manage user privileges.
phpMyAdmin is a valuable resource for website administrators and developers, providing efficient database management capabilities. Its accessibility and versatility make it an essential tool for anyone working with MySQL databases.
In this tutorial, you will install and secure phpMyAdmin on Ubuntu 20.04. We will also address some of the FAQs related to phpMyAdmin installation.
Advantages of phpMyAdmin
- User-Friendly Interface: phpMyAdmin offers an intuitive interface that simplifies database management tasks.
- SQL Query Execution: Users can run SQL queries effortlessly, making it easier to retrieve, update, and manipulate data.
- Import/Export Functionality: phpMyAdmin allows seamless data import and export from various formats, facilitating database migrations and backups.
- Privilege Management: It offers robust user privilege management, enabling control over database access and security.
- Cross-Platform Compatibility: phpMyAdmin works across different operating systems, making it accessible to a wide range of users.
Prerequisites to Install and Secure phpMyAdmin on Ubuntu 20.04
- Assuming that the server has a non-root user with the sudo privileges and a firewall configured with ufw
- Already ready with LAMP, i.e. Linux, Apache, MySQL, and even PHP installation on Ubuntu 20.04 server
Never run phpMyAdmin on a remote system over any plain HTTP connections.
Step 1 - Installing phpMyAdmin
1) You will first update the server’s package index. Then, use the apt package system to pull down files.
2) Now, install them on the system, using the below command:
sudo apt update
sudo apt install phpmyadmin php-mbstring gettext
It will then ask a few questions to ensure the installation is correct.
3) For server selection, select apache2.
4) Then, choose Yes when it asks whether to use dbconfig for setting up the database.
5) It will ask you to choose and confirm the MySQL program password for phpMyAdmin.
6) The process will add phpMyAdmin Apache configuration file into /etc/apache2/conf-enabled/ directory.
7) After that, enable the mbstring PHP extension, using the command:
sudo phpenmod mbstring
8) For recognition of changes, restart Apache:
sudo systemctl restart apache2
Step 2 - Adjusting the user Authentication and Privileges
1) Before, logging in and beginning interaction with MySQL databases, it is important to ensure that your MySQL users have the privileges necessary to interact with the program.
2) It will automatically create a database user known as phpMyAdmin. It is recommended to log in with the root MySQL user or through the phpMyAdmin interface.
Configuring the Password Access
In the latest ubuntu version, the root MySQL user is set to auth_socket plugin already by default. It gives greater security as well as usability but it can create complications when allowing an external program.
1) To log in to phpMyAdmin as root MySQL and to switch authentication methods, from auth_socket to mysql_native_password, use the below command
sudo mysql
2) To check the authentication method each MySQL user accounts have to enter the following command:
mysql> SELECT user,authentication_string,plugin,host FROM mysql.user;
The following will be the output:
+------------------+-------------------------------------------+-----------------------+-----------+
| user             | authentication_string | plugin                | host      |
+------------------+-------------------------------------------+-----------------------+-----------+
| root             |                                           | auth_socket           | localhost |
| mysql.session    | *THISISNOTAVALIDPASSWORDTHATCANBEUSEDHERE | mysql_native_password | localhost |
| mysql.sys        | *THISISNOTAVALIDPASSWORDTHATCANBEUSEDHERE | mysql_native_password | localhost |
| debian-sys-maint | *8486437DE5F65ADC4A4B001CA591363B64746D4C | mysql_native_password | localhost |
| phpmyadmin       | *5FD2B7524254B7F81B32873B1EA6D681503A5CA9 | mysql_native_password | localhost |
+------------------+-------------------------------------------+-----------------------+-----------+
5 rows in set (0.00 sec)
3) Then, authenticate using the auth_socket plugin.
4) Now, configure the root account to authenticate it with a password and run the following command:
mysql> ALTER USER 'root'@'localhost' IDENTIFIED WITH mysql_native_password BY 'password';
5) Further, run FLUSH PRIVILEGES telling the server to reload the grant tables. It will help to put the new changes into effect.
mysql> FLUSH PRIVILEGES;
6) Now, to check the authentication method put by each user, use the auth_socket plugin:
mysql > SELECT user,authentication_string,plugin,host FROM mysql.user;
The following will be the output:
Output

+------------------+-------------------------------------------+-----------------------+-----------+
| user             | authentication_string | plugin                | host      |
+------------------+-------------------------------------------+-----------------------+-----------+
| root             | *DE06E242B88EFB1FE4B5083587C260BACB2A6158 | mysql_native_password | localhost |
| mysql.session    | *THISISNOTAVALIDPASSWORDTHATCANBEUSEDHERE | mysql_native_password | localhost |
| mysql.sys        | *THISISNOTAVALIDPASSWORDTHATCANBEUSEDHERE | mysql_native_password | localhost |
| debian-sys-maint | *8486437DE5F65ADC4A4B001CA591363B64746D4C | mysql_native_password | localhost |
| phpmyadmin       | *5FD2B7524254B7F81B32873B1EA6D681503A5CA9 | mysql_native_password | localhost |
+------------------+-------------------------------------------+-----------------------+-----------+
7) Configure the password Access for a MySQL user.
8) Also, it will better suit the workflow to connect to phpMyAdmin with a dedicated user. For this, use the following command again:
sudo mysql
mysql -u root -p
9) Now create a new user and a strong password by:
mysql> CREATE USER 'sammy'@'localhost' IDENTIFIED BY 'password';
10) To grant user privileges to all tables, as well as the power to add, change, and remove user privileges, use the below command:
mysql> GRANT ALL PRIVILEGES ON *.* TO 'sammy'@'localhost' WITH GRANT OPTION;
11) Now, to exit the MySQL shell, use the command:
mysql> exit
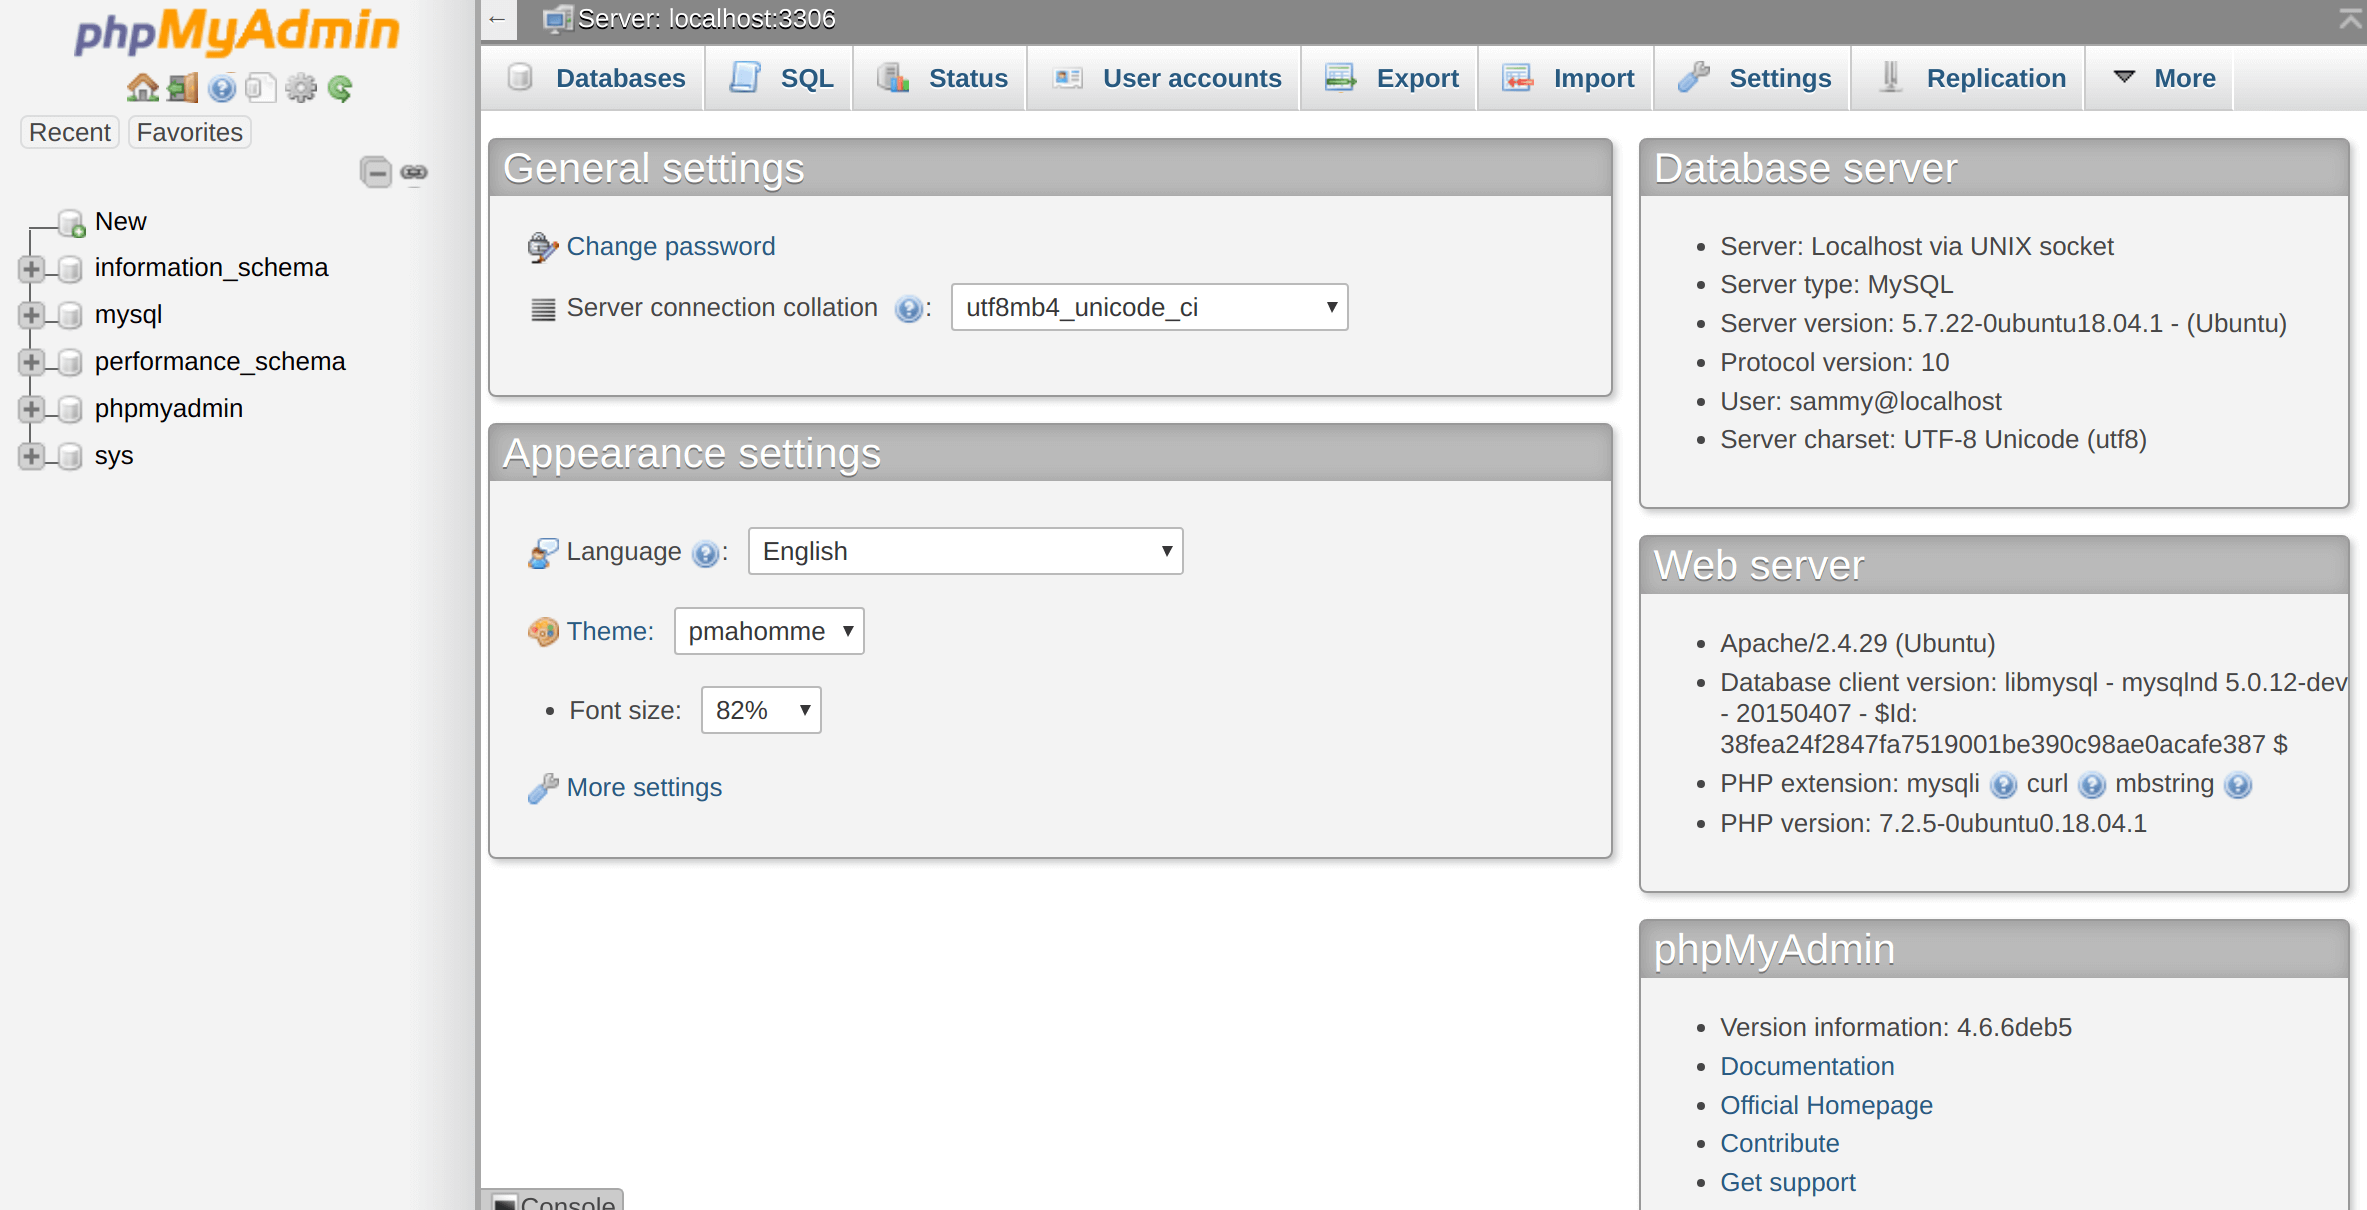
12) To access the web interface and to visit the server’s domain name or public IP address, use the command followed by /phpmyadmin:

http://your_domain_or_IP/phpmyadmin
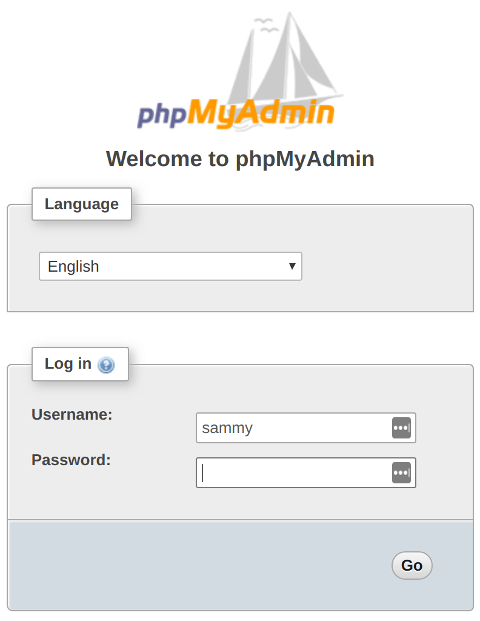
13) After logging in, you will see a web interface like this:
Step 3 - Securing the phpMyAdmin
As phpMyAdmin is highly targetable you need to secure it. Therefore, you will do it by placing a gateway in front of the entire application. You will need to use Apache’s built-in .htaccessauthentication.
1) For this, first enable the use of .htaccessfile.
2) Then, edit the linked file placed in the Apache configuration directory using the below command:
sudo nano /etc/apache2/conf-available/phpmyadmin.conf
3) Now add AllowOverride all directive into the <Directory /usr/share/phpmyadmin> section of configuration file.
/etc/apache2/conf-available/phpmyadmin.conf
<Directory /usr/share/phpmyadmin>
Options FollowSymLinks
DirectoryIndex index.php
AllowOverride All
. . .
4) Then restart Apache, to implement the changes made:
sudo systemctl restart apache2
5) Now you will need to create some security. For this, the file needs to be in the application directory. Create the necessary file and then open it in the text editor with root privileges by command:
sudo nano /usr/share/phpmyadmin/.htaccess
6) Now enter the following information:
/usr/share/phpmyadmin/.htaccess
AuthType Basic
AuthName "Restricted Files"
AuthUserFile /etc/phpmyadmin/.htpasswd
So, this helps in implementing password authentication using the password file. Also, it will set the message for the authentication dialog box and further help in setting the location of the password file and will specify that only authenticated users will have access to this resource, and stop unauthorized entry.
7) After, finishing save and close the file.
8) You will now be able to create the file. Now, pass it to an initial user with the htpasswd utility.
sudo htpasswd -c /etc/phpmyadmin/.htpasswd username
9) Now, select and confirm the password for the user.
10) If you want to enter an additional user, you will need to do so without the cflag.
sudo htpasswd /etc/phpmyadmin/.htpasswd additionaluser
11) Finally, you will be prompted for an additional account name and password. This you just configured, use command:
https://domain_name_or_IP/phpmyadmin

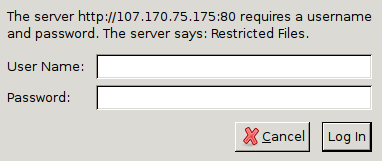
12) Therefore, after entering the Apache authentication, you will be taken to the PHPMyAdmin-authentication page where you can enter the MySQL credentials.
FAQs to Install phpMyAdmin on Ubuntu 20.04
What are the system requirements for phpMyAdmin on Ubuntu 20.04?
phpMyAdmin has minimal system requirements. It requires a LAMP (Linux, Apache, MySQL, PHP) stack installed on your Ubuntu 20.04 server.
How can I access phpMyAdmin after installation?
After installation, you can access phpMyAdmin by opening a web browser and entering http://your_server_ip/phpmyadmin in the address bar. Replace your_server_ip with the IP address of your Ubuntu 20.04 server.
Can I use phpMyAdmin to manage remote MySQL servers?
Yes, you can use phpMyAdmin to manage remote MySQL servers. During the installation, you will be prompted to enter the MySQL server's IP address or domain name.
Can I use phpMyAdmin with MariaDB instead of MySQL?
Yes, phpMyAdmin works with both MySQL and MariaDB. The installation process and usage remain the same.
What should I do if I encounter an "Access denied" error in phpMyAdmin?
Ensure that you have entered the correct username and password for your MySQL/MariaDB server. Also, verify that the user has appropriate privileges to access the databases.
How do I uninstall phpMyAdmin from Ubuntu 20.04?
To uninstall phpMyAdmin from Ubuntu 20.04, run the command sudo apt remove phpmyadmin in the terminal. You can also use sudo apt purge phpmyadmin to remove all configuration files.
Conclusion
We hope this tutorial helped you to understand how to install and secure the phpMyAdmin on Ubuntu 20.04.
If you have any further queries or doubts, please leave a comment below. We will be happy to respond to them.
