
Choose a different version or distribution
Introduction
Before we begin talking about how to install phpMyAdmin on Ubuntu 22.04, let's briefly understand – What is phpMyAdmin?
phpMyAdmin is a user-friendly web-based application used for managing MySQL databases. With its intuitive interface, it offers various functionalities like creating databases, managing tables, executing SQL queries, and handling user privileges.
This platform-independent tool ensures database security through authentication and SSL/TLS support. Its extensibility allows users to customize and enhance functionality with plugins. phpMyAdmin is a valuable tool for efficiently managing databases, accessible through any web browser.
In this tutorial, you will install and secure phpMyAdmin so that you can safely use it to manage your databases on an Ubuntu 22.04 system. We will also address a few FAQs on how to install phpMyAdmin on Ubuntu 22.04.
Advantages of phpMyAdmin
- User-Friendly Interface: phpMyAdmin provides a simple and intuitive interface for managing MySQL databases, making it easy for users to navigate and perform database operations.
- Broad Functionality: It offers a wide range of features, including database creation, table management, data manipulation, SQL execution, user management, and more.
- Platform Independence: phpMyAdmin is written in PHP and can be accessed through a web browser, making it compatible with various operating systems and accessible from anywhere.
- Security Features: It includes robust security measures like authentication, user privileges management, SSL/TLS support, and the ability to generate strong passwords, ensuring the protection of your database.
- Extensibility: phpMyAdmin supports plugins and extensions, allowing users to enhance its functionality and customize it according to their specific needs.
Prerequisites to Set Up and Secure phpMyAdmin on Ubuntu 22.04
To complete this guide, you will need the following:
- Server running Ubuntu 22.04.
- A non-root user with administrative rights.
- A firewall set up with
ufwshould be present on this server.
Using software like phpMyAdmin raises a number of crucial security issues, since it:
- Connects to your MySQL installation directly.
- Uses MySQL login credentials to handle authentication.
- Executes any SQL query and returns the results.
For these reasons, as well as the fact that phpMyAdmin is a widely-used PHP application that is regularly the target of attacks, you should never execute it on remote computers using a plain HTTP connection.
Step 1 - Installing phpMyAdmin
phpMyAdmin may be installed from the default Ubuntu repository using APT.
If you haven't done so recently, update your server's package index as your non-root sudo user:
sudo apt update
Installing the phpmyadmin package comes next. To enable specific functions and boost efficiency, the official documentation also suggests that you install a few PHP extensions on your server in addition to this package.
Several of these modules will have been installed along with the php package if you followed the prerequisite LAMP stack tutorial. However, it’s advised that you also install these packages:
php-mbstring: a module for managing strings that aren't ASCII and converting strings to various encodings.php-zip: with the help of this plugin, you can upload .zip files to phpMyAdmin.php-gd: support for the GD Graphics Library is enabled.php-json: provides JSON serialization capabilities for PHP.php-curl: enables PHP to communicate with multiple servers via various protocols.
You may install these packages on your machine by using the following command. Please be aware, however, that in order to configure phpMyAdmin properly, you must make some decisions during the installation process. Soon, we'll go over these possibilities:
sudo apt install phpmyadmin php-mbstring php-zip php-gd php-json php-curl
Here are the settings you should choose when prompted in order to configure your installation correctly:
- For the server selection, choose
apache2
SPACE to choose Apache, the installer won't transfer the required files when installing. For Apache to be selected, press SPACE, TAB, and then ENTER.- When prompted to use
dbconfig-commonto configure the database, chooseYes. - You will then be prompted to select and confirm a password for the phpMyAdmin MySQL application.
Note: If you followed Step 2 of the required LAMP stack guide to install MySQL, you might have chosen to enable the Validate Password plugin. When you try to set a password for the phpmyadmin account after enabling this component, an error is now generated:
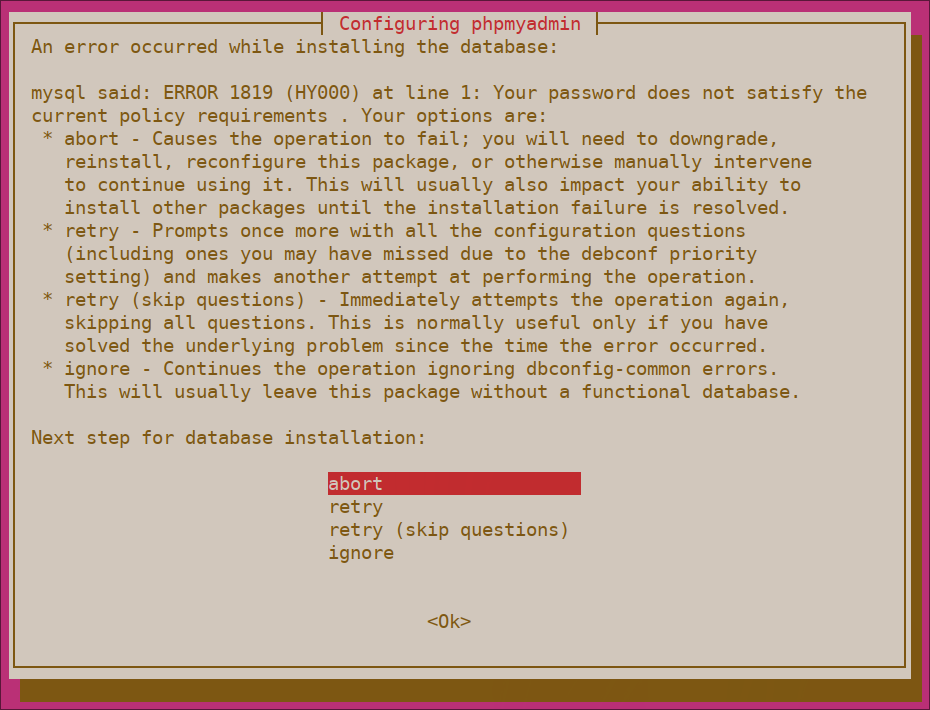
To fix this, choose the abort option to terminate the installation. Open your MySQL prompt after that:
sudo mysql
Alternately, run the following command and then enter your password when prompted if password authentication for the root MySQL user was enabled:
mysql -u root -p
Execute the following command from the prompt to disable the Validate Password component. It should be noted that doing this will just prevent the component from loading on your MySQL server, not actually uninstall it:
UNINSTALL COMPONENT "file://component_validate_password";
After that, you can leave the MySQL client:
exit
Then attempt installing the phpmyadmin package once more, and everything should go smoothly:
sudo apt install phpmyadmin
Once phpMyAdmin is set up, you can use sudo mysql or mysql -u root -p to reopen the MySQL prompt and then enter the following line to enable the Validate Password component once more:
INSTALL COMPONENT "file://component_validate_password";
The phpMyAdmin Apache configuration file is added after installation to the /etc/apache2/conf-enabled/ directory, where it is immediately read. The only item left to complete in this phase of the tutorial is to explicitly enable the mbstring PHP extension. You may do this by typing: to finish setting Apache and PHP to interact with phpMyAdmin:
sudo phpenmod mbstring
After that, you must restart Apache for your changes to take effect:
sudo systemctl restart apache2
phpMyAdmin has been set up to work with Apache and has been installed. However, you must make sure that your MySQL users have the privileges necessary for interacting with the programme before you can log in and start working with your MySQL databases.
Step 2 - Modifying User Authentication and Privileges
A database user named phpmyadmin was automatically created when you installed phpMyAdmin on your server. This user manages some of the program's internal operations. It is recommended that you use the administrator password you created during installation to log in as either your root MySQL account or as a user specifically created for managing databases through the phpMyAdmin interface.
Setting Up Password Access for the MySQL Root Account
The root MySQL user is configured in Ubuntu systems running MySQL 5.7 (and later versions) to authenticate via the auth_socket plugin by default rather than with a password. This provides improved security and usability in many circumstances, but it can also complicate things when an external programme, such as phpMyAdmin, needs to access the user.
If you haven't already, change the authentication mechanism of phpMyAdmin from auth_socket to one that uses a password. This will allow you to log in as your root MySQL user. Open the MySQL prompt in your terminal to complete this:
sudo mysql
Next, run the following command to determine the type of authentication each of your MySQL user accounts uses:
SELECT user,authentication_string,plugin,host FROM mysql.user;
Output
+------------------+------------------------------------------------------------------------+-----------------------+-----------+
| user             | authentication_string                                                  | plugin                | host      |
+------------------+------------------------------------------------------------------------+-----------------------+-----------+
| debian-sys-maint | $A$005$I:jOry?]Sy<|qhQRj3fBRQ43i4UJxrpm.IaT6lOHkgveJjmeIjJrRe6         | caching_sha2_password | localhost |
| mysql.infoschema | $A$005$THISISACOMBINATIONOFINVALIDSALTANDPASSWORDTHATMUSTNEVERBRBEUSED | caching_sha2_password | localhost |
| mysql.session    | $A$005$THISISACOMBINATIONOFINVALIDSALTANDPASSWORDTHATMUSTNEVERBRBEUSED | caching_sha2_password | localhost |
| mysql.sys        | $A$005$THISISACOMBINATIONOFINVALIDSALTANDPASSWORDTHATMUSTNEVERBRBEUSED | caching_sha2_password | localhost |
| phpmyadmin       | $A$005$?#{Z?`gN!c2az)}V-INCWXSuVdqB9zWteH1IkZfTe/rOLgVhSzEMM9R3G6K9    | caching_sha2_password | localhost |
| root             |                                                                        | auth_socket           | localhost |
+------------------+------------------------------------------------------------------------+-----------------------+-----------+
6 rows in set (0.00 sec)
This sample output shows that the auth_socket plugin is used by the root user to authenticate. Run the following ALTER USER command to set the root account to require a password for authentication:
ALTER USER 'root'@'localhost' IDENTIFIED WITH caching_sha2_password BY 'password';
Note: The root MySQL user is configured to authenticate using the caching_sha2_password plugin by the previous ALTER USER statement. The preferred authentication plugin for MySQL is caching_sha2_password since it offers more secure password encryption than the more standard but still widely used mysql_native_password, according to the official MySQL documentation.
However, caching_sha2_password is not consistently compatible with all versions of PHP. Although PHP claims that this problem has been resolved as of PHP 7.4, you might want to set root to authenticate with mysql_native_password if you subsequently discover a problem when attempting to access phpMyAdmin:
ALTER USER 'root'@'localhost' IDENTIFIED WITH mysql_native_password BY 'password';
Check each user's authentication method once again to ensure that root is no longer authenticating via the auth_socket plugin:
SELECT user,authentication_string,plugin,host FROM mysql.user;
Output
+------------------+------------------------------------------------------------------------+-----------------------+-----------+
| user             | authentication_string                                                  | plugin                | host      |
+------------------+------------------------------------------------------------------------+-----------------------+-----------+
| debian-sys-maint | $A$005$I:jOry?]Sy<|qhQRj3fBRQ43i4UJxrpm.IaT6lOHkgveJjmeIjJrRe6         | caching_sha2_password | localhost |
| mysql.infoschema | $A$005$THISISACOMBINATIONOFINVALIDSALTANDPASSWORDTHATMUSTNEVERBRBEUSED | caching_sha2_password | localhost |
| mysql.session    | $A$005$THISISACOMBINATIONOFINVALIDSALTANDPASSWORDTHATMUSTNEVERBRBEUSED | caching_sha2_password | localhost |
| mysql.sys        | $A$005$THISISACOMBINATIONOFINVALIDSALTANDPASSWORDTHATMUSTNEVERBRBEUSED | caching_sha2_password | localhost |
| phpmyadmin       | $A$005$?#{Z?`gN!c2az)}V-INCWXSuVdqB9zWteH1IkZfTe/rOLgVhSzEMM9R3G6K9    | caching_sha2_password | localhost |
| root             | $A$005$3y�y|Z?'_[} ZyVHuESVwNmjKWOH/ndETwS.Kty0IH7UfiXjOfVvyWroy4a.   | caching_sha2_password | localhost |
+------------------+------------------------------------------------------------------------+-----------------------+-----------+
6 rows in set (0.00 sec)
This output demonstrates that a password will be used by the root user to authenticate. With the password you've chosen for the phpMyAdmin interface here, you can now access it as the root user.
Configuring Password Access for a Dedicated MySQL User
As an alternative, some people might discover that using a dedicated user to connect to phpMyAdmin better matches their workflow. Open the MySQL shell once more to complete this:
sudo mysql
You must run the following command and enter your password when prompted in order to connect if you have enabled password authentication for your root user as mentioned in the previous section:
mysql -u root -p
Create a new user from there and give it a strong password:
CREATE USER 'sammy'@'localhost' IDENTIFIED WITH caching_sha2_password BY 'password';
Note: Again, depending on the version of PHP you've installed, you might want to change your new user's settings so that mysql_native_password rather than caching_sha2_password is used for authentication:
ALTER USER 'sammy'@'localhost' IDENTIFIED WITH mysql_native_password BY 'password';
After that, give your new user the necessary permissions. For instance, the following command would provide the user access to all database tables as well as the ability to add, modify, and remove user privileges:
GRANT ALL PRIVILEGES ON *.* TO 'sammy'@'localhost' WITH GRANT OPTION;
After that, close the MySQL shell:
exit
By going to your server's domain name or public IP address and then typing in /phpmyadmin, you can now access the web interface:
https://your_domain_or_IP/phpmyadmin
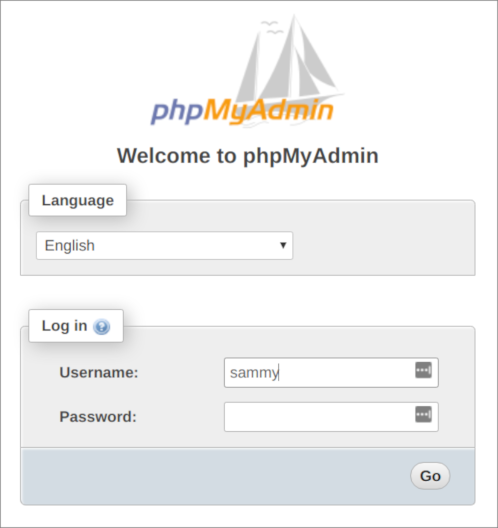
Enter the interface as root or with the newly created username and password that you just set up.
You will be directed to the phpMyAdmin user interface after logging in:

Now that you can connect to and communicate with phpMyAdmin, all that is needed to do is strengthen your system's security to keep attackers out.
Step 3 - Securing Your phpMyAdmin Instance
phpMyAdmin is a common target for attackers due to its widespread use, therefore you should take extra precautions to avoid unauthorized access. Utilizing Apache's integrated authentication and authorization capabilities included in the .htaccess file is one approach to accomplish this. Another is to place a gateway in front of the entire application.
To do this, you must first enable the use of .htaccess file overrides by modifying the Apache configuration file for your phpMyAdmin installation.
The phpmyadmin.conf file has been added to your Apache configuration directory; modify it using your chosen text editor. We'll use nano in this case:
sudo nano /etc/apache2/conf-available/phpmyadmin.conf
Include the AllowOverride All directive in the <Directory /usr/share/phpmyadmin> section of the configuration file:
<Directory /usr/share/phpmyadmin>
    Options SymLinksIfOwnerMatch
    DirectoryIndex index.php
    AllowOverride All
    . . .
Save the file after adding this line, then quit it. If you edited the file using nano, enter the changes by pressing CTRL + X, Y, and then ENTER.
Restart Apache to apply the modifications you made:
sudo systemctl restart apache2
You must now construct a .htaccess file for your application because you have authorized its use in order to put security into practise.
The file needs to be generated inside the application directory for this to work. By typing the following, you can make the required file and open it in your text editor with root privileges:
sudo nano /usr/share/phpmyadmin/.htaccess
Enter the following details in this file:
AuthType Basic
AuthName "Restricted Files"
AuthUserFile /etc/phpmyadmin/.htpasswd
Require valid-user
Each of these lines means as follows:
AuthType Basic: This line describes the kind of authentication you're using. This kind will use a password file to implement password authentication.AuthName: This configures the authentication dialogue box's message. To prevent unauthorised people from learning what is being protected, you should keep this general.AuthUserFile: The password file's location, which will be used for authentication, is set by this. Outside of the directories being provided should be this. We will soon create this file.Require valid-user: This states that this resource should only be accessible to people who have provided valid credentials. This is what truly prevents entry by unauthorised users.
Save your work and then exit the file.
Your password file was saved at /etc/phpmyadmin/.htpasswd. With the htpasswd tool, you can now make this file and give it an initial user:
sudo htpasswd -c /etc/phpmyadmin/.htpasswd username
A password will need to be chosen and verified for the user you are creating. The produced file then contains the hashed password that you supplied.
You must input an additional user without the -c flag, as in the following example:
sudo htpasswd /etc/phpmyadmin/.htpasswd additionaluser
After that, restart Apache to implement .htaccess authentication:
sudo systemctl restart apache2
You will now be asked for the additional account name and password that you just set up when you access your phpMyAdmin subdirectory:
https://domain_name_or_IP/phpmyadmin
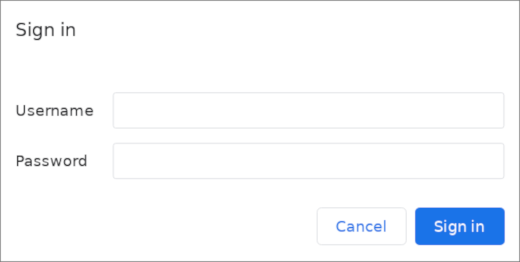
You will be sent to the standard phpMyAdmin authentication screen to enter your MySQL credentials after completing the Apache authentication. You add another layer of security to your database by adding a set of non-MySQL credentials. This is preferable because phpMyAdmin has already been exposed to security risks.
FAQs to Set Up and Secure phpMyAdmin on Ubuntu 22.04
How can I access phpMyAdmin after installation?
Access phpMyAdmin by opening a web browser and entering http://localhost/phpmyadmin in the address bar. Log in with your MySQL username and password.
How do I secure phpMyAdmin on Ubuntu 22.04?
Secure phpMyAdmin by running the command sudo dpkg-reconfigure phpmyadmin in the terminal. Choose Yes when prompted to use the dbconfig-common, and set a strong password for the phpMyAdmin database.
Can I change the default URL path for phpMyAdmin?
Yes, you can change the URL path for phpMyAdmin by editing the Apache configuration file. Use the Alias directive to specify a custom URL path.
How can I enable HTTPS (SSL/TLS) for phpMyAdmin?
Enable HTTPS for phpMyAdmin by configuring an SSL certificate on your Apache server. Once configured, access phpMyAdmin using https://localhost/phpmyadmin.
What are some recommended security practices for phpMyAdmin?
Some security practices include using strong passwords, restricting access to specific IP addresses, regularly updating phpMyAdmin, and disabling the "root" login for MySQL.
Can I limit access to phpMyAdmin from specific IP addresses?
Yes, you can limit access to phpMyAdmin by editing the Apache configuration file and using the Allow from directive to specify the IP addresses that are allowed to access it.
What should I do if I forget the phpMyAdmin password?
Reset the phpMyAdmin password by logging into the MySQL server as the root user and executing the appropriate SQL command to reset the password for the phpMyAdmin user.
Conclusion
We hope this detailed tutorial helped you understand how to install and setup phpMyAdmin on Ubuntu 22.04.
If you have any queries, please leave a comment below, and we’ll be happy to respond to them for sure.