
Choose a different version or distribution
Introduction
Before we begin talking about how to install and use Composer on Ubuntu 22.04, let's briefly understand – What is Composer?
Composer is a powerful computer tool used in software development to manage and organize dependencies for PHP projects. It simplifies the process of integrating external libraries and frameworks, making it easier for developers to build and maintain their applications.
With Composer, programmers can easily specify the required components and their versions, which are then automatically installed and updated. This efficient package manager boosts productivity and promotes code reusability. By streamlining dependency management, Composer empowers developers to create robust and efficient PHP applications effortlessly.
In this tutorial, you will learn how to install and get started with Composer on an Ubuntu 22.04 system. We will also address a few FAQs on how to install Composer on Ubuntu 22.04.
Advantages of Composer
- Simplifies Dependency Management: Composer streamlines the process of integrating external libraries and frameworks, making it easier to manage dependencies in PHP projects.
- Enhanced Code Reusability: By managing dependencies, Composer promotes code reuse, allowing developers to leverage existing components and libraries in their projects.
- Version Control: Composer enables precise version control of dependencies, ensuring that the required components are always up-to-date and compatible.
- Efficient Package Management: Composer automatically handles package installation, updating, and removal, saving time and effort for developers.
- Widely Supported: Composer is widely adopted in the PHP community, with a vast ecosystem of packages available, providing extensive support and resources for developers.
Prerequisites to Install and Use Composer on Ubuntu 22.04
You must have non-root sudo user access to an Ubuntu 22.04 server and have your server's firewall enabled in order to follow this guide.
Step 1 - Installing PHP and Extra Dependencies
Composer requires php-cli to run PHP scripts on the command line and unzip to extract zipped archives, in addition to dependencies like git and curl that should already be present on your Ubuntu 22.04 system. We will now install these prerequisites.
Update the package manager cache first by executing:
sudo apt update
Use the subsequent command to install the necessary packages after that:
sudo apt install php-cli unzip
When prompted to confirm installation, type Y and then press ENTER.
You can start installing Composer after installing the requirements.
Step 2 - Downloading and Installing Composer
A PHP installer script is offered by Composer. It will be downloaded, checked to make sure it isn't damaged, and then used to install Composer.
Make sure that you are in your home directory, then use curl to retrieve the installer:
cd ~
curl -sS https://getcomposer.org/installer -o /tmp/composer-setup.php
The downloaded installation will then be compared to the most recent installer's SHA-384 hash, which can be accessed on the Composer Public Keys / Signatures page. To expedite the verification process, you can use the following command to programmatically obtain the most recent hash from the Composer page and put it in a shell variable:
HASH=`curl -sS https://composer.github.io/installer.sig`
You can perform the following tests to confirm the result:
echo $HASH
Output
906a84df04cea2aa72f40b5f787e49f22d4c2f19492ac310e8cba5b96ac8b64115ac402c8cd292b8a03482574915d1a8
Run the following PHP code, which is accessible from the Composer download page, to confirm that the installation script can be executed without risk:
php -r "if (hash_file('SHA384', '/tmp/composer-setup.php') === '$HASH') { echo 'Installer verified'; } else { echo 'Installer corrupt'; unlink('composer-setup.php'); } echo PHP_EOL;"
The following output will appear:
Output
Installer verified
You must download the installation script again and double check that you are using the right hash if the output states Installer corrupt. Repeat the verification procedure after that. When you work with an approved installer, you can continue.
The following command will download and install Composer as a system-wide command named composer under /usr/local/bin. Use it to install Composer globally.
sudo php /tmp/composer-setup.php --install-dir=/usr/local/bin --filename=composer
You'll observe results resembling these:
Output
All settings correct for using Composer
Downloading...

Composer (version 2.3.5) successfully installed to: /usr/local/bin/composer
Use it: php /usr/local/bin/composer
Run the following to evaluate your installation:
composer
Output
______
  / ____/___  ____ ___  ____  ____  ________  _____
 / /   / __ \/ __ `__ \/ __ \/ __ \/ ___/ _ \/ ___/
/ /___/ /_/ / / / / / / /_/ / /_/ (__  )  __/ /
\____/\____/_/ /_/ /_/ .___/\____/____/\___/_/
                    /_/
Composer version 2.3.5 2022-04-13 16:43:00

Usage:
  command [options] [arguments]

Options:
  -h, --help                     Display help for the given command. When no command is given display help for the list command
  -q, --quiet                    Do not output any message
  -V, --version                  Display this application version
      --ansi|--no-ansi           Force (or disable --no-ansi) ANSI output
  -n, --no-interaction           Do not ask any interactive question
      --profile                  Display timing and memory usage information
      --no-plugins               Whether to disable plugins.
      --no-scripts               Skips the execution of all scripts defined in composer.json file.
  -d, --working-dir=WORKING-DIR  If specified, use the given directory as working directory.
      --no-cache                 Prevent use of the cache
  -v|vv|vvv, --verbose           Increase the verbosity of messages: 1 for normal output, 2 for more verbose output and 3 for debug
This demonstrates that Composer was successfully installed and is now accessible throughout your system.
Use the php /tmp/composer-setup.php command to accomplish this. In your current directory, this will produce a composer.phar file that can be run using the php composer.phar command.
Let's now see how Composer may be used to handle dependencies.
Step 3 - Using Composer in a PHP Project
Managing these dependencies and their versions can be challenging because external libraries are frequently used in PHP projects. Composer addresses that issue by keeping track of project versions and dependencies and by making it easier to locate, install, and update the packages needed by a project.
You'll need a composer.json file if you want to use Composer in your project. The composer.json file provides Composer with information about the dependencies it needs to download for your project, as well as the permitted installation versions for each package. It is crucial to avoid installing unstable versions that can compromise backward compatibility and maintain consistency throughout your project.
It is not necessary for you to manually generate this file because doing so frequently results in syntax problems. You can create a new composer.json file based on the user’s input interactively using Composer. This is a good idea if you are thinking about sharing your project later as a package on Packagist. When you execute a composer require command to include a dependency in a newly created project, composer auto-generates a bare-bones composer.json.
The following procedures must be followed in order to use Composer to install a package as a dependency in a project:
- Determine the type of library the application requires.
- Search Packagist.org, the Composer's official package repository, for a suitable open source library.
- Choose the package that you want to rely on.
- To add the requirement in the
composer.jsonfile and install the package, runcomposer require.
Let's give it a shot with a demo application.
This application's objective is to turn a given text into a slug—a string that may be used in URLs. This is a frequent method of changing page titles into URL paths (like the final portion of the URL for this tutorial).
First, let's make a directory for our project. We'll refer to it as slugify:
cd ~
mkdir slugify
cd slugify
You might now issue the composer init command to generate a comprehensive composer.json file for your project, while it is not necessary. We'll use a simplified composer.json file that will be automatically generated when we require our first package because our project's sole goal is to show how to install dependencies using Composer.
We should now look on Packagist.org for a package that can assist us in creating slugs. The term "slug" will come up in a search on Packagist.
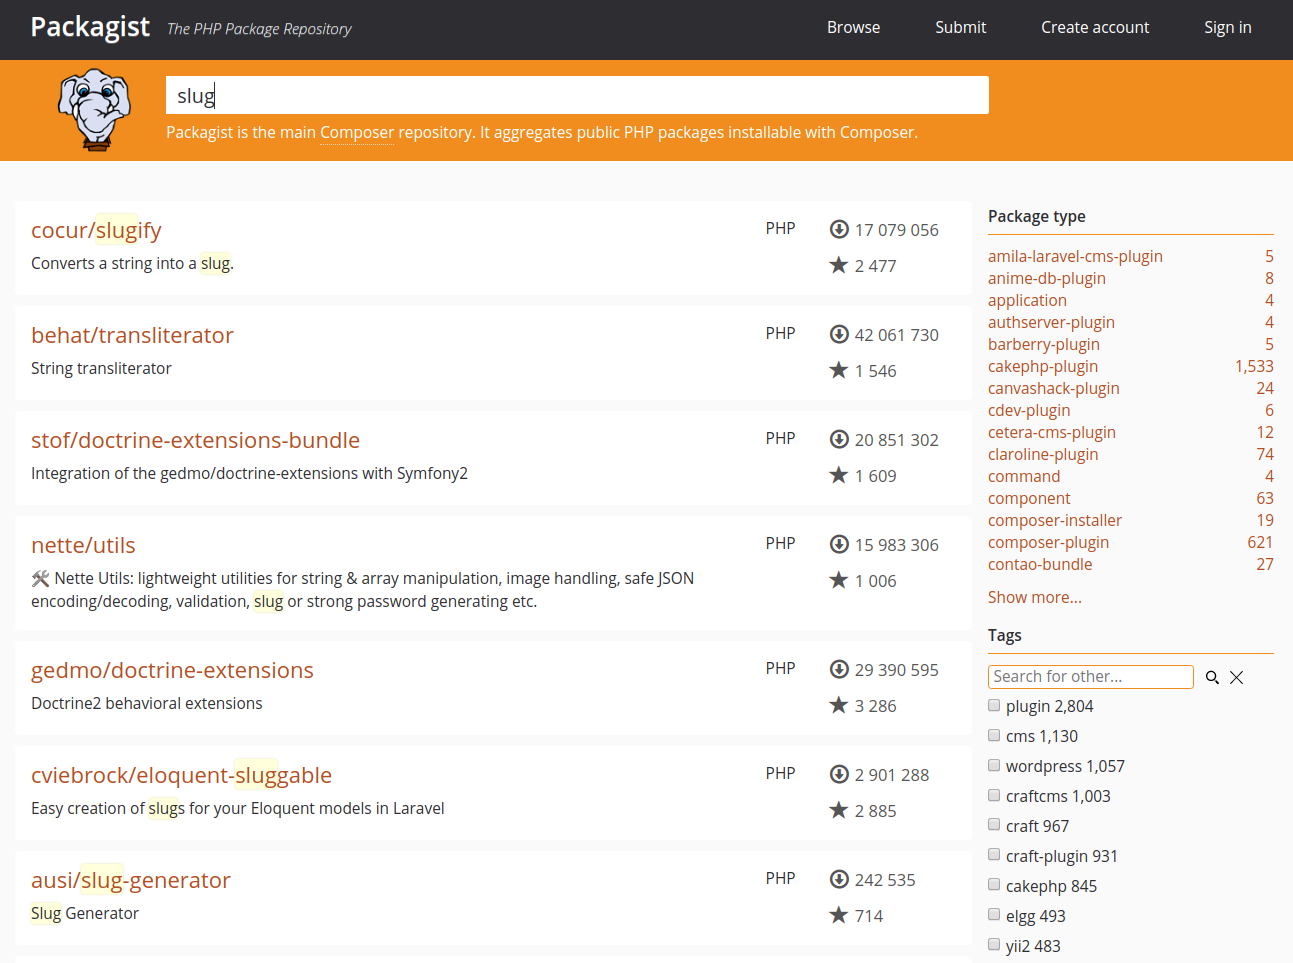
Each package in the list has two numbers on the right side of it. The bottom number indicates how many times a package was starred on GitHub, while the top number indicates how many times the item was installed using Composer. As so many people are using them, packages with more installations and stars generally tend to be more stable. To make sure it is what you need, it's also crucial to check the package description for relevancy.
A string-to-slug converter is required. With a respectable number of installations and stars, the search results indicate that the package cocur/slugify, which is the top result on that page, is a solid match.
There is a vendor name and a package name for each package on Packagist. Each package has a distinctive identifier (a namespace) in the same vendor/package format as GitHub's repository names. The namespace cocur/slugify is used by the library that we want to install. To require a package in your project, you must have access to its namespace.
You can use composer require, adding a package as a requirement, and create the composer.json file for your project now that you are certain which one you want to install. When requesting packages, it's vital to keep in mind that Composer keeps track of both application- and system-level dependencies. It's critical to identify system-level dependencies when determining which PHP modules a package depends on. In the example of the package cocur/slugify, it needs a PHP module that we haven’t installed yet.
An error message will appear if a necessary package depends on a system library that is not currently installed on your server.
composer require cocur/slugify:4.1
Output
./composer.json has been created
Running composer update cocur/slugify
Loading composer repositories with package information
Updating dependencies
Your requirements could not be resolved to an installable set of packages.

  Problem 1
    - Root composer.json requires cocur/slugify 4.1 -> satisfiable by cocur/slugify[v4.1.0].
    - cocur/slugify v4.1.0 requires ext-mbstring * -> it is missing from your system. Install or enable PHP's mbstring extension.
...
We may use apt search to look for the missing package and fix the system dependency issue:
apt search mbstring
Output
Sorting... Done
Full Text Search... Done
php-mbstring/jammy 2:8.1+92ubuntu1 all
  MBSTRING module for PHP [default]

php-symfony-polyfill-mbstring/jammy 1.24.0-1ubuntu2 all
  Symfony polyfill for the Mbstring extension

php8.1-mbstring/jammy 8.1.2-1ubuntu2 amd64
  MBSTRING module for PHP
You can run apt again to install the system dependency after finding the proper package name:
sudo apt install php-mbstring
When the installation is complete, use the composer require command once more:
composer require cocur/slugify
Output
Using version ^4.1 for cocur/slugify
./composer.json has been created
Running composer update cocur/slugify
Loading composer repositories with package information
Updating dependencies
Lock file operations: 1 install, 0 updates, 0 removals
  - Locking cocur/slugify (v4.1.0)
Writing lock file
Installing dependencies from lock file (including require-dev)
Package operations: 1 install, 0 updates, 0 removals
  - Installing cocur/slugify (v4.1.0): Extracting archive
Generating autoload files
The output shows that Composer selected the appropriate version of the package on its own. The composer.json and composer.lock files, as well as a vendor directory, have been added to your project's directory.
ls -l
Output
total 12
-rw-r--r-- 1 sammy sammy   59 Apr 18 14:17 composer.json
-rw-r--r-- 1 sammy sammy 3462 Apr 18 14:17 composer.lock
drwxr-xr-x 4 sammy sammy 4096 Apr 18 14:17 vendor
In order to ensure that the same versions of each package are used if someone else copies your project and installs its dependencies, the composer.lock file is used to record information about which versions of each package are installed. The project dependencies are contained in the vendor directory. Only the composer.json and composer.lock files need to be included in version control, not the vendor folder.
composer install to obtain the project's dependencies when installing a project that already has a composer.json file.Let's quickly review version restrictions. You'll find something similar if you look at your composer.json file's contents:
cat composer.json
Output
{
    "require": {
        "cocur/slugify": "^4.1"
    }
}
In composer.json, you may have noticed a special character ^ preceding the version number. Composer offers flexibility while maintaining project stability by supporting a variety of constraints and formats for specifying the necessary package version. Following semantic versioning, the caret (^) operator is the one that is advised for maximum interoperability and is utilized by the automatically generated composer.json file. The lowest compatible version in this situation is 4.0, and updates to any upcoming version lower than 5.0 are permitted.
In general, you won't need to make any changes to the version restrictions in your composer.json file. When a significant new version of your necessary library is released, and you want to upgrade, for example, or when the library you wish to use doesn't adhere to semantic versioning, you might need to manually update the restrictions.
For a clearer understanding of how Composer version limitations operate, consider the following examples:
| Constraint | Meaning | Example Versions Allowed |
|---|---|---|
| ^1.0 | >= 1.0 < 2.0 | 1.0, 1.2.3, 1.9.9 |
| ^1.1.0 | >= 1.1.0 < 2.0 | 1.1.0, 1.5.6, 1.9.9 |
| ~1.0 | >= 1.0 < 2.0.0 | 1.0, 1.4.1, 1.9.9 |
| ~1.0.0 | >= 1.0.0 < 1.1 | 1.0.0, 1.0.4, 1.0.9 |
| 1.2.1 | 1.2.1 | 1.2.1 |
| 1.* | >= 1.0 < 2.0 | 1.0.0, 1.4.5, 1.9.9 |
| 1.2.* | >= 1.2 < 1.3 | 1.2.0, 1.2.3, 1.2.9 |
See the official documentation for a more thorough explanation of Composer version limits.
Let's now see how Composer can load dependencies automatically.
Step 4 - Including the Autoload Script
Since PHP doesn't load classes automatically by default, Composer offers an autoload script that you may add in your project to enable autoloading. When you add your first dependent, Composer automatically creates this file.
The vendor/autoload.php file must only be present in your PHP scripts before any class creation.
Let's test it out in our demonstration programme. Open your text editor and create a new file called test.php:
nano test.php
To import the vendor/autoload.php file, activate the cocur/slugify dependency, and utilise it to generate a slug, add the following code:
<?php
require __DIR__ . '/vendor/autoload.php';

use Cocur\Slugify\Slugify;

$slugify = new Slugify();

echo $slugify->slugify('Hello World, this is a long sentence and I need to make a slug from it!');
Save the document, then close your editor.
Run the script now:
php test.php
This results in the output hello-world-this-is-a-long-sentence-and-i-need-to-make-a-slug-from-it.
When new versions are released, dependencies must be updated; therefore, let's see how to do that.
Step 5 - Updating Project Dependencies
Use the update command each time you want to update your project dependencies to more recent versions:
composer update
The libraries you needed for your project will be checked for updated versions using this method. Composer will replace the previously installed version if a newer version is discovered and it complies with the version constraint specified in the composer.json file. To reflect these modifications, the composer.lock file will be changed.
Moreover, you can update one or more individual libraries by naming them as follows:
composer update vendor/package vendor2/package2
After updating your dependencies, make sure to check in your composer.json and composer.lock files to your version control system so that other people can install the most recent versions as well.
FAQs to Install and Use Composer on Ubuntu 22.04
How do I check if Composer is installed?
You can verify the installation by running the command composer --version. If it displays the Composer version, it means Composer is successfully installed.
How can I update Composer to the latest version?
To update Composer to the latest version, you can use the following command: composer self-update.
Where should I install Composer globally on Ubuntu?
It is recommended to install Composer globally in the /usr/local/bin directory, as shown in the installation command mentioned earlier.
How can I install specific Composer packages?
To install specific Composer packages, you need to specify them in your project's composer.json file and then run the command composer install.
How do I add autoloading to my project using Composer?
In your project's composer.json file, define the autoload section with the appropriate namespace and class mapping. Then run the command composer dumpautoload to generate the autoloader files.
Can I use Composer in an existing PHP project?
Yes, you can use Composer in an existing PHP project. Simply create a composer.json file in your project's root directory and define your dependencies.
How can I use Composer in a production environment?
In a production environment, it is recommended to run the command composer install --no-dev to exclude development dependencies and ensure a minimal and optimized installation.
Conclusion
Composer is a powerful resource that may make handling dependencies in PHP projects much easier. It offers a dependable method of locating, downloading, and maintaining PHP packages that a project needs. You learned how to install Composer, add new dependencies to a project, and update these dependencies as newer versions become available in this article.
If you have any suggestions or queries, kindly leave them in the comments section.
