

Choose a different version or distribution
Introduction
Before we begin talking about how to install Monit on Ubuntu 20.04, let's briefly understand – What is Monit?
Monit is an open-source monitoring tool for system stability and performance. With Monit, you can proactively track vital system metrics, detect issues, and automatically take corrective actions.
This versatile solution offers real-time alerts, resource usage monitoring, process management, and more. Monit ensures optimal uptime and reduces downtime risks, making it an indispensable tool for system administrators and businesses. Boost your server's reliability and streamline operations with Monit's robust monitoring capabilities.
In this tutorial, you will install the Monit Monitoring system on Ubuntu 20.04 LTS Jammy JellyFish to monitor a server or desktop using its GUI web interface. We will also address a few FAQs on how to install Monit on Ubuntu 20.04.
Advantages of Monit
- Proactive Monitoring: Monit helps you detect and address issues before they impact your systems, ensuring optimal performance and uptime.
- Automated Actions: With Monit, you can automate corrective actions to resolve problems swiftly and minimize downtime.
- Real-time Alerts: Receive instant notifications about critical events and system failures, allowing you to respond promptly.
- Resource Monitoring: Keep track of CPU usage, memory utilization, disk space, and more to optimize resource allocation.
- Process Management: Monit allows you to control and manage processes, restart services, and ensure smooth operation of your applications.
Installing M/Monit monitoring on Ubuntu 20.04 Linux
Step 1 – Update Ubuntu 20.04
Let's install the most recent updates on our Ubuntu 20.04 system using the system update command. Along with it, the APT package manager cache will be rebuilt.
sudo apt update && sudo apt upgrade
Step 2 – Install Monit on Ubuntu 20.04
Let's install Monit Monitoring on Ubuntu 20.04 after executing the system update command, since it is accessible for installation through the default system repository. Therefore, there is no need to search for a third-party repository for updates.
sudo apt-get install monit
Step 3 – Check service Status & Version of Monit
After the installation is finished, let's see if the service is functioning properly in the background.
sudo systemctl status monit --no-pager -l
Start it using the following command if it isn't already running.
sudo systemctl start monit
Check the Monit version using:
sudo monit --version
Step 4 – Configuration File
The /etc/monit/monitrc file is used to configure the Monit program. There are several sample settings, some of which are commented out, self-explanatory, or have help messages in their comments. We advise against changing these settings directly in the file. For preferred settings, it is advisable to create a new one using sudo nano /etc/monit/conf.d/.
Step 5 – Enable m/Monit httpd port on Ubuntu
In order to communicate with Monit, port 2812 must be enabled; this can be done by modifying the configuration file.
sudo nano /etc/monit/monitrc
Locate the line: set httpd port 2812
For the lines that follow, remove the # tag at that point. If you want to use the Monit web interface remotely, as indicated in the screenshot, you must change the allow and use address value from localhost to 0.0.0.0.
Additionally, you have the option of changing the default password for the admin that is monit.
set httpd port 2812 and
use address 0.0.0.0 # only accept connection from localhost (drop if you use M/M>
allow 0.0.0.0/0 # allow localhost to connect to the server and
allow admin:monit # require user 'admin' with password 'monit'
Press Ctrl+X, type – Y, then hit Enter to save the file.
Step 6 – Check and load
Use the following command to verify that configuration files are error-free:
sudo monit -t

# If there are no errors, you will receive the following feedback:

# Control file syntax OK
Step 7 – Enable Monit service on Linux
Run the command to enable the Monit service to start automatically when the system boots to enable it because it is not enabled by default.
sudo /lib/systemd/systemd-sysv-install enable monit
Restart it once
sudo systemctl restart monit
Step 8 – Check Status
Run the following command to ensure everything is in working order.
sudo monit status
Step 9 – Permit Monit port in Ubuntu 20.04 firewall
Allow its port or service in the firewall to access the public network to access the Monit web interface from a host other than your local one.
sudo ufw allow 2812
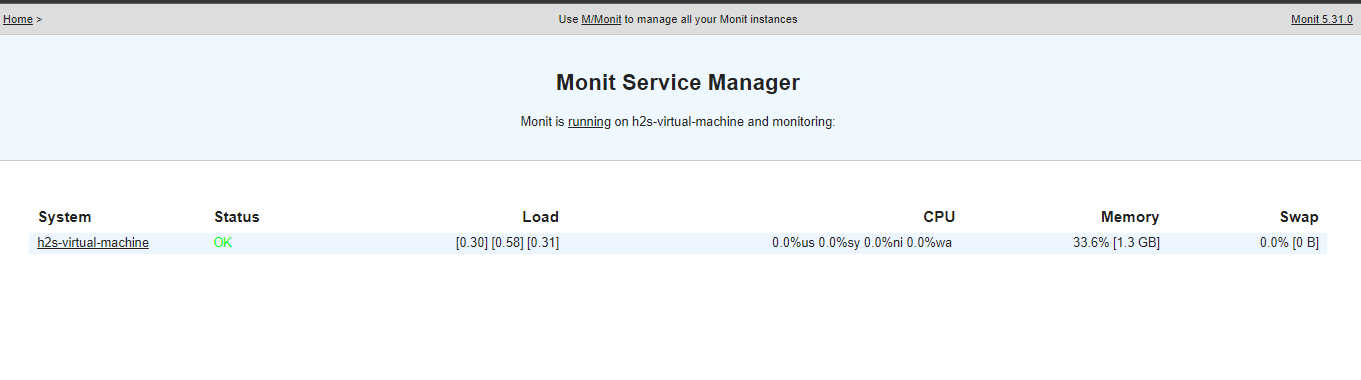
Step 10 – Access Web Interface
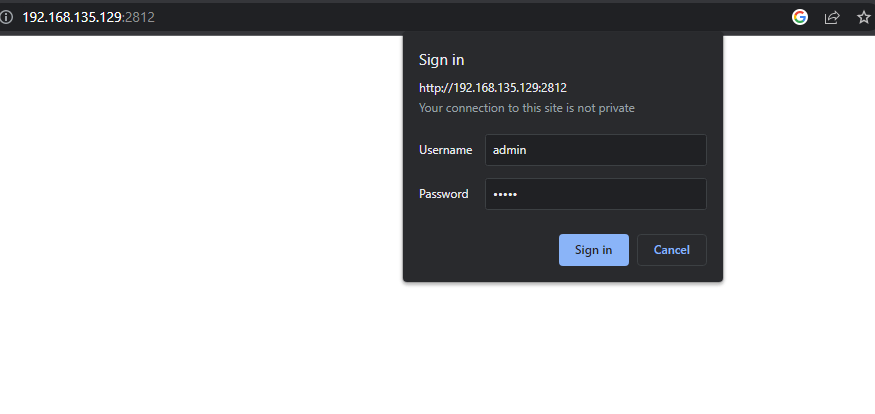
Launch a web browser on a local or remote computer that has access to the server's or computer's IP address, where the Monit Monitor system is installed. Additionally, direct it to http://your-server-ip-address:2812.
Username and password are required.
Step 11 – Add services to Monitor in Monit
For an application to be monitored, you may either build a service file or utilize one of the pre-configured ones found in the M/Monit folder.
There are multiple pre-made files for different popular server services, including the following in the directory /etc/monit/conf-available/:
acpid, at, mdadm, mysql, openntpd, pdns-recursor, rsyslog, snmpd,
apache2, cron, memcached, nginx, openssh-server, postfix and smartmontools.
It is necessary to build and activate a soft link to the service file in the /etc/monit/conf-enabled/ directory for Monit to take over the settings for the desired service.
For example:
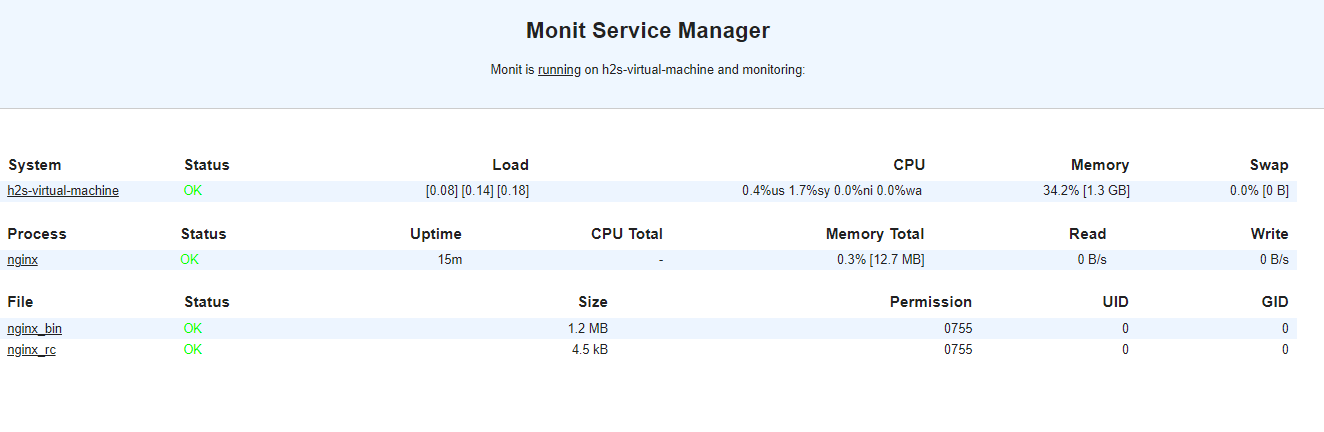
With the help of its pre-configured file, we want to monitor Nginx. Thus, for that-
Syntax:
sudo ln -s /etc/monit/conf-available/service-file /etc/monit/conf-enabled/
example for Nginx:
sudo ln -s /etc/monit/conf-available/nginx /etc/monit/conf-enabled/
The Monit daemon must be reloaded for the changes to take effect.
sudo monit reload
We may enable other services in the same way.
Manually Add Service
Now, if you wish to manually add a service, you must first create a file for it. For instance, you might want to use sensors to gather all hardware-related data about your system.
sudo apt install lm-sensors
sudo nano /etc/monit/conf-available/sensors
Add:
check program sensors with path /usr/bin/sensors
if status != 0 then alert
Save the file: Ctrl+X, Y, and press the Enter Key.
Enable it:
sudo ln -s /etc/monit/conf-available/sensors /etc/monit/conf-enabled/
Reload Monit:
sudo monit reload
FAQs to Install and Use Monit on Ubuntu 20.04
How do I access the Monit web interface?
Access the Monit web interface by opening a web browser and navigating to "http://localhost:2812". Login with your system username and password.
How can I configure Monit to monitor a specific process?
Edit the Monit configuration file (/etc/monit/monitrc) and define the process to monitor using the check process directive. Save the file and restart Monit for the changes to take effect.
Can I receive email notifications from Monit?
Yes, you can configure Monit to send email notifications. Edit the Monit configuration file, specify the email server details, and set the email alert options accordingly.
How do I monitor system resources with Monit?
Use the check system directive in the Monit configuration file to monitor system resources such as CPU, memory, and disk space. Customize the thresholds and actions as needed.
Can Monit restart a service automatically if it fails?
Yes, Monit can automatically restart a service if it fails. Configure the service in the Monit configuration file with the check process directive and specify the restart action.
Is it possible to schedule checks with Monit?
Yes, Monit allows you to schedule checks using the check directive. Set the desired interval and time settings in the configuration file to schedule regular checks.
How do I enable SSL encryption for the Monit web interface?
Generate an SSL certificate, configure Monit to use SSL in the configuration file, and specify the path to the certificate and key files.
Conclusion
We hope this detailed tutorial helped you understand how to install Monit on Ubuntu 20.04. Check the official documentation to learn more about it.
If you have any queries or doubts, please leave them in the comment below. We'll be happy to address them.
