
Introduction
Before we begin talking about how to install AngularJS on Ubuntu 22.04, let's briefly understand – What is AngularJS?
AngularJS is a robust JavaScript framework that simplifies web application development. It enables developers to create dynamic and responsive single-page applications effortlessly. With AngularJS, you can build interactive user interfaces, handle data binding, and perform tasks like form validation and routing.
This open-source framework also facilitates modular development and testing. With its popularity and extensive community support, AngularJS is an ideal choice for developing efficient and SEO-friendly websites.
In this tutorial, you will install AngularJS on Ubuntu 22.04. We will also address a few FAQs on how to install AngularJS on Ubuntu 22.04.
Advantages of AngularJS
- Two-way data binding: AngularJS eliminates the need for manual DOM manipulation by automatically synchronizing data between the model and the view.
- Modular architecture: AngularJS encourages modular development, making it easy to manage complex applications by dividing them into smaller, reusable components.
- Dependency injection: This feature allows for more maintainable code by enabling efficient management of dependencies and facilitating testing.
- Directives: AngularJS offers a rich set of built-in directives and allows developers to create their own custom directives to extend HTML's functionality.
- Active community: With a large and vibrant community, developers can benefit from resources, tutorials, and support when working with AngularJS.
Install Node.js on Ubuntu 22.04
Setting up the environment correctly is crucial before beginning the AngularJS installation. A prerequisite for AngularJS is Node.js, which is a runtime environment that enables JavaScript execution on your server. We'll guide you through the process of installing Node.js on your Ubuntu system in this section.
Step 1: Updating Ubuntu
We start our journey by patching the current packages for the system. By updating all installed packages to the most recent versions on your Ubuntu system, this step helps to minimize the possibility of package conflicts. The update and upgrade procedures are combined with the following command:
sudo apt update && sudo apt upgrade
Step 2: Installing Initial Packages
The next thing we need to do is make sure we have all the packages needed for our installation process ready. curl is one such package; it's a command-line utility for sending files via URLs. In the following steps, it will be utilized to download the NodeSource repository setup script. The command to install curl is as follows:
sudo apt install curl git wget -y
Step 3: Importing the NodeSource Repository
Only Node.js Long-Term Support (LTS) versions are compatible with AngularJS. We'll add the NodeSource repository, which houses these versions, to our system to make sure we install an LTS version.
The NodeSource repository setup script is downloaded and instantaneously run by the command below. The process of importing the repository is smooth:
curl -fsSL https://deb.nodesource.com/setup_lts.x | sudo bash -
It's a good idea to update the package lists in our system to reflect the addition of the repository:
sudo apt update
Step 4: Installing Node.js LTS via APT Command
Now that the NodeSource repository has been added, we can install Node.js. The command to accomplish this is simple:
sudo apt install nodejs
Step 5: Verifying the Installation of Node.js
We must verify that the Node.js installation was successful and that the version we have is the right one after installing it. Executing the subsequent command will reveal the Node.js version that is installed:
node --version
Install AngularJS on Ubuntu 22.04
Now that Node.js is installed, we can install AngularJS. We must install the Angular CLI (Command Line Interface) tool, which is used by AngularJS. With its helpful commands for creating components, services, and other things, this tool facilitates the development of Angular apps more quickly. We'll walk you through installing Angular CLI, updating the Node Package Manager (NPM), and verifying its installation in this section.
Step 1: Updating Node Package Manager (NPM)
The package manager for Node.js is called NPM. We can install libraries and packages for our projects using this helpful tool. Assuming NPM is up to date, we should install Angular CLI before continuing. This is crucial because it guarantees that we're utilizing NPM's most recent features and security updates.
You can use the following command to update NPM to the most recent version:
sudo npm install npm@latest -g
The 'global' flag (-g) indicates that we wish to update the NPM installed on the system as a whole, not just in the project that is currently running.
Step 2: Install Angular CLI on Ubuntu
We can now install the Angular CLI tool since we have an updated NPM. As previously mentioned, this tool makes working with AngularJS much easier by offering helpful commands that facilitate the creation of components, services, and more. With this command, you can install Angular CLI globally:
sudo npm install -g @angular/cli
By installing Angular CLI globally, the -g flag makes it possible to access it from any directory on your computer.
Step 3: Verifying the Installation of Angular CLI
It is best practice to confirm the installation of the Angular CLI after it has been installed. By completing this step, you can be sure that the Angular CLI has been installed correctly and is operational. The following command can be used to determine the version of the Angular CLI that is installed on your system:
ng version
An example of the output one might anticipate from the ng command in an Ubuntu Linux terminal is:
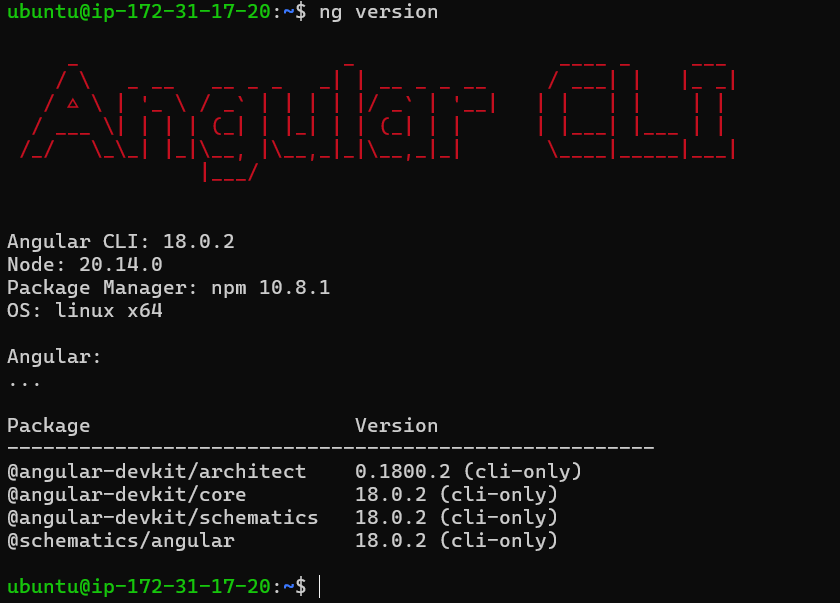
This command verifies that the installation was successful and prints the version of Angular CLI that is installed.
Creating an AngularJS Project on Ubuntu 22.04
Now that Node.js and Angular CLI have been installed successfully, you are ready to start working on your first AngularJS project. Angular CLI is a strong tool that will help us automate this process. It creates a new project with the necessary files, a directory structure, and a basic template so you can concentrate on the special features of your application. Now let's get started on building an AngularJS project.
Step 1: Generate a New AngularJS Project
It only takes a few commands to create a new AngularJS project using the Angular CLI. Go to the directory where you want the project to be created and execute the following command to start a new project:
ng new my-angular-app
The new AngularJS project is named my-angular-app in this command. You are welcome to substitute any other name for it.
For your new project, Angular CLI will ask you a few configuration questions about adding Angular routing, enforcing stricter type checking, and selecting the stylesheet format to use. You can select options based on the specifications of your project.
Step 2: Navigate into the New Project Directory
Use the cd (change directory) command to enter the project's directory once it has been successfully created:
cd my-angular-app
Replace the name you selected for your project in the preceding step for my-angular-app.
Step 3: Serve the Application
You can use the Angular CLI to serve your application now that you're in the project directory. This means that your application will be built and served from memory and accessible through a web browser. You will also need to start a development server.
ng serve
As you make changes to your files, this command restarts the server, keeps an eye on your files, and rebuilds the application. The application will be served at http://localhost:4200/ by default.
Use localhost for environments local to you, or the domain name for domains.
An example of what the ng serve command produces in an Ubuntu Linux terminal is:

Accessing the AngularJS Web Interface on Ubuntu 22.04
After your AngularJS project has been created and served, you need to visit your application's web interface. A seamless user experience is made possible by the single-page application (SPA) framework, AngularJS. It is simple to preview your application in a browser thanks to the built-in server that Angular CLI offers. We'll talk about accessing your AngularJS application in this section.
Step 1: Understanding the Local Server
Angular CLI created a local development server and began serving your application when you ran the ng serve command in the preceding section. This server is connected to your local machine via port 4200 by default. This means that you can access your AngularJS application by navigating to http://localhost:4200 in your web browser.
Step 2: Opening the Application in a Web Browser
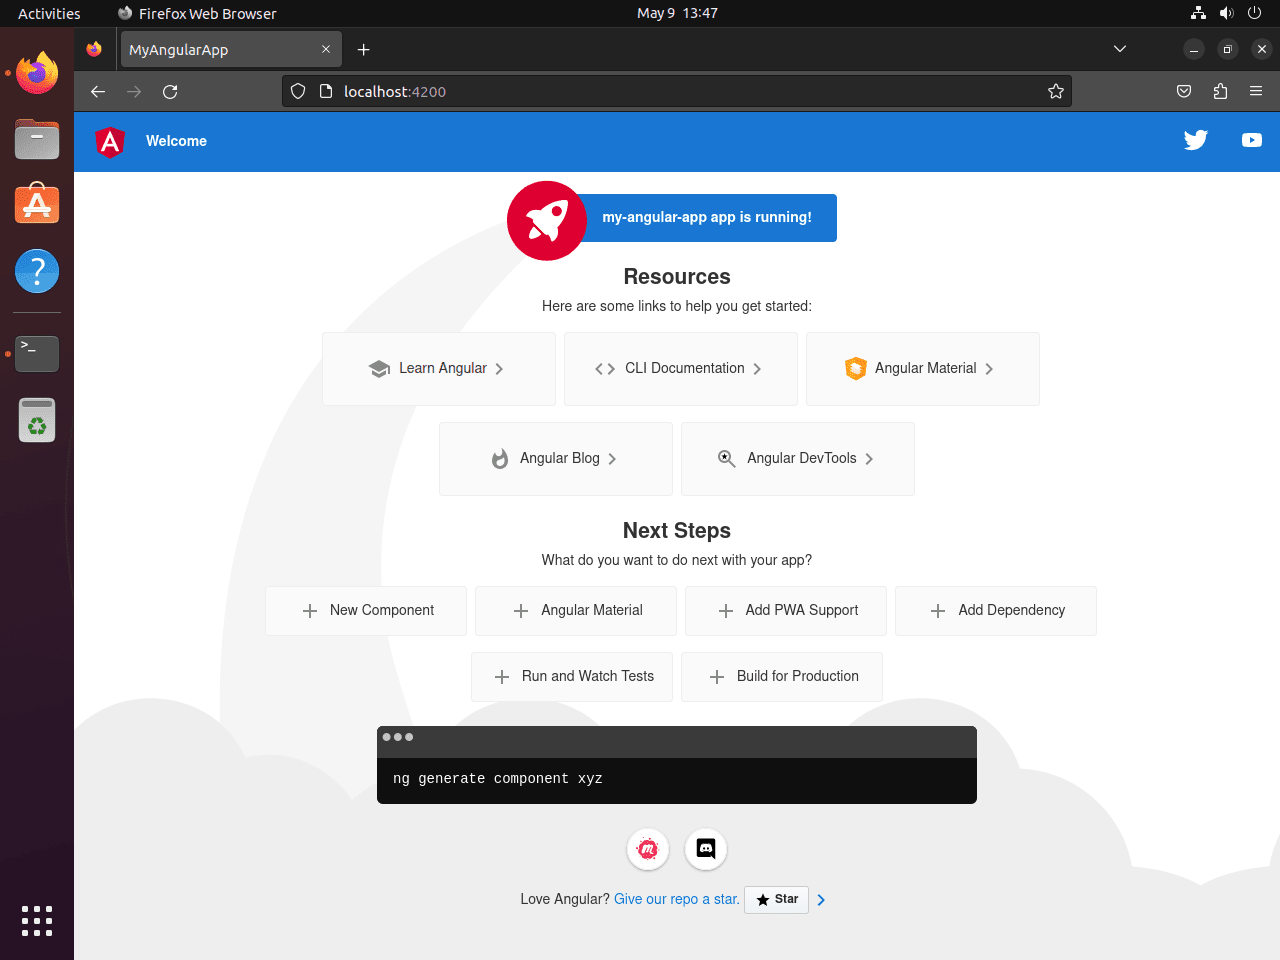
Go to http://localhost:4200 in any web browser to see your AngularJS application in action. A welcome page should appear, verifying that your AngularJS project has been properly configured and is being served.
The page you are viewing is the standard template that Angular CLI offers for brand-new projects. It's a fantastic place to start when creating your application. The Angular CLI's live-reload feature allows the application to automatically reload as you make changes to your project files.
Step 3: Exploring the Application Structure
After gaining access to your AngularJS application, it would be helpful to become acquainted with the organization of an AngularJS project. The majority of your development time should be spent in the src/ folder located in your project directory. It includes all the source files for the application, including stylesheets, components, modules, images, and more.
The application logic is located in the app/folder within src/. These consist of the root module, app.module.ts, and the root component, app.component.ts, respectively.
Your application will grow more sophisticated and feature-rich as you develop it by adding more parts, services, and modules.
An Example of an AngularJS test project's initial Web UI launch on Ubuntu Linux is as follows:
FAQs to Install AngularJS on Ubuntu 22.04
What is the purpose of installing Angular CLI?
Angular CLI is a powerful command-line tool that simplifies Angular development. It provides utilities for creating, building, and testing Angular applications.
Should I have a specific version of Node.js installed for AngularJS?
AngularJS requires Node.js version 12.14 and later. It is recommended to have the latest stable version of Node.js installed for a smooth experience.
Can I install multiple versions of AngularJS on Ubuntu 22.04?
Yes, it is possible to have multiple versions of AngularJS installed. Use the npm install -g @angular/cli@<version> command to specify the version during installation.
How can I create a new Angular project in Ubuntu 22.04 using Angular CLI?
Open the terminal, navigate to the desired location, and run ng new my-project to generate a new Angular project named "my-project".
How can I access the running Angular application in my browser?
Open a web browser and enter the URL http://localhost:4200 to access the running Angular application.
What if port 4200 is already in use?
If port 4200 is busy, you can change the default port by running ng serve --port <port_number>, replacing <port_number> with your desired port.
How do I verify if Angular CLI is successfully installed?
Open the terminal and run ng --version to verify the installation and check the Angular CLI version.
Conclusion
We hope this tutorial helped you understand how to install AngularJS on Ubuntu 22.04.
If you have any queries, please leave a comment below, and we’ll be happy to respond to them for sure.