
Introduction
Before we begin talking about how to install Apache in Docker, let's briefly understand – What is Apache and Docker?
Apache is an open-source web server software widely used to host websites on the internet. It offers a secure and reliable platform for delivering web content. Apache provides advanced features like virtual hosting, load balancing, and authentication.
Docker uses containers built from predefined images to accelerate and streamline the deployment of applications. Applications like web servers, which must maintain their configurations across many web browsers, target OS environments, and CPU architectures, benefit from the use of containers.
In this tutorial, you will install Apache in Docker. We will also address a few FAQs on how to install Apache in Docker.
Advantages of Apache
- Open-source: Apache is freely available and adaptable, making it accessible to developers worldwide.
- Security: It offers robust security measures, shielding websites from cyber threats and vulnerabilities.
- Flexibility: Apache supports a wide range of operating systems and integrates seamlessly with various software applications.
- Scalability: It handles high web traffic efficiently, ensuring websites remain accessible even during peak periods.
- Extensive Community Support: The Apache community provides regular updates, patches, and assistance, making it reliable and continuously evolving.
Prerequisites:
- A Linux server instance.
- Docker with non-root access turned on.
Run Apache Docker via Docker Hub Image
Using a container with a predefined Docker Hub image is the simplest approach to set up an Apache web server in Docker. Although you cannot modify the image for your deployment using this process, it still offers a great way to test a web server.
To deploy an Apache container based on the Docker Hub image, adhere to the instructions listed below.
Download the Apache Image for Docker
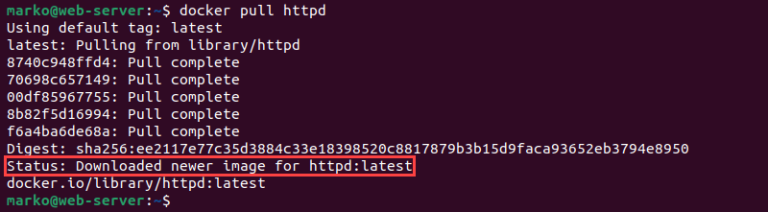
On Docker Hub, httpd is the recognised Apache image. Use the docker pull command to download the image to your system:
docker pull httpd
The output of the command displays the pull progress and reports when the download is complete.
Start the Apache Container
To create and launch a Docker container based on the httpd image, run the docker run command:
docker run -d --name [container-name] -p 80:[host-port] httpd
The command has a number of options.
- The
-doption instructs Docker to run the container as a background process or in detached mode. - You can give the container a name by using the
--nameflag. In the absence of this flag, Docker chooses a name at random. - The
-poption maps the container's TCP port80to a free open port on the host system.
In the example that follows, a container named apache is created, launched, and published to port 80 on the host system using the httpd image.
docker run -d --name apache -p 80:80 httpd
Docker outputs the ID of the new container if there are no issues.

Check if Apache is Running
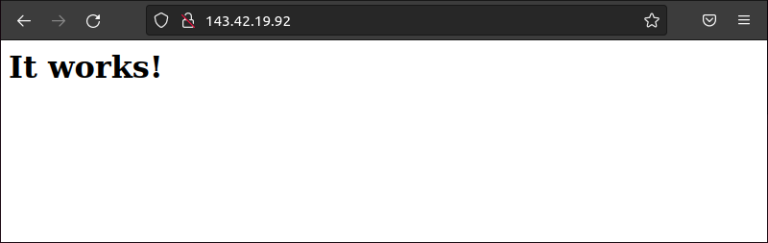
By launching a web browser and entering the server's IP address, you may test the new Apache installation:
http://[server-ip-address]
You can also use localhost and the host port you gave the container to connect to the Apache installation on the same computer.
http://localhost:[host-port]
Apache shows the default page, indicating that the deployment was successful.
Note: Type the following to terminate a running Docker container:
docker stop [container-name-or-id]
See our Docker Commands Cheat Sheet for additional Docker management commands.
Run Apache via Dockerfile
Using a customised image made with Dockerfile is another option to deploy an Apache instance in Docker. To construct the image and run a container based on it, adhere to the instructions listed below.
Create a Directory for Apache Image
Start by assembling all the information pertinent to the image into a dedicated directory.
1) Create the apache directory and navigate to it.
mkdir apache && cd apache
2) Create or copy the files you want to include in the image in the directory.
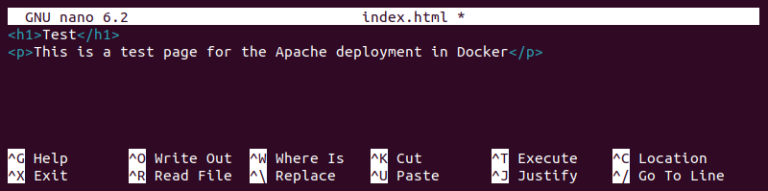
For instance, create a new landing page by making an index.html file in a text editor:
nano index.html
Add some HTML to the file.
<h1>Test</h1>
<p>This is a test page for the Apache deployment in Docker</p>
Save the file, then close it.
Build Dockerfile
The Dockerfile for the new image should then be created. All the directions Docker needs to put together a particular image are in the Dockerfile.
1) To generate the file, use a text editor.
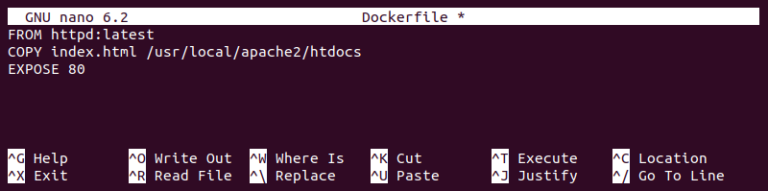
nano Dockerfile
2) Set up the image in writing.
FROM httpd:latest
COPY index.html /usr/local/apache2/htdocs
EXPOSE 80
The aforementioned example alters the most recent httpd image by copying index.html from the local directory into the /usr/local/apache2/htdocs directory. Moreover, container port 80 is made accessible for mapping to a host port by being exposed.
Save the file and exit.
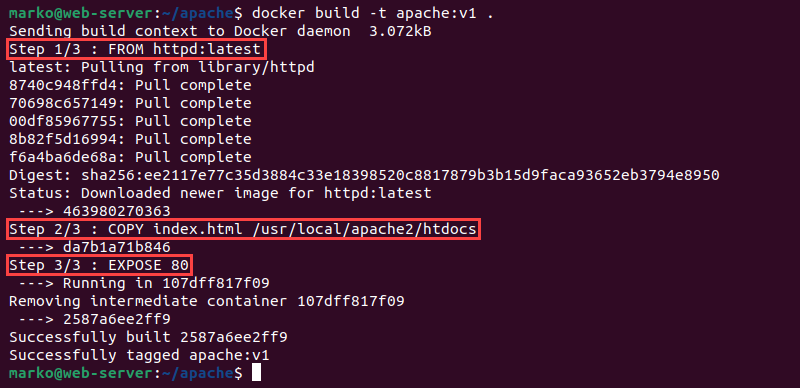
3) To create a Dockerfile-based image, use docker build.
docker build -t [image-name] .
The output demonstrates how Docker executed the commands from the Dockerfile.
Run Apache Dockerfile as a Container
Execute the created image through an Apache container:
docker run -d --name [container-name] -p 80:[host-port] [image-name]
The example that follows uses the Dockerfile-created apache:v1 image to build a detached container with the name apache. Port 80 for containers is mapped to port 80 for hosts.
docker run -d --name apache -p 80:80 apache:v1

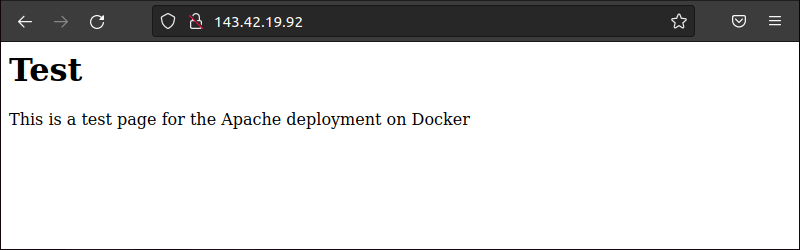
Verify if Apache is Running
Enter the server's IP address in a web browser to check the new Apache installation:
https://[server-public-ip-address]
Apache delivers the test page contained in the custom image, validating the deployment's success.
FAQs to Install Apache in Docker
Which Docker image should I use for Apache?
You can use the official Apache HTTP Server image provided by the Apache Software Foundation in the Docker Hub. It is widely used and maintained.
How to pull the Apache image from Docker Hub?
Use the command "docker pull httpd" to download the latest Apache HTTP Server image from Docker Hub.
How to create a Docker container for Apache?
Execute the command "docker run -d -p 80:80 httpd" to create a Docker container based on the Apache image. This maps port 80 of the host to port 80 of the container.
How to access Apache running in a Docker container?
Open a web browser and go to "http://localhost" or "http://<docker_host_ip>" if accessing from a remote machine. You should see the Apache default page.
How can I customize the Apache configuration in Docker?
Create a local file with your custom Apache configuration and mount it into the container using the "-v" flag in the "docker run" command. For example: "docker run -d -p 80:80 -v /path/to/custom.conf:/usr/local/apache2/conf/httpd.conf httpd"
How to manage multiple Apache containers with Docker?
Docker Compose allows you to define and manage multiple containers as services. Utilize a docker-compose.yml file to define each Apache container's configuration and interdependencies.
How to stop and remove a Docker container?
To stop a container, execute the command "docker stop <container_id>". To remove it, use "docker rm <container_id>". You can retrieve the container ID by running "docker ps -a".
Conclusion
The tutorial discussed the two methods for deploying an Apache web server with Docker. The first approach involved using the official image, whereas the second explained how to make your own customised Apache image.
If you have any suggestions or queries, kindly leave them in the comments section.