

Choose a different version or distribution
Introduction
Before we begin talking about how to install Apache Kafka on Ubuntu 24.04, let's briefly understand – What is Apache Kafka?
Apache Kafka is a high-performance distributed streaming platform used for building real-time data pipelines and streaming applications. Designed to handle massive amounts of data, it acts as a middleman that processes, stores, and transfers data efficiently within systems.
Kafka enables reliable data transport, storage, and processing by allowing seamless communication between applications. With its fault-tolerant architecture and scalability, Apache Kafka has become a popular choice for companies seeking real-time data processing solutions.
In this tutorial, you will install Apache Kafka on Ubuntu 24.04. We will also address a few FAQs on how to install Apache Kafka on Ubuntu 24.04.
Advantages of Apache Kafka
- Scalability: Apache Kafka can handle large volumes of data across distributed systems effortlessly.
- Fault Tolerance: Resilient architecture ensures data reliability even in the event of failures.
- Real-time Processing: Enables instant data processing for rapid decision-making.
- Efficient Data Transfer: Enables seamless data communication between systems.
- High Performance: Offers fast data processing and low-latency streaming capabilities, making it a top choice for businesses in need of efficient data handling solutions.
Prerequisites
Before beginning, make sure you have the following:
- An Ubuntu 24.04 dedicated server with a non-root user who has
sudoprivileges. - Java Development Kit (JDK) installed on your server.
- A minimum of 2GB of RAM.
Step 1: Update the System
Begin by updating the package list and upgrading the system packages to their latest versions.
sudo apt update -y
Step 2: Install Java
Kafka needs Java to operate. Install the most recent version of OpenJDK available in the Ubuntu repositories.
sudo apt install openjdk-21-jdk -y

(Optional) Change current Java version
If you have a different version of Java installed, you can switch to it using the following command:
update-alternatives --config java
Choose the Java version you wish to set by entering the corresponding number and pressing Enter.
Check the installation:
java -version
You should see an output that looks like this:
Output

openjdk version "21.0.3" 2024-04-16
OpenJDK Runtime Environment (build 21.0.3+9-Ubuntu-1ubuntu1)
OpenJDK 64-Bit Server VM (build 21.0.3+9-Ubuntu-1ubuntu1, mixed mode, sharing)
Step 3: Create Kafka User
For security purposes, it's advisable to create a separate user specifically for Kafka.
sudo useradd -m -s /bin/bash kafka
sudo passwd kafka

Change to the Kafka user:
sudo su - kafka
Step 4: Download and Extract Kafka
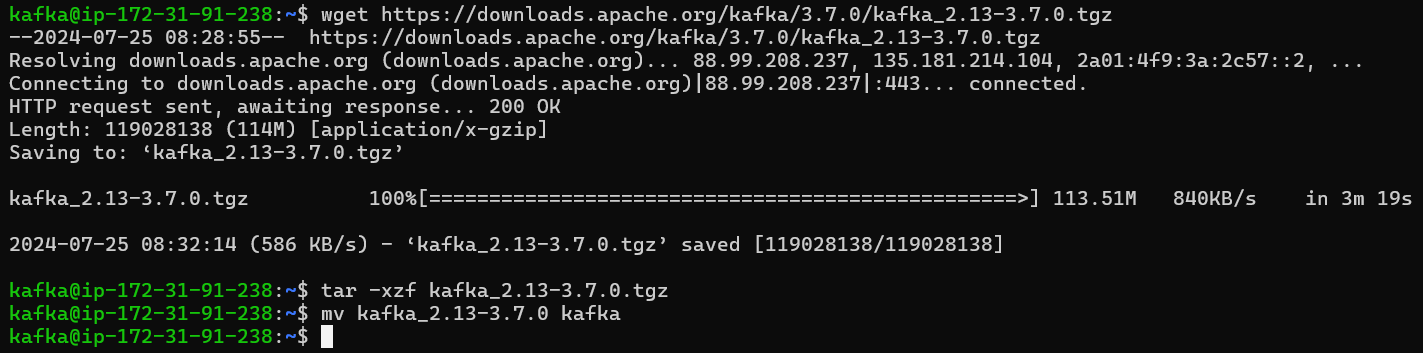
Download the most recent stable version of Kafka from the official Apache Kafka download page.
wget https://downloads.apache.org/kafka/3.7.0/kafka_2.13-3.7.0.tgz
tar -xzf kafka_2.13-3.7.0.tgz
mv kafka_2.13-3.7.0 kafka
Step 5: Configure Kafka
Kafka requires Zookeeper, which is included with Kafka for development and testing. In a production environment, you should configure a separate Zookeeper cluster.
Configure Zookeeper
Set up a data directory for Zookeeper:
mkdir -p ~/kafka/data/zookeeper
Modify the Zookeeper configuration file:
nano ~/kafka/config/zookeeper.properties
Change the dataDir property to refer to the new data directory:
dataDir=/home/kafka/kafka/data/zookeeper

Configure Kafka Broker
Set up a data directory for Kafka:
mkdir -p ~/kafka/data/kafka
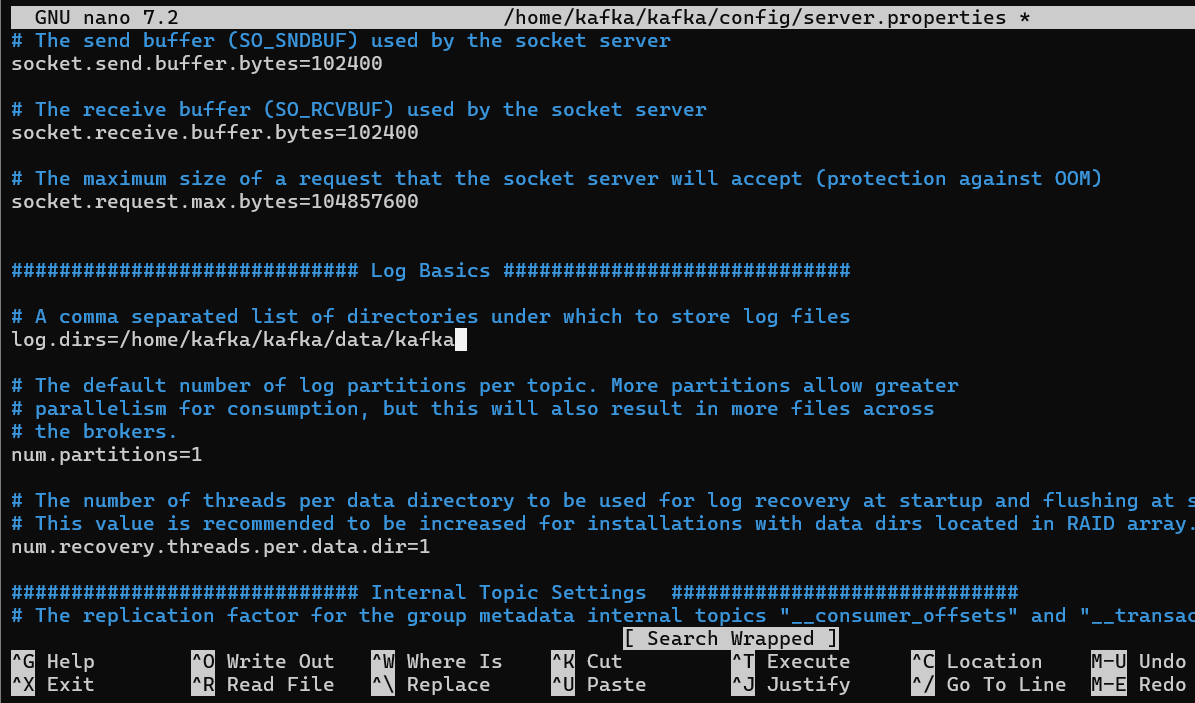
Modify the Kafka configuration file:
nano ~/kafka/config/server.properties
Adjust the following properties:
log.dirs=/home/kafka/kafka/data/kafka
zookeeper.connect=localhost:2181
Step 6: Start Zookeeper and Kafka
Open two terminal sessions: one for Zookeeper and one for Kafka. Make sure you are logged in as the Kafka user in both sessions.
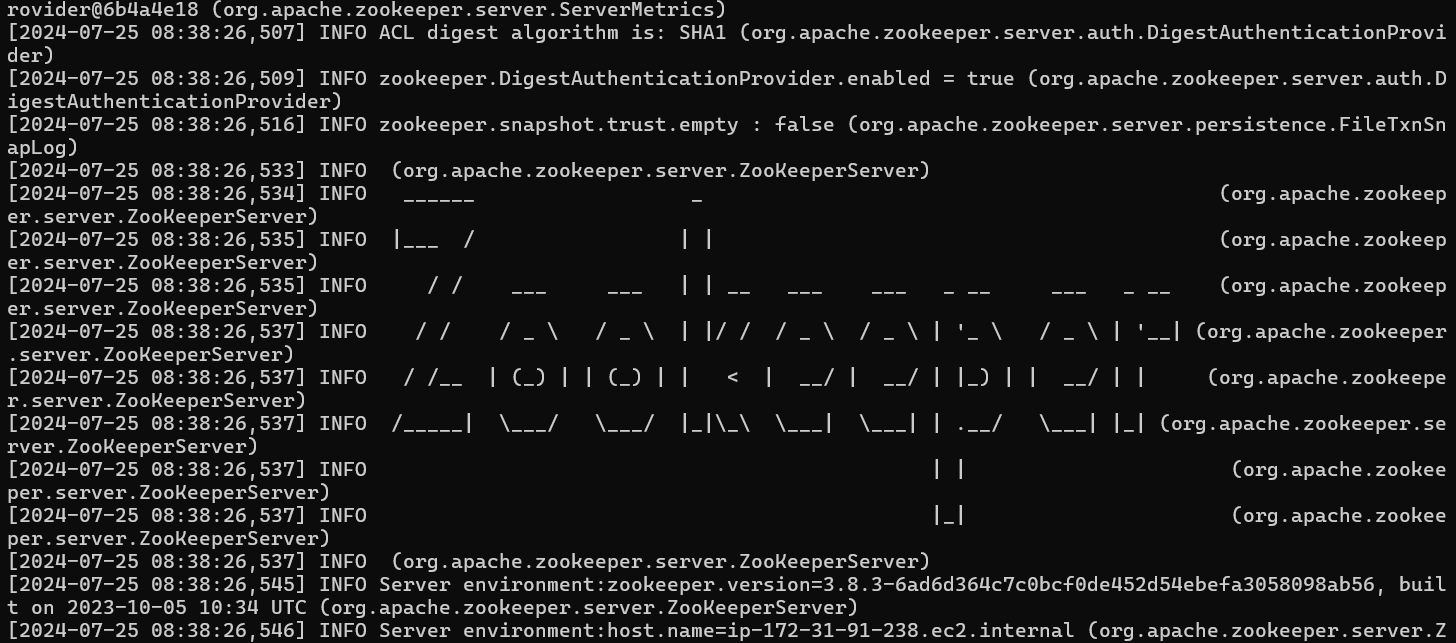
Start Zookeeper
~/kafka/bin/zookeeper-server-start.sh ~/kafka/config/zookeeper.properties
Start Kafka
In the second terminal session, begin Kafka
~/kafka/bin/kafka-server-start.sh ~/kafka/config/server.properties

Step 7: Testing the Installation
Create a Topic
In a new terminal session, with the Kafka user logged in, create a test topic:
~/kafka/bin/kafka-topics.sh --create --topic test --bootstrap-server localhost:9092 --partitions 1 --replication-factor 1

List Topics
Check that the topic was created:
~/kafka/bin/kafka-topics.sh --list --bootstrap-server localhost:9092

Produce Messages
Start a Kafka producer:
~/kafka/bin/kafka-console-producer.sh --topic test --bootstrap-server localhost:9092
Type several messages, pressing Enter after each one:
Hello Kafka
This is a test message

Consume Messages
Launch another terminal session and initiate a Kafka consumer:
~/kafka/bin/kafka-console-consumer.sh --topic test --from-beginning --bootstrap-server localhost:9092

You should observe the messages you entered in the producer terminal appearing in the consumer terminal.
(Optional) Set SELinux Enforcing
If you have enabled SELinux, follow this step: To start the Kafka and Zookeeper services, SELinux needs to be set to Enforcing. Since there is no specific SELinux configuration for these services, we set it to Enforcing to avoid encountering a "Permission Denied" error.
sudo setenforce 0
Step 8: Setting Up Kafka as a Systemd Service
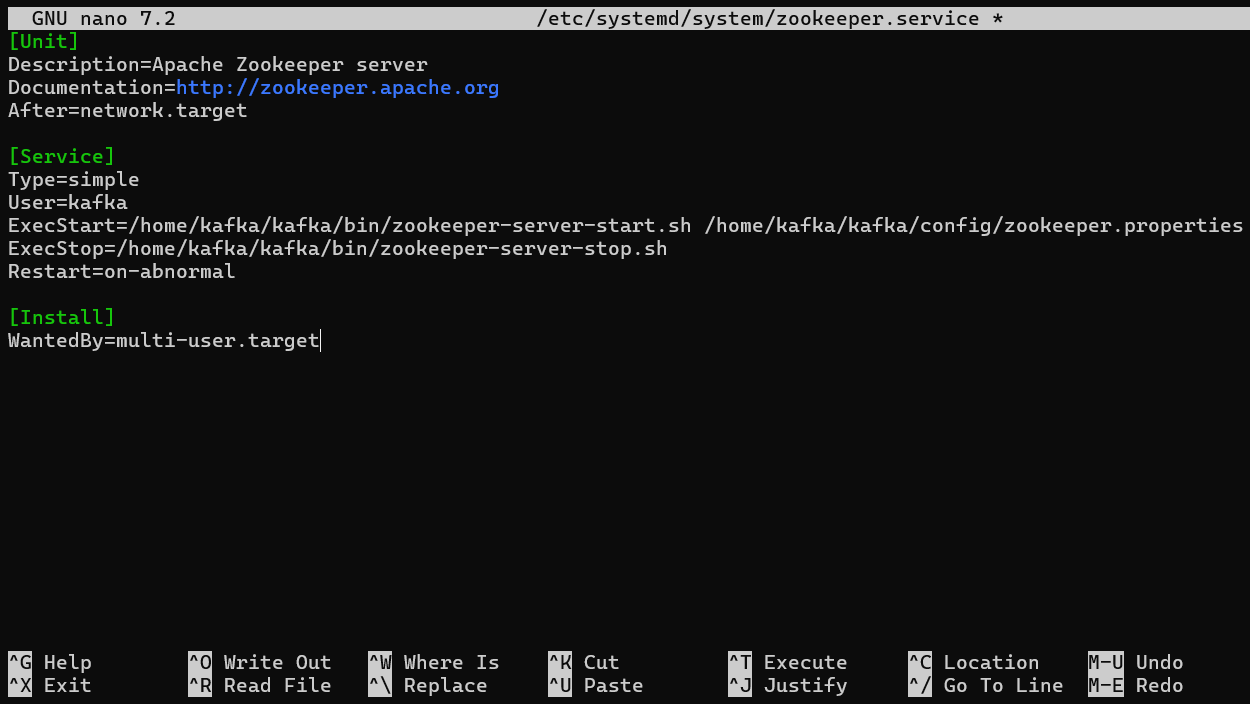
To ensure Kafka and Zookeeper start automatically on boot, configure them as systemd services. Begin by creating a new systemd service file for Zookeeper:
sudo nano /etc/systemd/system/zookeeper.service
Include the following content:
[Unit]
Description=Apache Zookeeper server
Documentation=http://zookeeper.apache.org
After=network.target

[Service]
Type=simple
User=kafka
ExecStart=/home/kafka/kafka/bin/zookeeper-server-start.sh /home/kafka/kafka/config/zookeeper.properties
ExecStop=/home/kafka/kafka/bin/zookeeper-server-stop.sh
Restart=on-abnormal

[Install]
WantedBy=multi-user.target
Create Kafka Systemd Service
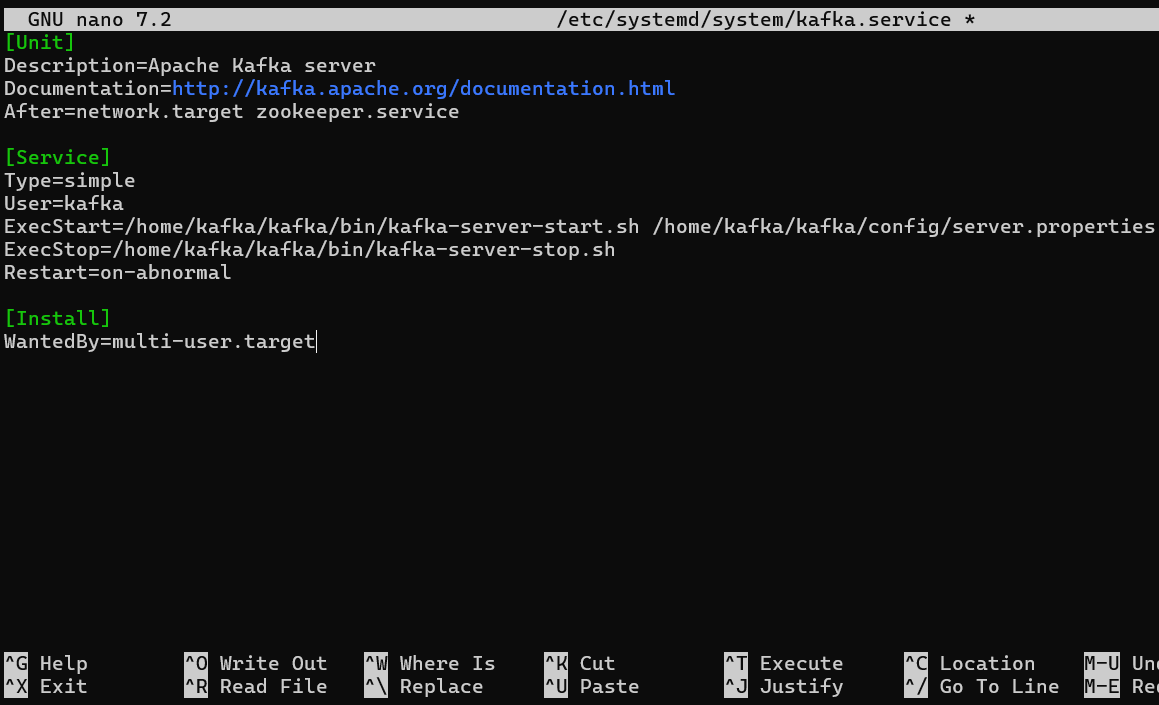
Set up a new systemd service file for Kafka:
sudo nano /etc/systemd/system/kafka.service
Add the following content:
[Unit]
Description=Apache Kafka server
Documentation=http://kafka.apache.org/documentation.html
After=network.target zookeeper.service

[Service]
Type=simple
User=kafka
ExecStart=/home/kafka/kafka/bin/kafka-server-start.sh /home/kafka/kafka/config/server.properties
ExecStop=/home/kafka/kafka/bin/kafka-server-stop.sh
Restart=on-abnormal

[Install]
WantedBy=multi-user.target
Start and Enable the Services
Refresh systemd to incorporate the new service files:
sudo systemctl daemon-reload
Start and enable Zookeeper:
sudo systemctl start zookeeper
sudo systemctl enable zookeeper

Start and enable Kafka:
sudo systemctl start kafka
sudo systemctl enable kafka

FAQs to Install Apache Kafka on Ubuntu 24.04
What are the main components of Kafka?
The main components are Producers, Consumers, Topics, Brokers, and Zookeeper.
What is the default port for Kafka?
The default port for Kafka is 9092.
What are some common use cases for Kafka?
Common use cases include log aggregation, real-time analytics, and event sourcing.
What is the difference between a Topic and a Partition?
A Topic is a category for messages, while a Partition is a subset of a Topic that allows for parallel processing of messages.
What is the significance of the Consumer Group in Kafka?
Consumer Groups allow multiple consumers to work together to read from a topic, enabling load balancing and fault tolerance.
How do I check the status of Kafka and Zookeeper?
Use the commands: sudo systemctl status zookeeper and sudo systemctl status kafka.
What is Zookeeper, and why is it needed?
Zookeeper is a centralized service for maintaining configuration information, naming, providing distributed synchronization, and providing group services. It is essential for managing Kafka brokers.
Conclusion
We hope this tutorial helped you understand how to install Apache Kafka on Ubuntu 24.04.
If you have any queries, please leave a comment below, and we’ll be happy to respond to them for sure.