
Choose a different version or distribution
Introduction
Before we begin talking about how to install Django, let’s briefly understand - What is a Django?
Django is a powerful framework useful for writing Python web applications. It is full of features that allow getting your applications as well as sites up. It's a framework that lets you focus on the unique portions of the application, even let the tools do the heavy lifting.
In this tutorial, you will install Django on CentOS 7. We will also address few FAQs related to Django installation.
Install the EPEL Repository
1) All the methods here will depend on the EPEL repository for CentOS and RedHat-like distributions. The EPEL repository has extra packages which are not maintained as part of the core distribution which is fairly sparse.
Configuring access to the EPEL repository is fairly simple. On the server, you need to configure yum to use the EPEL repository by typing the below command:
sudo yum install epel-release
Now, you can access all applications within the EPEL repository.
Having Different Methods
There are multiple ways in which you can install Django based on your needs and configure the development environment.
- Global Install from the Packages: The conventional
yumpackage manager can be used to install Django packages. This method is simple to follow, but not as flexible as the other methods. There might also be some version differences when you take it directly from the repository. - Global Install via
pip: Thepiptool is a package manager used for Python packages. Ifpipis installed, it will become very easy to install Django on the system level. It should always contain the latest stable release. - Install through pip in a
virtualenv: The Pythonvirtualenvpackage creates self-contained environments for various projects. It enables you to install Django in a project directory, without even affecting the main system. It will allow you to provide per-project customizations and packages easily. They add a slight mental and process overhead in comparison with globally accessible installation, but they provide the most flexibility. - Development Version Install via git: Get the code from the
gitrepo if you want to install the latest development version of the stable release. It is very important to get the latest features/fixes. Moreover, it can be done either globally or locally.
Now, you can select the installation method that best suits your needs. Next, continue with the below steps.
Global Installation from Packages
1) Here, you can simply use the yum package manager. It will download and install the necessary packages:
sudo yum install python-django
2) You will now test that the installation was successful. Do it by typing:
django-admin --version
1.6.10
It means that the software installation is successful. Even the Django version is not the latest stable.
Global Installation via pip
1) If you want to install the latest version of Django globally. It is a better option to use pip. First, you will need to install the pip package manager.
2) You can install the pip package manager from the EPEL repositories using the following command:
sudo yum install python-pip
3) After having pip, you can easily install Django globally by typing:
sudo pip install django
4) Verify if the installation is successful by typing:
django-admin --version
1.7.5
You will see, the version available via pip. It is more up-to-date than the one from the EPEL repository.
Installing from pip in a virtualenv
1) Installing Django using virtualenv tool is the most flexible way. It allows you to install any Python packages without affecting the rest of the system. This allows the selection of the Python packages on a per-project basis. Further, it is regardless of conflicts with other project’s needs. Now, begin by installing pip from the EPEL repository using the following command:
sudo yum install python-pip
2) After installation of pip, you will use it to install virtualenv package by typing:
sudo pip install virtualenv
3) Now, whenever you will start a new project, it will enable you to create a virtual environment for it. Start by creating and moving into a new project directory:
mkdir ~/newproject
cd ~/newproject
4) Now, create a virtual environment within the project directory by typing:
virtualenv newenv
5) It will install a standalone version of the Python, as well as pip into an isolated directory structure within the project directory. This virtual environment is called as newenv. You should name it something descriptive. Next, a directory will be created with the name you will select. So, it will hold a file hierarchy where the installation of your package is.
To install packages into the isolated environment. You can activate it by typing:
source newenv/bin/activate
6) Your prompt will change to reflect that, you are now in your virtual environment. It will look something like (newenv)username@hostname:~/newproject$.
Now use pip to install Django. Remember not to use sudo as you are installing locally:
pip install django
7) You will now verify the installation by:
django-admin --version
1.7.5
8) If you want to leave your virtual environment, you need to issue the deactivate command from anywhere on the system:
deactivate
9) Your prompt will now revert to the conventional display. So, to work on the project again, re-activate the virtual environment. Do it by moving back into the project directory and activating:
cd ~/newproject
source newenv/bin/activate
Development Version Installation via git
1) If you want a development version of Django, then download and install it from its git repository.
You need to install git on your system with yum. Further, install pip Python package manager. It will also handle the installation of Django after it is downloaded:
sudo yum install git python-pip
2) Once git is installed, then clone the Django repository. This repository will have more up-to-date features and bug fixes at the possible expense of stability. You can clone the repository to a directory django-dev within the home directory using the below command:
git clone https://github.com/django/django ~/django-dev
3) After cloning the repository, install it using pip. Use the -e option to install in "editable" mode. It is necessary when installing from version control:
sudo pip install -e ~/django-dev
4) You can verify if the installation is successful by:
django-admin --version
1.9.dev20150305200340
Please note that you can use virtualenv if you want to install a development version of Django in a single environment.
Creating a Sample Project
1) Now, after the installation of Django, you can get started with the project.
You can use django-admin command to create a project:
django-admin startproject projectname
cd projectname
2) It will create a directory called projectname within the current directory. Within this, it will also create a management script. Further, another directory called projectname is created with the actual code.
django-admin startproject projectname .
3) To bootstrap the database on more recent versions of Django, type the following command:
python manage.py migrate
4) You are using an older version of Django if the migrate command is not working.
python manage.py syncdb
5) You will be prompted to create an administrative user as part of the process. Select a username, an email address, and also a password for the user.
6) If you are using the migrate command, you will need to create the administrative user manually. Create the user by typing:
python manage.py createsuperuser
7) You will get a prompt for a username, an email address, and a password for the user. After you have a user, you will start up the Django development server and see how a fresh Django project looks like. Make sure to use this only for development purposes.
Now, before running the server, we need to add our IP to ALLOWED_HOSTS in projectname/projectname/setting.py.
python manage.py runserver 0.0.0.0:8000
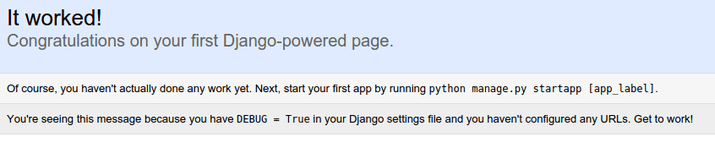
8) After that, visit your server’s IP address followed by :8000 in your web browser:
server_ip_address:8000
You will see something like below:
9) Next, append /admin to the end of your URL to get to the admin login page:
server_ip_address:8000/admin
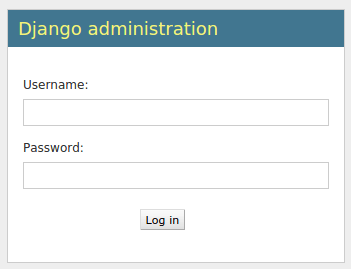
10) You will now enter the admin username as well as the password created. It will then direct you to the admin section of the site:
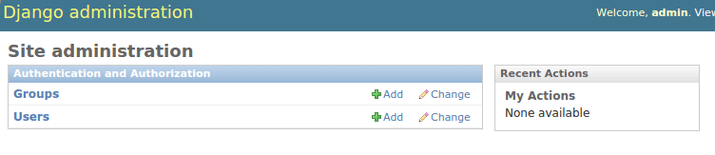
11) After finishing looking via the default site, you can stop the development server now. Do it by typing CTRL-C in your terminal. After the creation of the Django project, it will provide the structural basis for designing a more customized site.
FAQs to Install Django on CentOS 7
What Python version to use with Django?
Django 1.11 is the last version to support Python 2.7. Support for both Python 2.7 and Django 1.11 ends in 2020. Therefore, the latest versions of Python are often faster and have more features. They give better support.
Should the user use the stable version or the development version?
Mainly, if using code in production, you will be using a stable release. Django project publishes a full stable release every 9 months or so. It is with many bugfix updates now in between. These stable releases have API, coverable by backward compatibility guarantees. If you are writing code against stable releases, you will not have any problem upgrading to the next official version.
What is the EPEL repository?
The Extra Packages for Enterprise Linux (EPEL) repository provides additional software packages not included in the default CentOS repositories.
How can I install the EPEL repository on CentOS 7?
To install the EPEL repository, run the command: sudo yum install epel-release
How do I update my CentOS 7 system?
Use the command: sudo yum update
How can I verify if Django is installed correctly?
You can check the Django version by running: django-admin --version
Are there any additional dependencies I need to install for Django on CentOS 7?
It depends on your specific needs and project requirements. Django usually handles most dependencies itself, but you might need to install extra packages depending on the features you are using in your Django project.
Conclusion
We hope this detailed guide helped you to install Django on CentOS 7.
If you have any queries, please leave a comment below, and we’ll be happy to respond to them for sure.