

Choose a different version or distribution
Introduction
Before we begin talking about how to install Elasticsearch 8 on Ubuntu 22.04, let's briefly understand – What is Elasticsearch 8?
Elasticsearch 8 is a powerful and versatile open-source search and analytics engine. It is designed to store, search, and analyze large volumes of data quickly and efficiently. With Elasticsearch 8, you can easily implement effective full-text searching, real-time data analysis, and scalable distributed computing.
Its user-friendly API and extensive query capabilities make it suitable for various applications, from e-commerce to log analysis. Stay ahead of the competition by harnessing the advanced features and robust performance of Elasticsearch 8.
In this tutorial, you will install Elasticsearch 8 on Ubuntu 22.04. We will also address a few FAQs on how to install Elasticsearch 8 on Ubuntu 22.04.
Advantages of Elasticsearch 8
- Scalability: Elasticsearch 8 allows you to scale horizontally, effortlessly handling large amounts of data and high traffic loads.
- High-performance search: Its advanced search capabilities provide lightning-fast and accurate results, ensuring a smooth user experience.
- Real-time data analysis: Elasticsearch 8 enables real-time data indexing, empowering you to gain crucial insights and make data-driven decisions promptly.
- Distribution and fault tolerance: With built-in replication and sharding, Elasticsearch 8 ensures data reliability and fault tolerance in distributed environments.
- Powerful query functionality: Its robust query DSL allows for complex queries, aggregations, and filtering, providing precise and comprehensive search.
Import Elasticsearch 8 APT Repository on Ubuntu
Update Ubuntu System Packages
Update your Ubuntu system packages first to make sure all the parts are up-to-date:
sudo apt update && sudo apt upgrade
Maintaining system stability and security, this command updates the package lists and upgrades the packages to their most recent versions.
Install Initial Packages for Elasticsearch 8.0 Installation
A few packages need to be installed before installing Elasticsearch 8.0. Use the following command to install these prerequisite packages:
sudo apt install dirmngr ca-certificates software-properties-common apt-transport-https curl -y
Installing tools like dirmngr and ca-certificates for managing keyrings, software-properties-common for managing software repositories, apt-transport-https for safe package downloads, lsb_release for Linux Standard Base information, and curl for data transfers makes this step very important.
Import Elasticsearch 8 APT Repository
Elasticsearch 8.0 must be imported from the Elasticsearch APT repository because it is not included in the default Ubuntu repository.
Add Elasticsearch GPG Key
To verify the authenticity and integrity of the packages, import the GPG key first. Execute:
wget -q https://artifacts.elastic.co/GPG-KEY-elasticsearch -O- | sudo gpg --dearmor -o /usr/share/keyrings/elasticsearch-keyring.gpg
This command secures subsequent downloads from the repository by downloading the GPG key from Elasticsearch's official website and adding it to your system's keyring.
Add Elasticsearch 8.x APT Repository
Use the following to import the Elasticsearch repository after adding the GPG key:
echo "deb [signed-by=/usr/share/keyrings/elasticsearch-keyring.gpg] https://artifacts.elastic.co/packages/8.x/apt stable main" | sudo tee /etc/apt/sources.list.d/elastic-8.x.list
By creating a new source list file for Elasticsearch, this command makes sure that the newly added repository is recognized and trusted by your system in order to facilitate further installation steps.
Install Elasticsearch 8.x on Ubuntu
Update APT Index Cache After Elasticsearch 8 Import
Refresh the Repository List
Refreshing the package list on your system is the next step after importing Elasticsearch 8. This guarantees that your system will detect the recently added Elasticsearch repository. Run:
sudo apt update
By using this command, you can install the most recent version of Elasticsearch that is available in the repository by updating the APT index cache.
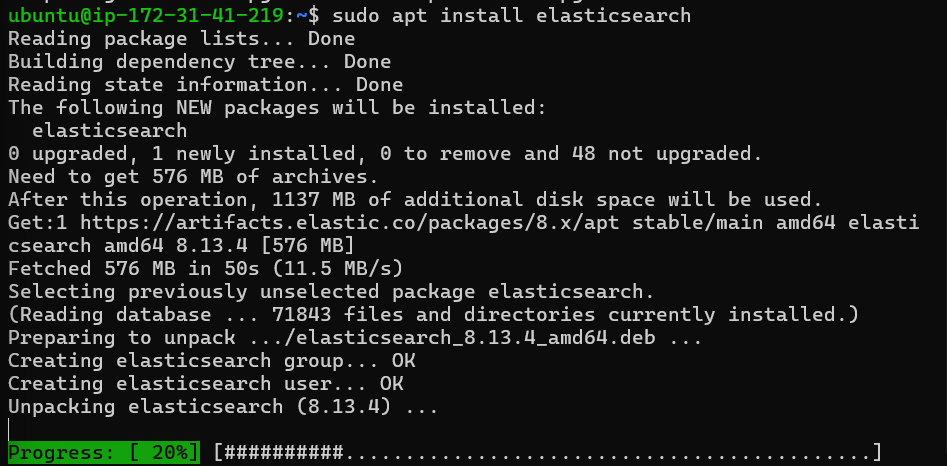
Install Elasticsearch
Once the repository list has been updated, run the following commands to install Elasticsearch:
sudo apt install elasticsearch
Using this command, Elasticsearch is downloaded and installed on your Debian computer. Maintaining optimal performance and security requires that you have the most recent stable version of Elasticsearch, which it makes sure you have.
Configure and Start the Elasticsearch Service
Enable and Start the Service
Elasticsearch does not launch automatically on system boot by default. Use the following to set up Elasticsearch to launch the service as soon as the computer boots up:
sudo systemctl enable elasticsearch.service --now
One easy way to start the service in the current session and enable it at boot is to use the systemctl command's --now flag.
Verify Service Status
Use the following to verify that Elasticsearch is operating as intended:
systemctl status elasticsearch
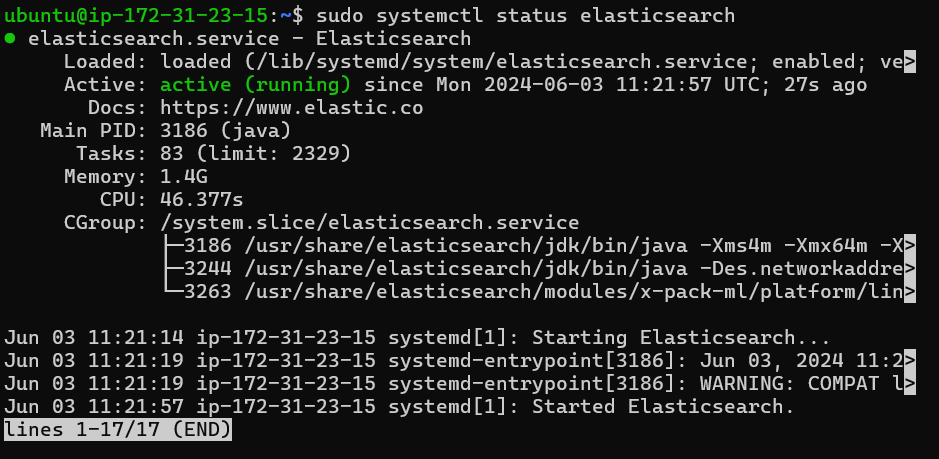
With the help of this command, you can check the Elasticsearch service's current status and make sure it's operating properly on your Ubuntu system.
Configure Elasticsearch 8 on Ubuntu
Understanding Elasticsearch Data and Configuration Directories
Default Data Directory
Elasticsearch stores data in /var/lib/elasticsearch. This directory controls the cluster's state and stores indexed data.
Configuration File Locations
You can find configuration files in /etc/elasticsearch. You are in charge of Elasticsearch's actions here. Options for Java start-up are configured in /etc/default/elasticsearch.
Single-server operations are well served by default configurations. Changes for clusters allow for remote connections.
sudo nano /etc/elasticsearch/elasticsearch.yml
Set up Remote Access (Optional)
Networking Configuration in Elasticsearch
To enable connections other than localhost, modify the configuration file's network settings.
Use the following to access the configuration file:
sudo nano /etc/elasticsearch/elasticsearch.yml
Uncomment the appropriate line for network binding in the Network section, then change it to your desired IP address.
Common Configuration Examples
Setting Network Host
To configure an internal private IP:
network.host: [Internal Private IP]
Cluster communication requires this configuration.
Configuring Cluster Name
For identification, specify the name of your cluster:
cluster.name: my-cluster
This name facilitates monitoring and cluster management.
Node Identification
Give each node a distinct name:
node.name: node-1
Cluster management is made simpler by unique node names.
Discovery Settings
Set up node finding in a cluster formation configuration:
discovery.seed_hosts: ["host1", "host2"]
In a cluster, these configurations are essential for nodes to find one another.
Memory Allocation
Make memory available to Elasticsearch:
-Xms1g
-Xmx1g
The JVM heap size is controlled by these parameters in /etc/default/elasticsearch, which is essential for efficiency.
Enabling CORS
For web-based Elasticsearch tools:
http.cors.enabled: true http.cors.allow-origin: "/.*/"
CORS settings in elasticsearch.yml enable interactions with web applications.
Save your edits, then close the editor. After that, restart Elasticsearch to make the changes effective:
sudo systemctl restart elasticsearch
Elasticsearch will run with the updated settings if you restart it.
Configure UFW Firewall for Elasticsearch 8 on Ubuntu
Setting Up Firewall Rules for Elasticsearch
Allowing Specific IP Addresses
Setting up the firewall to permit these particular connections is necessary in order to enable remote connections to Elasticsearch. Use this command to allow a specific IP address to be used:
sudo ufw allow from [IP Address] to any port 9200
Enter the desired external IP address in place of [IP Address]. This configuration makes it possible for traffic from this address to reach port 9200 on Elasticsearch, which is essential for cluster communication or remote access.
Allowing a Range of IP Addresses
If a range of IP addresses needs to be allowed, adjust the UFW rule accordingly:
sudo ufw allow from [IP Address Range] to any port 9200
In this case, [IP Address Range] might be a subnet that permits access to your Elasticsearch instance from multiple IP addresses inside that subnet.
Allowing All Traffic on Port 9200
You may need to open the Elasticsearch port to all traffic in some environments. This command exposes port 9200 to all incoming traffic, so proceed with caution:
sudo ufw allow 9200
This command is typically used for initial setup and testing, or in controlled environments.
Restricting Access to Local Network
Limit access to the local network for additional security, particularly in production settings. Only local network
connections to Elasticsearch are permitted with this command:
sudo ufw allow from 192.168.1.0/24 to any port 9200
To match the IP range of your local network, change 192.168.1.0/24. By limiting access to Elasticsearch to devices on your local network, this setting provides an extra degree of protection from outside threats.
Applying the Firewall Rules
Reloading UFW will activate the rules after they have been set up:
sudo ufw reload
The new rules are enforced by this command without breaking open connections. Ensuring the security of your Elasticsearch server while permitting essential traffic is an essential step.
Example Commands with Elasticsearch 8 on Ubuntu
Deleting an Index in Elasticsearch
To remove an index, like "samples," perform the following:
curl -X DELETE 'http://localhost:9200/samples'
To free up resources, this command deletes the specified index along with all of its contents.
Listing All Indexes
To see every index on your Elasticsearch server, click here:
curl -X GET 'http://localhost:9200/_cat/indices?v'
An overview of every index, including its health and document count, is given by this command.
Listing All Documents in an Index
To include every document in an index, such as "sample":
curl -X GET 'http://localhost:9200/sample/_search'
This command shows all stored documents, which is helpful for a fast overview of the index's contents.
Querying with URL Parameters
Make use of the Lucene query syntax for focused searches. To locate Harvard, for instance, in the "school" field:
curl -X GET http://localhost:9200/samples/_search?q=school:Harvard
This approach works well for straightforward URL-based queries.
Querying with JSON (Elasticsearch Query DSL)
JSON format is more readable and easier to handle for complex queries:
curl -XGET --header 'Content-Type: application/json' http://localhost:9200/samples/_search -d '{
      "query" : {
        "match" : { "school": "Harvard" }
    }
}'
This format is perfect for advanced searches because it supports complex query structures.
Listing Index Mapping
To comprehend an index's structure, such as "samples":
curl -X GET http://localhost:9200/samples
This command helps with query formulation by displaying the fields and their types within the index.
Adding Data to an Index
To add information to an index:
curl -XPUT --header 'Content-Type: application/json' http://localhost:9200/samples/_doc/1 -d '{
   "school" : "Harvard"
}'
This command, which is helpful for data ingestion, adds a document to the "samples" index.
Updating a Document
To make changes to an already-existing document:
curl -XPUT --header 'Content-Type: application/json' http://localhost:9200/samples/_doc/2 -d '
{
    "school": "Clemson"
}'

curl -XPOST --header 'Content-Type: application/json' http://localhost:9200/samples/_doc/2/_update -d '{
"doc" : {
               "students": 50000}
}'
These commands show how to modify data by creating and updating a document in the'samples' index first.
Backing Up an Index
To produce a backup index:
curl -XPOST --header 'Content-Type: application/json' http://localhost:9200/_reindex -d '{
  "source": {
    "index": "samples"
  },
  "dest": {
    "index": "samples_backup"
  }
}'
In order to create a "samples_backup" index—which is essential for data redundancy—this command duplicates the "samples" index.
Bulk Loading Data
For bulk data loading:
export pwd="elastic:"

curl --user $pwd  -H 'Content-Type: application/x-ndjson' -XPOST 'https://58571402f5464923883e7be42a037917.eu-central-1.aws.cloud.es.io:9243/0/_bulk?pretty' --data-binary @<file>
Using Elasticsearch's bulk API, this technique imports large datasets quickly and effectively.
Showing Cluster Health
To assess an Elasticsearch cluster's health:
curl --user $pwd -H 'Content-Type: application/json' -XGET https://58571402f5464923883e7be42a037917.eu-central-1.aws.cloud.es.io:9243/_cluster/health?pretty
Important details regarding the cluster's condition, such as data balance and node health, are provided by this command.
Aggregation and Bucket Aggregation
For analytical purposes (e.g., tracking web hits by city of user):
curl -XGET --user $pwd --header 'Content-Type: application/json'  https://58571402f5464923883e7be42a037917.eu-central-1.aws.cloud.es.io:9243/logstash/_search?pretty -d '{
        "aggs": {
             "cityName": {
                    "terms": {
                     "field": "geoip.city_name.keyword",
                                "size": 50

        }
   }
  }
}'
And for further in-depth information, like response codes broken down by city:
curl -XGET --user $pwd --header 'Content-Type: application/json'  https://58571402f5464923883e7be42a037917.eu-central-1.aws.cloud.es.io:9243/logstash/_search?pretty -d '{
        "aggs": {
          "city": {
                "terms": {
                        "field": "geoip.city_name.keyword"
                },
        "aggs": {
          "responses": {
                "terms": {
                     "field": "response"
                 }
           }
         }
      },
      "responses": {
                "terms": {
                     "field": "response"
                 }
        }
   }
}'
These examples show you how to leverage Elasticsearch's aggregation features for insightful analysis of data.
Using Elasticsearch with Basic Authentication
Every curl command needs to be authenticated for secure Elasticsearch setups.
curl -X GET 'http://localhost:9200/_cat/indices?v' -u elastic:(password)
This guarantees that the Elasticsearch data is only accessible to authorized users.
Pretty Print
To improve the readability of JSON output:
curl -X GET 'http://localhost:9200/(index)/_search'?pretty=true
To make the JSON response easier to analyze, add ?pretty=true.
Querying Specific Fields
If you want to receive only specific fields back, list them in the _source array:
GET filebeat-7.6.2-2020.05.05-000001/_search
 {
    "_source": ["suricata.eve.timestamp","source.geo.region_name","event.created"],
    "query":      {
        "match" : { "source.geo.country_iso_code": "GR" }
    }
}
This method simplifies data retrieval by concentrating the search results on particular fields.
Querying by Date
For date-based queries:
GET filebeat-7.6.2-2020.05.05-000001/_search
 {
    "query": {
        "range" : {
            "event.created": {
                "gte" : "now-7d/d"
            }
        }
}
}
Date math is essential for time-sensitive data analysis because it allows you to filter documents within a given period of time.
Managing Elasticsearch 8 on Ubuntu
Uninstalling Elasticsearch 8
Removing Elasticsearch Software
When Elasticsearch is no longer required, it can be effectively uninstalled. Use this to get rid of Elasticsearch from your system:
sudo apt remove elasticsearch
To ensure a clean removal, this command not only uninstalls Elasticsearch but also any installed packages that are no longer required.
Deleting the APT Repository
It's crucial to remove the Elasticsearch repository from your system's sources list after uninstalling the program. Carry out:
sudo rm -rf /etc/apt/sources.list.d/elastic-8.x.list
By deleting the Elasticsearch repository configuration file, you can stop future updates or installations from allowing your system to access out-of-date or superfluous Elasticsearch packages.
FAQs to Install Elasticsearch 8 on Ubuntu 22.04
How do I configure Elasticsearch 8?
You can modify Elasticsearch's configuration file to suit your requirements. Common settings include cluster name and network host. Remember to restart Elasticsearch after making changes.
How do I access the Elasticsearch REST API?
The Elasticsearch REST API can be accessed using various tools such as curl or HTTP clients. By default, the API endpoint is at "localhost:9200".
Can I change the default port for Elasticsearch?
Yes, you can modify the port by editing Elasticsearch's configuration file and updating the appropriate setting.
How do I enable automatic startup of Elasticsearch on system boot?
You can enable Elasticsearch to start automatically on system boot through systemd commands.
How can I monitor the health of my Elasticsearch cluster?
Elasticsearch provides a cluster health API that allows you to monitor the health of your cluster, including the number of nodes and overall status.
Can Elasticsearch 8 be used in a distributed setup?
Yes, Elasticsearch is designed to work in distributed setups, enabling improved availability, fault tolerance, and scalability. You can configure and add multiple nodes to form a cluster.
How can I back up and restore data in Elasticsearch 8?
To back up Elasticsearch 8 data, various approaches can be taken, including using snapshot and restore functionality, leveraging Elasticsearch APIs or third-party tools. It is important to have robust backup strategies to prevent data loss.
Conclusion
We hope this tutorial helped you understand how to install Elasticsearch 8 on Ubuntu 22.04.
If you have any queries, please leave a comment below, and we’ll be happy to respond to them for sure.