
Choose a different version or distribution
Introduction
Before we begin talking about how to install Ghost on Ubuntu 18.04, let's briefly understand - What is Ghost?
Ghost is an open-source blogging platform for easy content creation. It offers a simple and intuitive interface, making it ideal for individuals and businesses looking to build a professional website or blog.
With its powerful features, customizable themes, and extensive plugin options, Ghost allows users to focus on creating high-quality content that engages their audience. Whether you're a beginner or an experienced user, Ghost provides a user-friendly platform for blogging success.
In this tutorial, you'll install and configure Ghost on Ubuntu 18.04. We will also address some of the FAQs related to the Ghost installation.
Advantages of Ghost
- Simplicity: Ghost offers a clean and intuitive interface, making content creation and management effortless.
- Customizability: With a wide range of themes and plugins, users can personalize their blog to suit their needs.
- Performance: Ghost is optimized for speed, ensuring fast page loading and a smooth user experience.
- SEO-friendly: Built-in SEO tools help improve search engine visibility, increasing organic traffic to your blog.
- Responsive Design: Ghost provides mobile-friendly themes, allowing your blog to look great on any device.
Prerequisites
- 1GB Ubuntu 18.04 server
- Node.js
- Nginx installed on your server
- MySQL
Step 1 - Install dependencies
Install nodejs.
curl -fsSL https://deb.nodesource.com/setup_16.x | sudo bash -
sudo apt install nodejs -y
Install Nginx webserver.
sudo apt-get install nginx -y
sudo ufw allow 'Nginx Full'
Install MySQL:
sudo apt-get install mysql-server -y
sudo mysql_secure_installation
Step 2 - Installation of Ghost CLI application
Install Ghost using the official ghost-cli program.
This program will help you in:
- Installing Ghost
- Creating the MySQL user and database
- Configuring Nginx as a reverse proxy
- Securing the site using SSL/TLS encryption
1) At first, you need to download ghost-cli using npm, it will help you in the CLI globally on your Ubuntu system:
sudo npm install ghost-cli@latest -g
2) After that, you have to place Ghost in the var/www/ghost recommended directory location. Create a ghost directory using the following command:
mkdir /var/www/ghost
3) Now ensure that the user owns this directory.
sudo chown $USER:$USER /var/www/ghost
The /var/www/ghost directory must have full permissions for the user, and should have read and execute permissions for everyone else, now use the following command to set the permissions:
sudo chmod 775 /var/www/ghost
Now as you have CLI installed and the directory is in its place, you can now set up your blog.
Step 3 - Install and configure Ghost
1) Now you must switch to the /var/www/ghost/ directory using the following command:
cd /var/www/ghost/
2) After that, use the ghost command for installation. It will then configure Ghost to use MySQL as your default database. While other databases can be used, MySQL is recommended for the production setup.
ghost install
3) At first, the installer will ensure that you have all the necessary prerequisites installed and after confirming this it will download and install Ghost respectively.
Output

✔ Checking system Node.js version
✔ Checking logged in user
✔ Checking current folder permissions
✔ Checking operating system compatibility
✔ Checking for a MySQL installation
✔ Checking memory availability
✔ Checking for latest Ghost version
✔ Setting up install directory
✔ Downloading and installing Ghost v1.22.2
✔ Finishing install process
4) After the completion of the installation process, you will get a prompt for your blog URL and your MySQL database information. In this step, you will provide the root username and password.
You can use the default ghost_prod as your database name.
Output

? Enter your blog URL: http://example.com
? Enter your MySQL hostname: localhost
? Enter your MySQL username: root
? Enter your MySQL password: [hidden]
? Enter your Ghost database name: ghost_prod
After that, the configuration wizard will come into action and will create a ghost system user and will ask you the permission for creating a MySQL user, and you should allow it:
Output

✔ Configuring Ghost
✔ Setting up instance
Running sudo command: useradd --system --user-group ghost
Running sudo command: chown -R ghost:ghost /var/www/ghost/content
✔ Setting up "ghost" system user
? Do you wish to set up "ghost" mysql user? Yes
✔ Setting up "ghost" mysql user
Now, it will ask if you would like to configure Nginx.
After your confirmation, the installer will create the required reverse-proxy server block for your blog:
Output

? Do you wish to set up Nginx? Yes
✔ Creating nginx config file at /var/www/ghost/system/files/example.con.conf
Running sudo command: ln -sf /var/www/ghost/system/files/example.com.conf /etc/nginx/sites-available/example.com.conf
Running sudo command: ln -sf /etc/nginx/sites-available/example.com.conf /etc/nginx/sites-enabled/example.com.conf
Running sudo command: nginx -s reload
✔ Setting up Nginx
After that, you will get a prompt for setting up the SSL support. Press Y to continue if you are using a fully-qualified registered domain name and your DNS is pointing to your server's IP address.
Output

? Do you wish to set up SSL? Yes
Now, it will ask for your email address and then will install the certificate.
Output

? Enter your email (used for Let's Encrypt notifications) [email protected]
Running sudo command: mkdir -p /etc/letsencrypt
Running sudo command: ./acme.sh --install --home /etc/letsencrypt
Running sudo command: /etc/letsencrypt/acme.sh --issue --home /etc/letsencrypt --domain example.com --webroot /var/www/ghost/system/nginx-root --reloadcmd "nginx -s reload" --accountemail [email protected]
Running sudo command: openssl dhparam -out /etc/nginx/snippets/dhparam.pem 2048
Running sudo command: openssl dhparam -out /etc/nginx/snippets/dhparam.pem 2048
Running sudo command: mv /tmp/ssl-params.conf /etc/nginx/snippets/ssl-params.conf
✔ Creating ssl config file at /var/www/ghost/system/files/example.com-ssl.conf
Running sudo command: ln -sf /var/www/ghost/system/files/example.com-ssl.conf /etc/nginx/sites-available/example.com-ssl.conf
Running sudo command: ln -sf /etc/nginx/sites-available/example.com-ssl.conf /etc/nginx/sites-enabled/example.com-ssl.conf
Running sudo command: nginx -s reload
✔ Setting up SSL
After that, you will get a prompt from the configuration wizard for setting up the systemd service.
Now press Y to continue and following which the wizard will create a new systemd service with the name ghost_example-com and it'll be enabled to start on boot:
Output

? Do you wish to set up Systemd? Yes
✔ Creating systemd service file at /var/www/ghost/system/files/ghost_example-com.service
Running sudo command: ln -sf /var/www/ghost/system/files/ghost_example-com.service /lib/systemd/system/ghost_example-com.service
Running sudo command: systemctl daemon-reload
✔ Setting up Systemd
As a final step, the wizard will configure your database and you'll be asked if it should start Ghost, press Y to allow:
Output

Running sudo command: /var/www/ghost/current/node_modules/.bin/knex-migrator-migrate --init --mgpath /var/www/ghost/current
✔ Running database migrations
? Do you want to start Ghost? Yes
Running sudo command: systemctl is-active ghost_example-com
✔ Ensuring user is not logged in as ghost user
✔ Checking if logged in user is directory owner
✔ Checking current folder permissions
Running sudo command: systemctl is-active ghost_example-com
✔ Validating config
✔ Checking folder permissions
✔ Checking file permissions
✔ Checking content folder ownership
✔ Checking memory availability
Running sudo command: systemctl start ghost_example-com
✔ Starting Ghost
Running sudo command: systemctl is-enabled ghost_example-com
Running sudo command: systemctl enable ghost_example-com --quiet
✔ Starting Ghost
Your Ghost blog is now installed and ready to be used. Your blog will be accessible at http://example.com. Now, you should create your account to publish your first blog.
Step 4 - Account creation and blog configuration
Visit http://example.com/ghost to log in and configure your blog.
You will see a screen that will have the Create your account button. Press the button to get started.
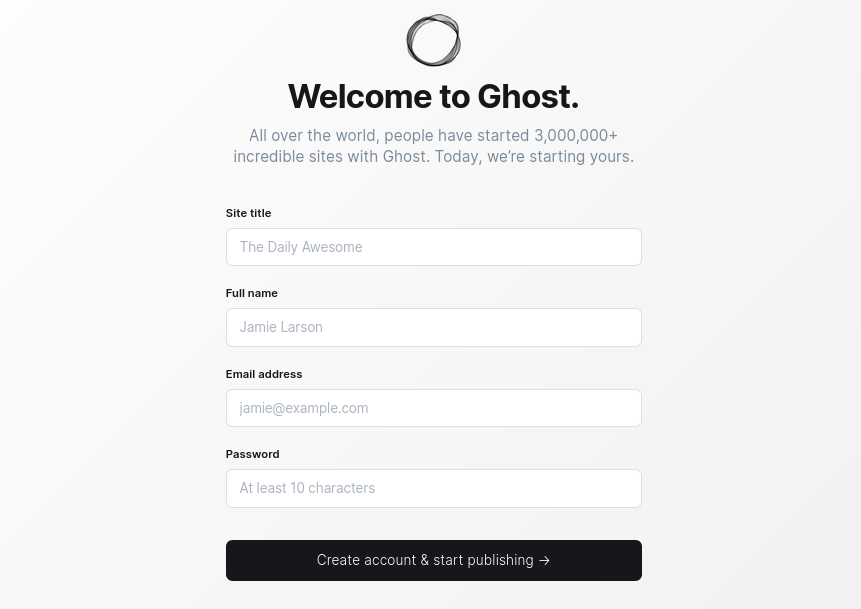
You will then see the Create your account screen that will ask you for your blog title, name, email address, and password.
Once you fill in the details, click on the Last step: Invite your team button.
It will ask you to provide the email addresses of other team members or collaborators. You can skip this step and select I'll do this later option available at the bottom of the screen.
After completing this process you will see a list of posts on Ghost.
You will see a menu on the left through which you can create new posts and manage other settings of the blog.
FAQs to Install Ghost on Ubuntu 18.04
What are the system requirements for installing Ghost on Ubuntu 20.04?
Ghost requires a server with at least 1GB RAM, 1 CPU core, and 10GB of storage. Ubuntu 20.04 is a compatible operating system for Ghost.
Can I install Ghost on a shared hosting platform?
No, Ghost requires a dedicated server or a Virtual Private Server (VPS) due to its resource requirements and the need for advanced configuration options.
Can I use a different web server instead of the default Ghost server?
Yes, you can configure Ghost to work with popular web servers like Nginx or Apache. The official Ghost documentation provides detailed instructions on setting up Ghost with different web servers.
Is it necessary to have coding knowledge to install Ghost on Ubuntu 20.04?
No, the installation process is straightforward and does not require coding knowledge. Simply follow the installation guide carefully.
Can I use a different database for Ghost on Ubuntu 20.04?
Yes, Ghost supports SQLite, MySQL, and PostgreSQL databases. You can choose the one that suits your needs during the installation process.
Can I install Ghost alongside other applications on my Ubuntu 20.04 server?
Yes, Ghost can be installed alongside other applications, but it's essential to ensure that there are no conflicts in terms of required resources or port usage.
How do I update Ghost on Ubuntu 20.04?
Updating Ghost is a straightforward process. You can follow the official upgrade guide provided by Ghost to perform the necessary updates.
Is it possible to migrate an existing Ghost installation to Ubuntu 20.04?
Yes, you can migrate your existing Ghost installation to a Ubuntu 20.04 server. The process involves transferring your content and database, followed by reconfiguring Ghost.
Conclusion
We hope this tutorial helped you understand how to install Ghost on Ubuntu 18.04.
If you have any further queries or concerns, do leave us a comment here, and we'll be sure to respond to you.
