
Introduction
Before we begin talking about how to install Glances on Ubuntu 22.04, let's briefly understand – What is Glances?
Glances is a powerful system monitoring tool that provides quick insights into the performance and status of your computer. With Glances, you can easily view real-time information about CPU usage, memory utilization, network traffic, disk activity, and other crucial system metrics.
This lightweight and user-friendly tool allows you to keep a close eye on your system's health, aiding in the efficient management and troubleshooting of any issues. Boost your productivity and ensure optimal performance with Glances, the versatile system monitoring solution.
In this tutorial, you will install Glances on Ubuntu 22.04. We will also address a few FAQs on how to install Glances on Ubuntu 22.04.
Advantages of Glances
- Real-time Insights: Get instant and accurate information about system performance and resource usage.
- Lightweight: Glances is a lightweight tool that consumes minimal system resources.
- User-friendly Interface: Its intuitive interface makes it easy to navigate and understand the system metrics.
- Versatile Monitoring: Glances offers comprehensive monitoring capabilities, including CPU, memory, disk, and network monitoring.
- Easy Troubleshooting: Quickly identify and address system issues to ensure efficient troubleshooting and better overall system performance.
1. Start with a system update
Before installing Glances, run the system update command on your Ubuntu 22.04. This is because the procedure will clean the APT cache in addition to installing the widely used updates.
sudo apt update
2. Install Python3 & require dependencies
Python is necessary for Glances to function properly, so you must have it installed on your computer. Even though Python is pre-installed on Ubuntu, you should still run the following command to get some of the necessary dependencies:
sudo apt-get install -y python3-pip python3-dev python3-docker gcc lm-sensors wireless-tools

To check the version:
python3 -V

3. Install Glances on Ubuntu 22.04
On Ubuntu 22.04 LTS Linux, there are two simple methods to install Glances: one is through APT, the system package manager by default, and the other is through PIP, the package manager for Python.
The most stable but older version of Glances will be installed through APT, which is the only difference. But we can use the PIP for the most recent version.
We'll demonstrate both methods here, but you should only use one to install Glances on your Linux computer. However, we employed the PIP method to carry out this tutorial.
Using APT package manager:
sudo apt install glances

Using PIP Python’s package manager:
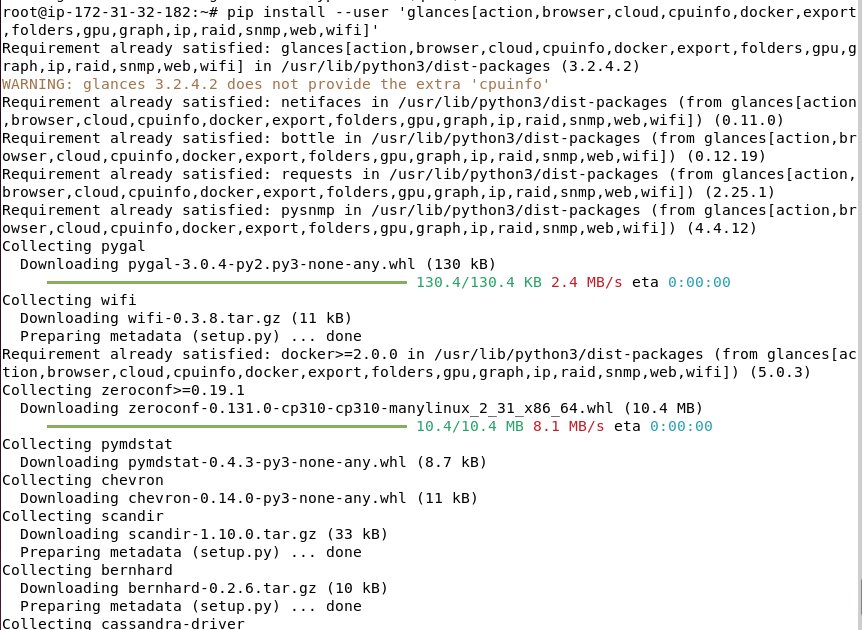
This will set up a full suite of Glances to monitor all significant supported items.
pip install --user 'glances[action,browser,cloud,cpuinfo,docker,export,folders,gpu,graph,ip,raid,snmp,web,wifi]'
4. Add Glances to the system PATH
Add the installation folder for the most recent version of Glances to your system path after utilizing the PIP to install it on your Ubuntu 22.04 Linux system. The Glances command line will now work from anywhere in the terminal thanks to this.
Open the Bashrc file and edit it. If the nano editor isn't already installed, use sudo apt install nano to get it.
nano ~/.bashrc
Next, copy the next line by scrolling to the end of the file.
PATH="$PATH:~/.local/bin"
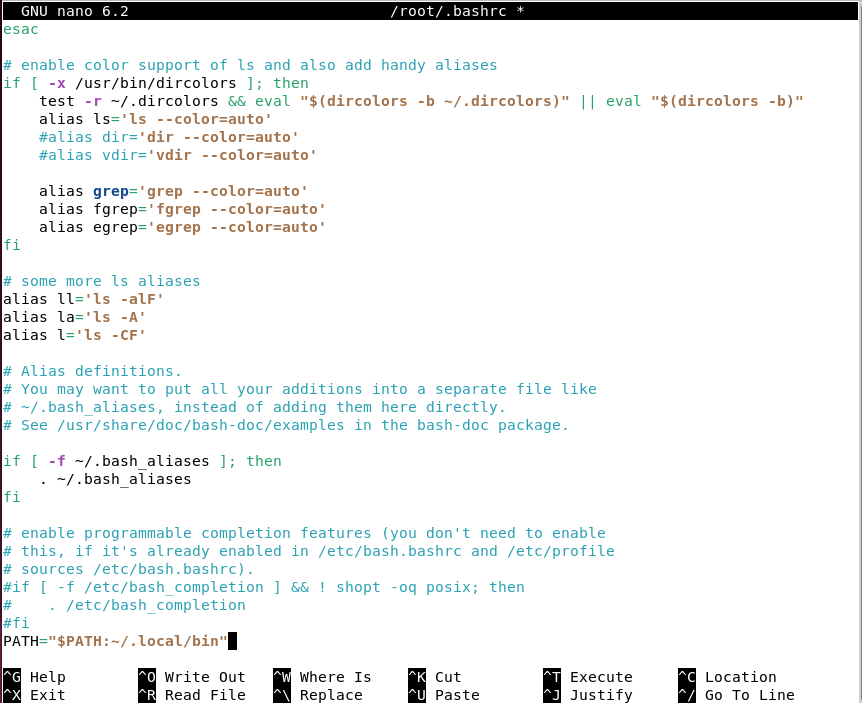
Use Ctrl+X to save and exit the file, then hit Y and Enter to continue.
Reload the configuration of the shell by using:
source ~/.bashrc
5. Check the version
Now that you have finished installing Glances on Linux, use the provided command to verify its version and determine whether it is operational or not.
glances --version

6. Glances Usage Options – Standalone server
You can use this Linux system monitoring tool by typing the following command in your terminal once it has been installed on our system.
glances
Additionally, the procedure and additional specifics of your system will be readily visible to you:

The settings can be changed in the following files: ~ /.config/glances/glances.conf (per user) or /etc/glances/glances.conf(system-wide; root rights required).
Keys to operate glances
These are keyboard shortcuts that you can use to view different types of information while Glances is running.
- C: Sort processes by% CPU usage
- M: Sort processes by% memory usage
- P: Sort processes by name
- I: Sort processes by I / O rate
- D: Show/hide disk I / O statistics
- F: Show/hide file system statistics
- N: Show/hide network statistics
- S: Show/hide hardware sensors
- T: Show network I / O combined
- U: Show cumulative network I / O
- W: Delete log entries of the WARNING level
- X: Delete log entries of the WARNING and CRITICAL levels
- Y: Show/hide hard drive temperature
- 1: Global CPU statistics or per core
- L: Show/hide log entries
- B: Bit / s or Byte / s for network I / O
- Q, Esc, Ctrl + C: break up
With the glances command in the terminal, you can use the following helpful command-line options:
-cor--config: You can provide the path to a different configuration file with this option. By default, Glances searches/etc/glances/glances.conffor its configuration file.-tor--time: This setting establishes the Glances refresh interval in seconds. Runningglances -t 5, for instance, refreshes Glances every 5 seconds.-for--process-filter: You can set a process filter with this option, which will restrict the process information display to only those that match the filter. Runningglances -f ssh, for instance, will only show processes with "ssh" in their names.-sor--server: With this option, Glances is launched in server mode, enabling you to connect to it using a different system's web browser. Glances will launch as a server on port 61209 by default when you runglances -s.-por--process-sort: `You can choose the process information's sorting order with this option. Runningglances -p name, for instance, sorts the process list according to name.-nor--network: TCP/UDP connections and network utilization are among the details displayed by this option.-mor--memory: This option shows memory usage statistics, such as overall and process-specific usage.-cor--cpu: This option shows CPU details such as average load and usage.-dor--diskio: This option shows read and write rates along with other disk I/O data.
This monitoring tool can be used with these command-line options to accomplish a number of tasks. Additional details can be found in the comprehensive program documentation and on the manual page.
7. Server/client mode on Ubuntu 22.04
You can use this monitoring tool's server and client modes to retrieve data from another system via a terminal without the need for SSH.
Thus, on the system whose data you wish to access remotely, first launch Glances in server mode, then use
glances -s
Next, utilize Glances' client mode on your local system to establish a connection with the remote system—where Glances' server component is already operational—by using its IP address or domain.
glances -c @SERVER-IP
If you want to keep an eye on the server's hardware but don't want to log in, this is pretty useful.
Note: In order to obtain performance data, glances must be installed on both the client and remote computers.
8. Open Port 61209 of Glances
Additionally, the system firewall or service providers must open port 61209 in order to retrieve data from the remote system.
Regarding the Ubuntu UFW firewall:
sudo ufw allow 61209
9. Start Glances Web server UI Interface
With the provided command, users can view the glances web user interface in place of the command terminal to track system performance in real time.
glances -w
The command above will take up space in the terminal, and when you close it, the webserver will also come to an end. As a result, you can use the – to launch it in the background for the current session.
glances -w &
Output
Output

Glances web server started on http://0.0.0.0:61208/
Open your web browser and type-
http://SERVER-IP-ADRESSE:61208
Put the IP address of the computer where you installed glances in place of SERVER-IP-ADRESSE.
Additionally, after activating its web server on Ubuntu, open the 61208 port in your firewall if you are accessing it remotely from another computer.
sudo ufw allow 61208
10. Create a Glances System Service file
Normally, in order to access the glances web server through a network using a browser, you have to start it every time. However, use the commands below to create a service that will run automatically in the background and with system bootup.
First, create a Symlink:
sudo ln ~/.local/bin/glances /usr/local/bin/
Create a service file:
sudo nano /etc/systemd/system/glances.service
Paste the below-given block of text:
Note: Your current system username, under which the glance service will be running, should be substituted for "vegastack" in the provided code.
[Unit]

Description=Glances
After=network.target

[Service]
ExecStart=/usr/local/bin/glances -w -t 5
User=vegastack
Restart=on-abort
RemainAfterExit=yes


[Install]
WantedBy=multi-user.target
Save the file by typing Y with the keyboard shortcut Ctrl+X and pressing Enter.
Reload Daemon:
sudo systemctl daemon-reload
Now, Enable and start the service file:
sudo systemctl enable glances.service
sudo systemctl start glances.service
sudo systemctl status glances.service
11. Glances Upgrade and Uninstallation on Ubuntu 22.04
Run the system update command to obtain the most recent update, if it's available, if you installed Glances using the APT:
sudo apt update && sudo apt upgrade
On the other hand, users of Python's PIP can execute:
pip install glances --upgrade
Nevertheless, you can uninstall Glances from Ubuntu if you no longer need this monitoring tool by running:
For APT users:
sudo apt remove glances
For Python PIP users:
pip uninstall glances
FAQs to Install Glances on Ubuntu 22.04
Is Glances open-source software?
Yes, Glances is an open-source software licensed under the LGPLv3.
Is Glances compatible with Ubuntu 22.04?
Yes, Glances is compatible with Ubuntu 22.04 and can be installed and used without any issues.
How do I launch Glances after installation?
Once installed, you can launch Glances by typing glances in the terminal.
Can I customize the appearance and metrics displayed in Glances?
Yes, Glances provides various customization options such as color schemes, sorting options, and choosing which system metrics to display. You can modify these settings in the Glances configuration file.
Can I monitor remote servers with Glances on Ubuntu 22.04?
Yes, Glances supports monitoring remote servers. Use the command glances -s and enter the remote server IP address.
Are there any alternatives to Glances for system monitoring on Ubuntu?
Yes, some popular alternatives to Glances include htop, atop, and nmon. You can install them using the package manager or by compiling from source.
Does Glances provide historical data or graphs of system metrics?
Glances primarily focuses on real-time monitoring, but you can save monitoring data to a file and later analyze it using external tools like Grafana or Elasticsearch.
Conclusion
We hope this tutorial helped you understand how to install Glances on Ubuntu 22.04.
If you have any queries, please leave a comment below, and we’ll be happy to respond to them for sure.