
Choose a different version or distribution
Introduction
Before we begin talking about how to install InvoiceNinja on Ubuntu 22.04, let’s briefly understand- What is InvoiceNinja?
InvoiceNinja is an open-source platform, usually used for billing, creating invoices and managing payments. It is specifically created to simplify financial interactions between freelancers and small to medium scale enterprises.
In this tutorial, you will install InvoiceNinja on Ubuntu 22.04. We will also address some FAQs related to the InvoiceNinja installation.
Advantages
- Open-Source: InvoiceNinja is an open-source software, allowing for customization and flexibility.
- Feature-Rich: It offers a wide range of features, including invoicing, time-tracking, expense management, and client management.
- Easy Invoicing: Creating and sending professional invoices to clients is simple and efficient.
- Payment Integration: InvoiceNinja supports various payment gateways, enabling clients to make payments directly.
- Customizable Templates: It provides customizable invoice templates to match your brand identity.
Prerequisites
- A Linux server with at least 512 MB RAM is required to install InvoiceNinja
- Ubuntu 22.04 on your server
- Set up a LAMP stack or LEMP stack before installation
- A domain name so your clients can view your invoices under your domain name
Step 1: Download InvoiceNinja Install Zip File on Ubuntu 22.04 Server
Login into your Ubuntu 22.04 server via SSH. Then run the following command to download the latest version of InvoiceNinja zip file onto your server.
wget https://github.com/invoiceninja/invoiceninja/releases/download/v5.4.9/invoiceninja.zipOnce downloaded, extract the archive to the /var/www/ directory with unzip.
sudo apt install unzip
sudo mkdir -p /var/www/invoiceninja/
sudo unzip invoiceninja.zip -d /var/www/invoiceninja/
The -d option specifies the target directory. InvoiceNinja web files will be extracted to /var/www/invoiceninja.
Then we need to change the owner of this directory to www-data so that the web server can write to this directory.
sudo chown www-data:www-data /var/www/invoiceninja/ -RWe also need to change the permission of the storage directory.
sudo chmod 755 /var/www/invoiceninja/storage/ -RStep 2: Create a Database and User in MariaDB
Before creating a database, first install
Log into MariaDB database server with the following command.
sudo mysqlThen create a database for Invoice Ninja. This tutorial names the database invoiceninja. You can use whatever name you like.
create database invoiceninja;Create the database user. Again, you can use your preferred name for this user. Replace your-password with your preferred password.
create user ninja@localhost identified by 'your-password';Grant this user all privileges on the invoiceninja database.
grant all privileges on invoiceninja.* to ninja@localhost;Flush privileges and exit.
flush privileges;
exit;
Step 3: Install PHP Modules
Ubuntu 22.04 ships with PHP7.4, but InvoiceNinja is already compatible with PHP8.0, so we install PHP8.0 for better performance. Run the following commands to install PHP modules required or recommended by InvoiceNinja.
sudo apt install software-properties-common

sudo add-apt-repository ppa:ondrej/php -y

sudo apt install php-imagick php8.0 php8.0-mysql php8.0-fpm php8.0-common php8.0-bcmath php8.0-gd php8.0-curl php8.0-zip php8.0-xml php8.0-mbstring php8.0-bz2 php8.0-intl php8.0-gmp libapache2-mod-php8.0
Then restart Apache. (If you use Nginx, you don’t need to restart Nginx.)
sudo systemctl restart apache2Step 4: Configure InvoiceNinja
Go to the InvoiceNinja web root.
cd /var/www/invoiceninja/Copy the example .env file.
sudo cp .env.example .envEdit this file with a command-line text editor like Nano.
sudo nano .envFind the following line.
APP_URL=http://localhostChange the URL to something like https://invoice.yourdomain.com, so you will be able to access InvoiceNinja using this subdomain.
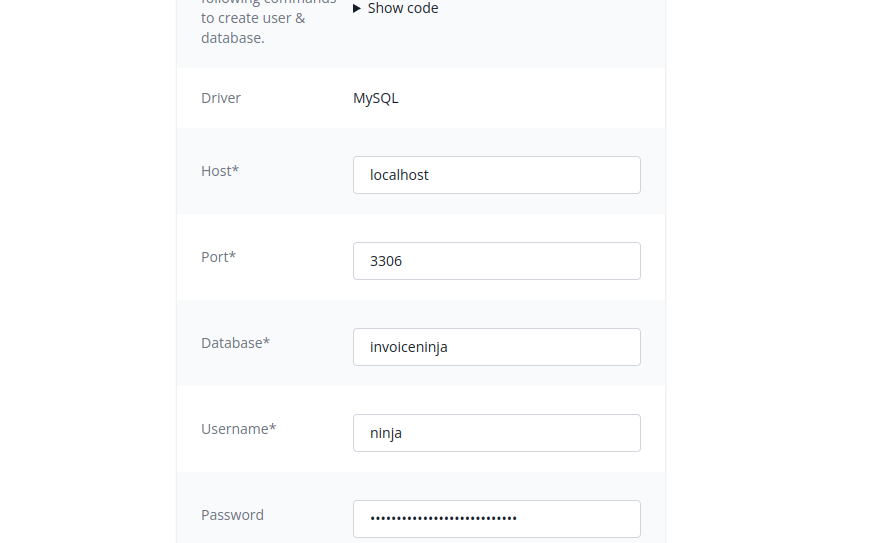
Then edit the database connection details. Enter the database name, database user, and password created in step 2.
DB_HOST=localhost
DB_DATABASE=invoiceninja
DB_USERNAME=ninja
DB_PASSWORD=ninja_password
DB_PORT=3306DB_PASSWORD="ninja_password".Save and close the file. Change the owner to www-data.
sudo chown www-data:www-data /var/www/invoiceninja/.envNext, run the following command to generate a unique app key for your InvoiceNinja installation.
sudo php8.0 /var/www/invoiceninja/artisan key:generateAnd migrate the database.
sudo php8.0 /var/www/invoiceninja/artisan migrate:fresh --seedStep 5: Setting Up Web Server
We can use Apache or Nginx web server.
Apache
If you prefer Apache, Install Apache
apt install apache2 -yNow create a virtual host file for Invoice Ninja.
sudo nano /etc/apache2/sites-available/invoice-ninja.confPut the following text into the file. Replace the red-colored text with your actual data. Don’t forget to set A record for the domain name. (Note that the web root is set to /var/www/invoice-ninja/public/, not /var/www/invoice-ninja/)
<VirtualHost *:80>
    ServerName invoice.yourdomain.com
    DocumentRoot /var/www/invoiceninja/public

    <Directory /var/www/invoiceninja/public>
       DirectoryIndex index.php
       Options +FollowSymLinks
       AllowOverride All
       Require all granted
    </Directory>

    ErrorLog ${APACHE_LOG_DIR}/invoice-ninja.error.log
    CustomLog ${APACHE_LOG_DIR}/invoice-ninja.access.log combined

</VirtualHost>
Save and close the file. Then enable this virtual host.
sudo a2ensite invoice-ninja.confWe need to enable the rewrite module.
sudo a2enmod rewriteRestart Apache for the changes to take effect.
sudo systemctl restart apache2Now you can access the Invoice Ninja setup wizard page (invoice.yourdomain.com/setup). If you see the default Apache page instead of the setup wizard, then you need to disable the default virtual host.
sudo a2dissite 000-default.confAnd restart Apache.
Before entering any information in the setup wizard, we need to enable HTTPS.
Nginx
If you prefer Nginx, Install Nginx
apt install nginx -y Now create a invoiceninja.conf file in /etc/nginx/conf.d/ the directory.
sudo nano /etc/nginx/conf.d/invoiceninja.confPut the following text into the file. Replace the red-colored text with your actual data. Don’t forget to create DNS A record for this subdomain. (Note that the web root is set to /var/www/invoiceninja/public/, not /var/www/invoiceninja/)
server {
    listen   80;
    listen   [::]:80;
    server_name invoice.yourdomain.com;

    root /var/www/invoiceninja/public/;
    index index.php index.html index.htm;
    charset utf-8;
    client_max_body_size 20M;

    location / {
        try_files $uri $uri/ /index.php?$query_string;
    }

    if (!-e $request_filename) {
       rewrite ^(.+)$ /index.php?q= last;
    }

    location = /favicon.ico { access_log off; log_not_found off; }
    location = /robots.txt  { access_log off; log_not_found off; }

    access_log  /var/log/nginx/invoiceninja.access.log;
    error_log   /var/log/nginx/invoiceninja.error.log;

    location ~ \.php$ {
        fastcgi_split_path_info ^(.+\.php)(/.+)$;
        fastcgi_pass unix:/run/php/php8.0-fpm.sock;
        fastcgi_index index.php;
        include fastcgi_params;
        fastcgi_param SCRIPT_FILENAME $document_root$fastcgi_script_name;
        fastcgi_intercept_errors off;
        fastcgi_buffer_size 16k;
        fastcgi_buffers 4 16k;
    }

    location ~ /\.ht {
        deny all;
    }

    sendfile off;
}
Save and close the file. Then test Nginx configuration.
sudo nginx -tIf the test is successful, reload Nginx for the changes to take effect.
sudo systemctl reload nginxNow you can access the Invoice Ninja setup wizard page (invoice.yourdomain.com/setup). Before entering any information in the setup wizard, we need to enable HTTPS.
Step 6: Enabling HTTPS
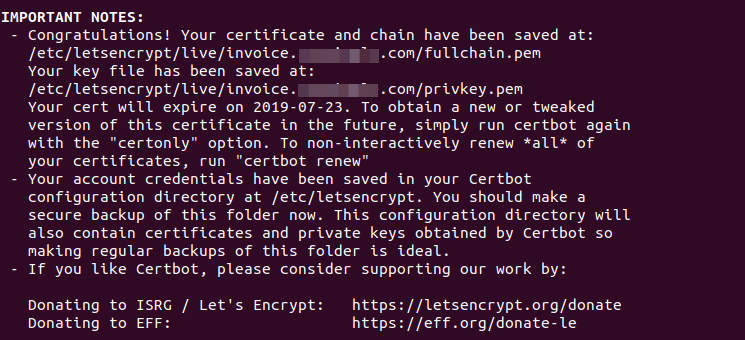
To encrypt the HTTP traffic, we can enable HTTPS by installing a free TLS certificate issued from Let’s Encrypt. Run the following command to install Let’s Encrypt client (certbot) on Ubuntu 20.04 server.
sudo apt install certbotIf you use Nginx, then you also need to install the Certbot Nginx plugin.
sudo apt install python3-certbot-nginxNext, run the following command to obtain and install TLS certificate.
sudo certbot --nginx --agree-tos --redirect --hsts --staple-ocsp --email [email protected] -d invoice.yourdomain.comIf you use Apache, install the Certbot Apache plugin.
sudo apt install python3-certbot-apacheAnd run this command to obtain and install TLS certificate.
sudo certbot --apache --agree-tos --redirect --hsts --staple-ocsp --email [email protected] -d invoice.yourdomain.comWhere
--nginx: Use the nginx plugin.--apache: Use the Apache plugin.--agree-tos: Agree to terms of service.--redirect: Force HTTPS by 301 redirect.--hsts: Add the Strict-Transport-Security header to every HTTP response. Forcing browser to always use TLS for the domain. Defends against SSL/TLS Stripping.--staple-ocsp: Enables OCSP Stapling. A valid OCSP response is stapled to the certificate that the server offers during TLS.
The certificate should now be obtained and automatically installed.
Step 7: Finish Installation with the Setup Wizard
Now go to invoice.yourdomain.com/setup to launch the web-based setup wizard. First, you need to designate a URL for your InvoiceNinja installation (https://invoice.yourdomain.com).
Then click the Test PDF button. If it’s successful, you will then enter the database connection credentials.
Click the Test connection button.
Next, Enter SMTP settings to make sure it can end invoices to your clients via email. If you use the free Sendinblue SMTP relay service, then enter your Sendinblue credentials here.
- Driver: SMTP
- Host: smtp-relay.sendinblue.com
- Username: your sendinblue username
- Password: your sendinblue password
- Port: 587
- Encryption: STARTTLS
Click the Send test email button to check if it’s working.
Finally, create an admin account.
After creating the admin user, you can log into InvoiceNinja.
Troubleshooting
If you encounter the 500 server error when using InvoiceNinja, please check the logs under /var/www/invocieninja/storage/logs/ directory. Most likely it’s a permission problem, which can be fixed with:
sudo chown www-data:www-data /var/www/invoiceninja/storage/framework/cache/data/ -RSet Up Cron Jobs
We need to set up Cron jobs to send recurring invoices and email reminders. Edit the www-data user’s crontab file.
sudo -u www-data crontab -eAdd the following lines at the end of this file.
#InvoiceNinja
0 8 * * * /usr/bin/php8.0 /var/www/invoiceninja/artisan ninja:send-recurring > /dev/null
0 8 * * * /usr/bin/php8.0 /var/www/invoiceninja/artisan ninja:send-reminders > /dev/null
* * * * * /usr/bin/php8.0 /var/www/invoiceninja/artisan schedule:run >> /dev/null 2>&1
Save and close the file. Run the following command to test if the Cron jobs will execute without errors.
sudo /usr/bin/php8.0 /var/www/invoiceninja/artisan schedule:runHow to Change SMTP Settings
If you need to change SMTP settings, you need to edit the .env file.
sudo nano /var/www/invoiceninja/.envEdit the following parameters, which is suitable for SMTP servers that require authentication.
MAIL_MAILER="smtp"
MAIL_HOST="hostname_of_smtp_server"
MAIL_PORT="587"
MAIL_USERNAME="[email protected]"
MAIL_PASSWORD="your_password"
MAIL_ENCRYPTION="tls"
MAIL_FROM_ADDRESS="[email protected]"
MAIL_FROM_NAME="Invoice"
If InvoiceNinja is installed on your mail server, or you have set up SMTP relay with Sendinblue, then you should use the following parameters.
MAIL_MAILER="sendmail"
MAIL_HOST="" MAIL_PORT=""
MAIL_USERNAME=""
MAIL_PASSWORD=""
MAIL_ENCRYPTION="none"
MAIL_FROM_ADDRESS="[email protected]"
MAIL_FROM_NAME="Invoice"
Save and close the file. Then clear the cache.
sudo -u www-data /usr/bin/php8.0 /var/www/invoiceninja/artisan optimizeIf the cache is cleared, you will see the following messages in the command output.
Configuration cache cleared! Configuration cached successfully! Route cache cleared! Routes cached successfully! Files cached successfully!
How to Upgrade Invoice Ninja
When a new version of InvoiceNinja is out, follow these steps to upgrade.
First, back up the database.
sudo mysqldump -u root invoiceninja > invoiceninja.sqlThen back up the web files.
sudo tar -cpzvf invoiceninaja.tar.gz /var/www/invoiceninja/Next, download the InvoiceNinja zip file from GitHub and replace the content in /var/www/invoice-ninja/, and install the dependencies.
cd /var/www/invoice-ninja/
sudo chown www-data:www-data /var/www/invoiceninja/ -R
sudo -u www-data composer install
Remove the .env file.
sudo rm /var/www/invoiceninja/.envNext, go to https://invoice.yourdomain.com/setup to re-run the setup wizard. The database schema will be upgraded in the process.
FAQs to Install invoiceNinja on Ubuntu 22.04 Server with Apache/Nginx
Can I self-host InvoiceNinja on my own server?
Yes, InvoiceNinja can be self-hosted on your own server, giving you full control over your data and customization options.
Is InvoiceNinja suitable for small businesses and freelancers?
Yes, InvoiceNinja is designed to meet the needs of small businesses, freelancers, and self-employed professionals.
Can I use InvoiceNinja to manage multiple currencies?
Yes, InvoiceNinja supports multiple currencies, allowing you to invoice clients in their preferred currency.
Does InvoiceNinja provide reporting and analytics features?
Yes, InvoiceNinja offers reporting and analytic features to help you track the financial health of your business.
Can I integrate InvoiceNinja with other software or services?
InvoiceNinja provides integration options with popular platforms like Stripe, PayPal, Zapier, and more.
Can I customize the look and feel of my invoices and quotes?
Yes, InvoiceNinja allows customization of invoice templates and quotes to match your branding and style.
Does InvoiceNinja provide multilingual support?
Yes, InvoiceNinja supports multiple languages, allowing you to use the application in your preferred language.
Conclusion
We hope this detailed tutorial helped you understand how to install InvoiceNinja on Ubuntu 22.04 server. To learn more about InvoiceNinja, check out the official InvoiceNinja Installation Document.
If you have any queries, please leave a comment below, and we’ll be happy to respond to them for sure.