
Choose a different version or distribution
Introduction
Before we begin talking about how to install Java on Ubuntu 20.04, let’s briefly understand - What is Java?
Java is a popular and versatile programming language widely used for developing software applications. It provides a platform-independent environment, allowing programs to run on different devices and operating systems. With its object-oriented approach, Java enables developers to create reusable code and build robust applications.
It is known for its security, performance, and scalability, making it ideal for a wide range of applications, from desktop software to web and mobile apps. Whether you're a beginner or an experienced developer, Java offers a vast array of libraries and frameworks that simplify the development process. Its wide adoption and extensive community support make Java a valuable skill in the ever-evolving tech industry.
In this tutorial, you will install OpenJDK and Oracle Java on Ubuntu 20.04. You can follow the same guidelines for other Ubuntu-based distributions, including Kubuntu, Linux Mint, and Elementary OS. We will also address some of the FAQs related to the Java installation.
Advantages of Java
- Platform Independence: Java programs can run on any device or operating system.
- Object-Oriented: Java's object-oriented approach allows for modular and reusable code.
- Security: Java's built-in security features protect against viruses and unauthorized access.
- Performance: Java's optimized compiler and runtime environment ensure efficient execution.
- Community and Resources: Java's large and active community provides extensive support, libraries, and frameworks.
Prerequisites Install Java on Ubuntu 20.04
- Sudo non-root user and a firewall
Install the default JRE/JDK
1) Use the version packages with Ubuntu for easier installation. Ubuntu 20.04 includes Open JDK 11 by default. It is an open-source variant of the JRE and JDK.
Start by installing the version, firstly you need to update the package index:
sudo apt update
2) Check if Java is already installed using the following command:
java -version
3) In case Java is not installed you'll see the following output:
Output

Command 'java' not found, but can be installed with:

sudo apt install openjdk-11-jre-headless  # version 11.0.11+9-0ubuntu2~20.04, or
sudo apt install default-jre              # version 2:1.11-72
sudo apt install openjdk-13-jre-headless  # version 13.0.7+5-0ubuntu1~20.04
sudo apt install openjdk-16-jre-headless  # version 16.0.1+9-1~20.04
sudo apt install openjdk-8-jre-headless   # version 8u292-b10-0ubuntu1~20.04
4) Now, execute the following command to install the default JRE:
sudo apt install default-jre
JRE will allow you to run almost all software based on Java.
5) Verify installation, using the following command:
java -version
6) You will get the below output:
Output

openjdk version "11.0.11" 2021-04-20
OpenJDK Runtime Environment (build 11.0.11+9-Ubuntu-0ubuntu2.20.04)
OpenJDK 64-Bit Server VM (build 11.0.11+9-Ubuntu-0ubuntu2.20.04, mixed mode, sharing))
7) In addition to JRE, you may also require JDK to run specific Java-based projects. Use the following command, to install JDK. It will also install JRE.
sudo apt install default-jdk
8) You can verify if JDK is installed, using the following command:
javac -version
Install Oracle JDK 11
Due to Oracle's license agreement with Java, it doesn't allow automatic installation through the package manager. If you want to install Oracle JDK, create an Oracle account and manually download the JDK to add a new package repository for the version you want to use. Use apt to install it with help from a third-party installation script.
Oracle's JDK version should match with the version of the installer script. To find out the version you will need, visit oracle-java11-installer page.
1) Search the package with Focal series as shown below:

2) Here the version of the script is 11.0.7, now you would need Oracle JDK 11.0.7. The version number will change depending on when you are installing the software.
3) Then visit the Downloads page and locate the version that matches the one you need.
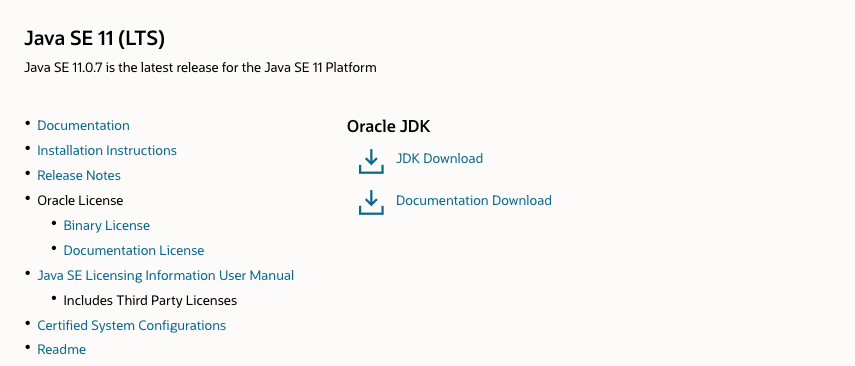
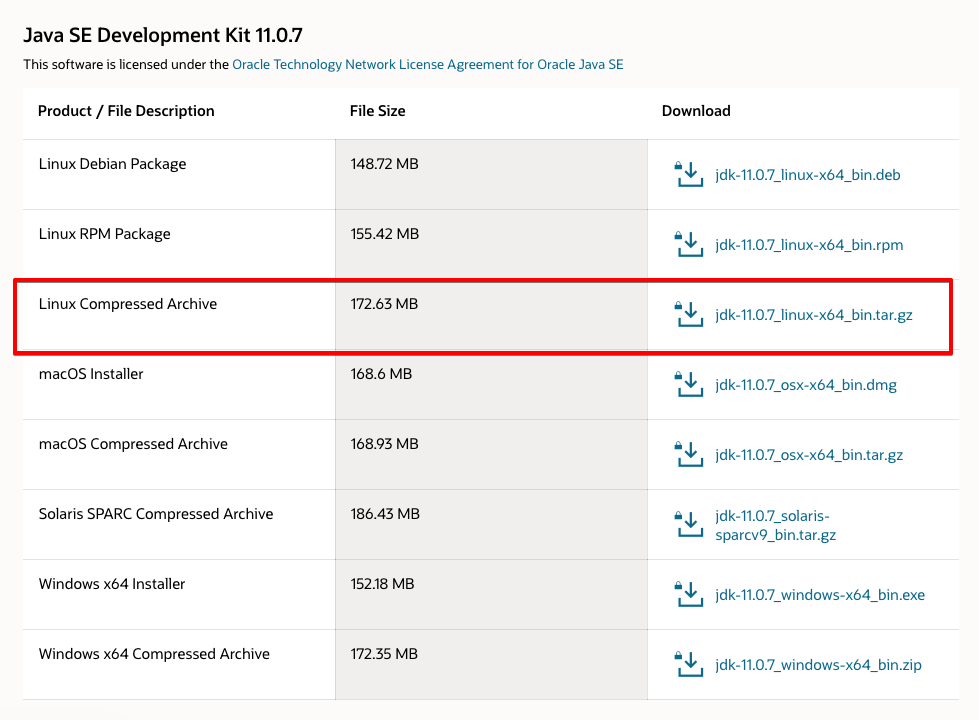
4) Now, click on JDK Download and it will take you to the screen that shows the available version. Click the .tar.gz package for Linux.
5) After that, accept Oracle's license agreement. Upload the file to your server. Use Windows Subsystem for Linux for macOS, Linux, or Windows and use scp command to transfer the file to the home directory of your user.
6) Run the following command assuming you have saved the Oracle JDK file to your local machine's Downloads folder:
scp Downloads/jdk-11.0.7_linux-x64_bin.tar.gz sammy@your_server_ip:~
7) Now, install the software-properties-common package. It will add the add-apt-repository command to your system:
sudo apt install software-properties-common
9) To proceed further, you need to import the signing key used to verify the software you are about to install:
sudo apt-key adv --keyserver keyserver.ubuntu.com --recv-keys EA8CACC073C3DB2A
10) You will the output like below:
Output

Output
gpg: key EA8CACC073C3DB2A: public key "Launchpad PPA for Linux Uprising" imported
gpg: Total number processed: 1
gpg:               imported: 1
11) Now, use add-apt-repository to add the repo to your list of package sources:
sudo add-apt-repository ppa:linuxuprising/java
You will get the following message:
Output

Oracle Java 11 (LTS) and 16 installer for Ubuntu (21.04, 20.10, 20.04, 18.04, 16.04 and 14.04), Pop!_OS, Linux Mint and Debian.

Java binaries are not hosted in this PPA due to licensing. The packages in this PPA download and install Oracle Java, so a working Internet connection is required.

The packages in this PPA are based on the WebUpd8 Oracle Java PPA packages: https://launchpad.net/~webupd8team/+archive/ubuntu/java

Created for users of https://www.linuxuprising.com/

Installation instructions (with some tips), feedback, suggestions, bug reports etc.:

. . .

Press [ENTER] to continue or Ctrl-c to cancel adding it.
12) Press ENTER to proceed with the installation. You may ignore a message about no valid OpenPGP data found.
13) Now, update your package list to make the new software available:
sudo apt update
14) Installer will now search for the Oracle JDK you downloaded in /var/cache/oracle-jdk11-installer-local. Create the directory and then move the Oracle JDK archive to this newly created directory:
sudo mkdir -p /var/cache/oracle-jdk11-installer-local/
sudo cp jdk-11.0.7_linux-x64_bin.tar.gz /var/cache/oracle-jdk11-installer-local/
15) Now, you can install the package:
sudo apt install oracle-java11-installer-local
Accept Oracle's license agreement, after which the installer will extract the Java package and install it.
Manage Java
1) On a single server you can have multiple Java Installations and you have the flexibility to configure the default version using the following command:
sudo update-alternatives --config java
2) If you have installed both the versions of Java then you will get the output like below:
Output

There are 2 choices for the alternative java (providing /usr/bin/java).

  Selection    Path                                         Priority   Status
------------------------------------------------------------
  0            /usr/lib/jvm/java-11-openjdk-amd64/bin/java   1111      auto mode
  1            /usr/lib/jvm/java-11-openjdk-amd64/bin/java   1111      manual mode
* 2            /usr/lib/jvm/java-11-oracle/bin/java          1091      manual mode

Press <enter> to keep the current choice[*], or type selection number:
3) Now, choose the number associated with the Java version to make it default. To keep the current settings, simply press ENTER.
4) You can use this method on other Java commands like javac, keytool, javadoc and jarsigner etc.
sudo update-alternatives --config javac
Set the JAVA_HOME Environment Variable
1) First step to set the environment variable is to identify where the Java is installed. Do it using the following command:
sudo update-alternatives --config java
2) After running the above command, you will get the output like below:
Output

There are 2 choices for the alternative java (providing /usr/bin/java).

  Selection    Path                                         Priority   Status
------------------------------------------------------------
  0            /usr/lib/jvm/java-11-openjdk-amd64/bin/java   1111      auto mode
  1            /usr/lib/jvm/java-11-openjdk-amd64/bin/java   1111      manual mode
* 2            /usr/lib/jvm/java-11-oracle/bin/java          1091      manual mode

Press <enter> to keep the current choice[*], or type selection number:
Installation paths are as follows:
- OpenJDK 11 is located at
/usr/lib/jvm/java-11-openjdk-amd64/bin/java. - Oracle Java is located at
/usr/lib/jvm/java-11-oracle/jre/bin/java.
3) Now, open /etc/environment using nano or your favorite text editor:
sudo nano /etc/environment
4) Add the following line at the end of the file, but do not include the bin/ portion of the path:
JAVA_HOME="/usr/lib/jvm/java-11-openjdk-amd64"
5) Editing this file will set the JAVA_HOME path for all users on your system.
6) Save the file and exit.
7) For changes to be applied, reload the file:
source /etc/environment
8) Verify that the environment variable is set:
echo $JAVA_HOME
9) You will get the path you set earlier as the output:
Output

/usr/lib/jvm/java-11-openjdk-amd64
To apply this setting, other users will have to log out and log in again.
FAQs to Install Java on Ubuntu 20.04
How can I check if Java is already installed on my Ubuntu system?
You can check if Java is installed by running the command java -version in the terminal. If Java is installed, it will display the version information; otherwise, it will prompt you to install it.
Can I install OpenJDK instead of the default JDK?
Yes, you can install OpenJDK on Ubuntu 20.04 by running the command sudo apt install openjdk-11-jdk or sudo apt install openjdk-8-jdk for OpenJDK 11 or 8, respectively.
What is the difference between JDK and JRE?
JDK (Java Development Kit) is a software development environment that includes tools for developing and compiling Java applications, while JRE (Java Runtime Environment) is required to run Java applications on a computer.
Can I install multiple versions of Java on Ubuntu 20.04?
Yes, you can install multiple versions of Java on Ubuntu 20.04. Simply install each version separately and switch between them by updating the JAVA_HOME and PATH environment variables.
How can I uninstall Java from my Ubuntu system?
To uninstall Java, you can run the command sudo apt remove default-jdk or sudo apt remove openjdk-11-jdk (replace with the appropriate package name) to remove the JDK. Additionally, you can run sudo apt autoremove to remove any unused dependencies.
Can I install Oracle JDK on Ubuntu 20.04?
Yes, you can install the Oracle JDK on Ubuntu 20.04, but it requires manual installation from the Oracle website. You need to download the JDK package, extract it, and set up the environment variables manually.
Is Java 8 available on Ubuntu 20.04?
Yes, Java 8 is available on Ubuntu 20.04. You can install it by running the command sudo apt install openjdk-8-jdk.
How can I switch between different Java versions on Ubuntu 20.04?
To switch between different Java versions on Ubuntu 20.04, you can update the JAVA_HOME and PATH environment variables to point to the desired Java installation. Make sure to update these variables accordingly in your shell configuration file (e.g., .bashrc or .zshrc).
Conclusion
We hope this detailed tutorial helped you understand how to install Java on Ubuntu 20.04.
If you have any queries, please leave a comment below, and we’ll be happy to respond to them for sure.