

Choose a different version or distribution
Introduction
Before we begin talking about how to install Jellyfin Media Server on Debian 12, let's briefly understand – What is Jellyfin Media Server?
Jellyfin Media Server is a powerful and user-friendly open-source software designed to organize and stream your media. With Jellyfin, you can effortlessly manage your movies, TV shows, music, and photos under one centralized platform. It supports a wide range of devices and media formats, enabling seamless streaming on your preferred device.
Jellyfin ensures privacy and security by providing complete control over your media collection. Download Jellyfin Media Server today and transform the way you enjoy your entertainment!
In this tutorial, you will install Jellyfin Media Server on Debian 12. We will also address a few FAQs on how to install Jellyfin Media Server on Debian 12.
Advantages of Jellyfin Media Server
- Accessibility: Jellyfin allows you to access your media library from anywhere, on any device, offering convenient streaming on-the-go.
- Customization: Enjoy a personalized media experience with Jellyfin's extensive customization options, including theme settings and subtitle support.
- Open-source: Being open-source, Jellyfin is continually evolving, with a passionate community contributing to its development and adding new features regularly.
- Privacy & Security: With Jellyfin, you have complete control over your media collection, ensuring your privacy and protecting your content from unauthorized access.
- Wide Compatibility: Jellyfin supports a vast range of devices and media formats, making it compatible with your preferred hardware and ensuring smooth streaming without any interruptions or playback issues.
Install Jellyfin Media Server on Debian 12 via APT
Step 1: Refreshing Debian System Before Jellyfin Installation
Having a fresh start guarantees the best possible compatibility with Jellyfin. As a result, updating the Debian system and bringing all packages up to date should be the first step. By doing this, the likelihood of running into compatibility problems during the installation process is reduced.
Open the terminal and run the following command:
sudo apt update && sudo apt upgrade
By using two commands at once, the system will be updated and all current packages will be refreshed.
Step 2: Install Required Jellyfin Installation Packages
Getting the packages required for a successful installation of Jellyfin is the next item on our checklist. Depending on the Debian distribution and version being used, the packages may change.
Open the terminal and execute:
sudo apt install software-properties-common apt-transport-https ca-certificates curl -y
Several important packages will be downloaded by this command:
apt-transport-httpspermits safe package retrieval over HTTPS for Debian.ca-certificateskeeps SSL certificates in order to confirm the legitimacy of the websites where downloads of packages are made.curlis a command-line utility that facilitates downloading files from the internet.
Step 3: Import Jellyfin Media Server APT Repositories
Jellyfin Media Server is not present in the repository that is default. In order to install, we must import the Jellyfin GPG key and repository. This process confirms that the Jellyfin package is authentic.
Import the GPG key first. Run the following in the terminal:
curl -fsSL https://repo.jellyfin.org/debian/jellyfin_team.gpg.key | sudo gpg --dearmor -o /usr/share/keyrings/jellyfin.gpg > /dev/null
It is necessary to add the Jellyfin repository after importing the GPG key. The stable and unstable versions are your options. The unstable version gives users access to the newest, though less tested, features, while the stable version provides a dependable, well-tested experience.
Stable Jellyfin Version, run:
echo "deb [arch=$( dpkg --print-architecture ) signed-by=/usr/share/keyrings/jellyfin.gpg] https://repo.jellyfin.org/debian $(lsb_release -cs) main" | sudo tee /etc/apt/sources.list.d/jellyfin.list
Unstable Jellyfin Version, run:
echo "deb [arch=$( dpkg --print-architecture ) signed-by=/usr/share/keyrings/jellyfin.gpg] https://repo.jellyfin.org/debian $(lsb_release -cs) unstable" | sudo tee /etc/apt/sources.list.d/jellyfin.list
Use the following commands to update your system with the recently added repository:
sudo apt update
This command will update the system's repository listing and guarantee that the Jellyfin Media Server is recognized.
Step 4: Install Jellyfin Media Server via APT Command
It's now possible to install the Jellyfin Media Server after importing the GPG key and Jellyfin repository. It is an easy process to finish with a single command:
sudo apt install jellyfin-ffmpeg5 && sudo apt install jellyfin jellyfin-server jellyfin-web
The above command instructs the system to retrieve and apply the Jellyfin package from the previously added repository. The Jellyfin service will be installed and launched automatically on your Debian system after it has been successfully executed.
Run the following command to make sure the Jellyfin service is up and running as it should:
systemctl status jellyfin
The Jellyfin service's current status can be found in the command's output. An "active" or "running" status will be indicated following a successful installation. The following commands can be used to manually start the Jellyfin service if it isn't running for whatever reason:
sudo systemctl start jellyfin
It is advised that Jellyfin be configured to launch automatically when the computer boots up for a seamless user experience. In this manner, every time you turn on your computer, your media server will be prepared.
To make the Jellyfin service run at boot, use the following command:
sudo systemctl enable jellyfin
It should now be possible to successfully install Jellyfin Media Server and configure it to launch automatically when the computer boots up. Jellyfin can now be used to efficiently and customised manage, stream, and arrange your media content.
Initial Setup of Jellyfin Media Server on Debian 12
The process of creating your own media center starts as soon as the Jellyfin Media Server is installed. You can set up the Jellyfin Media Server initially by following these instructions.
Step 1: Accessing the Jellyfin Web UI
You must first access the Jellyfin server's Web User Interface (Web UI) in order to activate it. To accomplish this, launch your favorite browser and go to your Debian server's IP address, followed by the Jellyfin port 8096 by default.
For example, you can enter the following URL in the address bar of your browser to access the Jellyfin server on the computer where it is installed:
http://127.0.0.1:8096
The Jellyfin welcome screen will appear when you press enter, indicating that the first server setup step has begun.
Step 2: Setting the Jellyfin Media Server Display Language
Selecting your preferred display language for the Jellyfin interface is the first step in setting up your Jellyfin server.
Press the "Next ->" button to move on to the next step after making your selection.

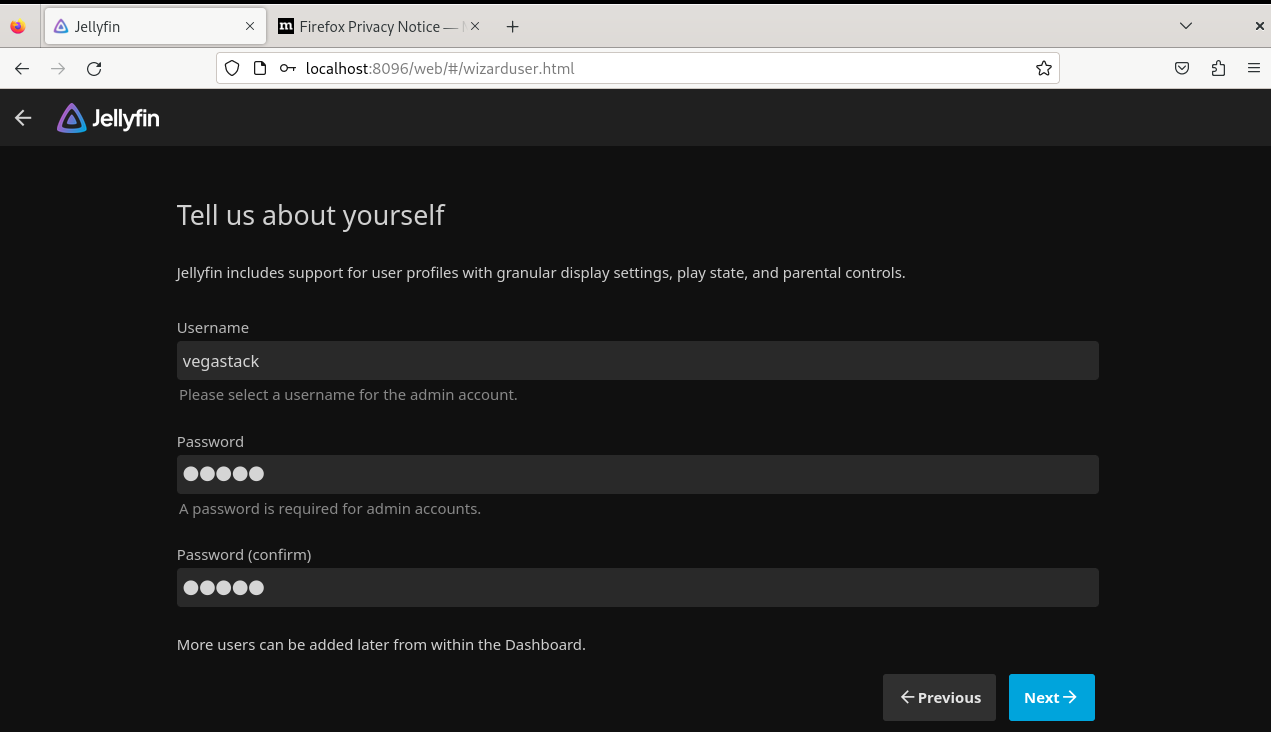
Step 3: Creating a Jellyfin Media Server Administrative Account
Afterwards, you will be directed to set up your Jellyfin account's username and password. With the administrative rights granted by this account, you can control user accounts, media libraries, and server settings on the Jellyfin server.
After entering your username and password, click "Next ->" to continue.
Step 4: Configuring Jellyfin Media Libraries
Setting up your media libraries is the fourth step in configuring a Jellyfin server. On Jellyfin, your media content is added and arranged in media libraries. You can create different libraries for different kinds of media, including music, TV series, and films.
To organize and see your media content on Jellyfin, add your media files to these libraries. The big "+" or "Add Media Library" button on the Jellyfin dashboard can be clicked to do this.

Step 5: Adding Media Content to Jellyfin Media Server
It's simple to add your media content to Jellyfin. After clicking the "Add Media Library" button, you can choose which kind of media—such as films, TV series, or music—to add. Use the instructions to add your media folder. You can also designate the media content's metadata language. Additional details like actor biographies, album artwork, and episode descriptions are provided by the metadata language.
Clicking "Next ->" will allow you to move on to the next step after adding your media libraries.

Step 6: Setting Metadata Language on Jellyfin Media Server
The next screen is the Metadata Language screen, where you can select the language you want your media content's metadata to be in. Plot summaries, reviews, and cast and crew information are just a few of the extra details that the metadata adds to your media content.

Step 7: Configuring Jellyfin Media Server Remote Access
To configure the Jellyfin server, the next step is to enable remote access. You can access your media from any location with an internet connection thanks to this feature.
To get everything ready:
- Activate remote access to your Jellyfin platform.
- Activate the port mapping automatically. By doing this, you can be sure that incoming traffic reaches your Jellyfin server properly and continues to stream.
Disable remote access if you don't need it.
Select the necessary items for your remote access configuration and click the "Next ->" button to move forward.

Step 8: Completing the Initial Setup
Now that you've got this far, all it takes is one click to complete your Jellyfin server's initial setup. The following screen will indicate that the installation process is complete and your server is prepared for use after you have finished the aforementioned steps.

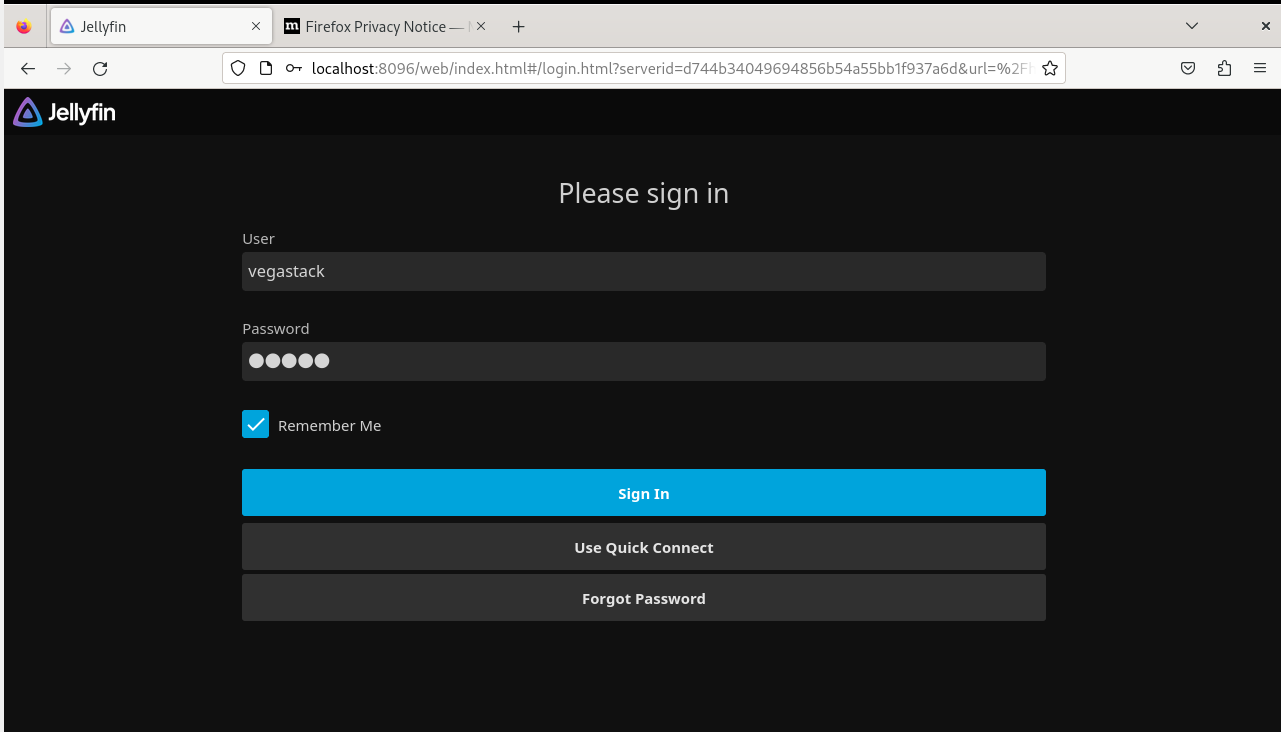
Step 9: Logging into the Jellyfin Server
It's time to log into your media server after the setup. Enter the username and password you created during the initial configuration when you navigate to the Jellyfin Web UI.
Press the "Sign in" button to enter the realm of your personal media.
Step 10: Explore the Jellyfin Media Server Dashboard
After logging into your Jellyfin server, the dashboard serves as your command center. You can control user accounts, media libraries, and server settings from this interface. You can perform the following actions from the dashboard:
- Adding More Media Content: Adding additional media content to your Jellyfin server is a continuous way to improve it. To add a particular type of media, such as music, TV series, or movies, click the "Add Media Library" button. The location of the media files, the name of the library, and any particular media type settings are among the details you'll need to supply.
- Configuring Customizations: You can alter your server's appearance and feel with Jellyfin to further improve your viewing experience. By selecting "General" or "Display" settings after clicking the "Dashboard" button, you can adjust customizations like themes, language, and metadata.
- Managing Users: You can add, remove, and change user accounts as an administrator to control who has access to your media content. Click the "Users" button on the dashboard and choose "Add User" or "Edit User" to perform these actions.

Troubleshooting: How to Reset Jellyfin Media Server Initial Setup
Sometimes you might run into problems when setting up your Jellyfin media server for the first time, or you might want to redo it for some other reason. Fortunately, the setup process resets to a fairly simple procedure. You can restart the setup process by editing the value of IsStartupWizardCompleted in the system.xml file and then restarting the Jellyfin server.
Now let's get into the detailed instructions for achieving this:
Step 1: Accessing the system.xml File
We will use the built-in Linux command-line text editor nano to access the system.xml file. Most Linux distributions come pre-installed with Nano, a user-friendly text editor. To use nano to open system.xml, enter the following command:
sudo nano /etc/jellyfin/system.xml
When you run this command, the system.xml file opens in the nano text editor, where you can edit it.
Step 2: Modifying the ‘IsStartupWizardCompleted’ Value
There is a value called IsStartupWizardCompleted in the system.xml file. Whether the setup wizard loads when you access the Jellyfin Web UI depends critically on this value. In essence, it functions as a toggle, with "true" denoting completion of the setup and "false" denoting incompleteness.
When the setup is declared finished, the value looks like this:
<IsStartupWizardCompleted>true</IsStartupWizardCompleted>
You must set this value to false in order to reset the setup procedure. To accomplish this, swap out the line for the following:
<IsStartupWizardCompleted>false</IsStartupWizardCompleted>
After you make this adjustment, the Jellyfin server is informed that the initial setup is not complete, allowing you to restart from scratch.
Step 3: Restarting the Jellyfin Server
It's imperative to make sure the system.xml modifications that have been made take effect. To accomplish this, use the following command to restart the Jellyfin server:
sudo systemctl restart jellyfin
With this command, the Jellyfin server is stopped and then restarted by the Linux system and service manager systemd. The modifications we made to system.xml are then implemented by Systemd.
Step 4: Initiating the Setup Process Again
You can now resume the setup procedure after restarting the Jellyfin server. You can accomplish this by going to http://127.0.0.1:8096 to access the Jellyfin Web UI. You can now carry out the setup procedure as though this is your first time configuring Jellyfin.
Setup Permissions for Jellyfin Media Drives on Debian 12
One important step in configuring your Debian system's Jellyfin media server is setting up the necessary permissions. Giving Jellyfin access to your media directories allows it to read and manage them.
The setfacl command will be used to change the ownership of files and directories, in contrast to the conventional Linux chown and chgrp commands. For handling intricate apps like Jellyfin, the more precise control over access permissions offered by the setfacl command is helpful.
Step 1: Installing the ACL Package
Using the setfacl command requires the Access Control List (ACL) package, which improves the permission model in Linux. You can use the apt package manager and the following command to make sure you have it installed:
sudo apt install acl -y
Installing the ACL package is done with the install acl command; the apt package manager is used to install, update, and remove software on Debian systems. The sudo prefix runs the command with superuser permissions.
Step 2: Granting Jellyfin Access to Media Directories
After making sure ACL is installed, you can allow Jellyfin to access your media directory and its subdirectories by giving it the required permissions. With the -R flag, the following command applies the permissions recursively, ensuring that all files and subdirectories inside are also updated:
sudo setfacl -R -m u:jellyfin:rx /media/mymediadrive
The path to your media directory is /media/mymediadrive. The setfacl command sets the access control list. The-R option executes the command recursively. The -m option modifies the ACL. The u:jellyfin:rx grants the user 'jellyfin' read (r) and execute (x) permissions.
Step 3: Assigning Permissions to Individual Files or Directories
The command is slightly different if you need to grant permissions to specific media directories or files.
As seen below, the -R recursive flag is not present.
sudo setfacl -m u:jellyfin:rx /media/mymediadrive/example-name-of-file-or-directory
Additional Jellyfin Media Permission Command Examples
You can change the permissions for several directories at once by listing them one after the other, with spaces between each entry:
sudo setfacl -m u:jellyfin:rx /media/mymediadrive/dir1 /media/mymediadrive/dir2 /media/mymediadrive/dir3
Alternatively, you can use the -x flag along with the user and the permission to remove a specific permission:
sudo setfacl -x u:jellyfin:r /media/mymediadrive
With this command, Jellyfin's read permission on the designated directory is removed.
In summary, the setfacl command gives you flexible control over your Jellyfin server's permissions. You can make sure that your Jellyfin server runs smoothly by correctly configuring permissions for your media directories.
Further Commands For Jellyfin Media Server on Debian 12
Let's take a closer look at how your Jellyfin media server is set up on your Debian system. This section will go over configuring the UFW firewall to control network traffic and setting up a Secure Shell (SSH) tunnel for remote access. To improve your media server's security and functionality, you must take both of these actions.
Setup SSH for Remote Access
A network protocol called SSH, or Secure Shell, offers a safe method of connecting to a remote computer. It's useful if you want to use a different location to access your Debian Jellyfin media server.
Step 1: Install SSH Server for Jellyfin Access
The first step to remote access on a Debian computer is to install an SSH server. Use your terminal to run the following command to install the openssh-server package:
sudo apt install openssh-server
To run the command with superuser permissions in this case, use the sudo command. The package we are installing is openssh-server, and the package manager on Debian for managing software installations is the apt install command.
Step 2: Connecting to Jellyfin Media Server via SSH Tunnel
You can establish a remote connection to your Jellyfin media server once the SSH server has been installed successfully. You can use the IP address of your server to establish an SSH tunnel. In the following command, substitute your real server's IP address for {server-ip-address}:
ssh {server-ip-address} -L 8096:localhost:8096
A secure connection to the server is established by the SSH command, and the -L flag binds a local port (the first 8096) to the IP address and port on the remote server (localhost:8096). Put differently, it forwards connections made to the remote server from your local computer.
Step 3: Accessing Jellyfin Media Server through SSH Tunnel
Now that the SSH tunnel has been established, open your web browser and use this URL to access the Jellyfin Media Server:
http://localhost:8096/web/index.html#/wizardstart.html
The HTTP requests are redirected to the remote server via the http://localhost:8096/webaddress. After completing the initial setup, go to https://{server-ip-address}:8096 and replace {server-ip-address} with the IP address of your remote server to access your Jellyfin media server.
Installation and Configuration of the UFW Firewall
Uncomplicated Firewall, or UFW, is an intuitive front-end for iptables firewall rule management. It is necessary for managing network traffic on your Debian server, both inbound and outbound.
Step 1: Enabling the UFW Firewall
In Debian, UFW is not enabled by default; you will need to manually enable it. In your terminal, type the following command to activate the UFW firewall:
sudo apt install ufw
sudo ufw enable
Step 2: Allowing Incoming Traffic on Port 8096
Once the UFW firewall is up and running, you need to open port 8096 to incoming traffic in order for the Jellyfin Media Server to work properly. The command to open port 8096 is as follows:
sudo ufw allow 8096
By allowing incoming traffic to flow through port 8096, this instruction guarantees uninterrupted operation of the Jellyfin Media Server.
Setup Jellyfin Apache or Nginx as a Reverse Proxy on Debian 12
Configuring a Reverse Proxy with Apache for Jellyfin
The best way to make your Jellyfin Media Server accessible from a distance is usually to use a reverse proxy. Let's look at how to configure Apache on your Debian system to act as a reverse proxy.
Step 1: Installing Apache Web Server
It is essential that you install the Apache web server on your Debian system. To do this, run the following command:
sudo apt install apache2 -y
Apache should be running by default. If it's not, though, you can manually start it with the following command:
sudo systemctl start apache2
Step 2: Enabling Necessary Apache Modules
The necessary modules should then be enabled. To do this, run the following command:
sudo a2enmod proxy proxy_http headers proxy_wstunnel
Step 3: Creating a Virtual Host Configuration File
Now, use the following command to create a new Jellyfin virtual host configuration file:
sudo nano /etc/apache2/sites-available/jellyfin.conf
This will allow you to use the nano text editor to edit the configuration of your virtual host.
Step 4: Setting Up a Subdomain and Configuring the Virtual Host
You need an active domain name in order to set up a subdomain. Purchases of domain names are possible through a variety of online services such as Cloudflare and NameCheap. After setting up your subdomain, you can set up your virtual host on Apache. You should add the following configuration to your newly created jellyfin.conf file:
<VirtualHost *:80>
    ServerName jellyfin.example.com

    Redirect permanent / https://jellyfin.example.com

    ErrorLog /var/log/apache2/jellyfin-error.log
    CustomLog /var/log/apache2/jellyfin-access.log combined
</VirtualHost>

<IfModule mod_ssl.c>
<VirtualHost *:443>
    ServerName jellyfin.example.com

    DocumentRoot /var/www/html/jellyfin/public_html

    ProxyPreserveHost On

    ProxyPass "/socket" "ws://localhost:8096/socket"
    ProxyPassReverse "/socket" "ws://localhost:8096/socket"

    ProxyPass "/" "http://localhost:8096/"
    ProxyPassReverse "/" "http://localhost:8096/"

    SSLEngine on
    SSLCertificateFile /etc/letsencrypt/live/jellyfin.example.com/fullchain.pem
    SSLCertificateKeyFile /etc/letsencrypt/live/jellyfin.example.com/privkey.pem
    Protocols h2 http/1.1

    SSLCipherSuite HIGH:RC4-SHA:AES128-SHA:!aNULL:!MD5
    SSLHonorCipherOrder on

    SSLProtocol all -SSLv2 -SSLv3 -TLSv1 -TLSv1.1

    ErrorLog /var/log/apache2/jellyfin-error.log
    CustomLog /var/log/apache2/jellyfin-access.log combined
</VirtualHost>
</IfModule>
After making changes, hit CTRL+O to save the file and CTRL+X to close it.
Step 5: Validating the Apache Configuration
It is important to confirm that your Apache configuration is correct before turning on the virtual host. Run the following command to carry out a practice run:
You must run the following command to enable the module in order to use Apache as a reverse proxy:
sudo apache2ctl configtest
Step 6: Enabling the Virtual Host
Now that you have verified that the configuration is error-free, it is time to enable the virtual host. You can accomplish this by giving the following command:
sudo a2ensite jellyfin.conf
By establishing a symbolic link between the sites-available and sites-enabled directories, this command makes it possible for Apache to serve the virtual host.
Step 7: Restarting Apache
Restarting the Apache service is the last step to make the changes take effect after the virtual host has been enabled. To do this, use the following command:
sudo systemctl restart apache2
This command loads the updated configuration by stopping the Apache service, applying the new virtual host settings, and then restarting the service.
Setting Up Nginx as a Reverse Proxy for Your Jellyfin Media Server
There are multiple steps involved in configuring a reverse proxy for your Jellyfin media server using Nginx. Here, we delve deeply into the procedure, dissecting it into digestible chunks to guarantee understanding.
High-performance web servers like Nginx are valued for their dependability, extensive feature set, and minimal resource usage. To access your media server remotely, set it up as a reverse proxy for Jellyfin.
Step 1: Installing Nginx
Start by using the following command to install Nginx:
sudo apt install nginx
This command uses the apt package management system to install Nginx. By raising the permissions, sudo guarantees that the command is run with administrator privileges.
Step 2: Starting the Nginx Service
The following command can be used to launch the Nginx service after it has been installed:
sudo systemctl start nginx
With the help of the command-line tool systemctl, you can manage the systemd system and service manager, which look after and manage the Debian operating system. The Nginx service is started with the start command.
Step 3: Ensuring Nginx is Enabled
Run the following command to confirm that Nginx launches automatically upon boot:
sudo systemctl enable nginx
If everything is done right, the system should make sure that Nginx is enabled at boot and synchronize the state of the Nginx service with the SysV service script.
Step 4: Checking the Status of Nginx
To verify that Nginx is operating as intended, run the following command:
systemctl status nginx
A snapshot of the Nginx service's current state, including whether or not it is running, can be obtained with the status command.
Step 5: Configuring Nginx as a Reverse Proxy
After Nginx has been started, open /etc/nginx/conf.d/jellyfin.conf and create a new server block file. You set the parameters for your reverse proxy in this configuration file.
This file can be created and edited with a text editor like nano. To open the file in Nano, use the following command:
sudo nano /etc/nginx/conf.d/jellyfin.conf
Step 6: Setting Up a Server Block File
In Nginx, a server block file describes a server and its settings. When configuring a server block file, the following are the essential components to take into account:
- The
listendirective: Determines the port and IP address that Nginx listens on. Port 80 is utilized in this instance. - The
server_namedirective: specifies the domain name or names to which Nginx will reply. Changejellyfin.example.comto the name of your domain. - The
access_loganderror_logdirectives: Establish where the error and access logs will be kept. - The
locationdirectives: Specify how incoming requests should be handled by Nginx. They set up theproxy_passdirective, which routes requests to Jellyfin from Nginx.
This is an illustration of how the server block file could appear:
server {
    listen 80;
    server_name jellyfin.example.com;

    access_log /var/log/nginx/jellyfin.access;
    error_log /var/log/nginx/jellyfin.error;

    set $jellyfin jellyfin;
    resolver 127.0.0.1 valid=30;

    # Security / XSS Mitigation Headers
    add_header X-Frame-Options "SAMEORIGIN";
    add_header X-XSS-Protection "1; mode=block";
    add_header X-Content-Type-Options "nosniff";

    location = / {
        return 302 https://$host/web/;
    }

    location / {
        # Proxy main Jellyfin traffic
        proxy_pass http://$jellyfin:8096;
        proxy_set_header Host $host;
        proxy_set_header X-Real-IP $remote_addr;
        proxy_set_header X-Forwarded-For $proxy_add_x_forwarded_for;
        proxy_set_header X-Forwarded-Proto $scheme;
        proxy_set_header X-Forwarded-Protocol $scheme;
        proxy_set_header X-Forwarded-Host $http_host;

        # Disable buffering when the nginx proxy gets very resource heavy upon streaming
        proxy_buffering off;
    }

    location = /web/ {
        # Proxy main Jellyfin traffic
        proxy_pass http://$jellyfin:8096/web/index.html;
        proxy_set_header Host $host;
        proxy_set_header X-Real-IP $remote_addr;
        proxy_set_header X-Forwarded-For $proxy_add_x_forwarded_for;
        proxy_set_header X-Forwarded-Proto $scheme;
        proxy_set_header X-Forwarded-Protocol $scheme;
        proxy_set_header X-Forwarded-Host $http_host;
    }

    location /socket {
        # Proxy Jellyfin Websockets traffic
        proxy_pass http://$jellyfin:8096/socket;
        proxy_http_version 1.1;
        proxy_set_header Upgrade $http_upgrade;
        proxy_set_header Connection "upgrade";
        proxy_set_header Host $host;
        proxy_set_header X-Real-IP $remote_addr;
        proxy_set_header X-Forwarded-For $proxy_add_x_forwarded_for;
        proxy_set_header X-Forwarded-Proto $scheme;
        proxy_set_header X-Forwarded-Protocol $scheme;
        proxy_set_header X-Forwarded-Host $http_host;
    }
}
Use CTRL+O to save this file, and CTRL+X to close the nano editor. By acting as a reverse proxy, the directives in the server block file above assist Nginx in determining how to send incoming requests to Jellyfin.
Step 7: Verifying Your Nginx Configuration
It is crucial to confirm that your Nginx configuration is error-free before moving further. To achieve this, run a dry run with the following command:
sudo nginx -t
This command's -t option checks the configuration file for problems such as syntactic errors. The output should verify that the configuration file is correct and the test is successful if everything is in order.
Step 8: Reloading the Nginx Service
To make the changes you've made to Nginx effective, you'll need to reload the service. You can do this by running the following command:
sudo systemctl reload nginx
Step 9: Accessing Your Jellyfin Media Server
You are able to remotely access your Jellyfin Media Server once Nginx has been configured as a reverse proxy for Jellyfin. Make sure your DNS records and domain point to the IP address of your server first.
Once the domain and DNS are properly configured, go to jellyfin.example.com, or the address you entered in the server block, to access the Jellyfin Media Server. Your media library is easily accessible thanks to Nginx, which routes incoming requests to Jellyfin's online interface.
Step 10: Secure Your Server with Let’s Encrypt SSL Free Certificate
Adding an SSL (Secure Sockets Layer) certificate to your server is a crucial step in protecting the confidentiality and integrity of your data. By enabling an encrypted connection between the client and the server, SSL certificates prevent sensitive data from being intercepted while it is being transferred. Let's Encrypt makes server security easy and accessible by offering free SSL certificates.
Understanding Certbot and Let’s Encrypt
Let's Encrypt automates the process of obtaining and renewing SSL certificates by using agent software. One such agent is the Electronic Frontier Foundation's Certbot, an open-source program. Certbot sets up your web server to use SSL certificates and makes the process of issuing and renewing them easier.
You need to install a specific Certbot package based on the web server software you use. You will need python3-certbot-apache if your server is running Apache, and python3-certbot-nginx if it is running Nginx.
Installing Certbot for Apache:
The Certbot Apache package can be installed with the following command:
sudo apt install python3-certbot-apache
Installing Certbot for Nginx:
As an alternative, you can install the Certbot Nginx package using the following command if you're running a Nginx server:
sudo apt install python3-certbot-nginx
Running Certbot to Obtain a Let’s Encrypt SSL Certificate
You can use Certbot to generate and install an SSL certificate after installing the necessary Certbot package. You will need to use the --apache or --nginx option to specify the web server software that is being used.
Other options like --agree-tos, --redirect, --hsts, and --staple-ocspare also accepted by the Certbot command. These settings add a Strict-Transport-Security header, enable OCSP Stapling, set up 301 redirects, and accept the terms of service to Certbot, all of which help make the setup more secure.
Don't forget to enter your email address and domain name in place of the placeholders in the commands below.
Use this command to start an Apache server if you are:
sudo certbot --apache --agree-tos --redirect --hsts --staple-ocsp --email [email protected] -d yourdomain.com
Use this command to start a Nginx server:
sudo certbot --nginx --agree-tos --redirect --hsts --staple-ocsp --email [email protected] -d yourdomain.com
Your server's connection will be secure and your website will be available via HTTPS after Certbot has created an SSL certificate and set your server to use it.
Automating SSL Certificate Renewal with Cron
Let's Encrypt SSL certificates are valid for 90 days by default. Automated renewal processes should be set up to prevent service interruptions. The command to renew certificates that Certbot offers can be set up to run on a regular basis using cron, a job scheduler found in operating systems similar to Unix.
Testing Certificate Renewal:
Do a dry run to make sure the renewal procedure functions properly before setting a time for the certificate renewal:
sudo certbot renew --dry-run
Scheduling Certificate Renewal:
Certificate renewals can be scheduled if the dry run goes well. Use the following command to open the crontab file in edit mode:
sudo crontab -e
Then, add the next line to the file's end to plan a daily check for the renewal of the certificate at 2:30 AM:
30 2 * * * /usr/bin/certbot renew --quiet
You can set up an automated process where the cron runs a daily check for required certificate renewals by saving and exiting the file. Unless an error occurs, the --quiet option guarantees that cron executes this task silently.
By following these procedures, you've successfully implemented Let's Encrypt SSL certificates and improved the security of your server. Additionally, you've automated their renewal procedure, guaranteeing that your server and its clients will always have an encrypted connection.
Additional Commands For Jellyfin Media Server on Debian 12
Maintenance done correctly is essential. when working with server-hosted software. Regular updates and occasionally the removal of software are examples of maintenance. This section describes how to use APT, the Advanced Packaging Tool, which is necessary for managing software on Debian-based systems, to update and uninstall the Jellyfin Media Server from your Debian system.
Update Jellyfin Media Server on Debian
It's crucial to maintain your Jellyfin Media Server updated if you want to take advantage of the newest features, security patches, and bug fixes. Jellyfin's updates can be managed via APT because it comes packaged as a regular Debian package.
Checking for Available Updates
First, add the most recent details about available packages and their versions to your local package index. During this process, your Debian system's configured remote repositories are queried by the APT tool to determine whether the installed packages have updated versions.
The package index can be updated by running the following command:
sudo apt update
Upgrade Jellyfin Media Server
Use the apt upgrade command to update the package if the apt update command suggests that a more recent version of Jellyfin is available:
sudo apt upgrade
All of your system's upgradeable packages are updated with the apt upgrade command. It intelligently manages dependencies to maintain system consistency.
Remove Jellyfin Media Server From Debian
There may be times when your Debian system can live without the Jellyfin Media Server. Then you are able to uninstall it.
Uninstalling Jellyfin
To remove Jellyfin, use the command below:
sudo apt remove jellyfin
With this command, you can reinstall Jellyfin in the future without losing your settings because APT is instructed to remove the package from the system while preserving the configuration files.
Removing the Jellyfin Repository
It is advised to delete the Jellyfin repository from your computer in order to stop updates in the future and unintentional reinstallations of Jellyfin. The directory located at /etc/apt/sources.list.d/ contains the repository configuration for Jellyfin.
To remove the Jellyfin repository, run the following command:
sudo rm /etc/apt/sources.list.d/jellyfin.list
Your system won't have any more information about the Jellyfin repository after executing this command. As a result, in subsequent update checks, it will not look for or retrieve updates for Jellyfin.
FAQs to Install Jellyfin Media Server on Debian 12
What are the system requirements for Jellyfin Media Server on Debian 12?
Jellyfin requires a 64-bit processor, minimum 2GB of RAM, and sufficient storage to accommodate your media library.
Can I install Jellyfin on a headless server?
Yes, Jellyfin can be installed on a headless server, allowing you to manage and stream your media remotely.
How can I access Jellyfin Media Server remotely?
After installation, you can access Jellyfin remotely by opening the server's IP address in a web browser on any device connected to the same network.
Does Jellyfin support transcoding?
Yes, Jellyfin offers transcoding capabilities to ensure seamless streaming on devices that may not support certain media formats directly.
Can I use Jellyfin with multiple users?
Absolutely! Jellyfin allows multiple users to create their own accounts, each with personalized access to the media library.
Is it possible to add metadata and subtitles to media files in Jellyfin?
Yes, Jellyfin fetches metadata and subtitles automatically for your media library, ensuring a rich viewing experience.
Are there mobile apps available for Jellyfin?
Yes, Jellyfin offers mobile apps for iOS and Android, allowing you to access your media library on the go.
Conclusion
We hope this tutorial helped you understand how to install Jellyfin Media Server on Debian 12.
If you have any queries, please leave a comment below, and we’ll be happy to respond to them for sure.