
Choose a different version or distribution
Introduction
Before we begin talking about how to install Joplin on Debian 12, let's briefly understand – What is Joplin?
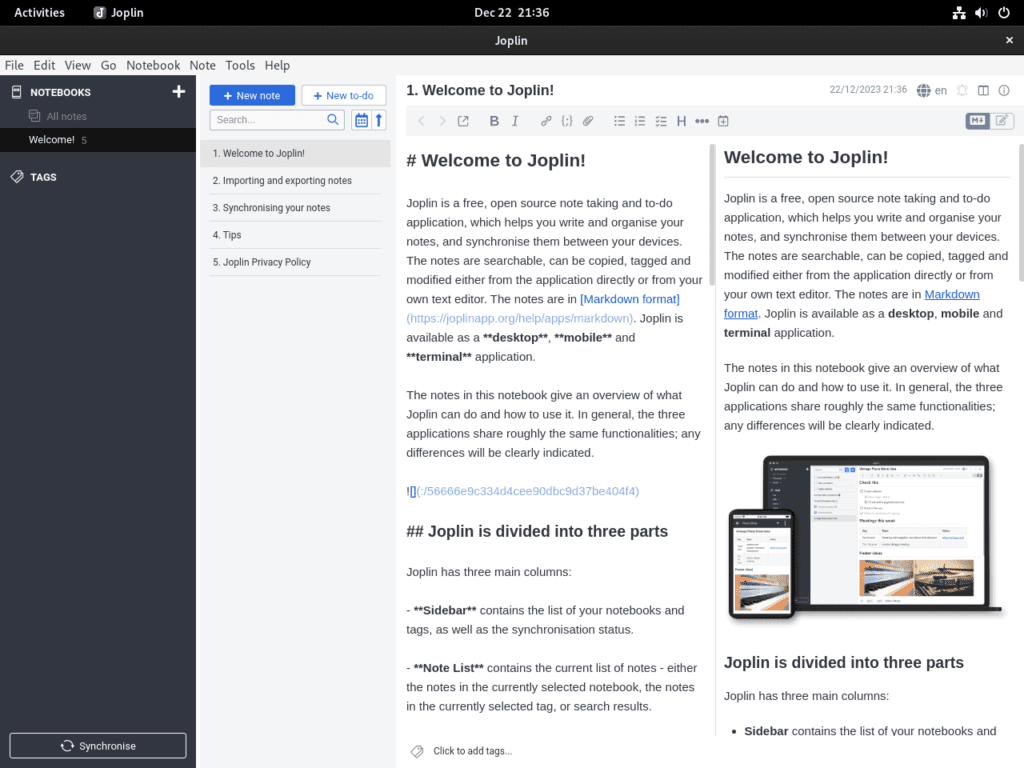
Joplin, a powerful note-taking app, offers a seamless experience across various platforms. It enables users to create, organize, and sync notes effortlessly. This open-source software prioritizes privacy and security while providing features like markdown support, tags, to-do lists, and attachments.
With Joplin, accessing and managing notes becomes a breeze. Experience productivity at its best with Joplin's user-friendly interface and diverse functionality.
In this tutorial, you will install Joplin on Debian 12. We will also address a few FAQs on how to install Joplin on Debian 12.
Advantages of Joplin
- Cross-platform: Joplin seamlessly syncs notes across devices and operating systems for enhanced productivity.
- Privacy-focused: Joplin prioritizes data privacy and security, ensuring your information remains secure.
- Markdown support: Write, format, and organize notes using markdown language for a clean and efficient note-taking experience.
- Tagging and organization: Easily categorize and search notes using tags, making it simple to stay organized.
- Attachments and to-do lists: Joplin allows you to add attachments to your notes and create to-do lists, bringing more versatility to your note-taking process.
Install Joplin on Debian 12 via Joplin
Step 1: Update Your Debian System
It is imperative that you update your Debian system prior to beginning the Joplin installation. By ensuring that all packages are current, this lowers the possibility of running into compatibility or conflicting problems.
Use the following commands in the terminal to update your system:
sudo apt update && sudo apt upgrade
sudo apt update: Provides the most recent details on available updates by refreshing the system's package database.sudo apt upgrade: Brings every installed package up to date with the latest version.
Step 2: Download and Execute Joplin’s Installation Script
Joplin is not available on Debian's default repositories, in contrast to many other applications. But the Joplin team provides an easier way to install it with a bash script. You can run this script straight from the terminal by downloading it from GitHub.
To download and run the Joplin installation script, run this command:
wget -O - https://raw.githubusercontent.com/laurent22/joplin/dev/Joplin_install_and_update.sh | bash --allow-root
Breaking Down the Command:
wget: An internet file downloader on a command-line tool.-O -: Instructs wget to send the file it has downloaded to standard output on the terminal.https://raw.githubusercontent.com/laurent22/joplin/dev/Joplin_install_and_update.sh: The direct URL for the script used to install Joplin.|: The output of the previous command can be passed to another command using the pipe symbol.bash: Runs the installation script.
Install Joplin on Debian 12 via Flatpak and Flathub
Step 1: Enable Flathub on Your Debian System
One essential resource for distributing apps via Flatpak is Flathub. Use the following command to add Flathub to your Debian Flatpak environment:
sudo flatpak remote-add --if-not-exists flathub https://flathub.org/repo/flathub.flatpakrepo
By using this command, Flathub is guaranteed to be acknowledged as a reliable source for Flatpak apps. As a precaution, the--if-not-exists option prevents Flathub from being added again if it already is in your system, thereby preventing duplicate entries.
Step 2: Install Joplin via Flatpak
Now that Flathub is enabled, Joplin can be installed. The installation is started with the following command:
flatpak install flathub net.cozic.joplin_desktop -y
Using this command ensures that the installation of Joplin on your Debian system goes more smoothly by retrieving it from the Flathub repository. In Flathub, Joplin is uniquely represented by the application identifier net.cozic.joplin_desktop, which makes installation easier.
Launching Joplin on Debian 12
CLI Commands to Launch Joplin
Launching Joplin from the terminal requires a different command, depending on which installation method you chose. The precise instructions for each method are as follows:
Bash Script Launch Method
Making the Joplin AppImage Executable
Make sure the Joplin AppImage is executable before attempting to run Joplin from any user account. This is an important step because it gives the permissions needed to run the application. Using the chmod command in your terminal, you can accomplish this:
chmod +x /home/$USER/.joplin/Joplin.AppImage
The Joplin AppImage file, which is housed in the user's home folder's .joplin directory, has its permissions changed by this command. This command can be customized for any user on the system because the $USER variable dynamically displays the username of the current user.
Creating a Symbolic Link for Easy Access
Making the AppImage executable is the first step; the next is to add a symbolic link to a directory in the system PATH. This lets you use a single command to start Joplin, no matter what directory you are currently in on the terminal. Serving as a shortcut to the real AppImage file, the symbolic link, run the following command to establish this connection:
sudo ln -s /home/$USER/.joplin/Joplin.AppImage /usr/local/bin/joplin
By putting the symbolic link in /usr/local/bin, which is normally included in the PATH of the system, you can use the terminal to type joplin to start Joplin.
joplin
Flatpak Launch Method
To launch Joplin, use a slightly different command if your installation was finished using Flatpak:
flatpak run net.cozic.joplin_desktop
flatpak run: Gives Flatpak instructions on how to run a particular application.net.cozic.joplin_desktop: The Flatpak system's unique Joplin identifier.
With the help of this command, you can use Joplin's extensive note-taking and organizing features.
GUI Launch Method
Joplin is easy to launch and doesn't require terminal interaction for users who prefer a graphical user interface:
- Navigate to the 'Show Applications' icon, which is normally found in the Debian desktop environment's lower left corner.
- Input "Joplin" into the search field. As you type, the Joplin application icon will show up.
- To launch the application, click the Joplin icon.
First-Time Tips with Joplin on Debian 12
After installing Joplin on Debian, you can now use the following first-time user tips to get the program up and running:
General Tips for New Joplin Users on Debian
- Explore Notebooks and Notes: Learn how to write in notebooks and how to arrange notes. Try choosing
File > New notebookandFile > New noteto start fresh notebook and note creation. - Markdown Basics: Joplin allows you to format notes in Markdown. Try enhancing your notes with some Markdown syntax experiments. Use
*for bullet points,#for headings, and**text**for bold text, for instance. - Keyboard Shortcuts: Using keyboard shortcuts will help you work more quickly. To create a new note, press
Ctrl + N, and to save your current note, pressCtrl + S.
Customizing Joplin on Debian
- Themes and Appearance: Make Joplin seem and feel unique. To change the editor layout or select between the Light and Dark themes, go to
Tools > Options > Appearance. - Plugins: Plugins can be used to improve Joplin's functionality. To explore and install plugins for encryption, web clipping, and other features, go to
Tools > Options > Plugins. - Synchronization Settings: Configure synchronization so that your notes are updated on all of your devices. Go to
Tools > Options > Synchronizationand select Dropbox or Nextcloud as your sync destination.
Other Joplin Helpful Tips on Debian
- Search Functionality: Use the search function to locate notes quickly. With Joplin's robust search, you can narrow results by notebook, tags, or particular keywords.
- Attachments and Images: To make your notes more engaging, include attachments or pictures. You can use the attachment button or drag and drop files straight into a note.
- Tagging System: Use tags to efficiently arrange your notes. Choose
Tools > Tagsto create tags, then attach them to notes so they can be easily retrieved. - Export and Import Notes: Notes can be exported from Joplin in a number of formats. To import notes from other applications, select
File > Import, or selectFile > Exportto backup your notes.
You should have no trouble starting to use Joplin on Debian with these tips. You'll find more ways to customize the app to suit your note-taking needs as you get more familiar with it.
Managing Joplin on Debian 12
Updating Joplin on Debian
Joplin must be updated in order to guarantee the best possible security and functionality. The update process differs based on whether Flatpak or Joplin Bash Script is used for installation.
Bash Script Update Method
If the Joplin bash script was used to install Joplin, you might want to think about croning updates. Joplin stays up to date without the need for human intervention thanks to this automated method.
Start by using the following to access your crontab file.
crontab -e
Next, include the following line to update Joplin on each system startup:
@reboot bash /path/to/your/joplin_update_script.sh
The path to your Joplin update script should be replaced with /path/to/your/joplin_update_script.sh.
Flatpak Command Update Method
It's easy to update Joplin installed using Flatpak. Use the following to update all Flatpak apps, including Joplin:
flatpak update
In order to specifically update Joplin, run:
flatpak update net.cozic.joplin_desktop
Removing Joplin from Debian
It may be necessary for you to remove Joplin in some circumstances. These are the instructions for installing Flatpak and using the bash script installation method.
Joplin Manual Remove Method
Delete the Joplin directory in order to uninstall Joplin using the bash script:
rm -rf ~/.joplin
rm -rf ~/.config/*Joplin*
rm -rf ~/.config/*joplin*
The Joplin directory and all of its contents will be deleted by running this command.
Flatpak Command Remove Method
To uninstall Joplin that was installed via Flatpak, run:
flatpak uninstall net.cozic.joplin_desktop
With this command, you can successfully remove Joplin from your Debian system.
FAQs to Install Joplin on Debian 12
What are the system requirements for installing Joplin on Debian 12?
Joplin has modest system requirements: Debian 12 with a compatible processor, sufficient memory, and available storage space.
Can I sync my notes across devices after installing Joplin on Debian 12?
Yes, Joplin offers seamless synchronization across various devices and platforms, ensuring your notes are always up-to-date.
Is Joplin compatible with cloud storage services like Dropbox or Nextcloud?
Yes, Joplin supports integration with popular cloud storage services, including Dropbox, Nextcloud, and more.
Does Joplin provide encryption for my notes on Debian 12?
Yes, Joplin offers end-to-end encryption, allowing you to keep your notes secure on Debian 12.
Can I import my existing notes into Joplin on Debian 12?
Absolutely, Joplin provides an import feature to bring in notes from various formats and applications, making migration hassle-free.
Are there any plugins or extensions available for Joplin on Debian 12?
Yes, Joplin supports plugins and extensions, expanding its functionality and allowing users to customize their note-taking experience.
How frequently is Joplin updated on Debian 12?
Joplin has an active development community, ensuring regular updates and bug fixes to enhance performance and provide new features.
Conclusion
We hope this tutorial helped you understand how to install Joplin on Debian 12.
If you have any queries, please leave a comment below, and we’ll be happy to respond to them for sure.