

Choose a different version or distribution
Introduction
Before we begin talking about how to install Jupyter Notebook on Debian 12, let's briefly understand – What is Jupyter Notebook?
Jupyter Notebook is an open-source web application that allows you to create and share documents containing live code, visualizations, and explanatory text. It provides an interactive environment that supports multiple programming languages, making it a popular tool among data scientists and researchers.
With Jupyter Notebook, you can explore, analyze, and present data in a collaborative and efficient manner. Its versatility and user-friendly interface make it an essential tool in the field of data science and coding. Start using Jupyter Notebook today to enhance your coding experience and data analysis capabilities.
In this tutorial, you will install Jupyter Notebook on Debian 12. We will also address a few FAQs on how to install Jupyter Notebook on Debian 12.
Advantages of Jupyter Notebook
- Interactivity: Jupyter Notebook allows for real-time code execution, enabling interactive data exploration and analysis.
- Collaboration: Multiple users can work together on a notebook, facilitating seamless collaboration and knowledge sharing.
- Visualization: It supports rich media integration, making it easy to create and display interactive visualizations within the notebook.
- Code Modularity: Jupyter Notebook promotes code reusability by allowing users to organize code into cells, making it easier for debugging and maintenance.
- Language Support: It supports multiple programming languages, including Python, R, and Julia, providing flexibility for different computational tasks.
Setup Python for Jupyter on Debian 12
Step 1: Refreshing Your Debian System Packages
It is essential to begin by updating your system's package repositories, just like you would with any other system upgrade or application installation. Type this command into a terminal window:
sudo apt update
sudo apt upgrade
With the help of these commands, you can make sure that your system's package repositories are up-to-date and ready for a seamless Python 3 installation.
Step 2: Install Python 3 for Jupyter on Debian
Installing Python 3 is the next step once your system packages have been updated. The ease of use and simplicity of the process can be attributed to Debian's aptitude (apt) package manager.
To install Python 3, type the following command into your terminal window:
sudo apt install python3 python3-dev python3-venv python3-pip
This command prompts your computer to install Python 3, which includes the virtual environment package (python3-venv) and its development files (python3-dev).
Step 3: Creating a Virtual Environment on Debian for Jupyter
It has become necessary to use virtual environments for package installation through Pip with the latest versions of Debian, such as Debian 12 Bookworm. That's why setting up your virtual environment is so important.
Let's use Python 3's venv module to build our virtual environment now. The following command can be entered into the terminal to accomplish this:
python3 -m venv myenv
The virtual environment name, myenv, is used in this command. You are welcome to replace it with a name of your choosing.
Recall that the foundation of Python programming is the creation and management of virtual environments. It makes it possible to create segregated areas where different projects and their dependencies can coexist peacefully. Code deployments become cleaner and more dependable as a result of this best practice, which dramatically lowers the likelihood of version conflicts.
Install Jupyter Notebook on Debian 12
Step 1: Enabling the Virtual Environment for Jupyter Installation on Debian
Before proceeding with the installation of the Jupyter Notebook, we must first enable the virtual environment that we previously created. This is an easy process that can be completed with the following command:
source myenv/bin/activate
The myenv virtual environment will become active upon executing this command. If you had a different name for your virtual environment, don't forget to replace myenv with the real name.
Step 2: Check for Upgrades with Python Pip Before Jupyter Installation on Debian
Using the most recent version of your tools is always advantageous, especially considering how quickly technology is developing. Pip needs to be updated to the most recent version as a result. To do this, use the following command:
pip install --upgrade pip
By using this command, you can take advantage of the newest features and enhancements available in Pip and make sure your version is updated to the most recent one.
Step 3: Install Jupyter Notebook via Pip on Debian
Now that we have an updated version of Pip, we can install Jupyter Notebook. You may create and share documents with live code, equations, graphics, and narrative text using the free and open-source web tool Jupyter Notebook. It is extensively utilized in a variety of fields, including machine learning, statistical modeling, data visualization, numerical simulation, and data cleansing and transformation.
The command to install the Jupyter Notebook is as follows:
pip install jupyter
This command tells Pip to set up your system for the Jupyter Notebook.
Step 4: Launching Jupyter Notebook on Debian
Jupyter Notebook can now be launched with the following easy command once it has been installed:
jupyter notebook
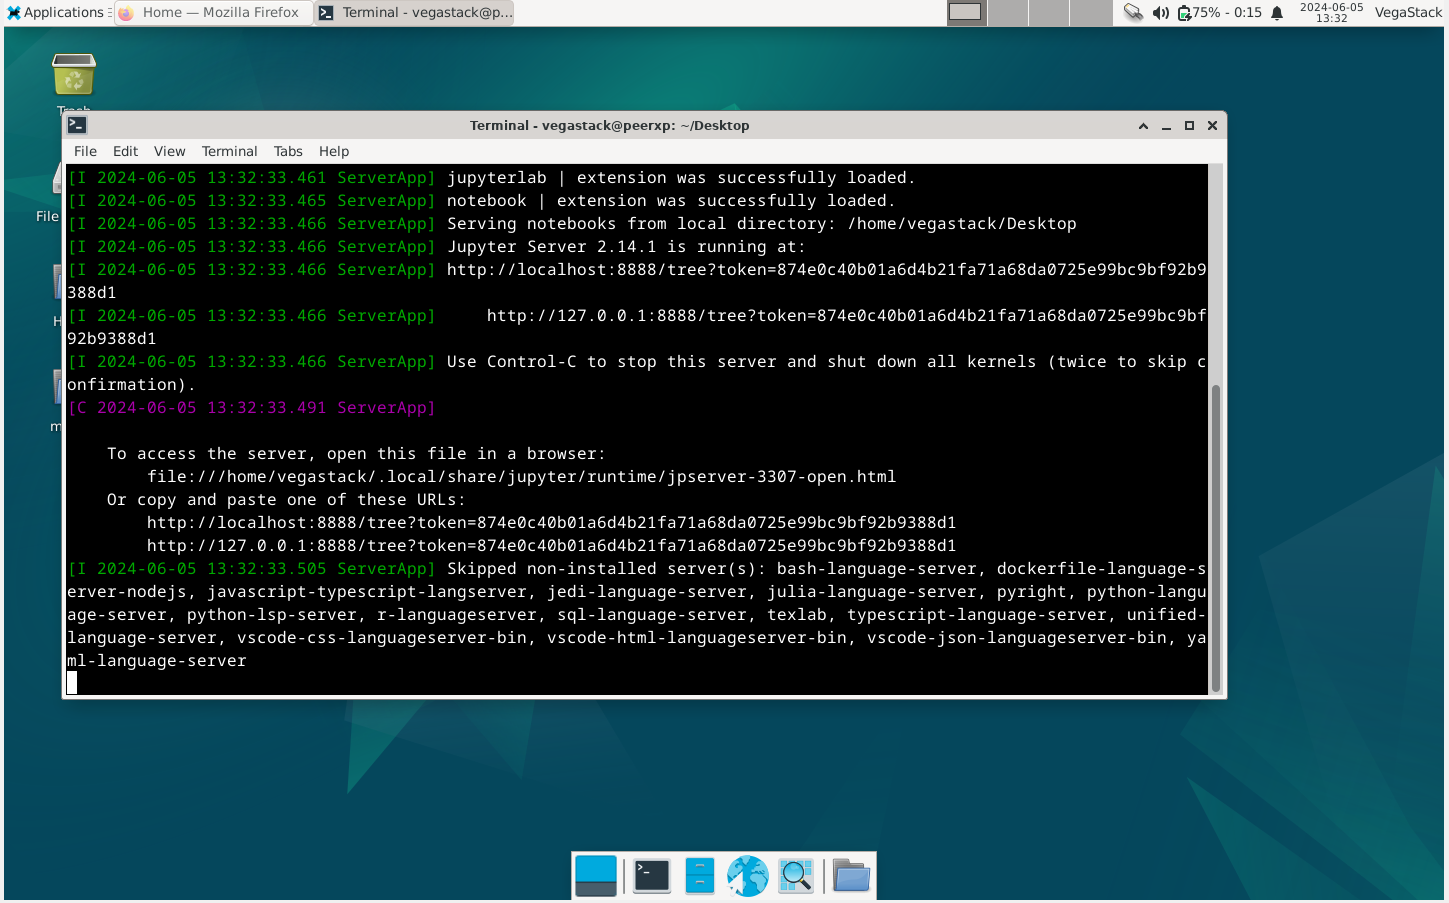
Your Jupyter Notebook will launch after this command has been successfully executed. Otherwise, click on the URL that appears in the terminal.
Establish Secure Connection via SSH Tunneling with Jupyter on Debian 12 (Situational)
Understanding SSH Tunneling with Jupyter and Debian
On your server, Jupyter Notebook runs on particular ports. Any number, including 8888, 8889, and so on, can be used for these. One safe way to connect to the server's port is via SSH tunneling.
Depending on the Linux operating system, this section will describe how to set up an SSH tunnel in the subsections that follow.
Setting Up SSH Tunneling for Jupyter and Debian
The process of establishing an SSH tunnel is similar to that of using SSH for remote server login for Linux users. What sets them apart is when you add parameters to the SSH command.
Run the following command in a fresh local terminal window to configure SSH tunneling:
ssh -L 8888:localhost:8888 your_server_username@your_server_ip
Let's dissect this directive. The -L option designates the local (client) host port to be forwarded to the corresponding host and port on the remote side (server), and the ssh command initiates an SSH connection. In other words, any process running on port 8888, the second port on the server, will essentially become accessible on port 8888, the first port on the local machine.
If another process is already using port 8888, you can change to any other port that is open. Change your_server_ip to the IP address of your server and your_server_username to your real username on the server.
To give an example, the command would be as follows for a user called "vega" and a server IP address of 203.0.113.0:
ssh -L 8888:localhost:8888 [email protected]
Once you've run the ssh -L command and seen no error messages, you can move on to your programming environment and set up Jupyter Notebook by using:
jupyter notebook
After the Jupyter Notebook command has been successfully run, an output with a URL will be sent to you. Open this URL in any web browser on your local computer to access the Jupyter Notebook web interface. It is imperative that the token number appears in the URL and that it begins with http://localhost:8888. If prompted, enter the given token number string at http://localhost:8888.
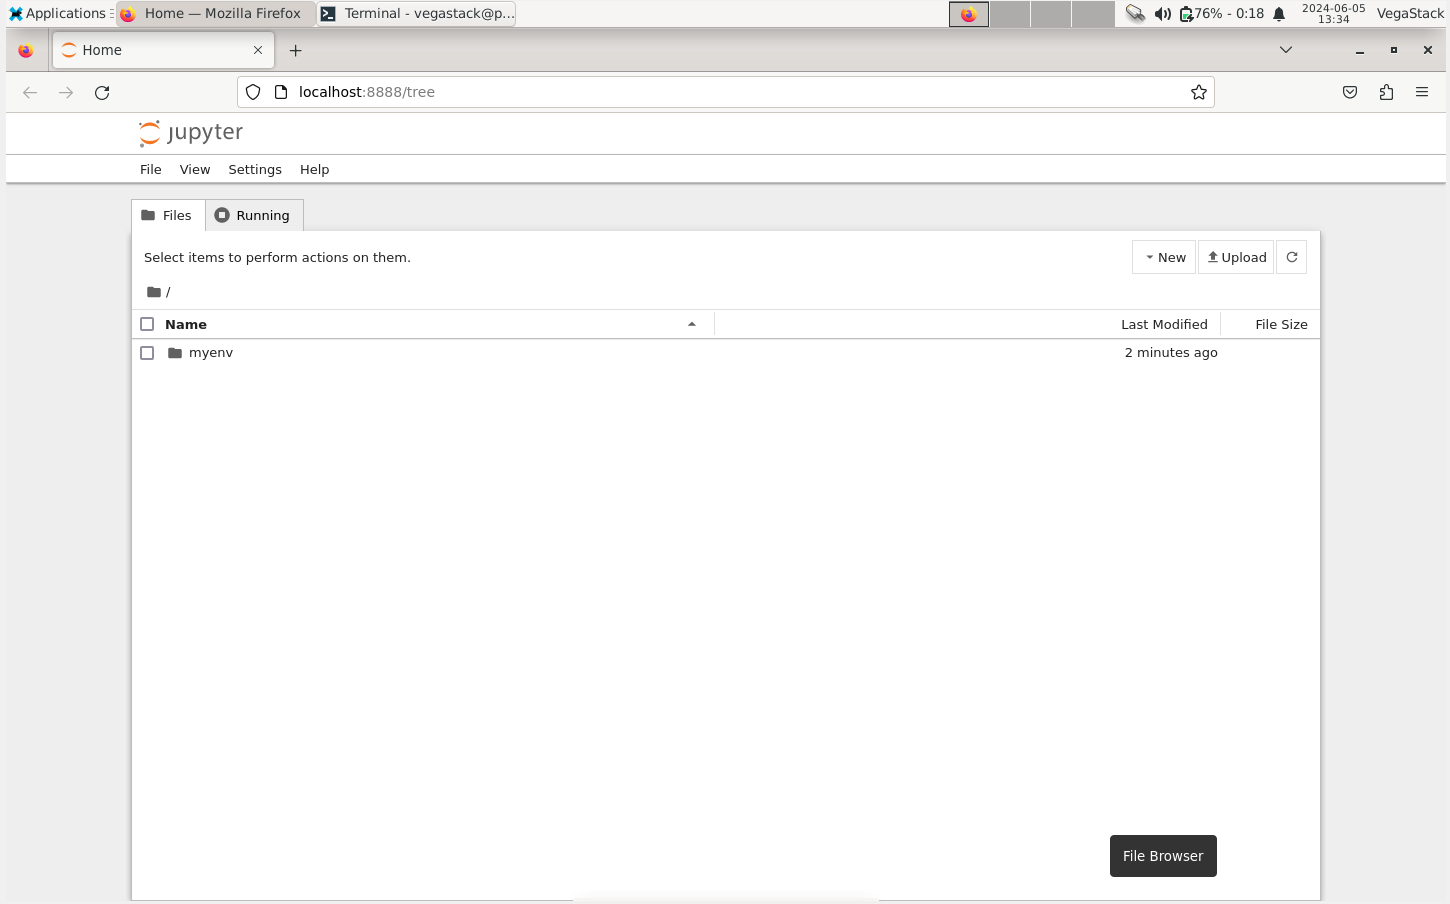
Jupyter Web Interface on Debian 12
Accessing Jupyter Notebook’s Web Interface
Now that you've got your secure SSH tunneling connection established, you should be able to use a web browser to access your Jupyter Notebook. Jupyter Notebook is an incredibly feature-rich and potent tool. To get you started with the notebook, a few fundamental features are covered in this section.
Jupyter Notebook shows all the files and folders from the directory it opens in a convenient manner. In order to effectively access your resources when starting a project, always remember to launch Jupyter Notebook from the project's directory.
Exploring Notebook Functionality
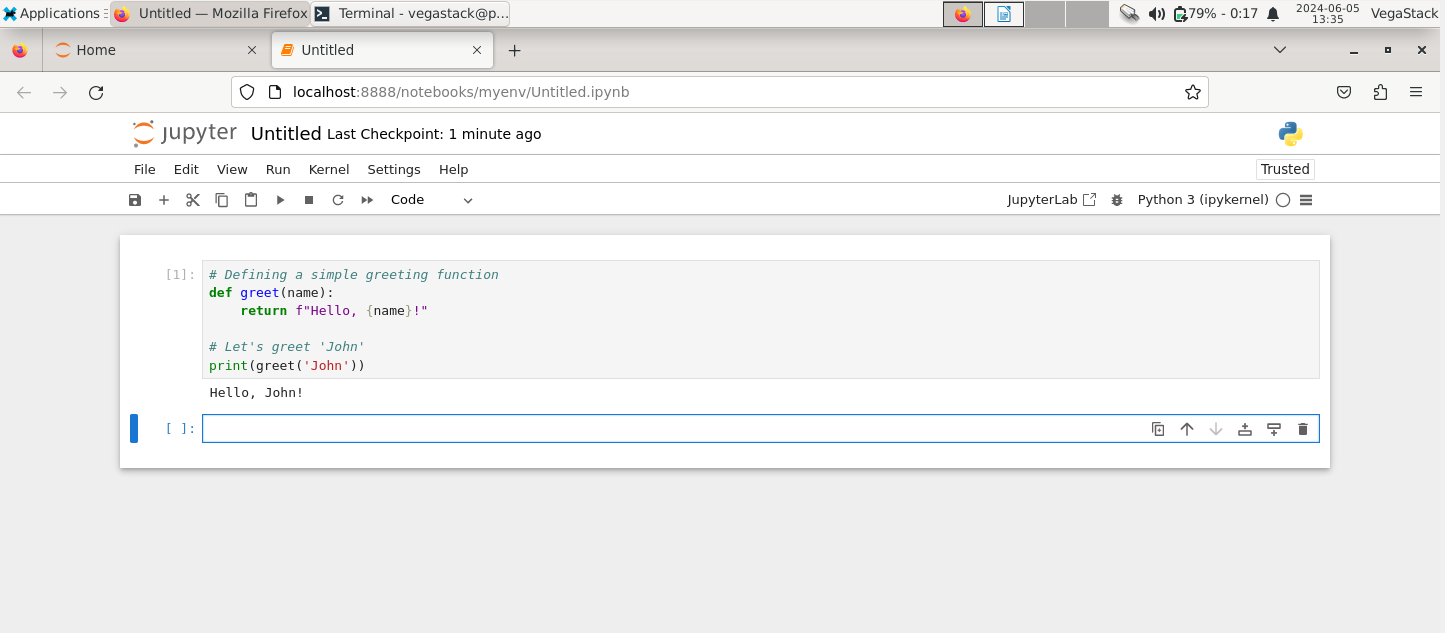
Once a notebook has been opened, you can run Python code within its cells or switch the cell to markdown mode for documentation purposes.
Experimenting With Python Code in Jupyter
To complete the circle in your understanding of Jupyter, let's try executing some Python code. Here is an example of a snippet of Python code that we can execute:
# Defining a simple greeting function
def greet(name):
    return f"Hello, {name}!"

# Let's greet 'John'
print(greet('John'))
This script defines a basic function called greet() that accepts a name as an input and outputs a customized greeting. The result is then printed after calling this function and passing in "John" as an argument.
FAQs to Install Jupyter Notebook on Debian 12
Can Jupyter Notebook run multiple programming languages?
Absolutely! Jupyter Notebook supports various programming languages such as Python, R, Julia, and many more. This flexibility allows you to work with different languages within the same notebook.
Can I use Jupyter Notebook offline?
Yes, once installed, you can use Jupyter Notebook offline. The notebook server runs locally on your machine, allowing you to access and work on your notebooks without an internet connection.
How can I access Jupyter Notebook in my web browser?
After starting the Jupyter Notebook server, you can access the application by opening a web browser and entering localhost:8888 in the address bar. This will direct you to the Jupyter Notebook interface.
Can I share my Jupyter Notebook with others?
Yes, Jupyter Notebook allows you to share your notebooks with others. You can share the notebook files (.ipynb) directly or convert them to other formats like HTML or PDF for easy sharing and collaboration.
Is Jupyter Notebook free to use?
Yes, Jupyter Notebook is an open-source project released under the modified BSD license. It is free to use and distribute, allowing users to take advantage of its features without any cost.
Is it possible to run Jupyter Notebook on a remote server and access it from my local machine?
Yes, you can run Jupyter Notebook on a remote server and access it through your local machine. Start the notebook server on the remote server with the appropriate configurations, then access it by opening a web browser on your local machine and entering the URL provided.
Are there any alternatives to Jupyter Notebook for creating interactive code documents?
Yes, there are alternatives to Jupyter Notebook, such as Google Colab, RStudio Notebook, and Apache Zeppelin. These tools offer similar functionalities and can be used depending on your specific requirements and programming language preferences.
Conclusion
We hope this tutorial helped you understand how to install Jupyter Notebook on Debian 12.
If you have any queries, please leave a comment below, and we’ll be happy to respond to them for sure.