

Introduction
Before we begin talking about how to install Matomo with Nginx on Ubuntu 22.04, let's briefly understand – What is Matomo?
Matomo is a powerful web analytics platform designed to help businesses gain valuable insights about their website visitors. Formerly known as Piwik, Matomo offers a range of features such as real-time analytics, user behavior tracking, and goal conversion measurement. With its customizable dashboards and detailed reports, Matomo enables businesses to understand user interactions, improve website performance, and make data-driven decisions.
Matomo with Nginx is a winning combination of a powerful web analytics platform and a high-performance web server. Matomo provides insightful data about website visitors, helping businesses make informed decisions. Nginx ensures fast and scalable performance even during heavy traffic, enhancing the user experience. With Matomo's customization options and Nginx's efficiency, businesses can optimize their websites and gain valuable insights for improved marketing strategies.
In this tutorial, you will install Matomo with Nginx on Ubuntu 22.04. We will also address a few FAQs on how to install Matomo with Nginx on Ubuntu 22.04.
Advantages of Matomo with Nginx
- Real-time analytics: Matomo with Nginx provides instant insights into website traffic and user behavior.
- High performance: Nginx's efficient web server ensures fast and scalable Matomo performance even with high traffic.
- Data ownership: With Matomo and Nginx, businesses retain complete control and ownership of their website analytics data.
- Privacy compliance: Matomo helps businesses adhere to data privacy regulations and protect user information.
- Customizability: Matomo with Nginx offers extensive customization options, allowing businesses to tailor analytics to their specific needs.
Prerequisites of Installing Matomo Web Analytics (Piwik) on Ubuntu 22.04
The user will require a server and a domain name to follow the tutorial. The steps listed below should be followed after you have a VPS running Ubuntu 22.04.
MySQL/MariaDB is the database used by Matomo, which is written in PHP. You must already have the LAMP or LEMP stack installed on Ubuntu 22.04 in order to follow this tutorial. Once the LAMP or LEMP stack configuration is complete, return to this page and continue reading.
Step 1: Download Matomo on Ubuntu 22.04
Use SSH to log into your server. On your server, you can always use the following command to download the most recent version of Matomo.
wget https://builds.matomo.org/matomo-latest.zip
After downloading, use unzip to extract the archive.
sudo apt install unzip && sudo mkdir -p /var/www/ sudo unzip matomo-latest.zip -d /var/www/
The target directory is specified with the -d option. The location of the extracted Matomo web files is /var/www/matomo/. Next, in order for the web server to write to this directory, we must set www-data as the owner of this directory.
sudo chown www-data:www-data /var/www/matomo/ -R
Step 2: Create a Database and User in MariaDB
Use the following command to log into the MariaDB database server.
sudo mysql
As an alternative, you can log in with this command.
sudo mariadb
Next, make a Matomo database. The database is called matomo in this tutorial. You are free to use any name you desire.
create database matomo;
Make a user in the database. Once more, you are free to use this user's preferred name. Change your-password to the one you prefer.
create user matomouser@localhost identified by 'your-password';
Give this user access to the entire matomo database.
grant all privileges on matomo.* to matomouser@localhost;
Flush your privileges.
flush privileges;
exit;
Step 3: Create Apache or Nginx Configuration File
Apache
Create a virtual host configuration file in the /etc/apache2/sites-available/ directory if you would rather use the Apache web server.
sudo nano /etc/apache2/sites-available/matomo.conf
Add the text below to the file. Change analytics.example.com to the name of your own website. In your DNS manager, don't forget to set an A record for the domain.
<VirtualHost *:80>
        ServerAdmin webmaster@localhost
        ServerName analytics.example.com
        DocumentRoot /var/www/matomo/

        <Directory /var/www/matomo>
           DirectoryIndex index.php
           Options FollowSymLinks
           AllowOverride All
           Require all granted
        </Directory>

        <Files "console">
           Options None
           Require all denied
        </Files>

        <Directory /var/www/matomo/misc/user>
           Options None
           Require all granted
        </Directory>

        <Directory /var/www/matomo/misc>
           Options None
           Require all denied
        </Directory>

        <Directory /var/www/matomo/vendor>
           Options None
           Require all denied
        </Directory>

        ErrorLog ${APACHE_LOG_DIR}/matomo_error.log
        CustomLog ${APACHE_LOG_DIR}/matomo_access.log combined

</VirtualHost>
Save and close the file. Then enable this virtual host.
sudo a2ensite matomo.conf
To make the change take effect, reload the Apache web server.
sudo systemctl reload apache2
Nginx
In the /etc/nginx/conf.d/ directory, create a matomo.conf file if you'd rather use the Nginx web server.
sudo nano /etc/nginx/conf.d/matomo.conf
Add the text below to the file. Change analytics.example.com to the name of your own website. In your DNS manager, don't forget to set an A record for the domain.
server {
    listen [::]:80;
    listen 80;
    server_name analytics.example.com;

    access_log /var/log/nginx/matomo.access.log;
    error_log /var/log/nginx/matomo.error.log;

    root /var/www/matomo/;

    index index.php;

    ## only allow accessing the following php files
    location ~ ^/(index|matomo|piwik|js/index).php {
        include snippets/fastcgi-php.conf;
        fastcgi_param HTTP_PROXY ""; # prohibit httpoxy: https://httpoxy.org/
        fastcgi_pass unix:/run/php/php8.1-fpm.sock;
    }

    ## needed for HeatmapSessionRecording plugin
    location = /plugins/HeatmapSessionRecording/configs.php {
        include snippets/fastcgi-php.conf;
        fastcgi_param HTTP_PROXY "";
        fastcgi_pass unix:/run/php/php8.1-fpm.sock;
    }

    ## deny access to all other .php files
    location ~* ^.+\.php$ {
        deny all;
        return 403;
    }

    ## serve all other files normally
    location / {
        try_files $uri $uri/ =404;
    }

    ## disable all access to the following directories
    location ~ /(config|tmp|core|lang) {
        deny all;
        return 403; # replace with 404 to not show these directories exist
    }
    location ~ /\.ht {
        deny  all;
        return 403;
    }

    location ~ \.(gif|ico|jpg|png|svg|js|css|htm|html|mp3|mp4|wav|ogg|avi|ttf|eot|woff|woff2|json)$ {
        allow all;
        ## Cache images,CSS,JS and webfonts for an hour
        ## Increasing the duration may improve the load-time, but may cause old files to show after an Matomo upgrade
        expires 1h;
        add_header Pragma public;
        add_header Cache-Control "public";
    }

    location ~ /(libs|vendor|plugins|misc/user) {
        deny all;
        return 403;
    }

    ## properly display textfiles in root directory
    location ~/(.*\.md|LEGALNOTICE|LICENSE) {
        default_type text/plain;
    }
}
Save and close the file. To make the changes effective, test the Nginx configuration and then reload Nginx.
sudo nginx -t
sudo systemctl reload nginx
Step 4: Install and Enable PHP Modules
To install PHP modules that Matomo requires or recommends, run the following commands.
sudo apt install php-imagick php8.1-mysql php8.1-fpm php8.1-common php8.1-gd php8.1-curl php8.1-zip php8.1-xml php8.1-mbstring php8.1-bz2 php8.1-intl
Reloading the Apache web server is necessary in order for it to function with these PHP modules.
sudo systemctl reload apache2
Users of Nginx do not have to refresh.
You should now be able to access the Matomo web-based install wizard at http://analytics.example.com. However, let's enable HTTPS first before you enter any data.
Step 5: Enable HTTPS
We can install a free TLS certificate from Let's Encrypt to enable HTTPS, which will encrypt HTTP traffic when you visit the Matomo web interface. To install the Let's Encrypt client (certbot) on Ubuntu 22.04, run the following commands.
sudo apt update sudo apt install certbot
The Certbot Nginx plugin must also be installed if you use Nginx.
sudo apt install python3-certbot-nginx
Next, execute the subsequent command to acquire and set up the TLS certificate.
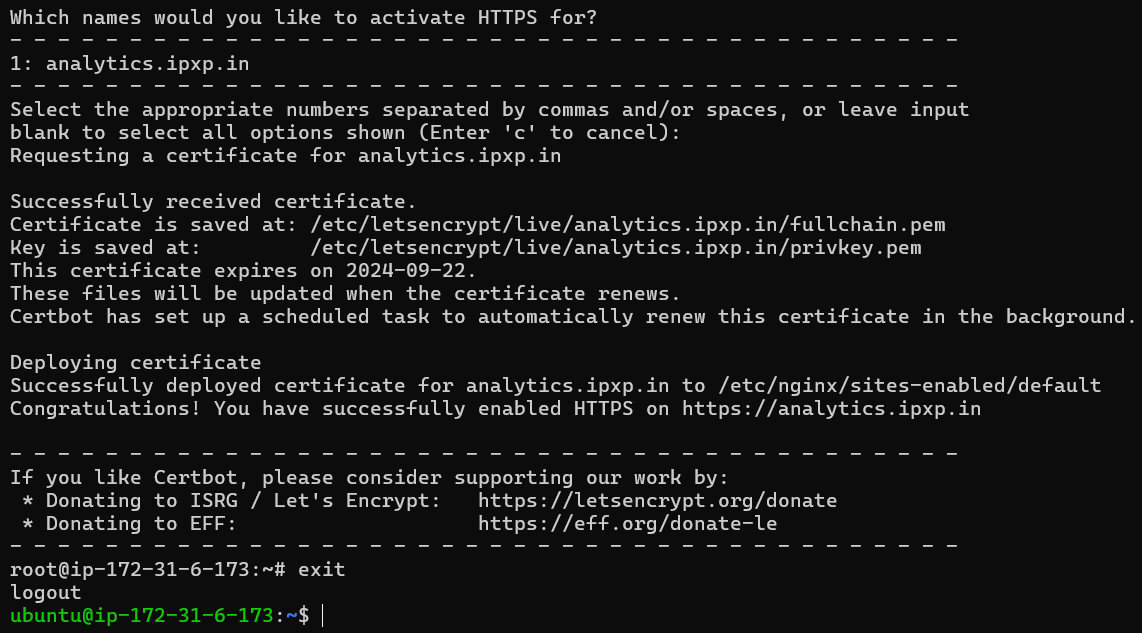
sudo certbot --nginx --agree-tos --redirect --hsts --staple-ocsp --email [email protected] -d analytics.example.com
The Certbot Apache plugin must also be installed if you use Apache.
sudo apt install python3-certbot-apache
After that, execute this command to install the TLS certificate.
sudo certbot --apache --agree-tos --redirect --hsts --staple-ocsp --email [email protected] -d analytics.example.com
Explanation:
--nginx: Use the nginx plugin.--apache: Use the Apache plugin.--agree-tos: Agree to terms of service.--redirect: Force HTTPS by 301 redirect.--hsts: Add the Strict-Transport-Security header to every HTTP response. Forcing browser to always use TLS for the domain. Defends against SSL/TLS Stripping.--staple-ocsp: Enables OCSP Stapling. A valid OCSP response is stapled to the certificate that the server offers during TLS.
At this point, the certificate ought to be downloaded and installed automatically.
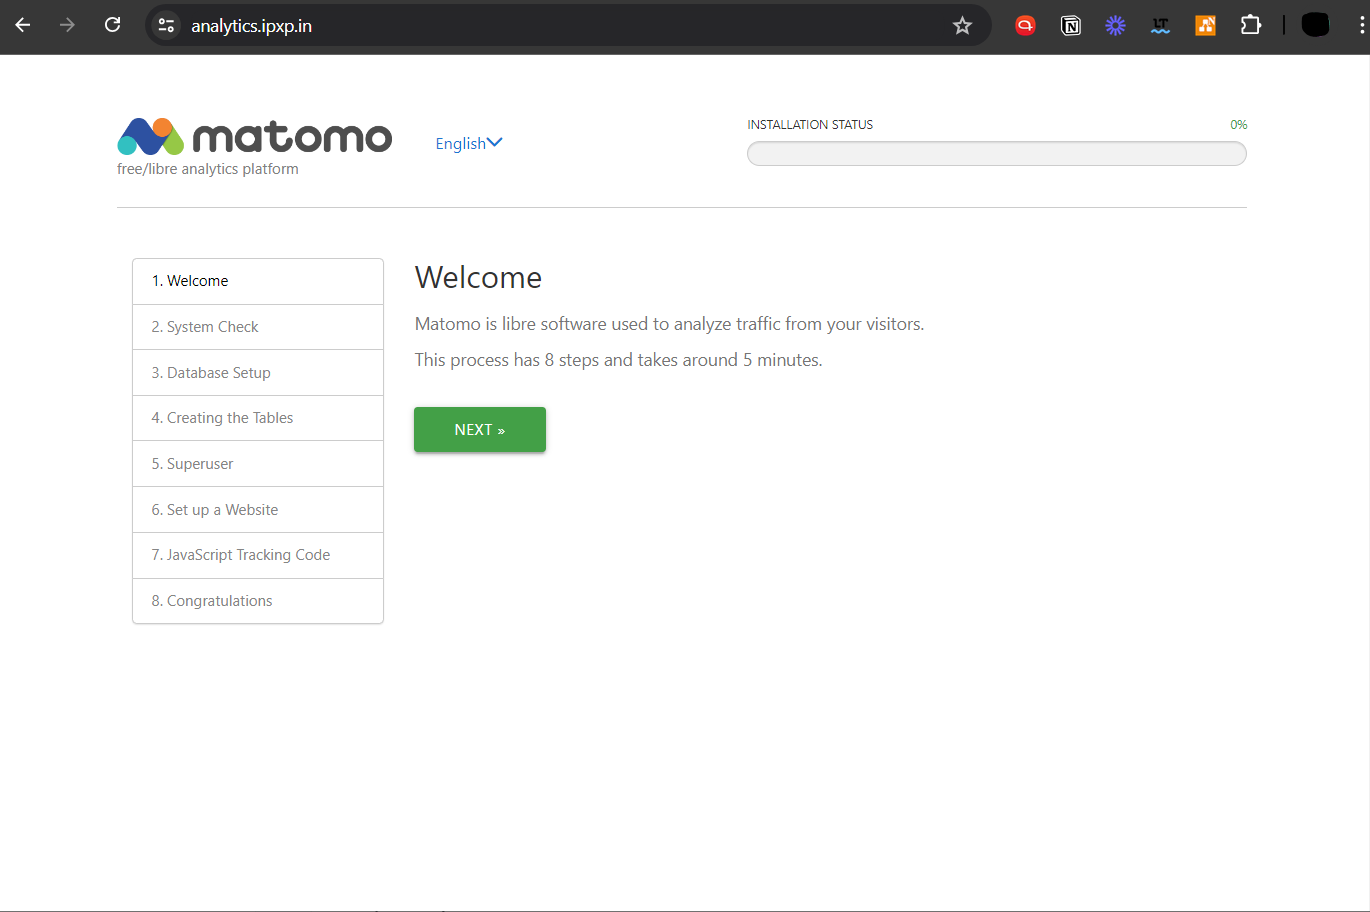
Step 6: Finish the Installation in your Web Browser
To start the web-based install wizard, navigate to https://analytics.example.com. Next, press the button.
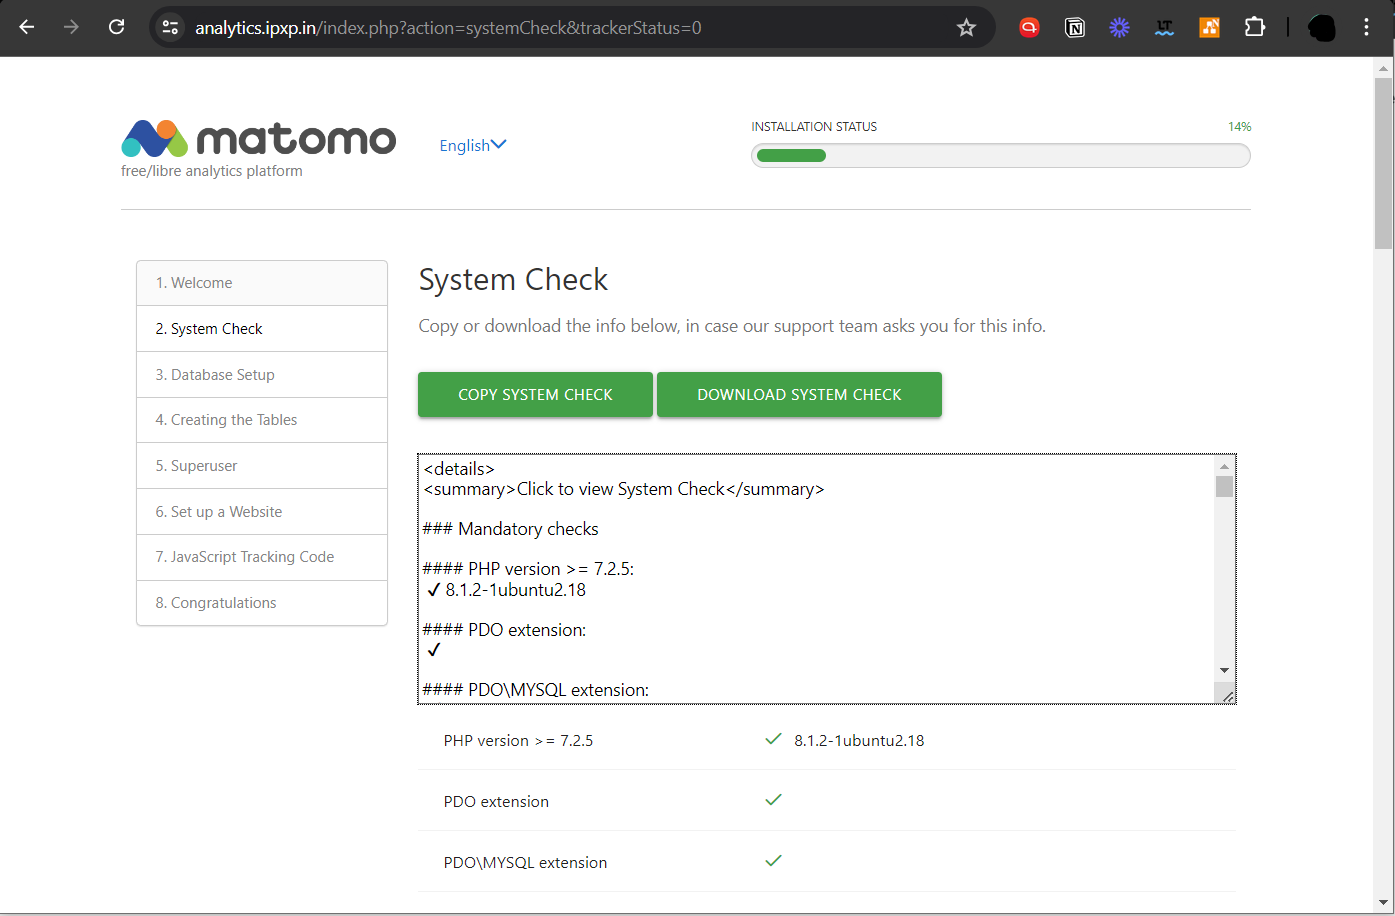
It will verify that your system satisfies the prerequisites, such as PHP extensions. Click Next if all prerequisites have been satisfied.
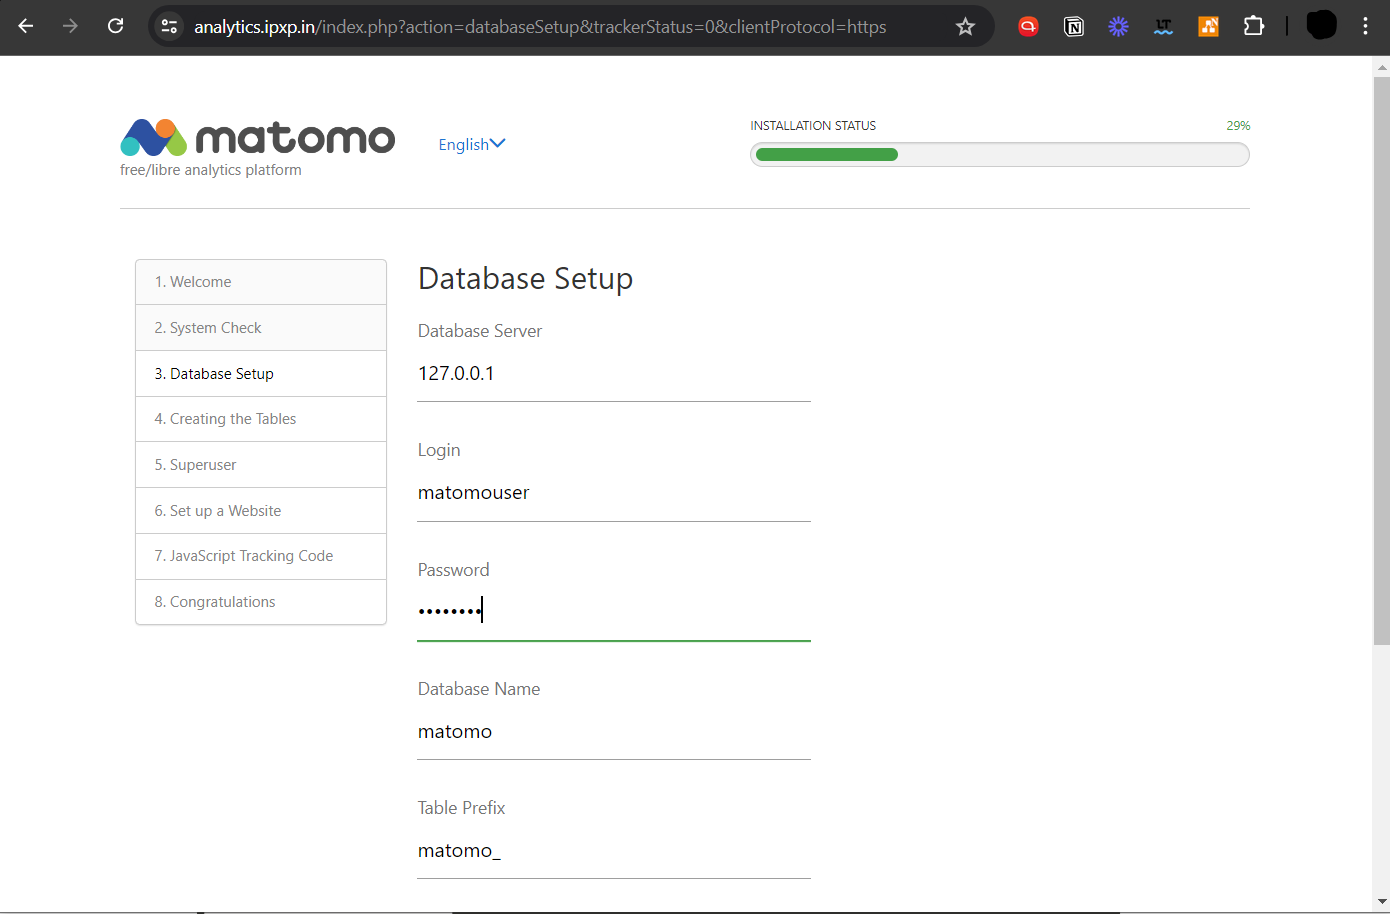
Enter the MariaDB username, password, and database name that you previously created in the following step. In other fields, you can use the default value.
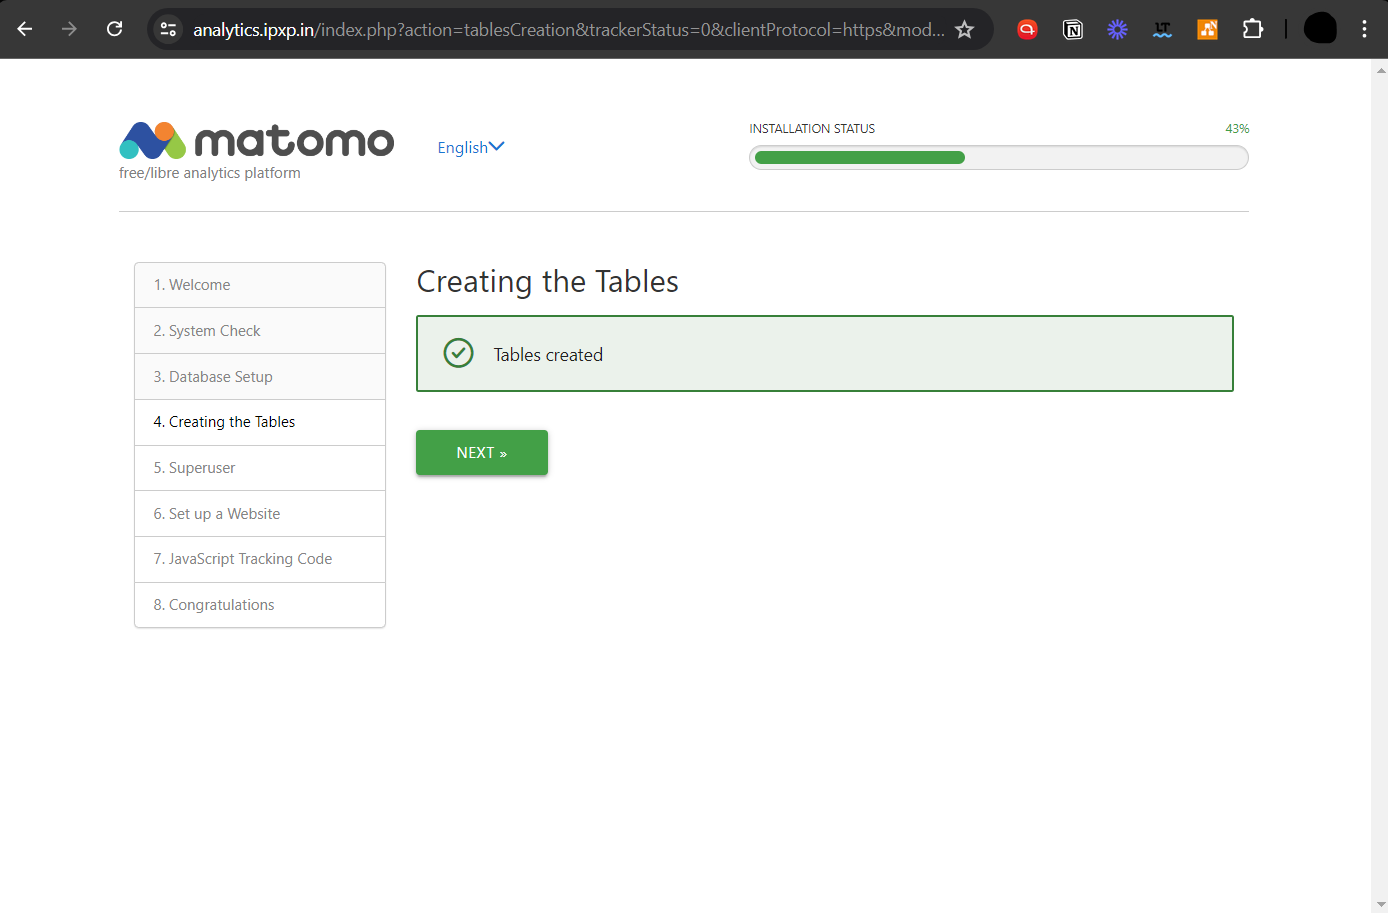
The install wizard will automatically create a few tables in the database after you click Next. To proceed, click Next.
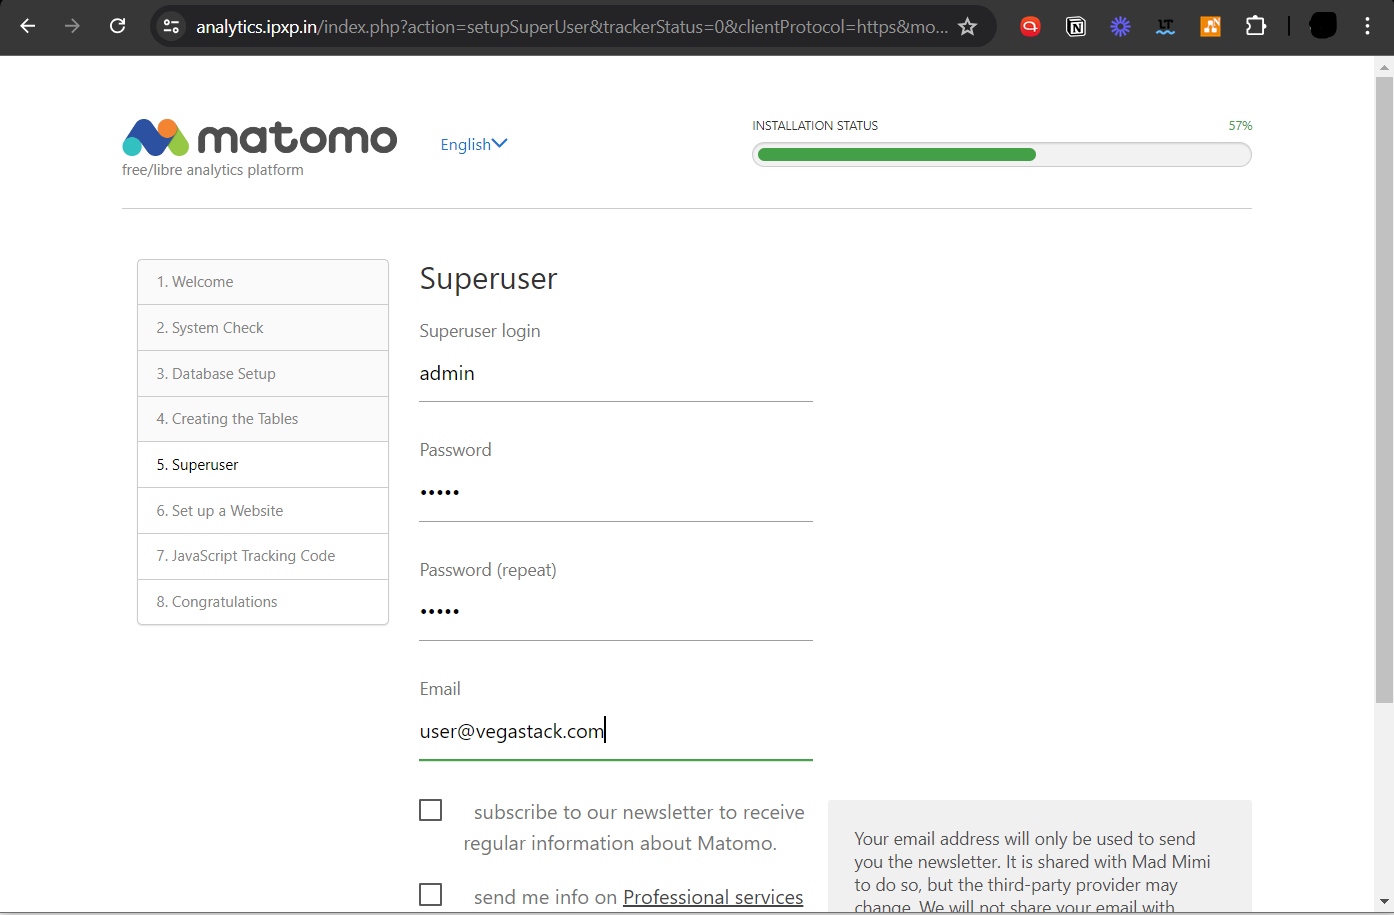
Make an admin user for the Matomo web interface in the next screen.
After creating the admin user, you need to add a website to collect analytics data.
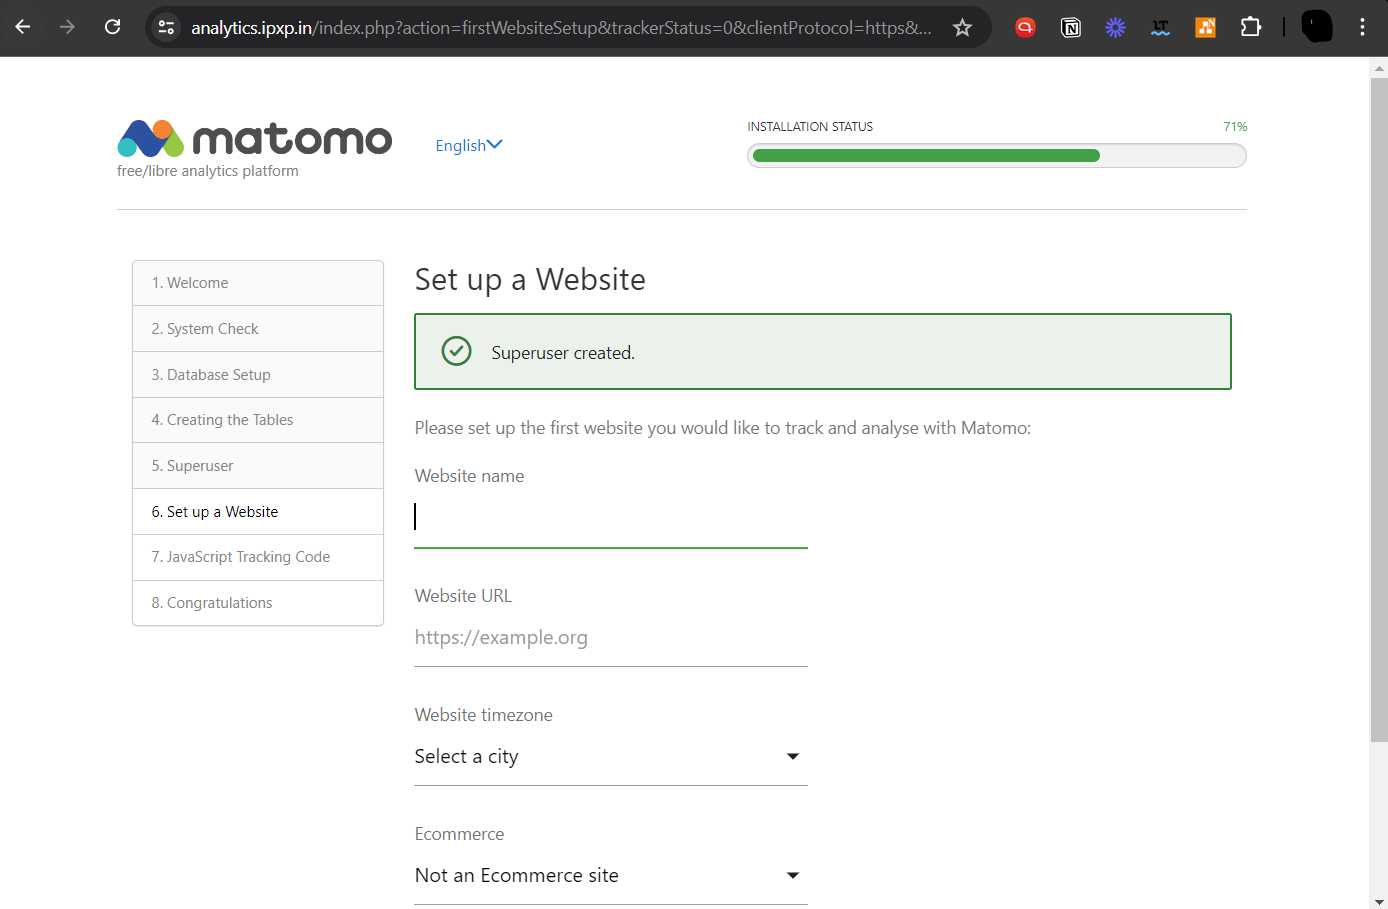
You need to add a website after creating the admin user in order to collect analytics data.
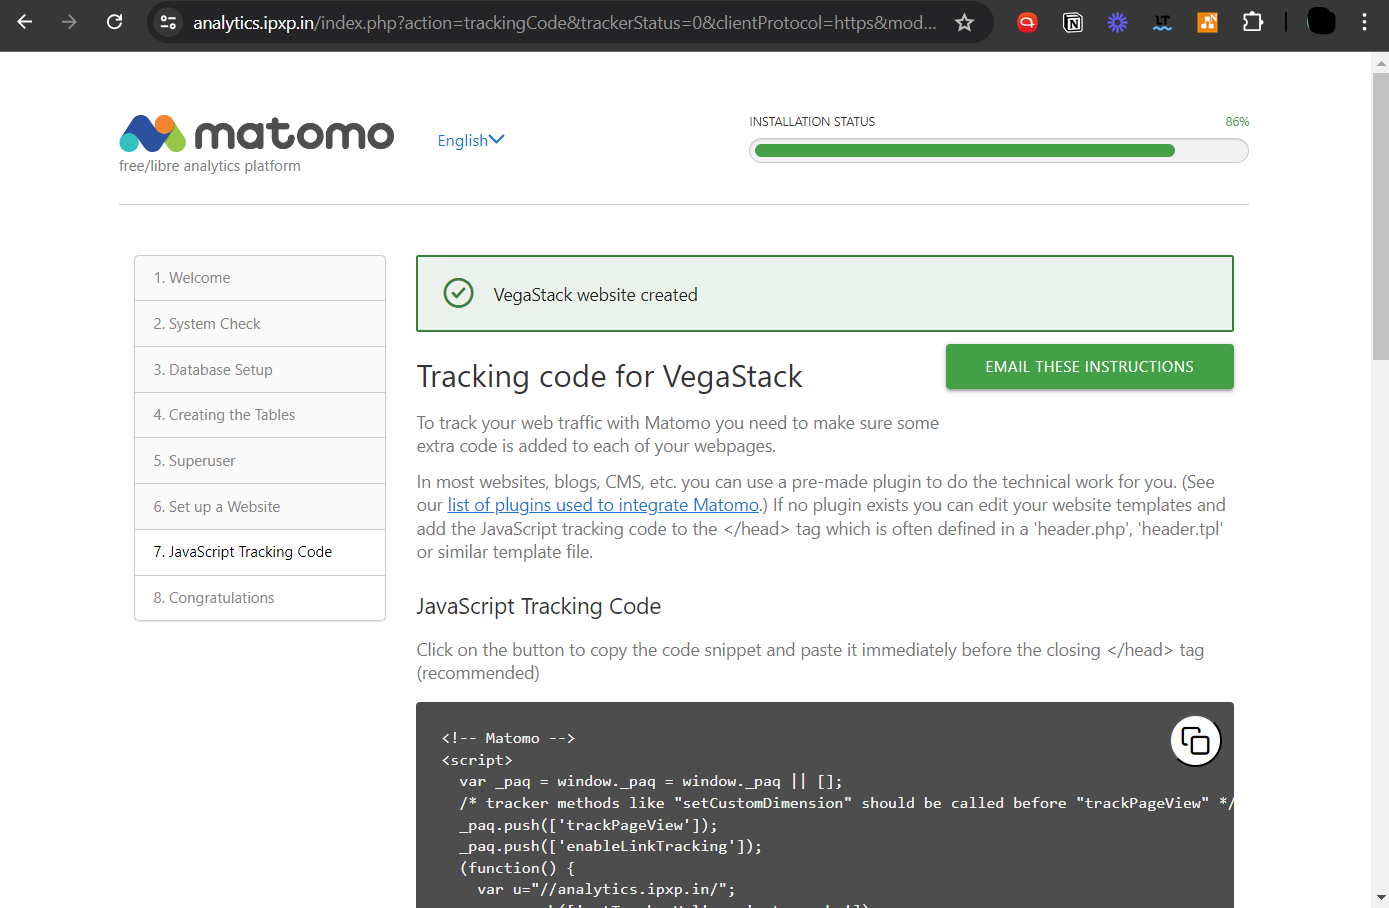
The JavaScript tracking code must then be added to your website.
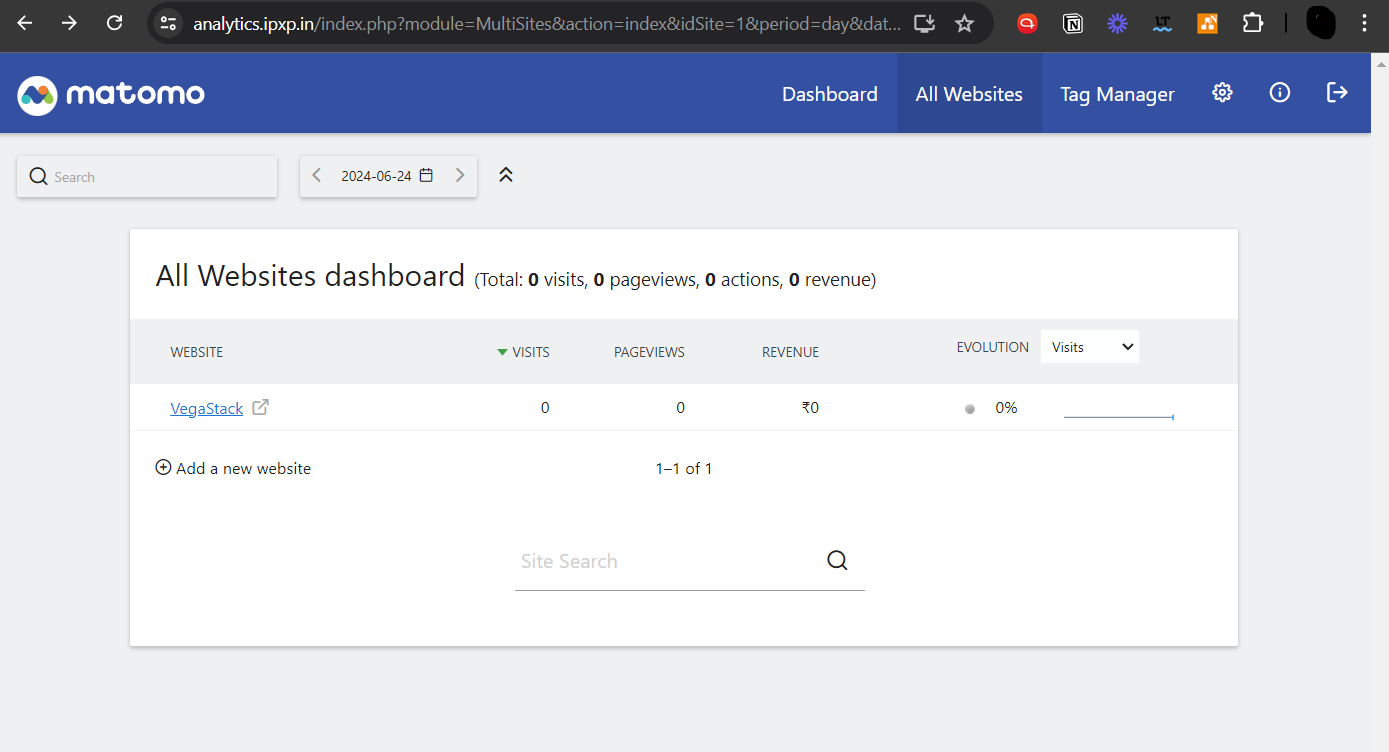
Your Matomo installation is finished when you click the Next button. You can now access the Matomo dashboard and see information about visitors.
Track Users with JavaScript Disabled
You can select to track users who have disabled JavaScript by clicking the cog icon located in the upper-right corner of the Matomo web interface, selecting websites -> tracking code.
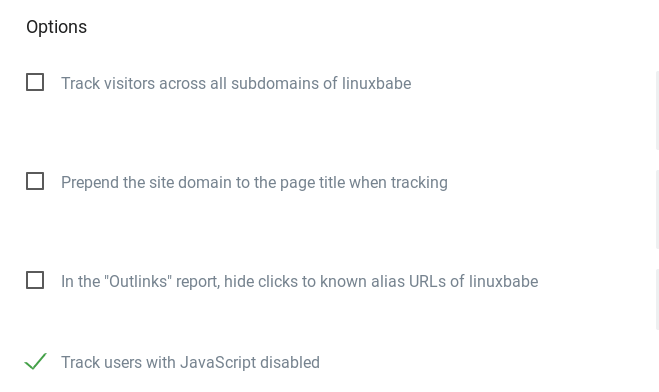
A new tracking code is coming. The new tracking code must be used in place of the current one. Actually, all that's changed in the tracking code is the addition of the next line.
<noscript><p><img src="//analytics.example.com/matomo.php?idsite=1&rec=1" style="border:0;" alt="" /></p></noscript>
The visitor's browser will download an image if they have disabled JavaScript or if JavaScript is not available.
Set Up Cron Jobs for Medium and High-Traffic Websites
In order to automatically archive Matomo reports, you must set up a cron job if your website receives thousands of page views every day. Use the following command to create the Cron job file.
sudo nano /etc/cron.d/matomo-archive
Next, include the subsequent lines in the file.
MAILTO="[email protected]" 5 * * * * www-data /usr/bin/php /var/www/matomo/console core:archive --url=https://analytics.example.com > /dev/null
Standard error will be sent to your email address, and standard output will be sent to /dev/null. Close and save the file. This Cron job will run at five minutes past the hour every hour.
How to Set Up Email Notification
It is a good idea to enable Matomo to send email notifications, such as password reset emails, if there are multiple users. Check out this tutorial to learn how to set up an email server.
Keep in mind that we strongly advise operating the iRedMail mail server on a brand-new, uncontaminated OS. It is possible for iRedMail to install unsuccessfully and possibly corrupt other installed web apps on an operating system.
You can set up SMTP relay if you don't want to manage your own email server.
How to Set Up Accurate Geolocation with GeoIP
By default, Matomo uses the language that visitors use to infer their location. This isn't true. For instance, a higher percentage of "US visitors" will be found in the Matomo report since many non-US visitors set En-US as their OS's default language. We can use the free MaxMind GeoLite2 IP database to obtain more accurate geolocation.
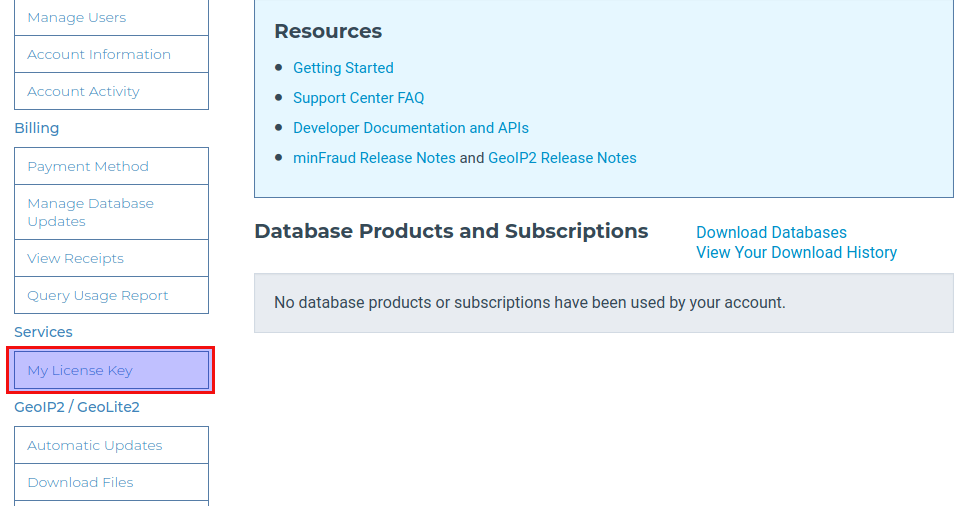
The first step is to register for a MaxMind account. You will get an email from Maxmind. To create a password and log into your MaxMind account, click the email's link. Then, from the left bar, choose My License Key.
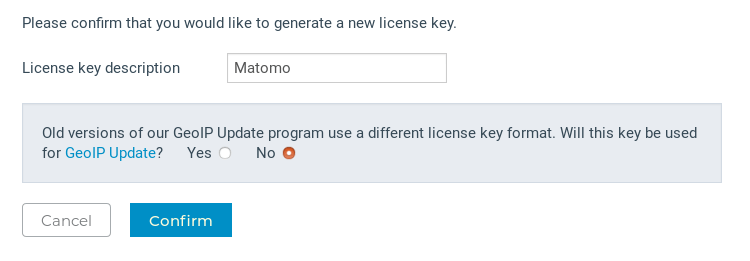
Click the Generate New License Key button.
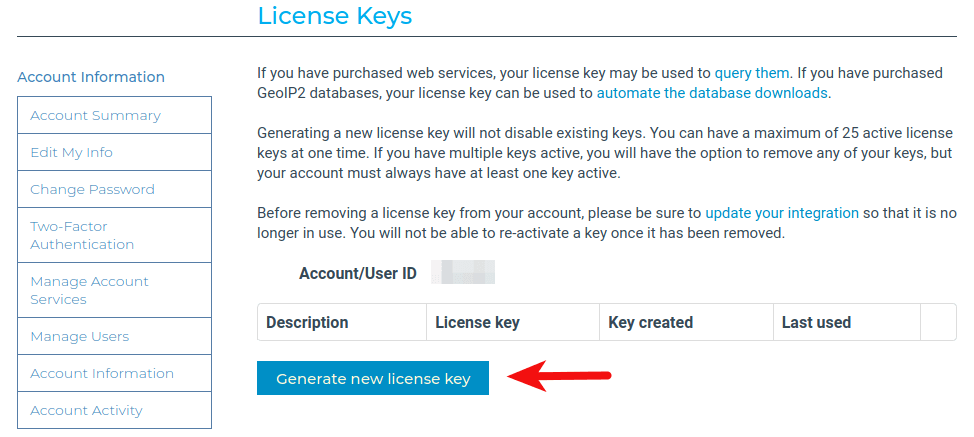
Select No when asked if you want your license key to be used for GeoIP updates, and give it a name. After that, press the Confirm button. That's when your license key appears. The license key will only appear once, so make sure to copy it to your clipboard.
Next, navigate to System -> Geolocation by clicking the cog icon (Administration) in the Matomo web interface. Next, download to your server the most recent version of the Maxmind GeoIP database. Put your actual license key in place of your_license_key.
wget -O GeoLite2-City.tar.gz 'https://download.maxmind.com/app/geoip_download?edition_id=GeoLite2-City&suffix=tar.gz&license_key=your_license_key'
Extract the tarball.
tar xvf GeoLite2-City.tar.gz
An extraction of the tarball will take place into a directory called GeoLite2-City_20200814. Next, relocate the GeoLite2-City.mmdb file to the directory located at /var/www/matomo/misc/.
sudo mv GeoLite2-City_20200814/GeoLite2-City.mmdb /var/www/matomo/misc/
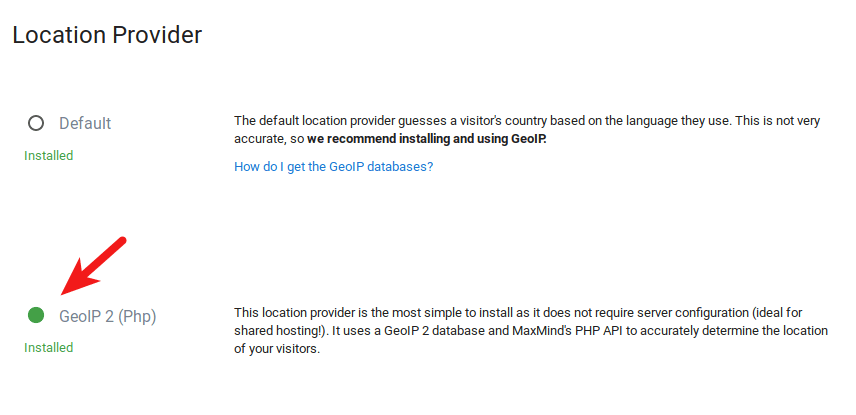
The Matomo Geolocation settings page should now reload. Select GeoIP 2 (Php), the second location provider.
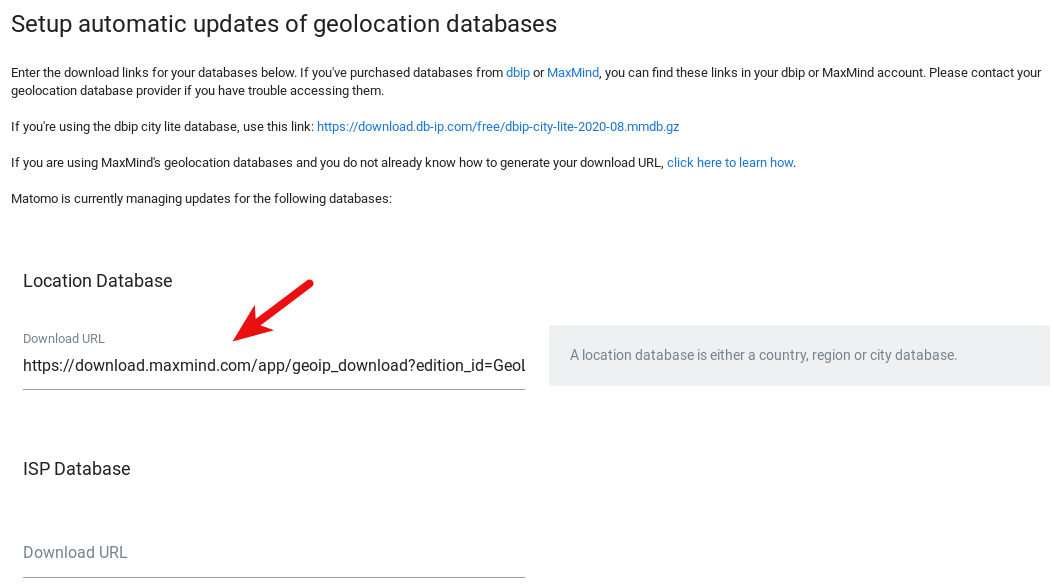
For your settings to be saved, click the Save button. You can also enter the Download URL in the lower section of this page, which will allow Matomo to update the GeoIP database automatically.
- The MaxMind download URL is:
https://download.maxmind.com/app/geoip_download?edition_id=GeoLite2-City&suffix=tar.gz&license_key=your_license_key
- Update the database every week.
Running Matomo Behind Cloudflare CDN
Matomo can only view the IP address of the Cloudflare servers if it is operating behind the Cloudflare CDN. Navigate to the Nginx main configuration file and make changes to display the visitors' actual IP address.
sudo nano /etc/nginx/nginx.conf
In the http section, add the following directives.
set_real_ip_from 103.21.244.0/22;
set_real_ip_from 103.22.200.0/22;
set_real_ip_from 103.31.4.0/22;
set_real_ip_from 104.16.0.0/12;
set_real_ip_from 108.162.192.0/18;
set_real_ip_from 131.0.72.0/22;
set_real_ip_from 141.101.64.0/18;
set_real_ip_from 162.158.0.0/15;
set_real_ip_from 172.64.0.0/13;
set_real_ip_from 173.245.48.0/20;
set_real_ip_from 188.114.96.0/20;
set_real_ip_from 190.93.240.0/20;
set_real_ip_from 197.234.240.0/22;
set_real_ip_from 198.41.128.0/17;
set_real_ip_from 199.27.128.0/21;
set_real_ip_from 2400:cb00::/32;
set_real_ip_from 2606:4700::/32;
set_real_ip_from 2803:f800::/32;
set_real_ip_from 2405:b500::/32;
set_real_ip_from 2405:8100::/32;
set_real_ip_from 2c0f:f248::/32;
set_real_ip_from 2a06:98c0::/29;

# use any of the following two
real_ip_header CF-Connecting-IP;
#real_ip_header X-Forwarded-For;
set_real_ip_from specifies trusted addresses that are known to send accurate replacement addresses; in this case, those are Cloudflare IP addresses. Close and save the file. After that, reload Nginx to make the modifications effective.
sudo systemctl reload nginx
The Matomo Dashboard -> Visitors -> Visits Log is where you can view the IP addresses of your visitors.
FAQs to Install Matomo with Nginx on Ubuntu 22.04
Does Matomo with Nginx support real-time analytics?
Yes, Matomo with Nginx provides real-time analytics, allowing you to monitor website traffic and user behavior as it happens.
Can I retain ownership of my analytics data with Matomo and Nginx?
Absolutely, with Matomo and Nginx, you have full control and ownership of your website analytics data, ensuring data privacy and compliance.
Does Matomo with Nginx comply with data privacy regulations?
Yes, Matomo helps businesses adhere to data privacy regulations by providing tools and features to protect user information and maintain compliance.
Can I customize Matomo with Nginx to fit my specific needs?
Yes, Matomo offers extensive customization options, allowing you to tailor the analytics platform to your unique requirements and goals.
Will Matomo with Nginx perform well under high traffic conditions?
Absolutely, Nginx's high-performance web server ensures optimal Matomo performance, even under heavy traffic loads.
Can I integrate Matomo with other tools or platforms for enhanced analytics?
Yes, Matomo offers various integration options with other tools and platforms to expand your analytics capabilities. Consult the Matomo documentation for integration guides.
Can I use a different database server instead of MySQL or MariaDB with Matomo and Nginx?
Yes, Matomo with Nginx supports various database servers. Besides MySQL and MariaDB, you can use PostgreSQL or other compatible databases with minor configuration changes.
Conclusion
We hope this tutorial helped you understand how to install Matomo with Nginx on Ubuntu 22.04.
If you have any queries, please leave a comment below, and we’ll be happy to respond to them for sure.