
Choose a different version or distribution
Introduction
Before we begin talking about how to install Mautic on Ubuntu 20.04, let’s briefly understand - What is Mautic?
Mautic is a powerful and user-friendly marketing automation platform. It enables businesses to automate their marketing campaigns, manage leads, and nurture customer relationships effectively. With Mautic, you can create personalized and targeted email campaigns, track customer interactions, and analyze data to make informed marketing decisions.
It's an open-source solution that provides flexibility and scalability for businesses of all sizes. Mautic empowers marketers to streamline their marketing efforts and engage with customers in a more personalized and efficient way.
In this tutorial, you will install Mautic 4 on Ubuntu 20.04. We will also address a few FAQs related to Mautic installation on Ubuntu 20.04.
Advantages of Mautic
- Automation: Mautic enables businesses to automate their marketing tasks, saving time and effort.
- Personalization: With Mautic, marketers can create personalized campaigns to engage customers on an individual level.
- Lead Management: Mautic offers robust lead management capabilities, allowing businesses to track, nurture, and convert leads effectively.
- Analytics: Mautic provides detailed analytics and reporting features, helping marketers measure campaign performance and make data-driven decisions.
- Flexibility: As an open-source platform, Mautic offers customization options and integrates seamlessly with other marketing tools, enhancing workflow efficiency.
Prerequisites to Install Mautic 4 on Ubuntu 20.04
- PHP 7.2.21 + (Magic Quotes GPC off)
- MySQL 5.7 + (With InnoDB support)
- Apache / Nginx
- An SMTP service provider such as Pepipost
Step 1 - Install PHP FPM along with other Dependencies
sudo apt install php libapache2-mod-php libapache2-mod-php php-common php-mbstring php-xmlrpc php-soap php-gd php-xml php-intl php-tidy php-mysql php-cli php-mcrypt php-ldap php-zip php-curl php-sqlite3 php-fpm
Step 2 - Enter the Root Directory
1) Firstly, enter the root directory of your remote server:
cd var/www/html/
Step 3 - Create a new Directory
1) Now, create a new directory and name it Mautic using the below command:
sudo mkdir mautic
cd mautic
Step 4 - Download the Mautic 4 File Package
1) You can find the Mautic downloadable package here, fill in the credentials and click on the Download button. The downloaded file will be named mautic-4.4.6.zip.
2) You may also use the following steps to install Mautic through git and Composer:
git clone -b 4.4.6 https://github.com/mautic/mautic.git mautic
cd mautic && composer install
Step 5 - Copy the File to the Remote Server
1) Enter the commands given below:
scp -r mautic-3.0.0-beta.zip root@<your-domain-name/ip-address>:/var/www/html/mautic/mautic.zip
Step 6 - Unzip File Contents
1) In case, you don't have unzip installed, use the following command:
sudo apt-get install unzip
2) Use the below command to unzip:
sudo unzip mautic.zip
Step 7 - Delete the Zip File
sudo rm -rf mautic.zip
Step 8 - Setting up MySQL
1) Begin with installing MySQL server:
sudo apt install mysql-server
2) Then, you need to set a MySQL password. Once the installation is complete, a temporary password will be generated in the mysqld.log file which can be accessed with the following command:
sudo grep 'temporary password' /var/log/mysqld.log
3) You will then see the following message:
4) Copy the password you see and proceed to enter the command given below:
sudo mysql_secure_installation
5) When prompted to Validate your password press 'Y'. You can then select the password strength. Choose from Low, Medium, or Strong.
6) Enter the password and then say 'Yes' to all other prompts.
7) This will be followed by a prompt asking how you'd like to set up your MySQL installation. Choose 'Y' for all.
You will then be able to log in with the user root and a blank password.
8) Next, log in to MySQL and create a Mautic database then add a User.
mysql > create database mautic;

mysql > CREATE USER 'mauticuser'@'localhost' IDENTIFIED BY 'password';

mysql > GRANT ALL PRIVILEGES ON * . * TO 'mauticuser'@'localhost';

mysql > FLUSH PRIVILEGES;

mysql > exit;
Step 9 - Setting up the HTTP server
1) You may either choose to install Nginx or Apache.
Nginx
sudo apt install nginx
sudo systemctl start nginx
sudo systemctl enable nginx
2) Then, make the configuration file for mautic in nginx sites-available
vim /etc/nginx/sites-available/mautic
server {
        listen       80 default_server;
        listen       [::]:80 default_server;
        server_name  <Your domain name>;
        root         /var/www/html/mautic;

        location / {
                try_files $uri /index.php$is_args$args;
        }

        location ~ \.php$ {
        fastcgi_pass unix:/run/php/php7.4-fpm.sock;
        fastcgi_index index.php;
        fastcgi_param SCRIPT_FILENAME $document_root$fastcgi_script_name;
        include fastcgi_params;
        fastcgi_split_path_info ^(.+.php)(/.+)$;
        }
    }
    ```
3) Next, you need to add either of the following depending on your PHP FPM setup
fastcgi_pass 127.0.0.1:9000;
Or
fastcgi_pass unix:/var/run/php7.4-fpm.sock;
sudo vim /etc/php/7.4/fpm/pool.d/www.conf
Then link you configuration to sites-enabled and unlink default conf:
sudo ln -s /etc/nginx/sites-available/mautic /etc/nginx/sites-enabled/
sudo unlink /etc/nginx/sites-enabled/default
sudo systemctl restart nginx
Apache
1) Use the following commands to install Apache:
sudo apt install apache2
sudo systemctl start apache2
sudo systemctl enable apache2
vim /etc/httpd/conf/httpd.conf
2) After that, make the following changes to apache2.conf file
<VirtualHost *:80>
DocumentRoot /var/www/html/mautic
<Directory />
        Options FollowSymLinks
        AllowOverride All
    </Directory>
    <Directory /var/www/mautic>
        Options FollowSymLinks MultiViews
        AllowOverride All
        Order allow,deny
        Allow from All
    </Directory>
</VirtualHost>
3) Next, navigate to http://<your-domain-address>/ in order to open the Mautic installation panel.
Step 10 - Setting Folder Permissions
1) The following error would appear if certain permissions are not set:
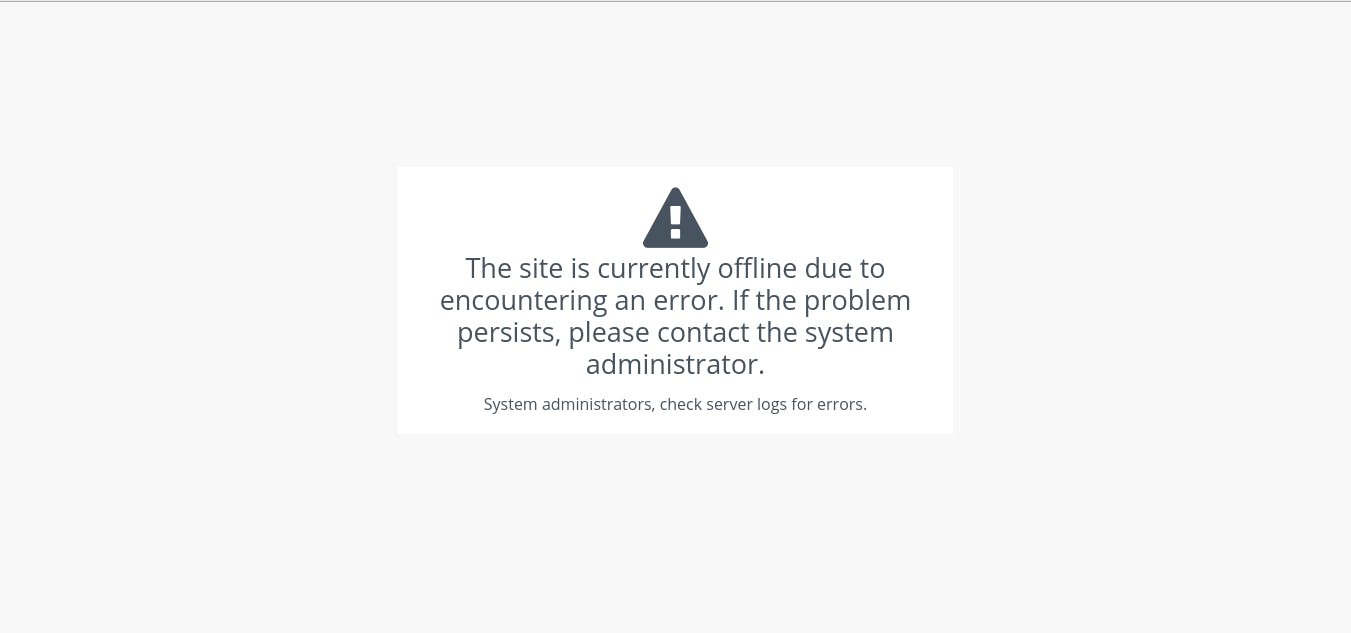
2) The major cause for this error is the Mautic folder user group being different from the PHP FPM instance. Run the following command if your PHP FPM group is www-data:
sudo chown -R www-data:www-data /var/www/html/mautic/
3) In case it is Nginx, use the following command:
sudo chown -R nginx:nginx /var/www/html/mautic/
For Apache use :
sudo chown -R apache:apache /var/www/html/mautic/
4) To check the user group of the PHP FPM file :
sudo vim /etc/php/7.4/fpm/pool.d/www.conf
5) Now check the user option and set the Mautic directory permission:
sudo chmod -R 755 /var/www/html/mautic/
vim /etc/php-fpm.d/www.conf
6) Now, check the php_value[session.save_path] attribute.
In case, you're still having some issues you should follow the commands given below:
sudo chcon -t httpd_sys_rw_content_t /var/www/html/mautic/app/logs -R
sudo chcon -t httpd_sys_rw_content_t /var/www/html/mautic/app/cache -R
sudo chcon -t httpd_sys_rw_content_t /var/www/html/mautic/app/config -R
You need to make sure that all the dependencies related to PHP are installed.
7) Next, return to your browser and refresh the window. If there are still any issues, try debugging the Nginx user logs:
cat /var/log/nginx/error.log
Step 11 - Setup
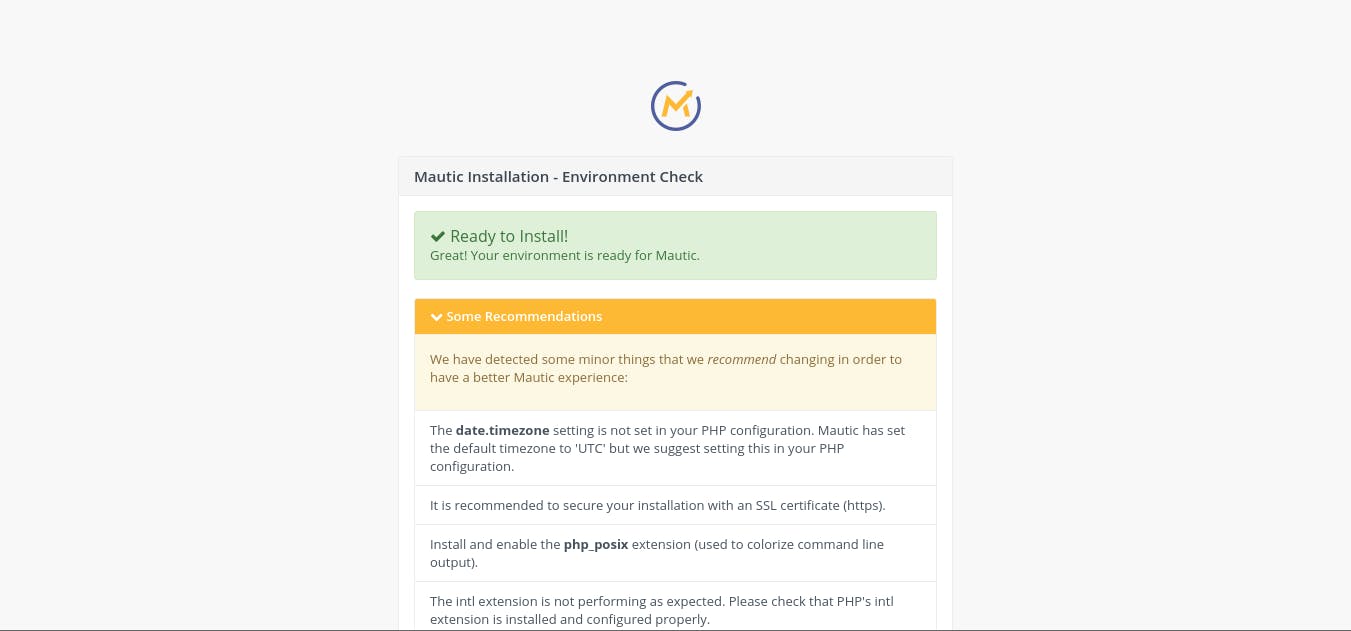
In case, the Mautic setup is yet to be done, you'll be redirected to the installation panel.
When all the dependencies match, you will see a Ready to Install prompt otherwise the mismatched dependencies will be listed down.
For minor bug fixes, you will receive a list in the recommendation section. You can choose to fix them there and then.
Resolving remaining dependencies
1) Once the stated dependencies have been fixed, select Next:
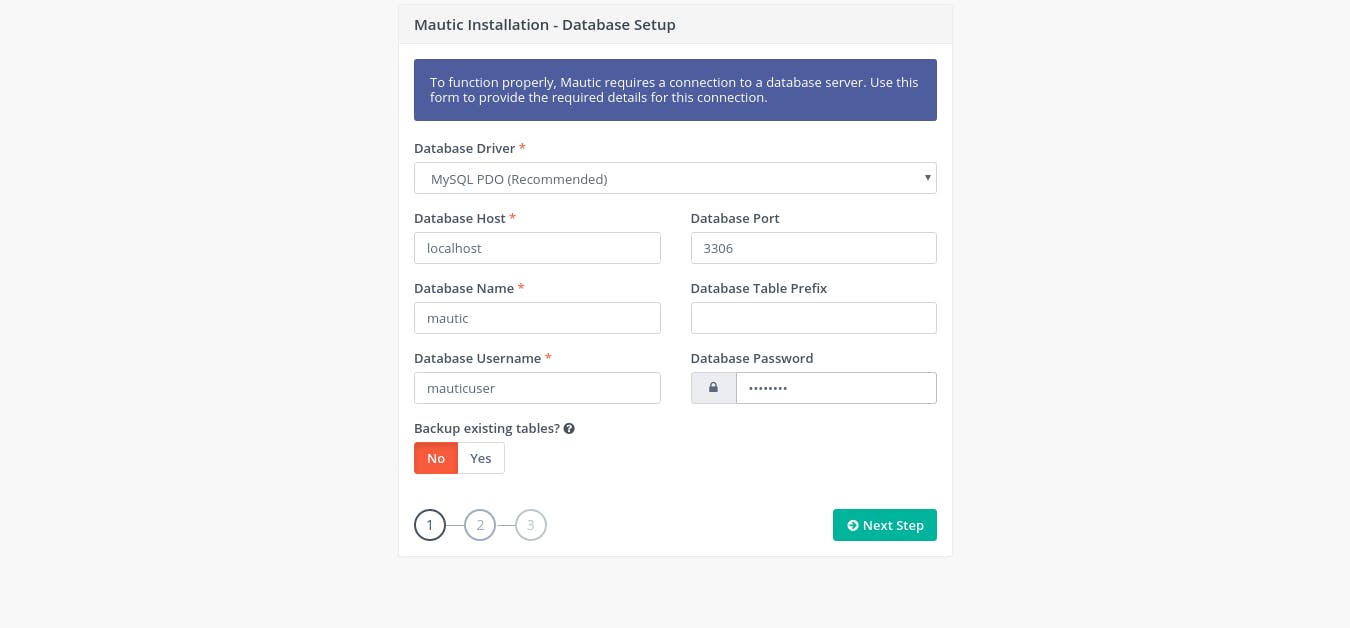
Set your Database Credentials
1) Database Driver should be kept on pre-set MYSQL PDO
2) The database name is mautic, username mauticuser, and the password you have set.
3) There is no need to select the Backup existing tables Option if this is the first installation.
4) Click next.
Set Admin user settings
Now, fill in the Admin credentials, which will be used to log in to the Mautic user panel. Also, this email address will help you reset passwords.
Once done, click on Next.
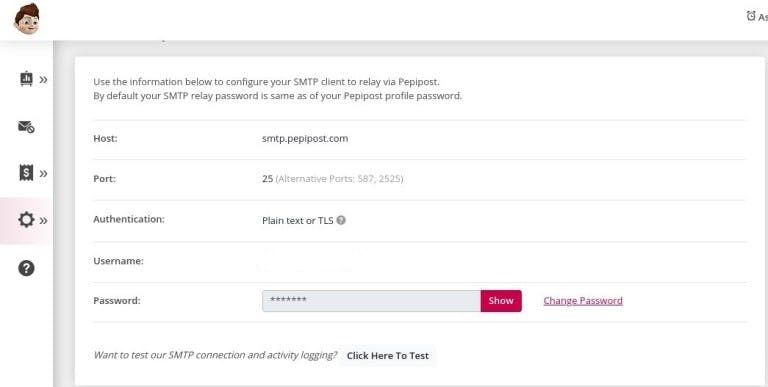
Get your SMTP Credentials
1) Next, you need to log in with your user credentials on the corresponding application.
2) Then, you've to Open the SMTP integration panel.
3) You will find your SMTP credentials in the SMTP Relay tab, there is a reference image below:
Set up SMTP Configuration Settings
There'll be two parameters in the [Who should the email be sent as?] section.
1) From Name that would be visible on the sent email.
2) From Email-ID, for example, [email protected]. The domain name should be a valid and verified domain in order to send emails.
Then, there'll be [How should email be spooled and delivered?] section. Adjust the following:
In Email handling, there are two options.
1) Send Immediately: Recommended if your email list is not huge since it will result in a slowdown.
2) Queue: The mail list will be waiting in a message pool until they are sent in a batch by send email cron.
Mailer transport: Select [Other SMTP Server]
Server: smtp.pepipost.com
Port: 25 [or you can set the port to 587 if 25 is blocked at your sever]
Encryption: TLS
Authentication mode: Login
Username: Your_username
Password: Your_password
After that, click on Next.
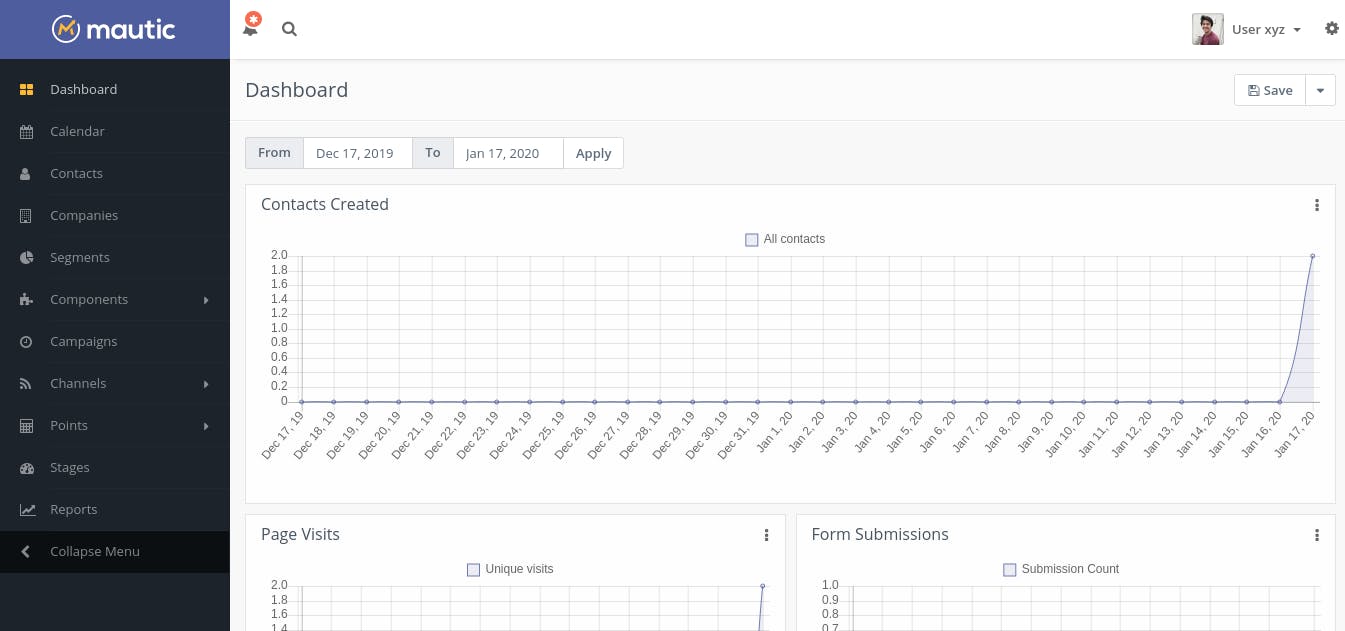
The login panel will appear now and then the dashboard will be revealed:
Adding Cron Jobs
A cron job can be termed as a scheduler that works on the specified paths at specified intervals. Almost all actions and updates are done using Cron jobs. It is very important to set them properly otherwise most of the functionality won't work.
1) You can use the following command for the same:
apt-get install cron
2) Next, add Mautic Cron jobs with the following command:
sudo crontab -e
3) Then, add the crons given below:
*/5 * * * *  php /var/www/html/mautic/app/console mautic:segments:update >> /var/log/crontab.log 2>&1

*/10 * * * *  php /var/www/html/mautic/app/console mautic:campaigns:update >> /var/log/crontab.log 2>&1

*/12 * * * *  php /var/www/html/mautic/app/console mautic:campaigns:trigger >> /var/log/crontab.log 2>&1

*/15 * * * *  php /var/www/html/mautic/app/console mautic:emails:send >> /var/log/crontab.log 2>&1
The time intervals will set up your contacts, emails, and campaigns. Therefore, setting the time interval is extremely essential.
Operations:
Sending Your First Test Mail
Step 1 - Add New Contacts
You can go about this step in two ways:
1. Single Contact Creation
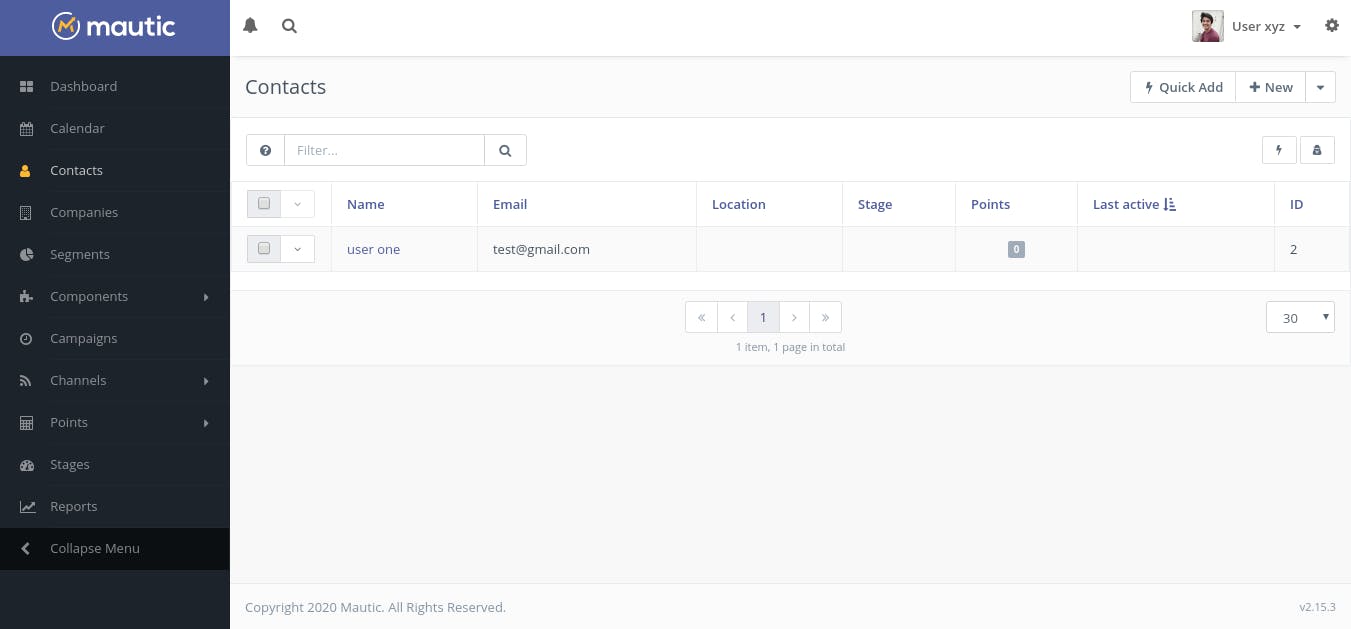
Go to Contacts on the Nav Bar --> New --> Add user credentials --> Apply --> Save & Close. You will then be able to see the newly created contact.
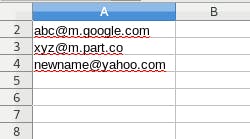
2. Bulk Upload Email List
1) Alternatively, you can create a CSV file with a list of email addresses you wish to send the details to. A reference is given below:
2) Then Click on Contacts --> Dropdown arrow next to Prev button --> Import
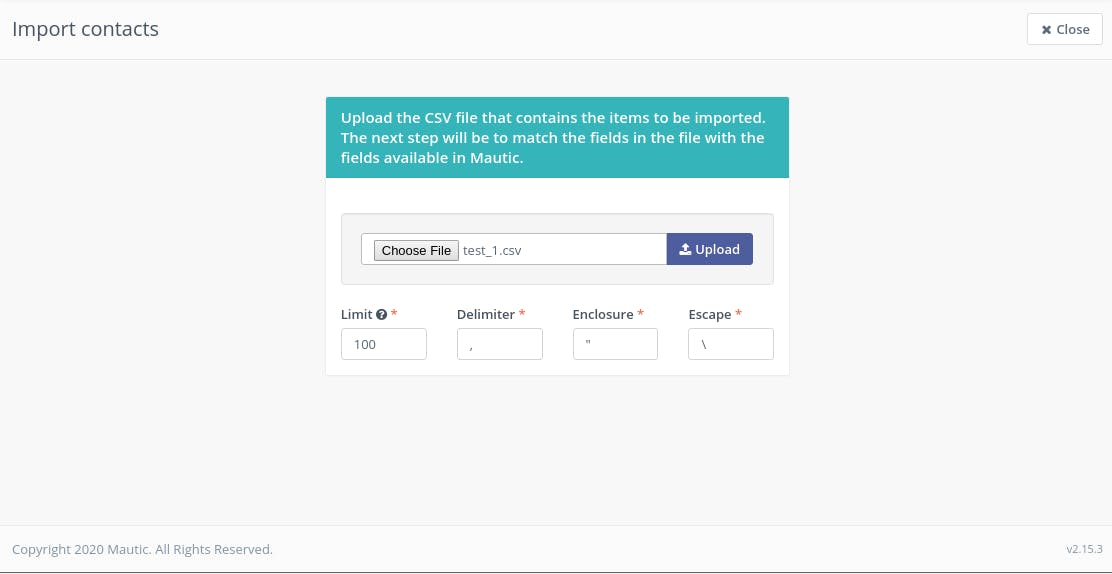
3) The File upload panel opens. Select Choose file --> Select the CSV file --> Upload.
4) The limit option can be altered for large CSV files. This way you can add a large batch of emails with the help of Mautic.
5) Then, you will be redirected to the import panel where multiple options can be selected.
6) There are two sections in this panel. The first one allows you to customise your import.
7) The second section will have dropdowns and values mentioned above them. Select the right values to put in.
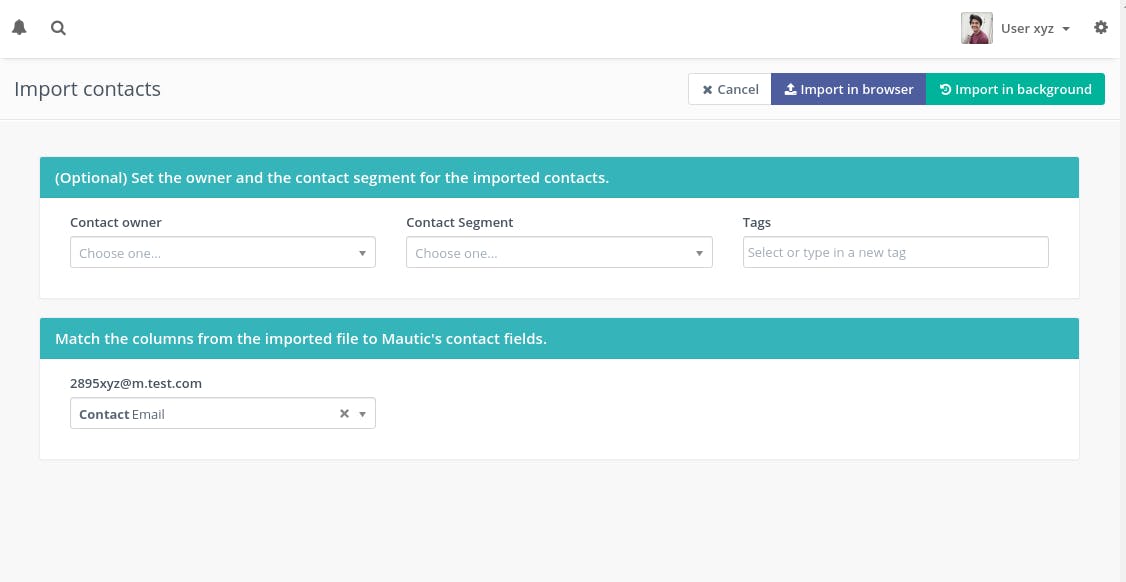
8) Next, you may choose to Import in the browser, which is for a limited number of emails. The browser need not be closed in this case.
9) The other option is Import in the background, which is apt for a huge number of emails. The browser runs in the background in this case.
10) Once the import is successful, a message will be displayed. You can then view the imported contacts.
Step 2 - Create a New Segment
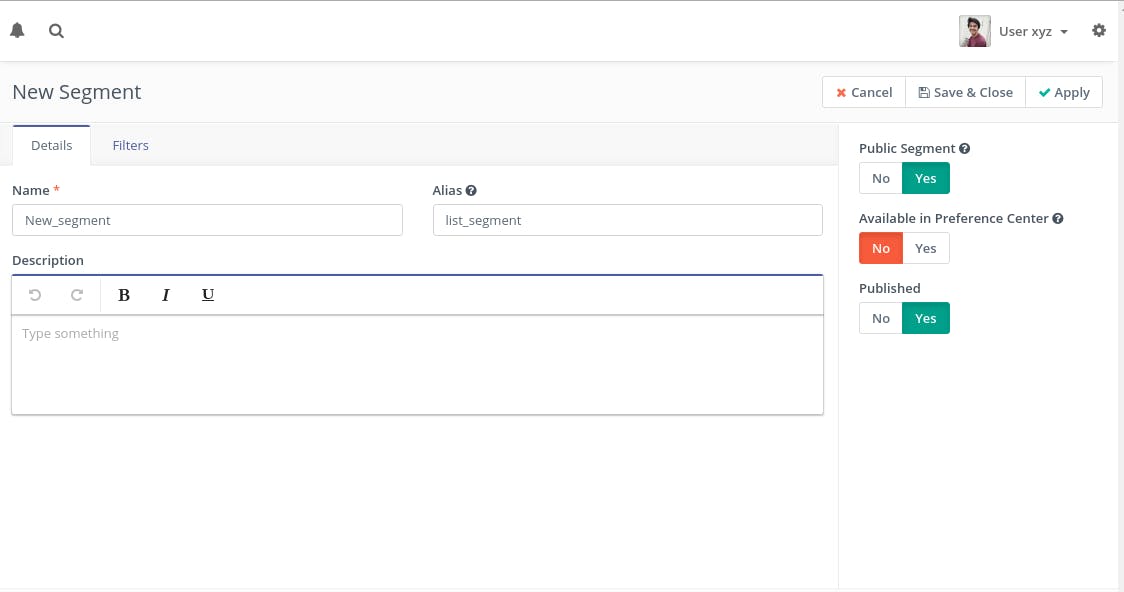
1) Click on Segments in the Nav bar --> New --> Enter the name, Alias (It may be auto-generated too):
2) Click on Filters --> Select the email from the dropdown:
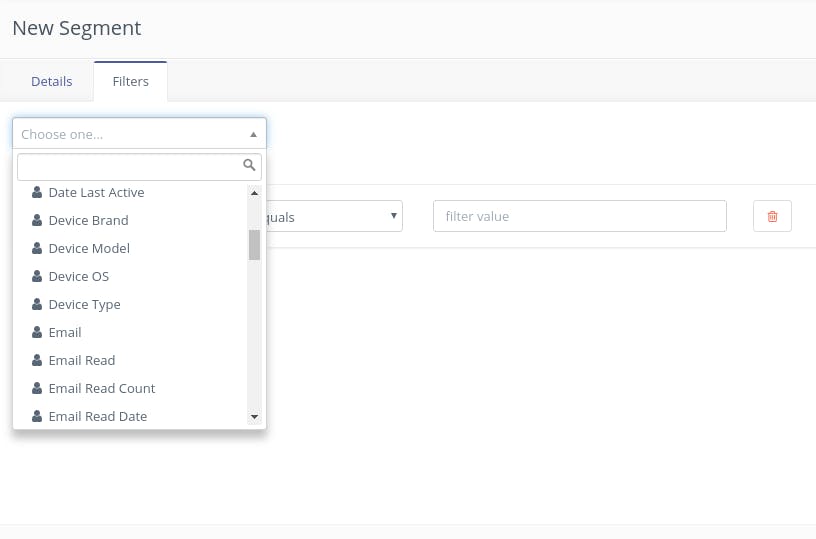
3) Now, set the email filtering conditions which will be used to filter out the emails.
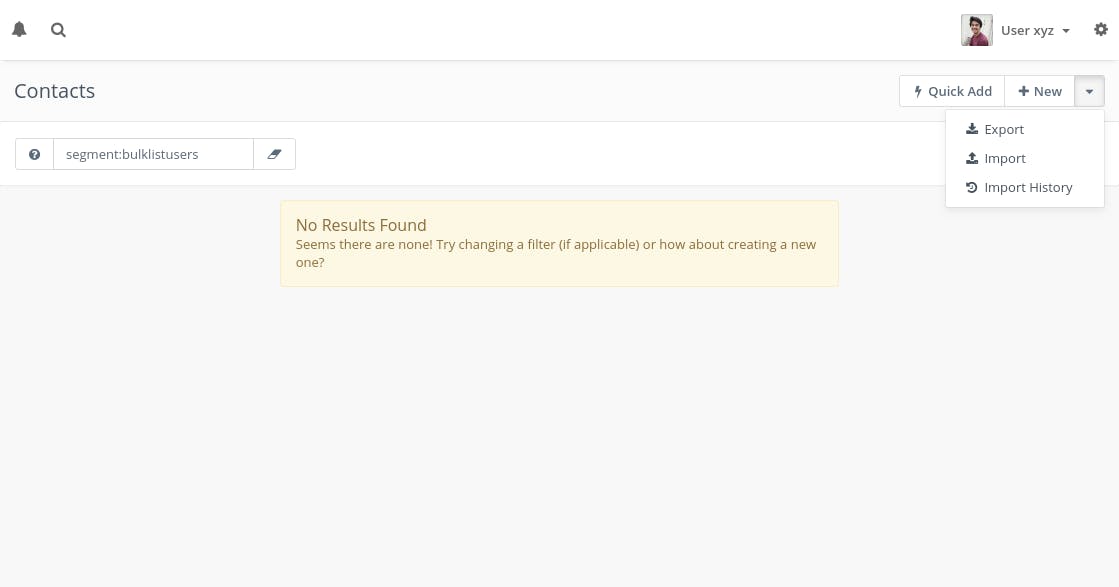
4) Select [Is Not Empty] in order to choose all the emails by setting the filter to Not Empty.
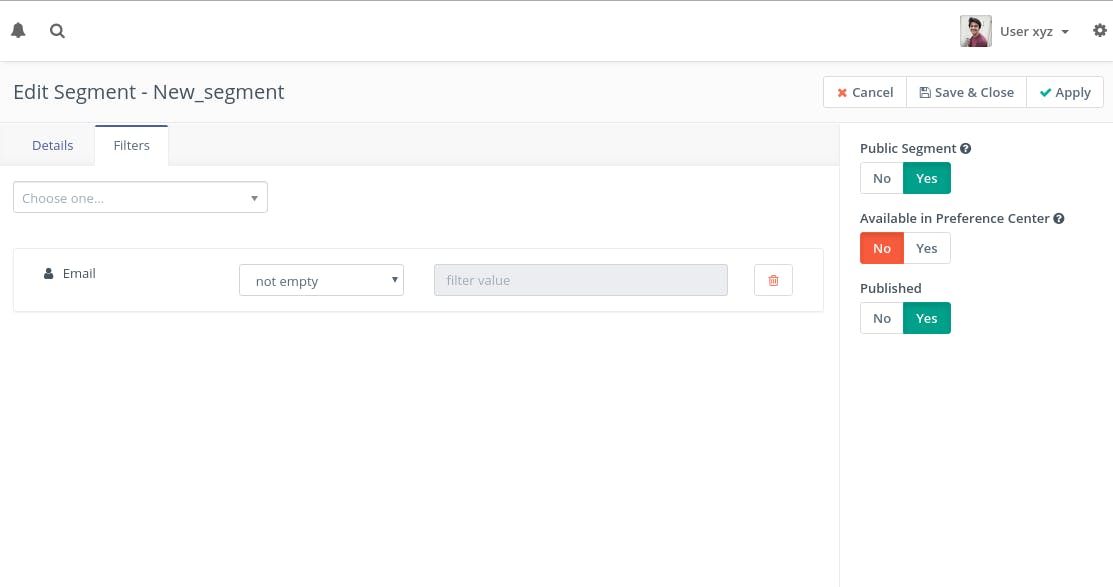
5) Select Apply --> Save & Close. On the basis of your Cron setup, the segment will be posted.
Step 3 - Create a New Campaign
1) Go to the Campaigns Section --> New --> Enter name and description:

2) Select [Launch Campaign Builder] --> [Contact Segments] --> Select segment you want to add in the Contact Source pop up --> Add
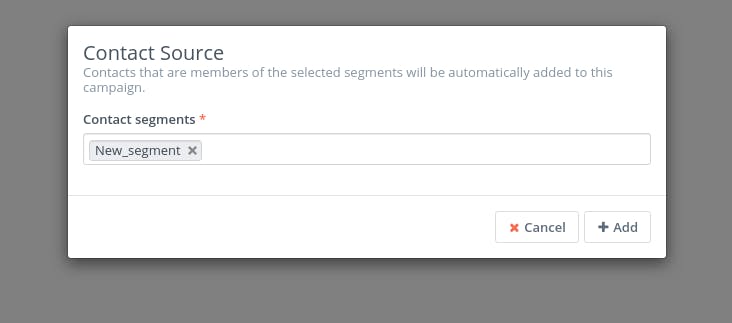
3) After that, click on Apply --> Save and Close.
4) This will reveal the names of segments wherein you need to click on the grey circle to see more options:
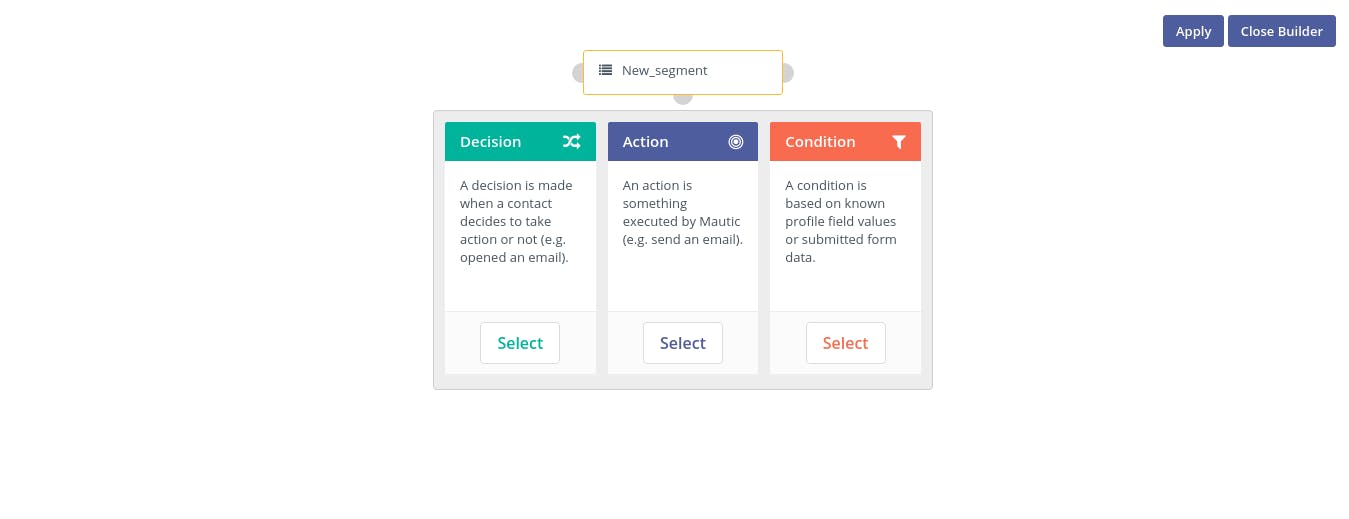
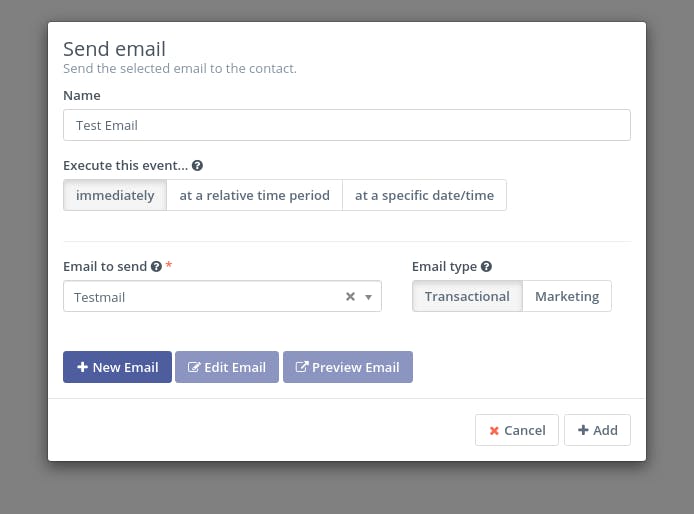
5) Select Action --> Send Email. You will then see Send Email pop up.
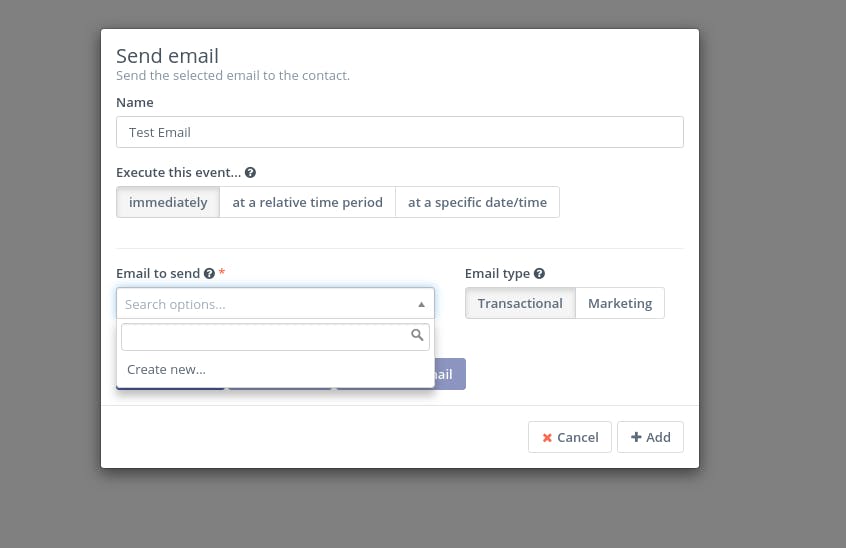
6) Then, set the email name. From Email to Send, select the Create New Dropdown, select the blank template, fill in certain credentials.
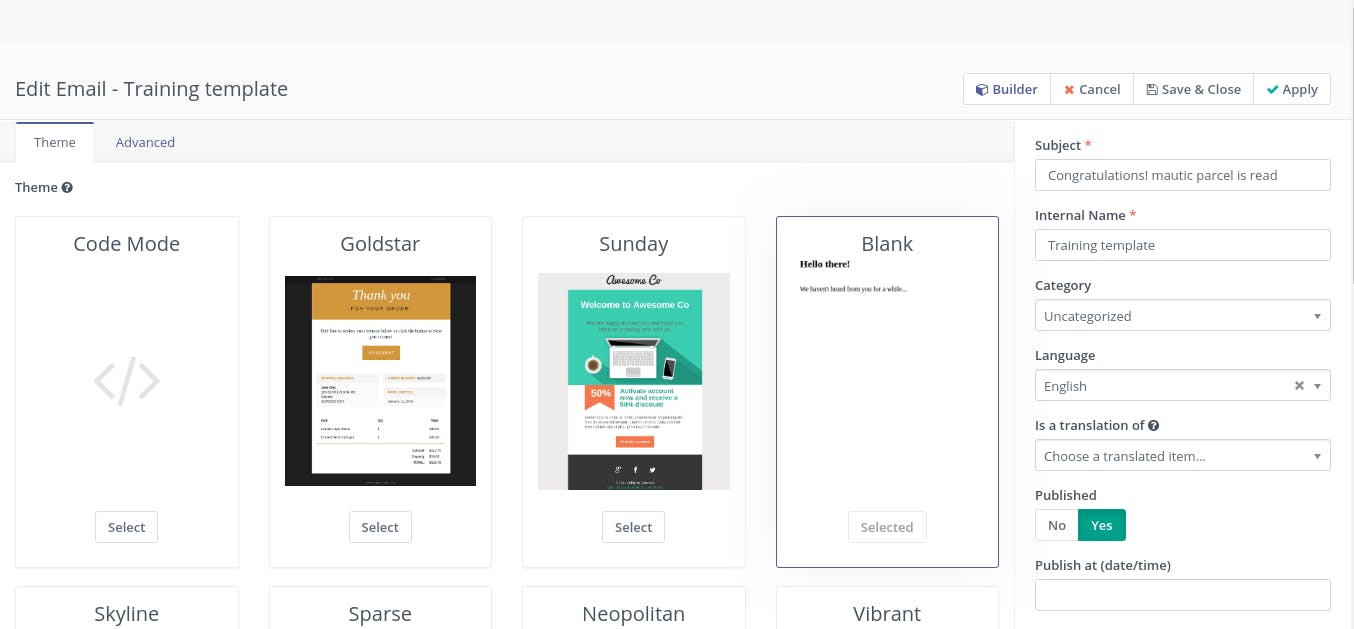
7) Then click on the Advanced tab, fill in Name, Address, and other details.

8) Choose Builder you will see a new window. You can then customise the body of your email.
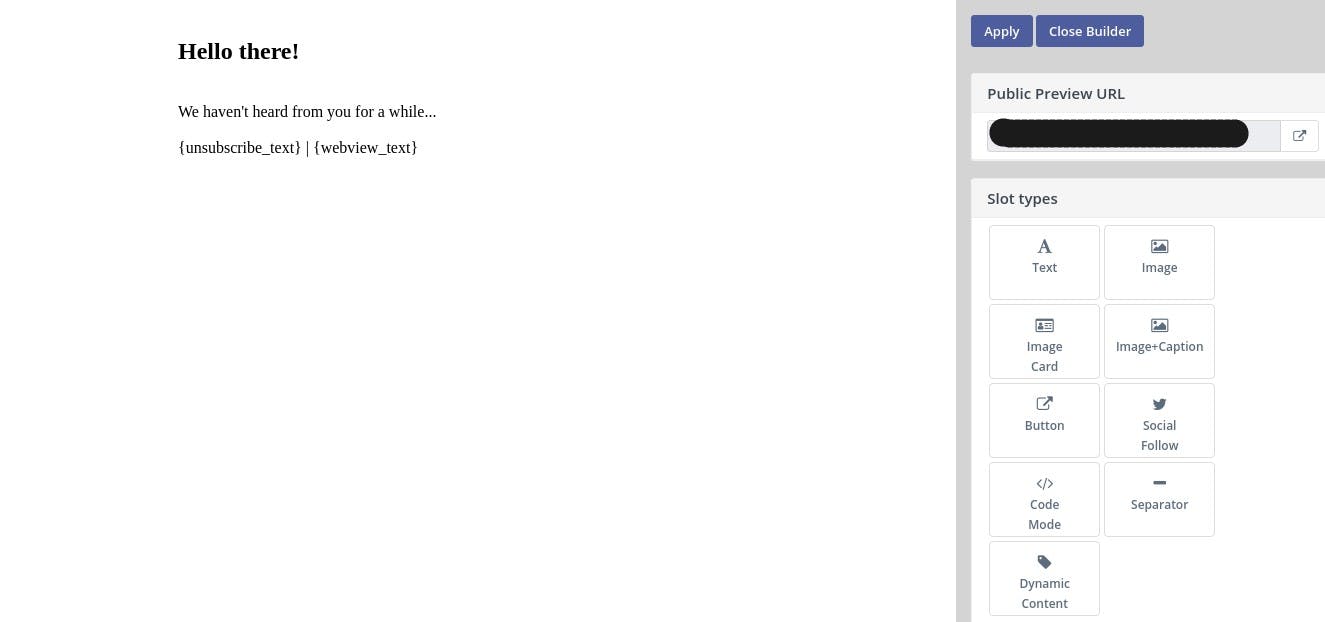
9) Select Apply --> Save & Close the window. You can then set the email type according to your needs.

10) Select [Apply] --> [Close Builder]. Then go to the Edit Campaign Panel and set Published to Yes. Next, select [Apply] --> [Save & Close].
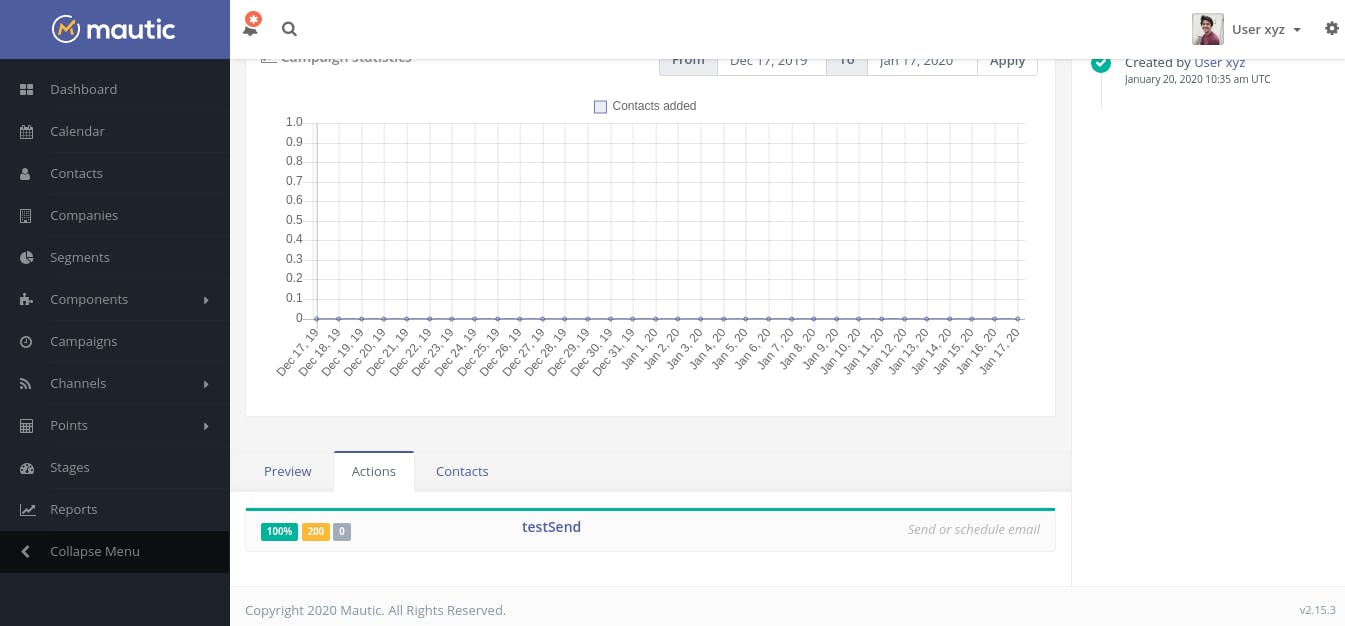
11) Now, you'll be able to see all the campaign progress represented via a graph. This enables your campaign to send emails. After some time, Cron will make sure the emails are sent and you'll be able to see them in your dashboard.
12) You can also check your progress on the Campaign Panel.
FAQs to Install Mautic on Ubuntu 20.04
Can I use a different web server instead of Apache?
Yes, you can use either Apache or Nginx as your web server for Mautic 4 on Ubuntu 20.04.
Do I need to set up a database for Mautic 4?
Yes, you need to set up either MySQL 5.7 or MariaDB 10.3 to create a database for Mautic 4.
Is it necessary to have PHP 7.4 or higher for Mautic 4?
Yes, Mautic 4 requires PHP 7.4 or a higher version to ensure compatibility and optimal performance.
Can I upgrade from an older version of Mautic to Mautic 4 on Ubuntu 20.04?
Yes, Mautic provides guidelines for upgrading from previous versions to Mautic 4. Follow the upgrade instructions carefully to ensure a smooth transition.
Are there any specific PHP extensions required for Mautic 4?
Yes, Mautic 4 requires specific PHP extensions such as mbstring, zip, xml, and gd. Make sure these extensions are enabled on your server.
How can I secure my Mautic 4 installation on Ubuntu 20.04?
You can secure your Mautic 4 installation by enabling SSL/TLS, implementing strong passwords, and regularly updating Mautic and its dependencies.
Can I install Mautic 4 on a shared hosting environment?
It is recommended to have a dedicated server or VPS for installing Mautic 4 to ensure optimal performance and control over the environment.
Conclusion
We hope this detailed tutorial helped you to install, configure and operate Mautic on Ubuntu 20.04 server. To learn more about Mautic installation on Ubuntu 20.04 server, check out the official Mautic installation document
If you have any queries, please leave a comment below and we’ll be happy to respond to them for sure.