
Introduction
Before we discuss how to install ModSecurity 3, OWASP CRS with Nginx on Ubuntu 22.04, let's first understand- What is ModSecurity 3 and OWASP CRS?
ModSecurity is an open-source web application firewall (WAF) module that can be integrated with Nginx to enhance web application security. The OWASP (Open Web Application Security Project) Core Rule Set (CRS) provides a set of rules to protect against common web application vulnerabilities.
This tutorial explains how to install ModSecurity 3, OWASP CRS, and configure them with Nginx on Ubuntu 22.04. We will also address few FAQs to install ModSecurity 3, OWASP CRS, and configure them with Nginx on Ubuntu 22.04.
Advantages
- Enhanced Web Application Security: ModSecurity acts as a web application firewall, providing protection against common web application vulnerabilities.
- Comprehensive Security Rules: By integrating OWASP CRS with ModSecurity, you have access to a set of rules designed to detect and mitigate various types of web application attacks.
- Customizable Security Policies: ModSecurity allows customization of security policies to fit your application's specific requirements and protection needs.
- Integration with Nginx: ModSecurity seamlessly integrates with Nginx, a high-performance web server and reverse proxy, leveraging its speed and scalability.
- Real-Time Attack Monitoring and Logging: ModSecurity provides real-time monitoring and logging capabilities, enabling you to monitor and analyze potential security threats effectively.
Pre-installation Steps For Modsecurity 3 with Nginx on Ubuntu 22.04
Before beginning the ModSecurity installation, prepare your server for the upcoming tasks. Update your system and ensure you have the latest version of Nginx
Step 1: Update Ubuntu Before Modsecurity 3 Installation
The first step is to keep the server up-to-date as it ensures all software packages to have the latest security patches and also performance improvements. It can be executed by the following command:
sudo apt update && sudo apt upgrade Step 2: Remove Pre-existing Nginx Installation (Situational)
If you have a pre-existing Nginx installation, then we would recommend removing the existing one and install the latest version.
Firstly, we have to stop the current Nginx service with the following command:
sudo systemctl stop nginxThen, remove the existing Nginx installation with the below mentioned command:
sudo apt purge nginx -y && sudo apt autoremove nginx -yThe purge option completely removes the Nginx package along with its configuration files, whereas the autoremove command removes any packages that were automatically installed to satisfy Nginx dependencies.
Step 3: Add the Latest Nginx PPA (Optional)
As mentioned earlier, remove the outdated Nginx service and add a new, current PPA (Personal Package Archive) for Nginx.
To add the nginx stable PPA, execute:
sudo add-apt-repository ppa:ondrej/nginx -yTo add the nginx mainline PPA, execute:
add-apt-repository ppa:ondrej/nginx-mainline -y
Step 4: Update Packages Index After Nginx PPA Import on Ubuntu
After importing the required repository, we will have to update APT sources list as it is necessary, and it can be done by using the following command:
sudo apt updateNow, install Nginx with the following command:
sudo apt install nginx/etc/nginx/nginx.conf configuration file. It’s generally recommended to keep your current configuration file by pressing n.Step 5: Uncomment DEB-SRC Nginx Source on Ubuntu
The PPA installation process does not include the source code by default. So, you have to enable a specific feature and manually download Nginx source code to compile modsecurity later.
sudo nano /etc/apt/sources.list.d/ondrej-ubuntu-nginx-mainline-jammy.list
Find the line that starts with # deb-src and uncomment it (i.e., remove the #). If you use a different third-party repository, replace the path in the command with the appropriate one:
# deb-src https://ppa.launchpadcontent.net/ondrej/nginx-mainline/ubuntu/ jammy main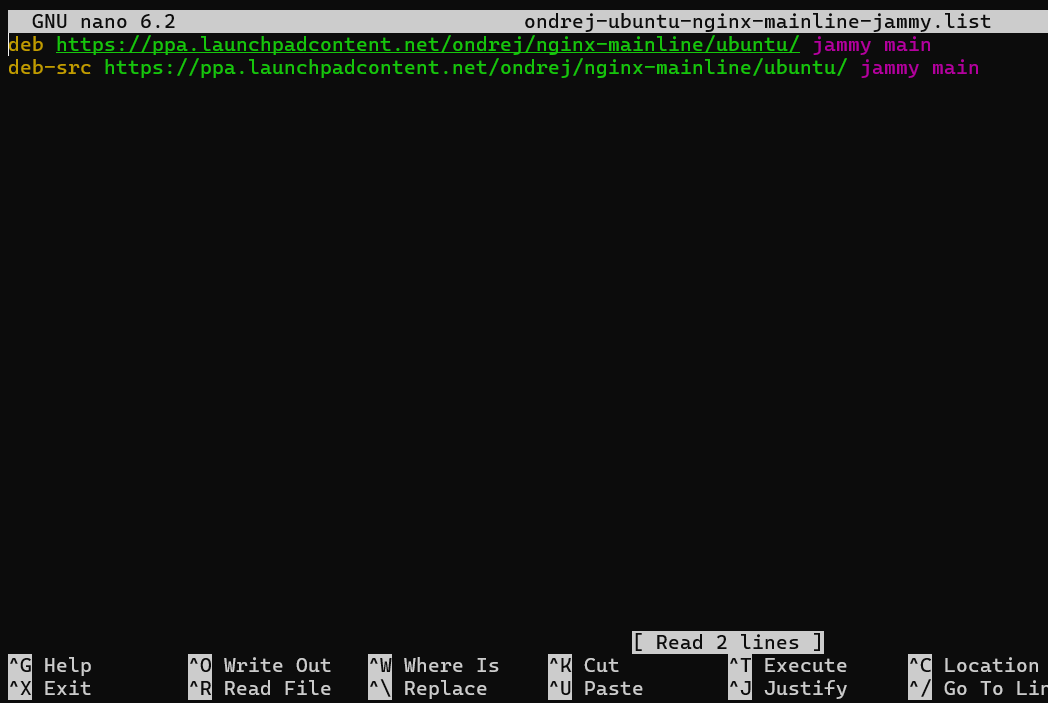
Once you have completed, save the file by pressing CTRL+O and then exit by pressing CTRL+X.
If you are more comfortable with command-line utilities, you can also use sed command to uncomment the source line:
sudo sed -i 's/# deb-src/deb-src/g' /etc/apt/sources.list.d/ondrej-ubuntu-nginx-mainline-jammy.listLastly, update the repository list using the following command:
sudo apt update
Download Nginx Source Code on Ubuntu
We must compile Modsecurity dynamic module against Nginx source code to integrate it with Nginx.
Firstly, we need to download and store Nginx source code in a specific directory.
Step 1: Create Directory Structure
First, we create a directory to download and store the Nginx source code and the command to create it is as follows:
sudo mkdir /usr/local/src/nginx && cd /usr/local/src/nginxThe above command helps to create the directory and also changes the current directory to current directory.
Step 2: Install Required Packages and Download Nginx Source
We must install a package named dpkg-dev before we can download the source code. This package provides several development tools to build, upload and unpack Debian source packages. It can be installed with following command:
sudo apt install dpkg-dev -yNow we are able to download Nginx source code with necessary tools. It can be accomplished using the following command:
sudo apt source nginx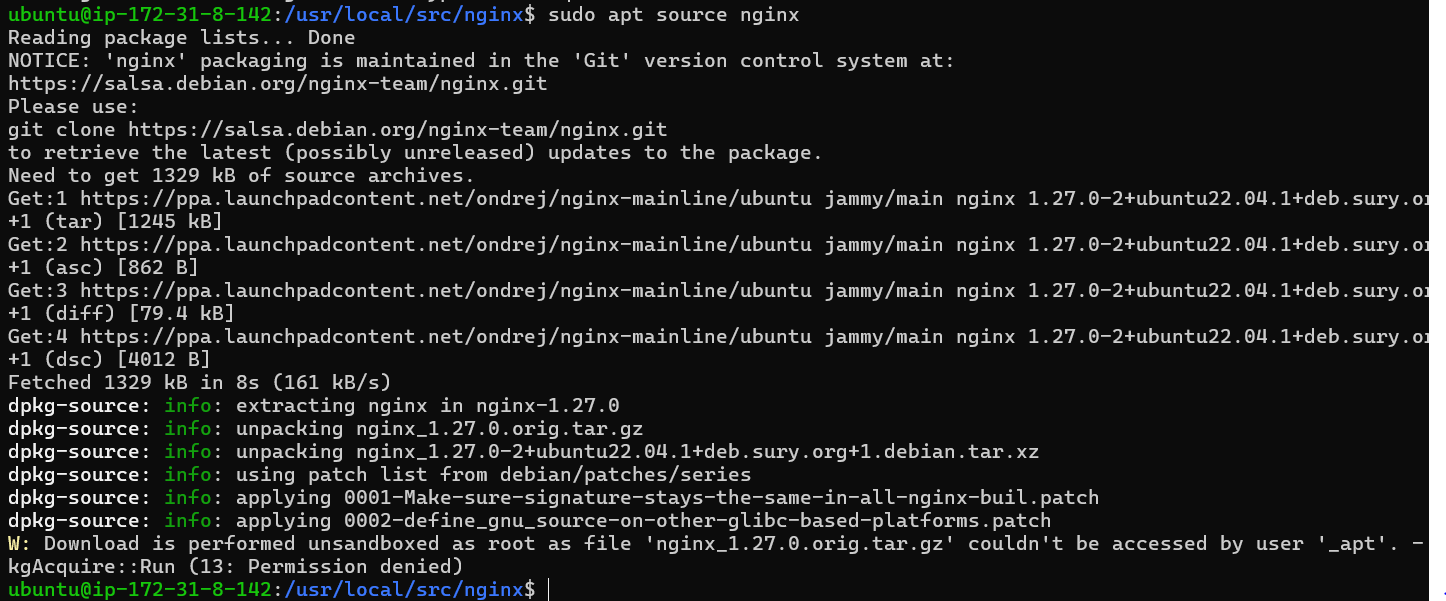
Step 3: Verifying the Source Version on Ubuntu
After downloading the source code, we have to ensure that the downloaded source version matches with the installed Nginx version.
First, list the files in the current directory to confirm you have downloaded the source code:
ls
You can be able to see certain files and directories related to Nginx.
Next, confirm that the source package matches the Nginx version installed on your Ubuntu system. You can check the installed Nginx version with the following command:
nginx -v
Install libmodsecurity3 for ModSecurity 3 on Ubuntu 22.04
ModSecurity is an effective firewall for web applications, and libmodsecurity3 is its core component that handles HTTP filtering.
Step 1: Clone the ModSecurity 3 Repository on Ubuntu
First, fetch the libmodsecurity3 source code from its GitHub repository using Git, if it's not installed, use the following command to add it:
sudo apt install gitWe need to adjust the ownership of the directory to avoid the root privileges before we clone the repository:
sudo chown -R $user:$user /usr/local/src/This command recursively changes the ownership of the directory to the current user.
Next, let’s clone the libmodsecurity3 repository. We’ll use a shallow clone (--depth 1) to save bandwidth and storage. This means we’ll only fetch the latest revision of the v3/master branch:
git clone --depth 1 -b v3/master --single-branch https://github.com/SpiderLabs/ModSecurity /usr/local/src/ModSecurity/After cloning the repository, change your working directory to the newly cloned repository:
cd /usr/local/src/ModSecurity/Step 2: Install libmodsecurity3 Dependencies on Ubuntu
The compilation of libmodsecurity3 requires several dependencies. Install them with the following command:
sudo apt install gcc make build-essential autoconf automake libtool libcurl4-openssl-dev liblua5.3-dev libfuzzy-dev ssdeep gettext pkg-config libpcre3 libpcre3-dev libxml2 libxml2-dev libcurl4 libgeoip-dev libyajl-dev doxygen libpcre++-dev libpcre2-16-0 libpcre2-dev libpcre2-posix3 -yNext, initialize and update the Git submodules with the following commands:
git submodule init
git submodule update
Step 3: Build ModSecurity Environment on Ubuntu
Now we can build the ModSecurity environment. Firstly, run the build script:
./build.sh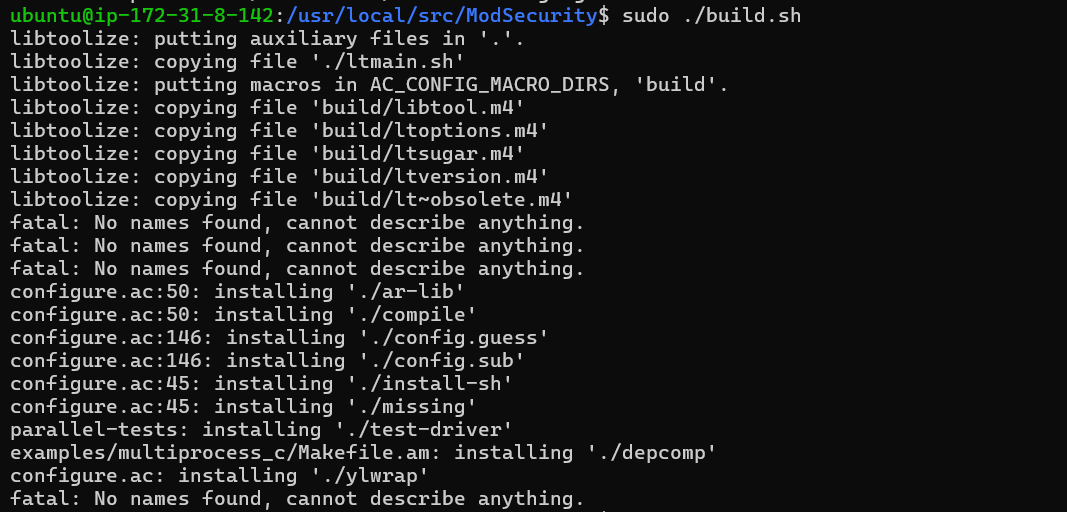
Now configure the environment:
./configure
fatal: No names found, cannot describe anything. Don’t worry, this error message can be safely ignored.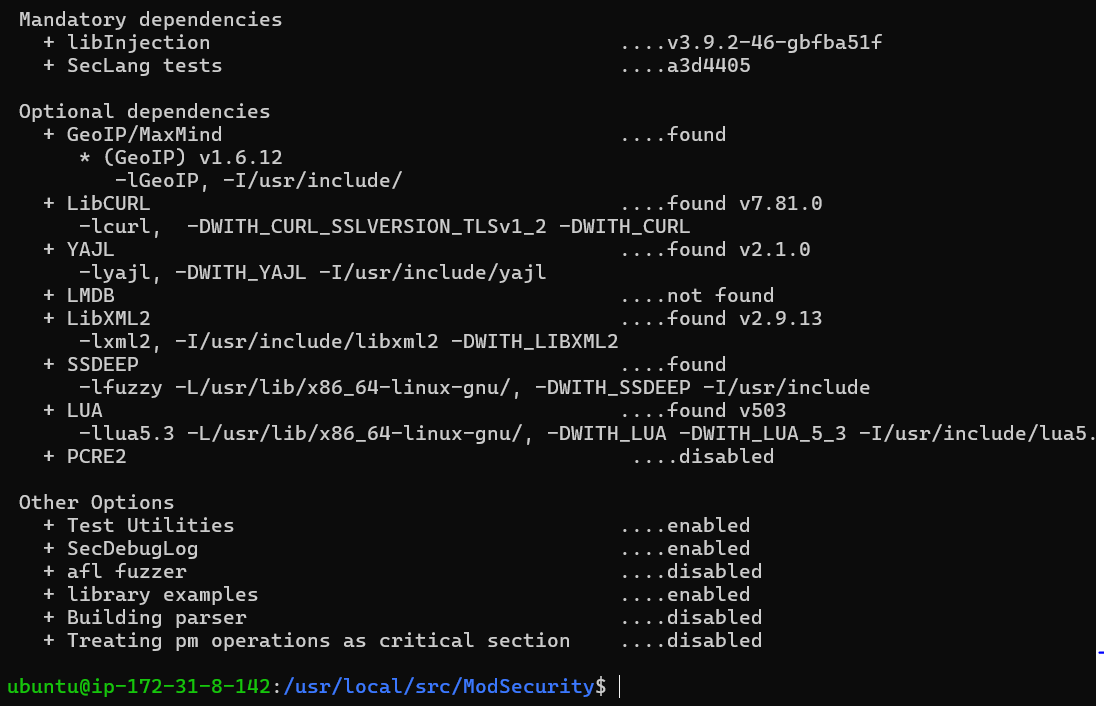
Step 4: Compile the ModSecurity Source Code on Ubuntu
Once we have built and configured the environment for libmodsecurity3 now we are ready to compile it, and it can be done using the following command:
makeFor people who tend to work on high-performance servers, you can speed up the compilation process by running the below mentioned command followed by the number of CPU cores your server has:
make -j 6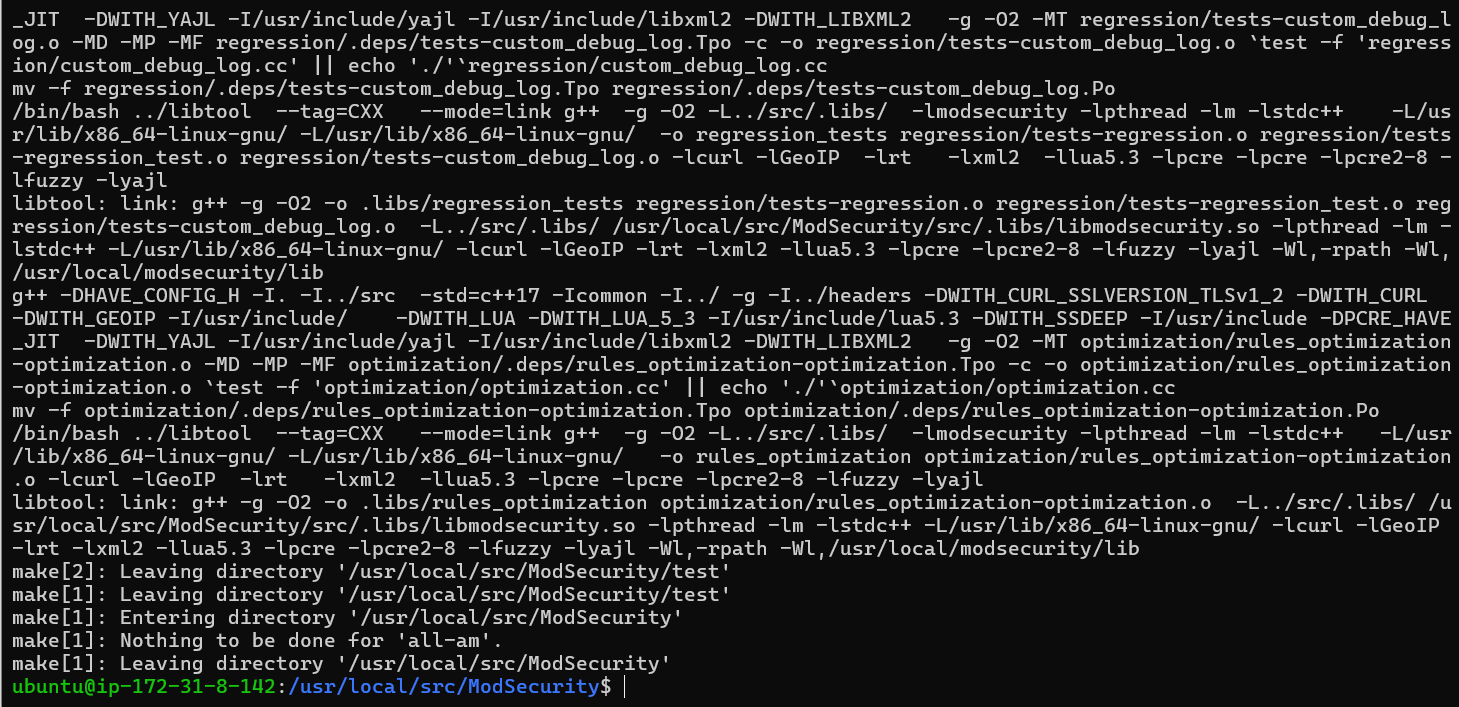
Step 5: Install Compiled Code For Modsecurity 3 on Ubuntu
Once we have compiled the source code, the next step is to install it:
sudo make install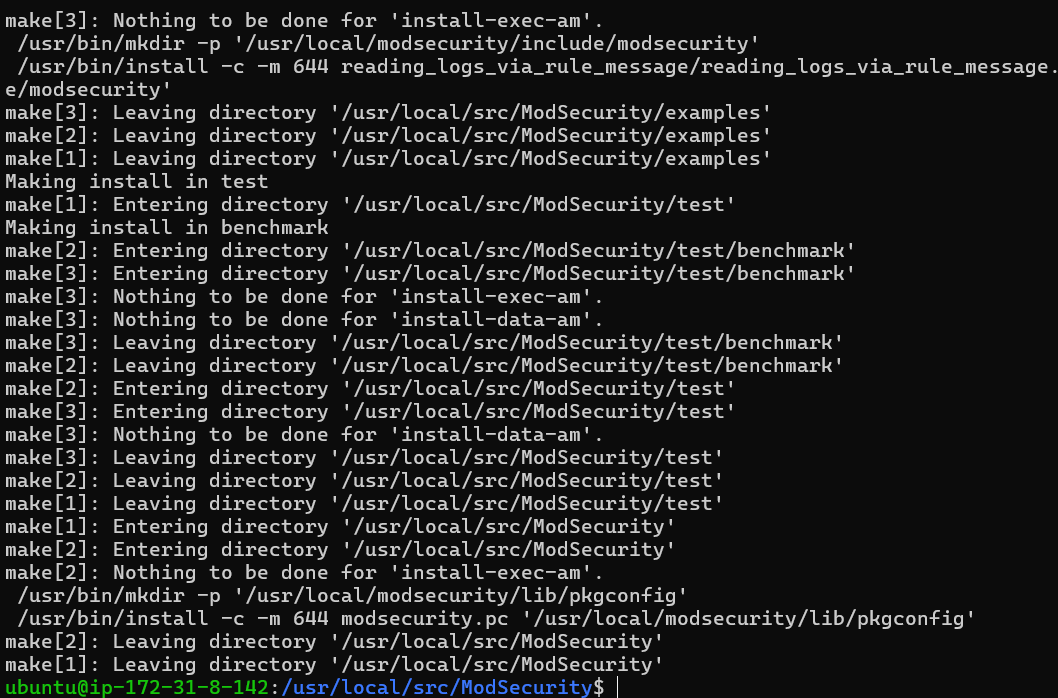
Install ModSecurity-nginx Connector on Ubuntu 22.04
In this section, we’ll walk you through installing the ModSecurity-nginx connector.
Step 1: Clone the ModSecurity-nginx Repository on Ubuntu
First, we need to fetch the source code of the ModSecurity-nginx connector. We do this by cloning the repository from GitHub, by following the command mentioned below:
git clone --depth 1 https://github.com/SpiderLabs/ModSecurity-nginx.git /usr/local/src/ModSecurity-nginx/This command fetches only the latest revision of the ModSecurity-nginx repository.
Step 2: Install ModSecurity-nginx Dependencies on Ubuntu
Next, we need to navigate to the Nginx source directory. You can do this by executing the following cd command:
cd /usr/local/src/nginx/nginx-1.*.*We’ll install the dependencies required for the ModSecurity-nginx connector present in the Nginx directory by executing the following command:
sudo apt build-dep nginx && sudo apt install uuid-devStep 3: Compile ModSecurity-nginx Connector
With the dependencies in place, we can compile the ModSecurity-nginx connector. For this, we need to run the following command:
./configure --with-compat --add-dynamic-module=/usr/local/src/ModSecurity-nginxThe --with-compat flag ensures compatibility with various systems, while the --add-dynamic-module option specifies the location of the ModSecurity-nginx connector.
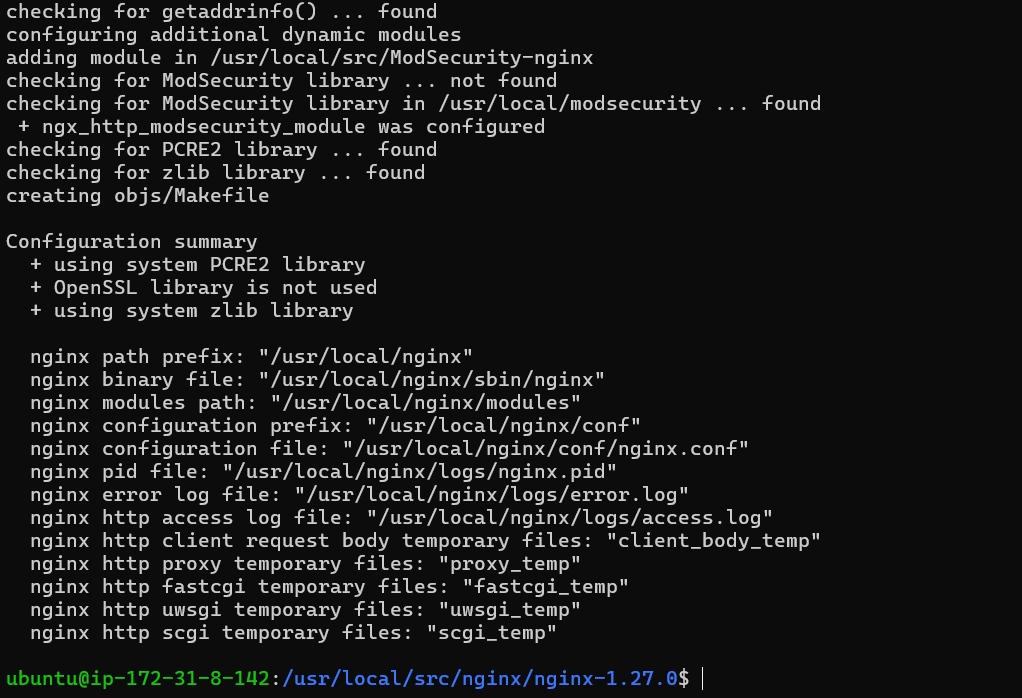
After configuring the environment, create the dynamic modules by running the make command:
make modules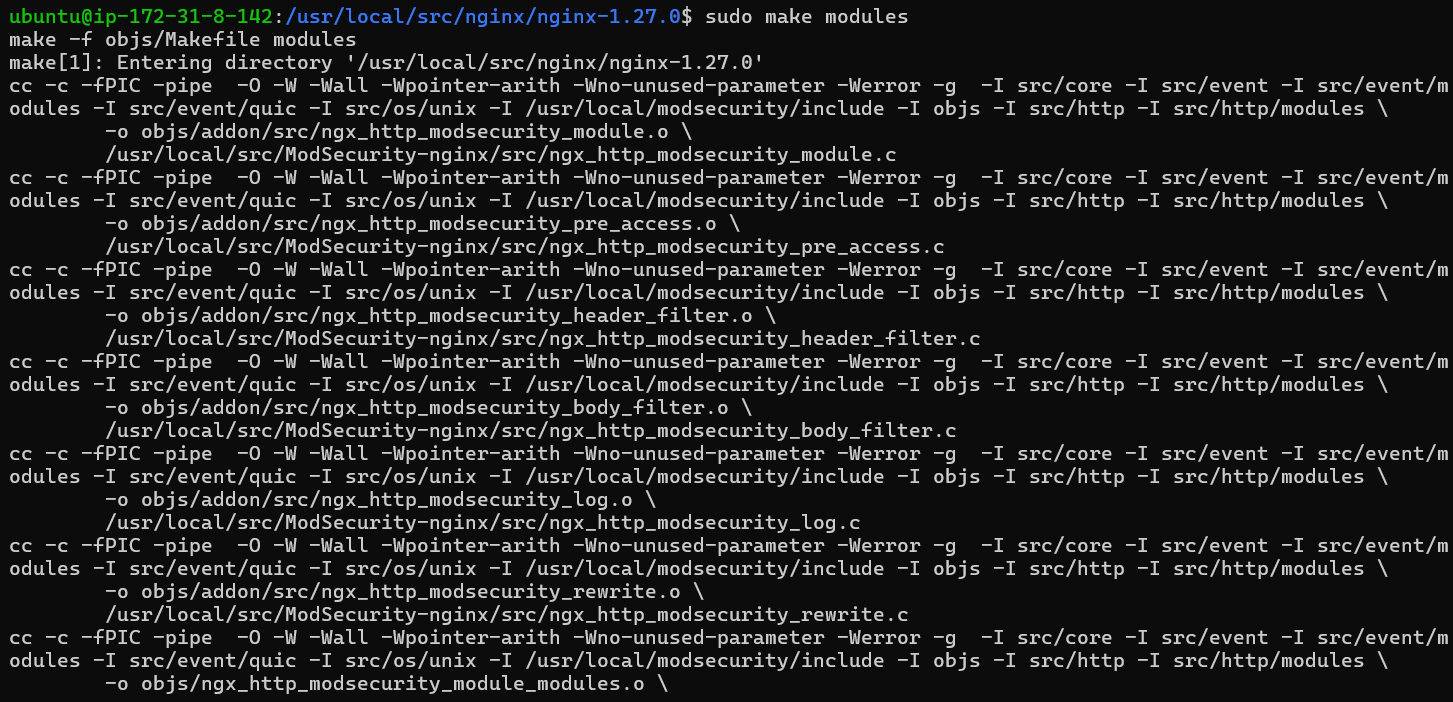
Step 4: Moving the Dynamic Module on Ubuntu
The final step in this process is moving the dynamic module to the appropriate directory, and it can be accomplished by using the following command:
sudo cp objs/ngx_http_modsecurity_module.so /etc/nginx/modules/It’s important to note that you can store the dynamic module anywhere, provided you specify the full path when loading it.
Configure the ModSecurity-nginx Connector with Nginx on Ubuntu 22.04
After successfully installing the ModSecurity-nginx connector, load and appropriately configure it into Nginx.
Step 1: Enable ModSecurity in nginx.conf
At first, we need to specify the location of ModSecurity module in the nginx.conf file and to proceed with this we have to open the file in text editor. In this example, we will be using nano:
sudo nano /etc/nginx/nginx.confAt the top of the file, add the following line:
load_module modules/ngx_http_modsecurity_module.so;This command instructs Nginx to load the ModSecurity module.
Next, add the following code under the http {} section:
modsecurity on;
modsecurity_rules_file /etc/nginx/modsec/modsec-config.conf;
The above commands enable ModSecurity and specify the location of the ModSecurity rules file.
Step 2: Create Directory and Files for ModSecurity 3 on Ubuntu
We need to create a directory to store configuration files and future rules, and it can be done by executing the following command:
sudo mkdir /etc/nginx/modsec/Next, copy the sample ModSecurity configuration file from the cloned Git directory to the directory you’ve just created:
sudo cp /usr/local/src/ModSecurity/modsecurity.conf-recommended /etc/nginx/modsec/modsecurity.confWe have to now modify the modsecurity.conf file. The ModSecurity rule engine is designed in such a way that it operates in DetectionOnly mode that is used to detect malicious behavior, but does not block it. So, to change this behavior open the modsecurity.conf file:
sudo nano /etc/nginx/modsec/modsecurity.confFind this line SecRuleEngine DetectionOnly and change it to:
SecRuleEngine OnNext, locate the SecAuditLogParts line:
# Log everything we know about a transaction.
SecAuditLogParts ABIJDEFHZ
Now save CTRL+O and exit CTRL+X the file.
Step 3: Create modsec-config.conf File on Ubuntu
To create a modsec-config.conf file would be our next step. This file will include the modsecurity.conf and other rule sets, such as OWASP CRS. Now, create and open the file with the following command:
sudo nano /etc/nginx/modsec/modsec-config.confAdd the following line:
Include /etc/nginx/modsec/modsecurity.confSave and exit the file.
Finally, copy the ModSecurity's unicode.mapping file using the cp command:
sudo cp /usr/local/src/ModSecurity/unicode.mapping /etc/nginx/modsec/Step 4: Validating Nginx Modsecurity 3 Configuration on Ubuntu
We have to validate our configuration before proceeding further. Perform a dry run of Nginx service by the following command:
sudo nginx -tIf we have set up everything correctly the following message would be displayed:
nginx: the configuration file /etc/nginx/nginx.conf syntax is ok
nginx: configuration file /etc/nginx/nginx.conf test is successful
The output confirms that the syntax in your Nginx configuration file is correct, signaling a successful configuration test.
Step 5: Apply Configuration Changes with Nginx on Ubuntu
After we have validated our configuration and no syntax errors are present then now we need to restart the Nginx service for the changes to take effect and it can be done by using the following command:
sudo systemctl restart nginxThis command will instruct your system to stop working and immediately restart the Nginx services.
After the restart the Nginx service will now have ModSecurity WAF enabled.
Install OWASP Core Rule Set for ModSecurity 3 on Ubuntu 22.04
The OWASP CRS offers a respected and widely accepted set of rules for web application firewalls (WAFs), serving as a robust protective barrier against most emerging internet threats.
Step 1: Navigate to ModSecurity 3 Directory on Ubuntu
Firstly, we have to navigate to the ModSecurity directory that has been created in previous steps:
cd /etc/nginx/modsecWe can change the ownership of the directory to the current user to avoid having the use of sudo command for following steps:
sudo chown -R $USER:$USER /etc/nginx/modsec/Step 2: Download OWASP CRS Archive on Ubuntu
Our next step is to download OWASP CRS archive using the wget command.
wget https://github.com/coreruleset/coreruleset/archive/refs/tags/v3.3.4.tar.gzDownload the nightly build version to stay updated with the latest developments.Only advanced users should use this version.
wget https://github.com/coreruleset/coreruleset/archive/refs/tags/nightly.tar.gzStep 3: Extract OWASP Core Rule Set Archive on Ubuntu
After the download is completed, extract the archive using the tar command:
tar -xvf v3.3.4.tar.gzDo remember to replace the version name with the name of file you have downloaded if you use a different version.
Step 4: Configure OWASP CRS on Ubuntu
The OWASP CRS has a sample configuration file that we need to rename. We will create a copy of this file,preserving the original as a backup using the cp command:
sudo cp /etc/nginx/modsec/coreruleset-3.3.4/crs-setup.conf.example /etc/nginx/modsec/coreruleset-3.3.4/crs-setup.confStep 5: Enable OWASP CRS Rules with Modsecurity 3 on Ubuntu
To enable the OWASP CRS rules, we need to modify the modsec-config.conf file:
sudo nano /etc/nginx/modsec/modsec-config.confAdd the following two lines to include CRS configuration and rules in this file:
Include /etc/nginx/modsec/coreruleset-3.3.4/crs-setup.conf
Include /etc/nginx/modsec/coreruleset-3.3.4/rules/*.conf
Save the file and exit.
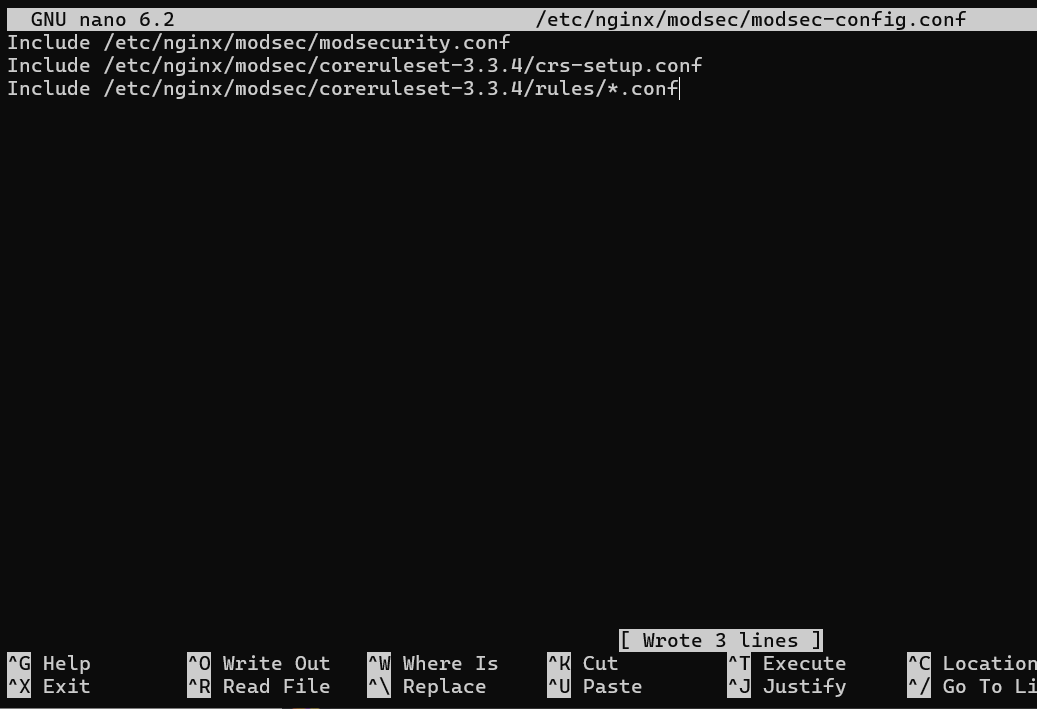
Remember to replace coreruleset-3.3.4 with the version you downloaded if it’s different.
Save the changes Ctrl+O and exit the text editor Ctrl+X.
sudo nginx -t
Step 6: Validating the Configuration and Restarting Nginx
After these significant changes are made to our Nginx configuration now, we have to validate everything to make sure that there exists no syntax errors or misconfigurations.
To perform this “dry run”, use the following command:
nginx: the configuration file /etc/nginx/nginx.conf syntax is ok
nginx: configuration file /etc/nginx/nginx.conf test is successful
This message tells us that our configuration is correct and that our changes will not disrupt service.
We are ready to make these changes live with the successful dry run. For the new configuration to take effect, we need to restart the Nginx service:
sudo systemctl restart nginxUnderstanding and Utilizing the OWASP Core Rule Set with Modsecurity 3 and Ubuntu
With the installation and setup of ModSecurity and the OWASP Core Rule Set (CRS) on your Nginx web server completed, it’s time to delve deeper into understanding and making use of the CRS.
Navigate CRS Configuration
To open the configuration file we have to use the following command:
sudo nano /etc/nginx/modsec/coreruleset-3.3.4/crs-setup.confThis file contains many options, each with detailed comments explaining their functions.
Scoring Modes in OWASP CRS
CRS operates with help of a scoring system and there are two primary modes of operation and they are as follows:
Anomaly Scoring Mode
# -- [[ Anomaly Scoring Mode (default) ]] --The recommended mode is the default. Each matching rule for a request or response in this mode increases an ‘anomaly score’. After evaluating all inbound and outbound rules, the system checks the total anomaly score against a threshold.
Self-Contained Mode
# -- [[ Self-Contained Mode ]] --When a rule matches this mode, the system immediately stops further evaluation. This mode reduces resource usage, offers less flexibility in blocking policy, and produces less informative audit logs. The system logs only the first detected threat, mirroring many Intrusion Detection Systems (IDS).
Paranoia Levels: Balancing Security and Usability
A unique feature of the CRS is its paranoia levels and these allow you to control the number of rule checks that contribute to your anomaly scores.
There are four paranoia levels:
- Paranoia Level 1: The default level recommended for most users. It enables most core rules and should rarely trigger false positives (FPs) or legitimate requests mistakenly identified as malicious.
- Paranoia Level 2: Designed for advanced users, this level enables additional rules, such as regex-based SQL and XSS injection protections. Some false positives may occur at this level.
- Paranoia Level 3: For expert users, this level enables even more rules and limits on special characters used. Expect to handle more false positives at this level.
- Paranoia Level 4: Only recommended for exceptional circumstances. This level restricts special characters further and is likely to produce many false positives.
Paranoia levels help strike a balance between security and usability. While high paranoia levels offer enhanced security, they may block legitimate traffic and trigger false alarms.
Verifying OWASP CRS Implementation with Modsecurity 3 on Ubuntu 22.04
Once we have successfully set up the OWASP CRS on our server it's important to test the implementation to ensure it's functioning.
It is known to be a crucial step as it verifies the effective deployment of the security rules and allows troubleshooting any potential issues.
Performing a Test Request to the Webserver
This URL should include a query string that tries to execute a command, clearly violating security rules.
https://www.yourdomain.com/index.html?exec=/bin/bashReplace yourdomain.com with your actual domain name. This URL attempts to pass the /bin/bash command through the exec parameter in the query string.
Interpreting the Response
If OWASP CRS is correctly set up and operational, it should identify this malicious request and respond with a 403 Forbidden error. This error implies that the server understood the request but refused to authorize it, which in this case, is a result of the ModSecurity rule violation.
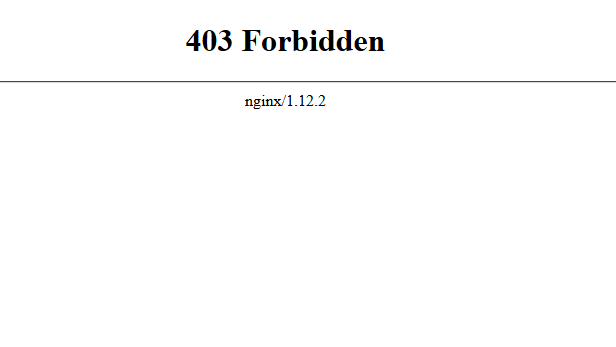
The image above shows a 403 Forbidden error page and this configuration actively protects your server from malicious requests.
Troubleshooting
If you don’t receive a 403 Forbidden error indicates that something is amiss. The most common issue is forgetting to switch ModSecurity from DetectionOnly mode to On. DetectionOnly mode logs the threats but doesn’t block them.
Dealing with False Positives and Custom Rule Exclusions with Modsecurity 3, OWASP CRs on Ubuntu 22.04
In the realm of cybersecurity, the deployment of the OWASP CRS alongside ModSecurity often serves as an effective line of defense. However, it can lead to instances of false positives, which can consume a significant amount of your time to manage.
Navigating False Positives
Striking a delicate balance between security and usability is crucial. Setting the paranoia level of ModSecurity rules too high may yield many false positives. Therefore, it is wise to begin with a lower paranoia level.
Excluding Common False Positives
ModSecurity offers a mechanism for whitelisting common actions that often trigger false positives.
Below is an example of a default rule that whitelists these actions:
#SecAction \
# "id:900130,\
#  phase:1,\
#  nolog,\
#  pass,\
#  t:none,\
#  setvar:tx.crs_exclusions_cpanel=1,\
#  setvar:tx.crs_exclusions_dokuwiki=1,\
#  setvar:tx.crs_exclusions_drupal=1,\
#  setvar:tx.crs_exclusions_nextcloud=1,\
#  setvar:tx.crs_exclusions_phpbb=1,\
#  setvar:tx.crs_exclusions_phpmyadmin=1,\
#  setvar:tx.crs_exclusions_wordpress=1,\
#  setvar:tx.crs_exclusions_xenforo=1"
To whitelist certain applications, uncomment the corresponding lines and leave the (1) number intact.
Streamlining the Syntax
For a cleaner syntax, you can modify the command to include only the applications you wish to whitelist.
SecAction \
 "id:900130,\
  phase:1,\
  nolog,\
  pass,\
  t:none,\
  setvar:tx.crs_exclusions_phpbb=1,\
  setvar:tx.crs_exclusions_phpmyadmin=1,\
  setvar:tx.crs_exclusions_wordpress=1"
Addressing Custom Exclusions
To handle custom exclusions, you need to activate a specific file. This step involves renaming the REQUEST-900-EXCLUSION-RULES-BEFORE-CRS-SAMPLE.conf file using the cp command:
sudo cp /etc/nginx/modsec/coreruleset-3.4-dev/rules/REQUEST-900-EXCLUSION-RULES-BEFORE-CRS.conf.example /etc/nginx/modsec/coreruleset-3.4-dev/rules/REQUEST-900-EXCLUSION-RULES-BEFORE-CRS.confWhitelisting Specific Paths and IP Addresses
There are instances where specific paths, often associated with certain applications, tend to trigger false positives. In such situations, you can whitelist these paths to eliminate unnecessary alerts. Here’s how you can do it:
SecRule REQUEST_URI "@beginsWith /wp-load.php?wpmudev" "id:1544,phase:1,log,allow,ctl:ruleEngine=off

SecRule REQUEST_URI "@beginsWith /ngx_pagespeed_beacon" "id:1554,phase:1,log,allow,ctl:ruleEngine=off"
The specified path will automatically allow any URL that begins with it, reducing false positives in the above example.
You may occasionally need to whitelist certain IP addresses known to be safe. ModSecurity offers options for this task.
SecRule REMOTE_ADDR "^195\.151\.128\.96" "id:1004,phase:1,nolog,allow,ctl:ruleEngine=off"

## or ###

SecRule REMOTE_ADDR "@ipMatch 127.0.0.1/8, 195.151.0.0/24, 196.159.11.13" "phase:1,id:1313413,allow,ctl:ruleEngine=off"
In these examples, the @ipMatch directive can be used to whitelist entire subnets, increasing the versatility of your whitelisting strategy. If you need to blacklist a specific IP address or subnet, replace allow with deny.
Refining Rule Exclusions
While whitelisting entire paths or IP addresses can reduce false positives, it might also unintentionally allow potentially harmful requests. A more precise approach is to disable specific rules that trigger false positives, rather than whitelisting entire paths. However, this approach requires more time and testing to fine-tune.
For instance, let’s say the rules wlet’sDs 941000 and 942999 keep triggering false alerts for your /admin/ area. You can disable these specific rules by using the ruleRemoveById directive as shown below:
SecRule REQUEST_FILENAME "@beginsWith /admin" "id:1004,phase:1,pass,nolog,ctl:ruleRemoveById=941000-942999"With this configuration, only the specified rules will be disabled for the /admin/ path, maintaining high protection for the rest of your application.
Configure Log Rotation for ModSecurity 3 on Ubuntu 22.04
When working with a web application firewall like ModSecurity 3, keeping an eye on the logs is crucial. However, these logs can quickly grow, potentially taking up significant storage space on your server. This growth can also make it more difficult to find specific entries when troubleshooting or analyzing security events. To manage this, we can set up a process known as log rotation.
Creating the ModSecurity Log Rotation File
To begin with, let’s create a configuration file for the log rotation process. This file will define how and when the log rotation happens. We can place this file in the /etc/logrotate.d/ directory, which is where the logrotate utility looks for its configuration files.
Use the following command to create and open a new file called modsec:
sudo nano /etc/logrotate.d/modsecThe nano command launches a text editor in the terminal, allowing you to create and edit the file directly.
Defining the Log Rotation Rules
In this file, we will define rules for rotating the ModSecurity logs. Copy and paste the following block of code into the file:
/var/log/modsec_audit.log
{
        rotate 31
        daily
        missingok
        compress
        delaycompress
        notifempty
}
Let’s break down what each line in this block of code does:
/var/log/modsec_audit.log: This is the file that we want to rotate. It’s the location of the ModSecurity audit log.rotate 31: This directive means thatlogrotateshould keep 31 rotated log files before discarding the oldest ones.daily: This instructslogrotateto rotate the log file once every day.missingok: If the log file is missing,logrotatewill not output an error message.compress: This directive tellslogrotateto compress the rotated log files to save space.delaycompress: This postpones compression of the previous log file to the next rotation cycle. This can be helpful if some programs are still writing to the file.notifempty: If the log file is empty,logrotatewill not rotate it.
These settings rotate your ModSecurity logs daily, maintaining a month’s worth of logs the settings to meet your needs. For instance, to keep only a week’s worth of logs, weeks rotate from 31 to 7. However, managing and analyzing a weekly log file can be cumbersome due to its potentially large size, so daily rotation is recommended for ModSecurity.
Prevent Nginx Updates with APT-HOLD on Ubuntu 22.04
As we navigate the complex world of managing web servers, it’s important to recognize that while generally beneficial, automated system updates can sometimes interfere with our carefully configured setups. This is especially true when we have customized or highly specific configurations, like Nginx with ModSecurity. In such cases, automated updates to Nginx can potentially overwrite our configurations or introduce compatibility issues with the current setup. Hence, it might be beneficial to prevent automatic updates to Nginx. We can achieve this by using the APT package management system feature known as “APT-HOLD”.
Understanding APT-HOLD
The apt-mark command, a utility within the APT package management system, lets users manipulate package status. Its “hold” option marks “packages” as held back, preventing their update.
Applying APT-HOLD to Nginx
To put Nginx on hold and thus prevent it from being automatically updated, we can use the apt-mark command as follows:
sudo apt-mark hold nginxAfter running this command, the system will hold back any updates for the Nginx package until you manually change this setting. This will ensure that automatic system updates keep your configuration intact and unaffected.
Reverting APT-HOLD
You may need to update Nginx at some point, perhaps to leverage new features or implement security patches. Remove the hold on Nginx updates by using the unhold option:
sudo apt-mark unhold nginxThis action returns the package to regular status, allowing updates the next time you upgrade your system’s packages and systems any issues between Nginx and Modsecurity, such as recompiling.
FAQs to Install ModSecurity 3,OWASP CRS with Nginx service on Ubuntu 22.04
How do I customize the ModSecurity and OWASP CRS configuration?
ModSecurity and OWASP CRS configuration files are located under /etc/nginx/modsecurity.d/. You can modify these files according to your requirements.
Can I use ModSecurity and OWASP CRS with other web servers like Apache?
Yes, ModSecurity can be used with other web servers like Apache HTTP Server. However, the configuration process may differ.
How can I test if ModSecurity and OWASP CRS are functioning correctly?
You can intentionally trigger known web application vulnerabilities or use ModSecurity's audit logs to verify that it is detecting and blocking malicious requests.
Are there any performance impacts of using ModSecurity?
Enabling ModSecurity and OWASP CRS may introduce some performance overhead due to rule processing. However, it can be optimized by fine-tuning the configuration.
Are there any known compatibility issues between ModSecurity and Nginx?
ModSecurity can be used with Nginx through connectors, but it's important to ensure the versions of ModSecurity, Nginx, and the connector are compatible.
Are there any performance implications when using ModSecurity with Nginx?
There may be a slight impact on performance due to the additional processing required by ModSecurity. Tuning the configuration can help mitigate any performance issues.
Can I disable ModSecurity for specific URLs or locations?
Yes, you can selectively disable ModSecurity rules for specific URLs, paths, or IP addresses using configuration directives.
Conclusion
We have gone through multiple steps on how to install ModSecurity 3,OWASP CRS with Nginx on ubuntu 22.04 in this tutorial.
If you have any queries you can ask them in the comments section and, we would be happy to respond to them.....
