
Introduction
Before we discuss how to install novelWriter on Ubuntu 22.04, let's first understand-What is novelWriter?
novelWriter is a specialized word processing tool designed for authors and novelists. It provides a dedicated environment for planning, organizing, and writing novels, making the writing process more streamlined and efficient.
This tutorial will walk you through the steps to install novelWriter on Ubuntu 22.04.
Advantages
- Organizational Tools: novelWriter offers a range of tools to help authors plan and organize their novels effectively. Features like storyboards, timelines, and character profiles allow for a structured and comprehensive approach to writing.
- Non-Linear Writing: With novelWriter, you can work on your novel in a non-linear fashion. You can easily navigate between chapters, scenes, or sections, allowing you to jump around and focus on different parts of your book as you see fit.
- Progress Tracking: novelWriter provides built-in features to track your progress while writing. You can set word count goals for chapters or sections, monitor your overall progress, and keep track of your writing milestones.
- Character and Plot Development: This tool offers dedicated sections for character profiles and plot development. You can create detailed backgrounds for your characters, including their relationships, motivations, and arcs. The plot development feature helps you outline and structure your story effectively.
- Distraction-Free Writing Environment: novelWriter provides a clean and distraction-free writing environment, free from clutter or unnecessary features, allowing authors to focus solely on their writing.
Install novelWriter on Ubuntu 22.04 via APT PPA
To install novelWriter in an Ubuntu system, we must follow a well-structured series of steps. This tutorial will break down each step, comprehensively explaining each command used. This should make it understandable to all users, regardless of their expertise level.
Step 1 – Updating Your Ubuntu System Before novelWriter Installation
Before we proceed with the novelWriter installation, it’s essential to ensure that your Ubuntu system is updated. Updating your system syncs all existing packages to their latest versions, reducing the possibility of software conflicts.
sudo apt update
sudo apt upgrade
In the commands above, sudo allows you to perform tasks that require administrative permissions. apt is Ubuntu’s package handling utility, update refreshes the list of packages, and upgrade updates all currently installed software packages to their newest versions.
Step 2 – Importing novelWriter’s Personal Package Archive (PPA)
The recommended method to install novelWriter in Ubuntu is via its PPA, which is maintained by Veronica Berglyd Olsen. You have the option to choose between two versions of this PPA – the stable version and the pre-release version.
sudo add-apt-repository ppa:vkbo/novelwriter -y
sudo add-apt-repository ppa:vkbo/novelwriter-pre -y
In the above commands, add-apt-repository is a script that adds an external APT repository to your sources list, while the -y flag is used to automatically confirm all prompts.
Step 3 – Refreshing the APT Package List After PPA Import
Once the novelWriter PPA is added to your Ubuntu system, you should update your APT package list. This will notify the system of the new packages available in the PPA. You can do this with the following command:
sudo apt update
This command fetches package information from all configured sources, including the newly added novelWriter PPA.
Step 4 – Install novelWriter on Ubuntu 22.04 via APT Command
Now that your system is updated and the novelWriter PPA has been added, you can proceed to install the novelWriter software. This can be done using the ‘install’ command in conjunction with Ubuntu’s package handling utility, ‘apt’. Use the following command to download and install novelWriter:
sudo apt install novelwriter
This command instructs the system to download and install novelWriter on your Ubuntu system.
Launching novelWriter on Ubuntu 22.04
Upon successfully installing novelWriter on your Ubuntu system, the next step is to launch the application. You can accomplish this in several ways depending on your preference or specific requirements.
Method 1 – Launching novelWriter from the Command Line on Ubuntu
One method to start using novelWriter is by executing a command in the terminal. This approach might appeal to those who are comfortable with command-line interfaces or those who need to launch the application programmatically. Here’s the command to start novelWriter:
novelwriter
In the command above, novelwriter is the name of the executable that starts the application. When you run this command, your system looks for an executable with this name in the directories listed in your PATH environment variable, and when found, it executes the file, thus starting the novelWriter application.
Method 2 – Launching novelWriter from the Graphical User Interface on Ubuntu
For desktop users who prefer using graphical interfaces, novelWriter can also be launched using its application icon. This method doesn’t require opening a terminal or writing any command. Instead, you navigate through the system’s graphical interface to find and launch the application. Here are the steps to follow:
- Navigate to
Activities. - Proceed to
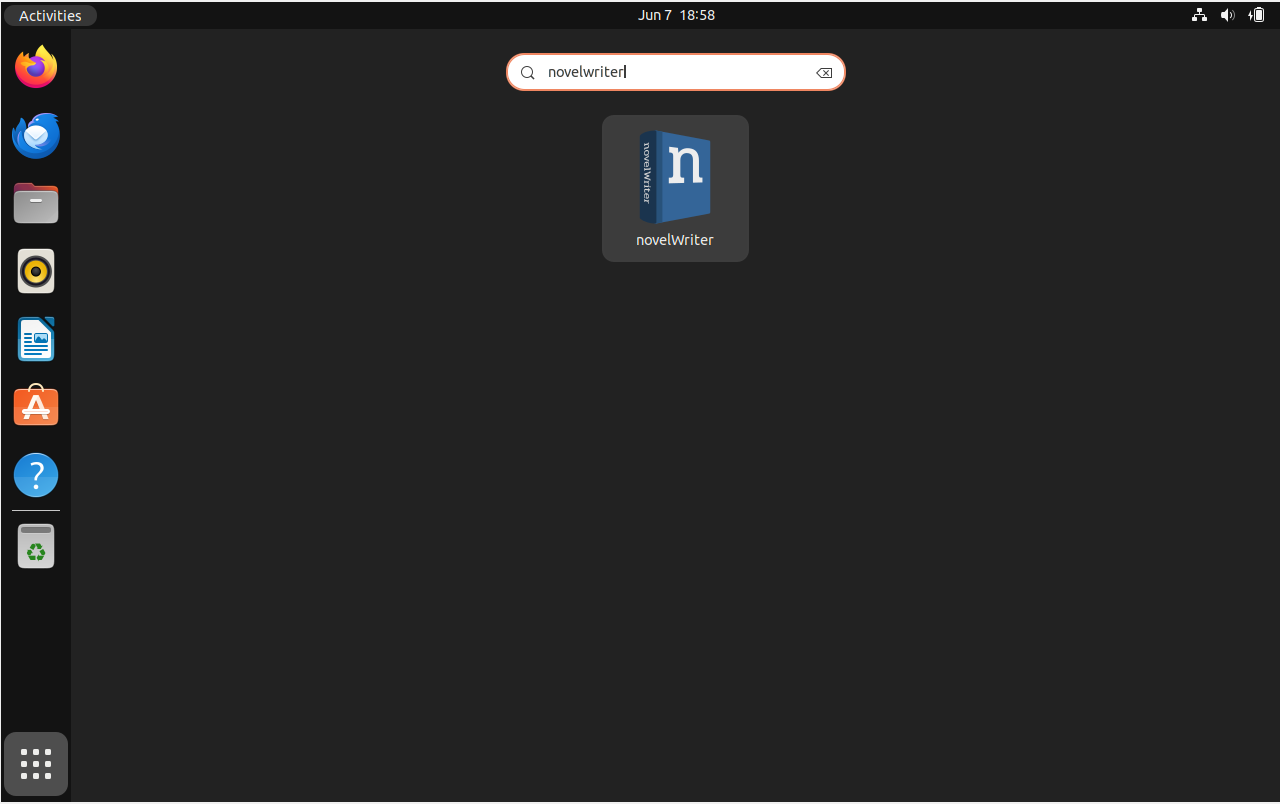
Show Applications. - Look for
novelWriter.
In the steps above, Activities and Show Applications are graphical elements in the Ubuntu desktop environment that help you find and start applications. The final step is to locate novelWriter among the list of applications and click on its icon to launch it.
First-time novelWriter Project Novel Setup on Ubuntu 22.04
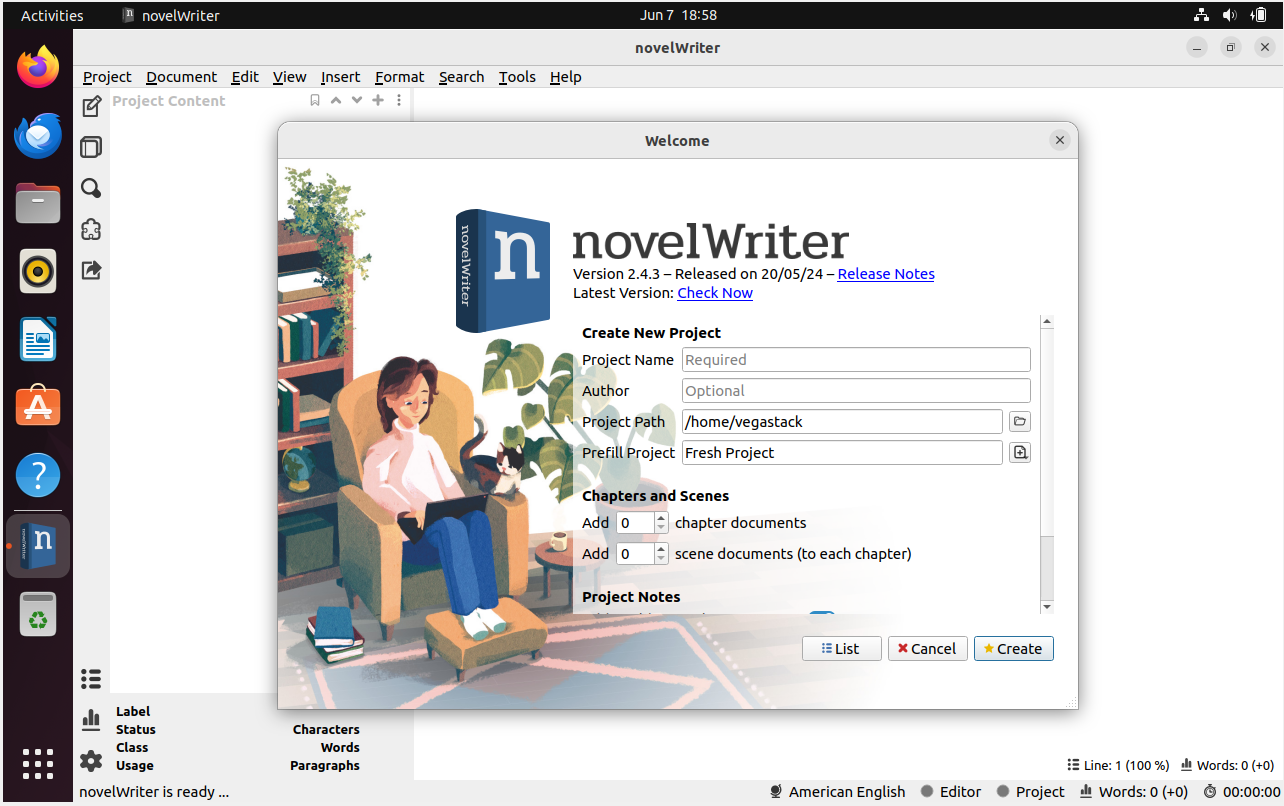
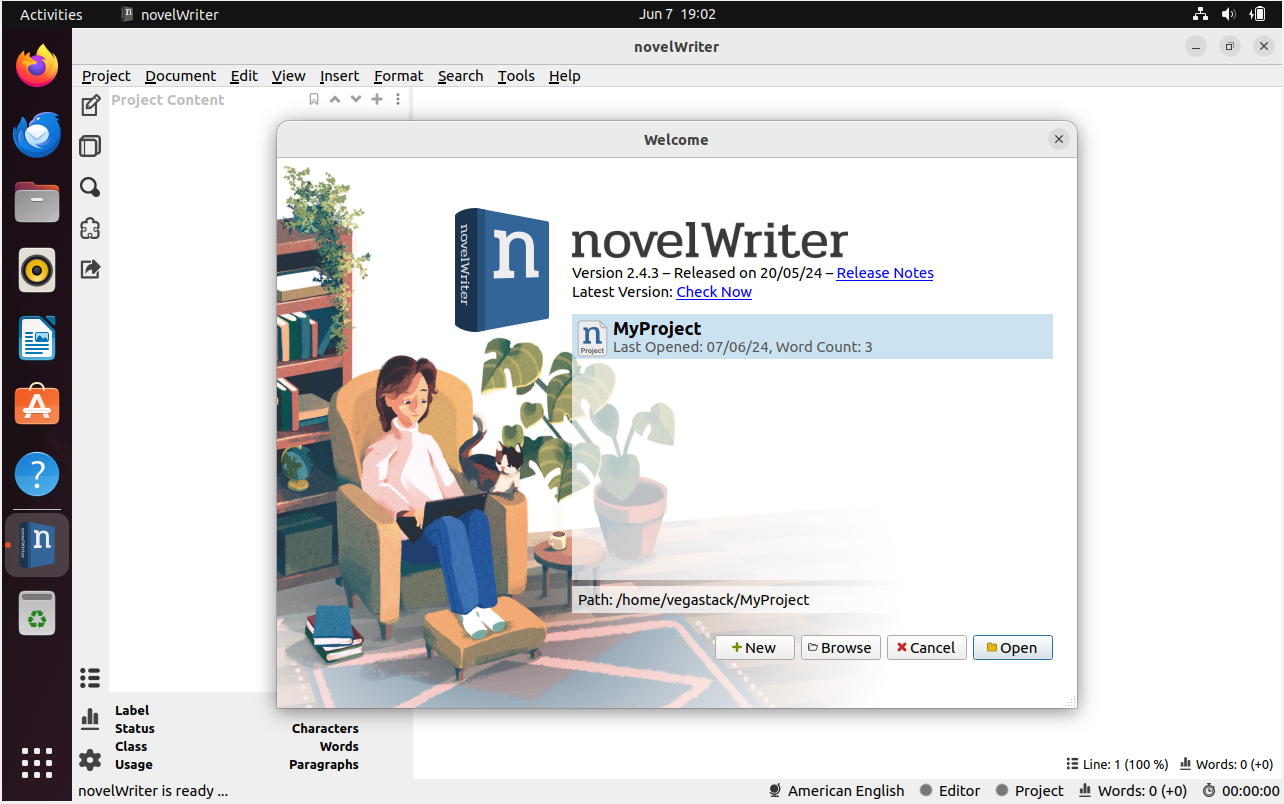
Setting up novelWriter for the first time requires some guidance. Upon launching the application, you are greeted with the “Open Project” screen that is essentially your project management dashboard. Since this is a fresh installation, you likely have no projects yet. So, let’s walk through the process of creating your first project.
Step 1 – Initiating a New Project with novelWriter on Ubuntu
In the “Open Project” screen, initiate the creation of a new project by clicking on the New button. This action directs you to the “Create New Project” tab.
Step 2 – Filling in Project Details with novelWriter on Ubuntu
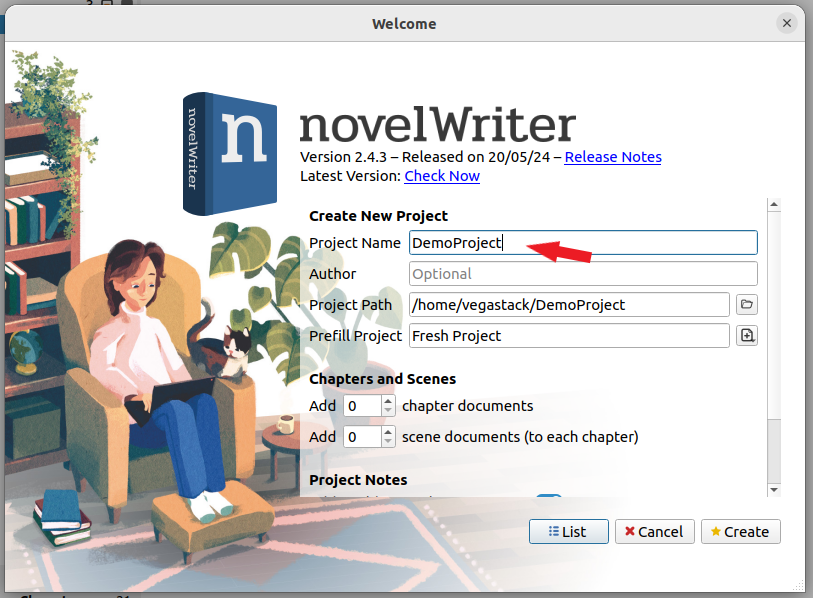
In the “Create New Project” tab, you’ll see a few fields that you need to fill out. These include the project name, the novel title, and the author’s name. As indicated, the fields are quite straightforward, but they’re essential as they define your project’s identity. After filling out these details, proceed by clicking on the Next button.
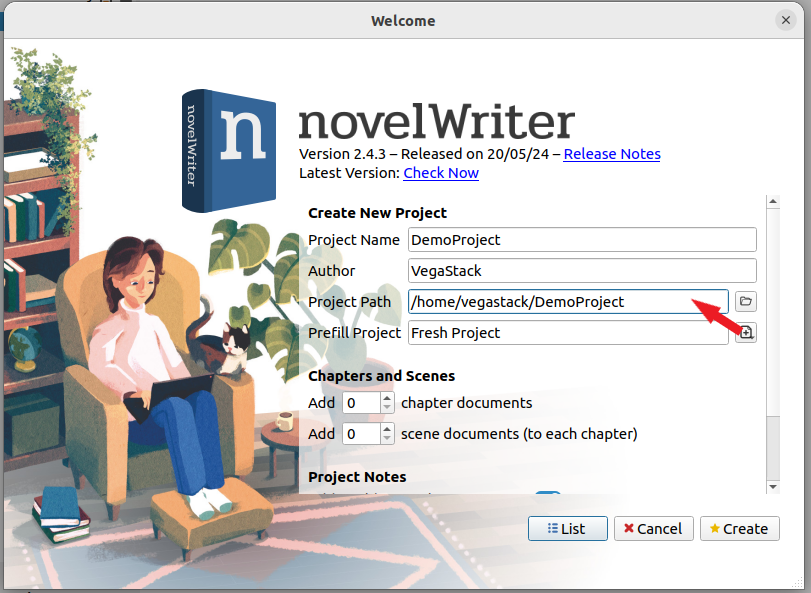
Step 3 – Choosing the Project Path with novelWriter on Ubuntu
The following tab prompts you to select the “Project Path.” This step is critical as it defines where on your system your novel project files will be saved. You might want to choose a location that’s easy for you to access and, preferably, one that you can back up to a cloud storage network. This backup option ensures that your work is safe even if your local copy is lost. You can even use services like Github, depending on your project’s size. After choosing a suitable location for your novel project, click on the Next button to proceed.
Step 4 – Setting Up the Project Template with novelWriter on Ubuntu
Finally, you’ll land on the novel project template page. This interface offers you customization options for your novel layout, user interface, and more. It provides a pre-filled novel layout by default that you can modify according to your preferences.

These steps should help you get started with novelWriter, allowing you to comfortably set up your first project. Now, you’re ready to let your creativity flow and start crafting your novel!
Tips on Getting Started with novelWriter on Ubuntu 22.04
After setting up novelWriter, you might be eager to dive straight in and begin working on your next big novel. However, understanding some tips and tricks can greatly enhance your novel writing experience on Ubuntu Linux. This section will provide you with several key insights to help you get the most out of this powerful writing tool.
Exploring Customization Options with novelWriter on Ubuntu
novelWriter offers a range of customization options that allow you to tailor your writing environment according to your preferences. Here are a few areas you might want to explore:
- Theme Settings: You can modify the application’s theme settings under
Tools > Preferences > Appearance. Here, you can choose from several pre-defined themes or create your own, adjusting elements like background color, text color, and highlighting color. - Text Editor Customizations: Within
Tools > Preferences > Editor, you can adjust the behavior of the text editor, setting preferences for text wrapping, line spacing, tab width, and more.
Utilizing Document Status and Labels with novelWriter on Ubuntu
novelWriter enables you to use document status and labels, which can be quite beneficial in keeping your work organized and tracking your progress. Here’s how you can use them:
- Document Status: This feature allows you to mark your documents as
Outline,Draft,Finished, orArchived. It’s a handy tool for keeping track of where you are in the writing process for each section of your novel. - Document Labels: You can assign labels such as
Chapter,Scene,Note, etc., to your documents. These labels can assist you in quickly identifying the type of content in each document.
Keyboard Shortcuts for Efficiency with novelWriter on Ubuntu
novelWriter has various keyboard shortcuts designed to improve your efficiency. Some of the most useful ones include:
Ctrl + S: Save current documentCtrl + W: Close current tabCtrl + Shift + W: Close all tabs except the current oneCtrl + Q: Quit novelWriter
You can find the complete list of shortcuts under Help > Show Cheat Sheet.
Backup Your Work with novelWriter on Ubuntu
While novelWriter doesn’t have a built-in backup feature, it is crucial to maintain regular backups of your work. As previously mentioned, you can use a cloud storage network, or services like Github, depending on your project’s size.
Managing novelWriter on Ubuntu 22.04
In this section, we will delve into important aspects of managing your novelWriter application on Ubuntu Linux. Specifically, we’ll cover how to update the software and remove it if necessary.
Update novelWriter on Ubuntu 22.04
To ensure the optimal performance of novelWriter and access to the latest features, it’s critical to keep your installation current. By maintaining regular updates, you also ensure the software remains compatible with the latest system updates and other integrated applications.
To check for and install updates for novelWriter, utilize the command line terminal on your Ubuntu Linux system. Below is the command you should use:
sudo apt upgrade && sudo apt upgrade
This command does more than just update novelWriter. It ensures all the packages that use the APT package manager, including your system packages, are kept up-to-date. For Linux newcomers, it is recommended to run this command periodically to maintain system stability, even if you’ve configured your system for automatic GUI updates or notifications.
Remove novelWriter on Ubuntu 22.04
In case you no longer need novelWriter, you can remove it from your Ubuntu Linux system. Use the following command to uninstall novelWriter:
sudo apt remove novelwriter
Remove novelWriter’s PPAs on Ubuntu 22.04
After uninstalling novelWriter, you might want to remove the corresponding PPAs (Personal Package Archives) if you are not planning on using the software again. The removal of PPAs ensures that your system’s package list remains clean, and it can also help to reduce the time required for system updates.
If you added the stable PPA when installing novelWriter, remove it with this command:
sudo add-apt-repository --remove ppa:vkbo/novelwriter -y
If you added the pre-release PPA, use this command to remove it:
sudo add-apt-repository --remove ppa:vkbo/novelwriter-pre -y
These steps will ensure that novelWriter is completely removed from your system, including the repositories used for its updates.
FAQs to Install novelWriter on Ubuntu 22.04
Is novelWriter free and open-source?
Yes, novelWriter is free and open-source software. It is released under the GNU General Public License.
What file formats does novelWriter support?
novelWriter uses its own file format (.novel) to store projects. However, it can also import and export plain text (.txt) files, providing flexibility in working with other applications if needed.
Can I write multiple books or projects using novelWriter?
Yes, novelWriter allows you to work on multiple projects simultaneously. You can create different projects for each book or writing endeavor.
Can I export my novel to other formats, like PDF or EPUB?
As of now, novelWriter does not have built-in export functionality to other formats like PDF or EPUB. It is primarily designed as a tool for planning and organizing your novel.
Can I collaborate with other authors using novelWriter?
novelWriter does not have native collaboration features. However, you can share your project files with other authors, allowing them to edit and work on the same novel, provided they also have novelWriter installed.
Does novelWriter support backups or version control?
novelWriter does not have built-in backup or version control features. It is recommended to regularly back up your novel projects manually to ensure data integrity.
Can I customize the appearance or layout of novelWriter?
novelWriter offers a few customization options, such as choosing a light or dark theme and adjusting the font size. However, it is primarily focused on functionality, rather than extensive customization.
Is novelWriter suitable for professional novelists or writers?
novelWriter can be a valuable tool for both professional and aspiring writers. Its focused features for planning and organizing novels make it particularly useful for authors who prefer a structured approach to writing.
Conclusion
Installing novelWriter on Ubuntu 22.04 provides authors with a specialized word processing tool designed for novel writing.
If you have any queries, feel free to ask them in the comments section, and we will be happy to respond to them........