
Introduction
Before we begin, talking about How to Install Odoo 11 on CentOS 7, let's briefly understand – What is Odoo?
Odoo 11 is an open-source enterprise resource planning (ERP) software that offers a suite of integrated business applications. It provides modules for various functions, including sales, CRM, accounting, inventory, manufacturing, project management, and more.
Odoo 11 is known for its user-friendly interface, scalability, and customization options. It supports multiple languages and can be accessed through web and mobile interfaces.
With its robust features and community support, Odoo 11 is a popular choice for businesses of all sizes seeking efficient and cost-effective management solutions.
In this tutorial, we will discuss how to install Odoo 11 on a CentOS 7 using Git source, and a Python virtual environment will be demonstrated in this tutorial. We will also address a few on how to install Odoo 11 on CentOS 7.
Advantages of Odoo 11
- Integrated Suite: Odoo 11 offers a comprehensive range of integrated applications for seamless management of various business functions.
- Customization: With its flexible and modular architecture, Odoo 11 allows businesses to easily customize and tailor the software to their specific needs.
- User-Friendly Interface: Odoo 11 boasts an intuitive and user-friendly interface, making it easy for employees to navigate and utilize the system effectively.
- Scalability: Whether your business is small or large, Odoo 11 can scale alongside your company's growth and adapt to changing requirements.
- Cost-Effective: Being open-source, Odoo 11 eliminates licensing costs and offers affordable implementation and maintenance options, making it a cost-effective solution for businesses.
Prerequisites to Install Odoo 11 on CentOS 7
Before we begin:
Log in as a sudo user on your CentOS machine and upgrade the system to the latest packages:
sudo yum update
Use the following command to enable the EPEL repository:
yum -y install https://dl.fedoraproject.org/pub/epel/epel-release-latest-7.noarch.rpm
We will use the Software Collections (SCL) repository to install Python 3.5 packages.
You can access newer versions of programming languages and services that are not included in the core repository by activating SCL. With the following command, the SCL repository can be enabled:
yum install -y http://mirror.centos.org/centos/7/extras/x86_64/Packages/centos-release-scl-rh-2-3.el7.centos.noarch.rpm
Use the following command to install Python 3.5 packages:
sudo yum install python3
sudo yum install python3-devel
Lastly, install git, pip, and all the tools needed to create Odoo dependencies:
sudo yum install npm
sudo yum install git gcc wget nodejs-less libxslt-devel bzip2-devel openldap-devel libjpeg-devel freetype-devel postgresql-devel --skip-broken
Create Odoo User
Create a new system user and group with the home directory /opt/odoo in order to execute the Odoo service:
sudo useradd -m -U -r -d /opt/odoo -s /bin/bash odoo
Install and Configure PostgreSQL
Install the PostgreSQL server and build a new PostgreSQL database cluster:
sudo yum install postgresql-server
sudo postgresql-setup initdb
After installation is finished, activate and launch the PostgreSQL service:
sudo systemctl enable postgresql
sudo systemctl start postgresql
Set up a PostgreSQL user with the same name as the system user you previously built, in this case odoo:
sudo su - postgres -c "createuser -s odoo"
Install Wkhtmltopdf
A set of free command-line tools that can convert HTML to PDF and other image formats are offered by the wkhtmltox package. You require the wkhtmltopdf tool in order to print PDF reports. Odoo 0.12.1 is the preferred version, although it is not included in the official CentOS 7 repositories.
Run the following commands to download and install the recommended version:
wget https://github.com/wkhtmltopdf/wkhtmltopdf/releases/download/0.12.1/wkhtmltox-0.12.1_linux-centos7-amd64.rpm
sudo yum localinstall wkhtmltox-0.12.1_linux-centos7-amd64.rpm
Install and Configure Odoo 11
In order to have more control over the versions and updates, we will install Odoo from the GitHub repository. We will also make use of virtualenv, a tool for building isolated Python environments.
Make sure you [switch to the user] “odoo” before you begin the installation process:
sudo su - odoo
You can use the following command to verify that you are logged in as an odoo user:
whoami
Now that the installation process is ready to begin, clone the odoo from the GitHub repository as follows:
git clone https://www.github.com/odoo/odoo --depth 1 --branch 11.0 /opt/odoo/odoo11
Next, create a new virtual environment for our Odoo installation by issuing the following command:
cd /opt/odoo
python3 -m venv odoo11-venv
Enable the environment:
source odoo11-venv/bin/activate
and install all essential Python modules:
pip3 install -r odoo11/requirements.txt
Use the following commands to deactivate the environment when installation is finished and switch back to your sudo user:
deactivate
exit
It is advisable to install custom modules in a separate directory if you intend to do so. Run the following command to make a new directory for the custom modules:
sudo mkdir /opt/odoo/odoo11-custom-addons
sudo chown odoo: /opt/odoo/odoo11-custom-addons
Making a configuration file is the next step:
sudo nano /etc/odoo11.conf
[options]
; This is the password that allows database operations:
admin_passwd = superadmin_passwd
db_host = False
db_port = False
db_user = odoo
db_password = False
addons_path = /opt/odoo/odoo11/addons
; If you are using custom modules
; addons_path = /opt/odoo/odoo11/addons,/opt/odoo/odoo11-custom-addons
Create a Systemd Unit File
We will make an odoo11.service unit file in the /etc/systemd/system/ directory with the following statements to run Odoo as a service:
sudo nano /etc/systemd/system/odoo11.service
[Unit]
Description=Odoo11
Requires=postgresql.service
After=network.target postgresql.service
[Service]
Type=simple
SyslogIdentifier=odoo11
PermissionsStartOnly=true
User=odoo
Group=odoo
ExecStart=/opt/odoo/odoo11-venv/bin/python3 /opt/odoo/odoo11/odoo-bin -c /etc/odoo11.conf
StandardOutput=journal+console
[Install]
WantedBy=multi-user.target
You should notify systemd that a new unit file has been created and launch the Odoo service by running:
sudo systemctl daemon-reload
sudo systemctl start odoo11
The following command can be used to verify service status:
sudo systemctl status odoo11
Output

● odoo11.service - Odoo11
   Loaded: loaded (/etc/systemd/system/odoo11.service; disabled; vendor preset: disabled)
   Active: active (running) since Wed 2018-03-28 20:13:30 UTC; 6s ago
 Main PID: 16174 (scl)
   CGroup: /system.slice/odoo11.service
           ├─16174 /usr/bin/scl enable rh-python35 -- /opt/odoo/odoo11-venv/bin/python3 /opt/odoo/odoo11/odoo-bin -c /etc/odoo11.conf
           ├─16175 /bin/bash /var/tmp/sclihoNjg
           └─16178 /opt/odoo/odoo11-venv/bin/python3 /opt/odoo/odoo11/odoo-bin -c /etc/odoo11.conf
Also, you can let the Odoo service start automatically when the system boots up if there are no errors:
sudo systemctl enable odoo11
Use the command listed below to view the messages that the Odoo service has logged:
sudo journalctl -u odoo11
Test the Installation
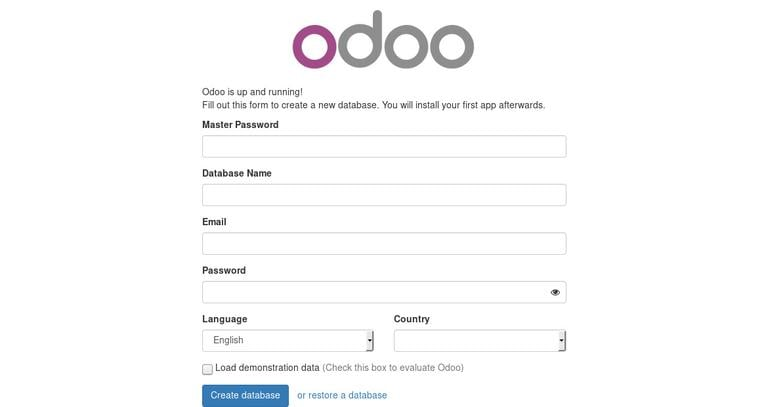
Enter the following into your browser: http://<your_domain_or_IP_address>:8069.
If the installation goes smoothly, a screen like this one will show up:
FAQs to Install Odoo 11 on CentOS 7
Does Odoo 11 require any specific dependencies or packages?
Yes, Odoo 11 has specific dependencies such as Python, PostgreSQL, and various Python libraries. These dependencies need to be installed before installing Odoo 11.
Can I install Odoo 11 using a virtual environment?
Yes, it is recommended to set up a virtual environment to isolate Odoo 11 and its dependencies from the system's global Python environment.
Is it possible to install Odoo 11 using the package manager?
Yes, you can use the package manager to install Odoo 11 on CentOS 7. However, it is advisable to review the specific instructions provided by the official Odoo documentation or the package manager's repository.
How can I configure Odoo 11 to start automatically on system boot?
You can configure Odoo 11 to start automatically on system boot by creating a systemd service file and enabling it.
How can I access the Odoo 11 web interface after installation?
Once Odoo 11 is installed, you can access the web interface by opening a web browser and entering the server's IP address or domain name followed by the specified port (usually port 8069).
What should I do if I encounter errors during the installation process?
If you encounter any errors during the installation, it is recommended to refer to the official Odoo documentation, community forums, or seek assistance from experienced Odoo consultants or developers for troubleshooting and resolving the issues.
Conclusion
In this tutorial, you learned to install Odoo 11 on CentOS 7 in a Python virtual environment.
If you have any queries, please leave a comment below, and we’ll be happy to respond to them.

