
Introduction
Before we begin talking about how to install OpenLiteSpeed web server on Ubuntu 20.04, let’s briefly understand - What is OpenLiteSpeed?
OpenLiteSpeed is a powerful, open-source web server software that delivers high performance and efficient handling of web traffic. It's designed to optimize the speed and scalability of websites, making them load faster and handle more users with ease.
OpenLiteSpeed offers advanced features like caching, SSL/TLS encryption, and HTTP/3 support, enhancing website security and performance. With its user-friendly interface and compatibility with popular control panels, OpenLiteSpeed is an excellent choice for individuals and businesses seeking a fast and reliable web server solution.
In this tutorial, we’ll demonstrate how to install and configure OpenLiteSpeed on an Ubuntu 20.04 server. We will also address a few FAQs on how to install and configure OpenLiteSpeed on an Ubuntu 20.04 server.
Advantages of OpenLiteSpeed
- Exceptional Performance: OpenLiteSpeed is known for its superior speed, ensuring fast website loading times and efficient handling of concurrent connections.
- Scalability: It can handle many concurrent users and effectively handle high traffic websites without sacrificing performance.
- Easy to Use: OpenLiteSpeed offers a user-friendly interface and is compatible with popular control panels, making it easy to set up and manage websites.
- Enhanced Security: It provides advanced security features, including SSL/TLS encryption and protection against DDoS attacks, safeguarding websites and user data.
- Feature-Rich: OpenLiteSpeed offers features like caching, HTTP/3 support, and built-in PHP support, allowing for optimal performance and flexibility in website development.
Prerequisites to Install OpenLiteSpeed Web Server on Ubuntu 20.04
You'll be requiring an Ubuntu 20.04 server with a sudo-enabled, non-root user and the ufw firewall enabled.
Step 1 - Installing OpenLiteSpeed
There is a software repository provided by OpenLiteSpeed, we can use this to download and install the server with the help of Ubuntu's standard apt command.
1) In order to enable this repository for your system, download and add the developer's signing key:
wget -qO - https://rpms.litespeedtech.com/debian/lst_repo.gpg | sudo apt-key add -
With the help of this key, you can cryptographically verify if the software we're about to download is tampered.
2) Now, add the repository information to your system:
sudo add-apt-repository 'deb http://rpms.litespeedtech.com/debian/ bionic main'
Now, the add-apt-repository command will refresh the package cache and new software will be ready to install.
3) Use the apt install command to install the OpenLiteSpeed server and its PHP extensions:
wget http://archive.ubuntu.com/ubuntu/pool/universe/libo/libonig/libonig4_6.7.0-1_amd64.deb

sudo apt install ./libonig4_6.7.0-1_amd64.deb
sudo apt install lsphp74 openlitespeed
4) After that, create a soft link to the PHP version that you have just installed so that it can direct the OpenLiteSpeed server to use the correct version:
sudo ln -sf /usr/local/lsws/lsphp74/bin/lsphp /usr/local/lsws/fcgi-bin/lsphp5
Now you need to secure the server by updating the admin account.
Step 2 - Setting the Administrative Password
1) Before testing the server, you should set a new password for OpenLiteSpeed. The default password is 123456, the following command can help us with changing the password:
sudo /usr/local/lsws/admin/misc/admpass.sh
2) You will then be prompted to set a username. Press ENTER directly and the username will be updated as admin. Next, update the password and hit ENTER. You will receive the following output:
Output

Administrator's username/password is updated successfully!
Step 3 - Starting and Connecting to the server
1) You can verify the installation using the lswsctrl command:
sudo /usr/local/lsws/bin/lswsctrl status
Output

litespeed is running with PID 795.
2) In case you don't see a similar outcome, you can use the lswsctrl to start the server:
sudo /usr/local/lsws/bin/lswsctrl start
Output

[OK] litespeed: pid=8301.
3) Next, we need to open up some ports on the firewall using the ufw command:
sudo ufw allow 8088
sudo ufw allow 7080
4) 8088 is the first port, and it is the default port for OpenLiteSpeed's example site, which should be accessible to the public by now. Next, navigate to your IP address or domain name followed by :8088 in order to specify the port:
http://server_domain_or_IP:8088
This will reveal the default OpenLiteSpeed welcome page, which looks like this:
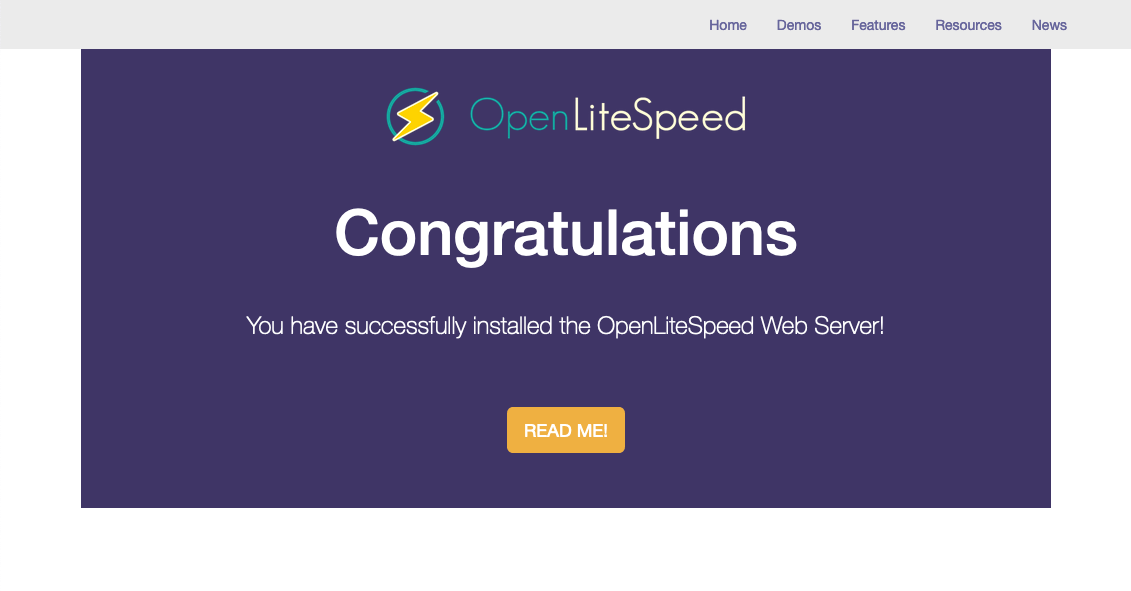
The links at the bottom of the page are designed to demonstrate various features of the server. Once you click through them, you'll see that they have been installed and configured. You can explore various features by clicking around. For instance, an example CGI script would be available, a customized PHP instance would be up and running, and custom error pages and authentication gates would be configured.
5) Once you're satisfied, navigate to your server's domain name or IP address with the help of HTTPS followed by :7080 to specify the port:
https://server_domain_or_IP:7080
The chances are that you will see a warning saying that the SSL certificate from the server cannot be validated. This is due to the fact that the certificate is a self-signed one. You have to click through the options to proceed to the site. In case of chrome, you have to select Advanced then "Proceed to.....".
6) You will then be prompted to put in the username and password that you created using the admpass.sh script:

7) On completion, you will be brought to the OpenLiteSpeed administration login page.
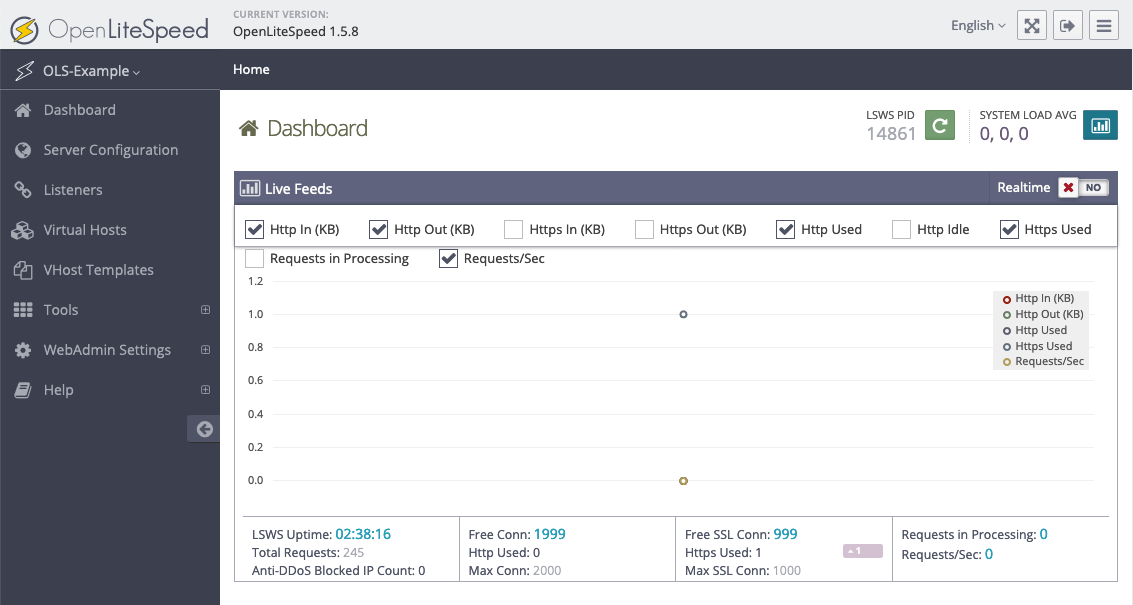
This is the page where most of the configuration will take place.
Step 4 - Changing the port of the default page
For demonstration purposes, we'll be changing the port the site uses from 8088 to the conventional HTTP port 80.
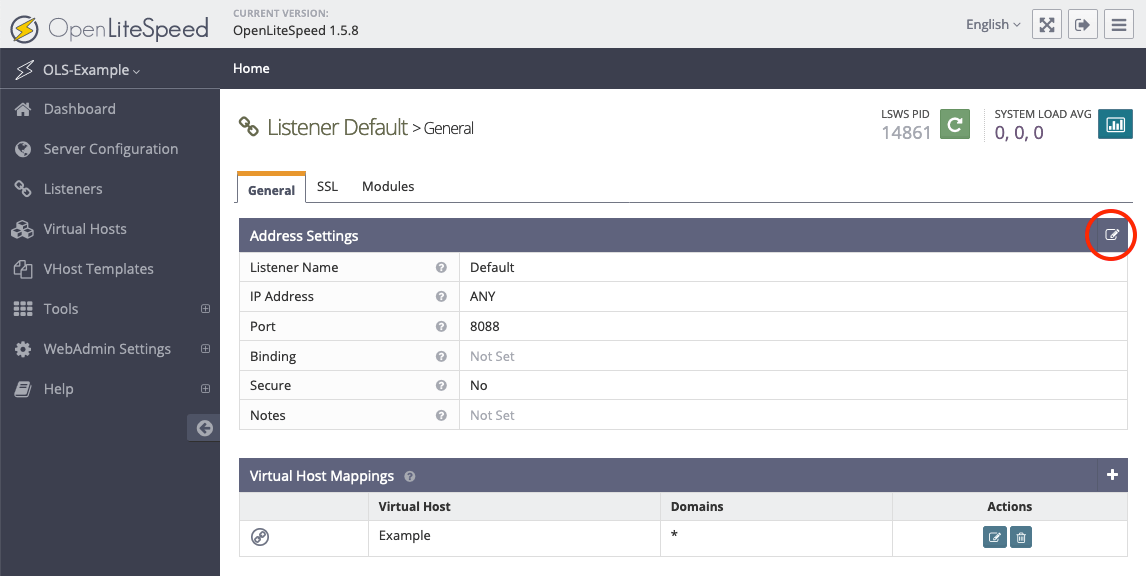
1) For this, select Listeners on the left side of the screen, which would show you all the available listeners.
Select the "View/Edit" option for the default listener.

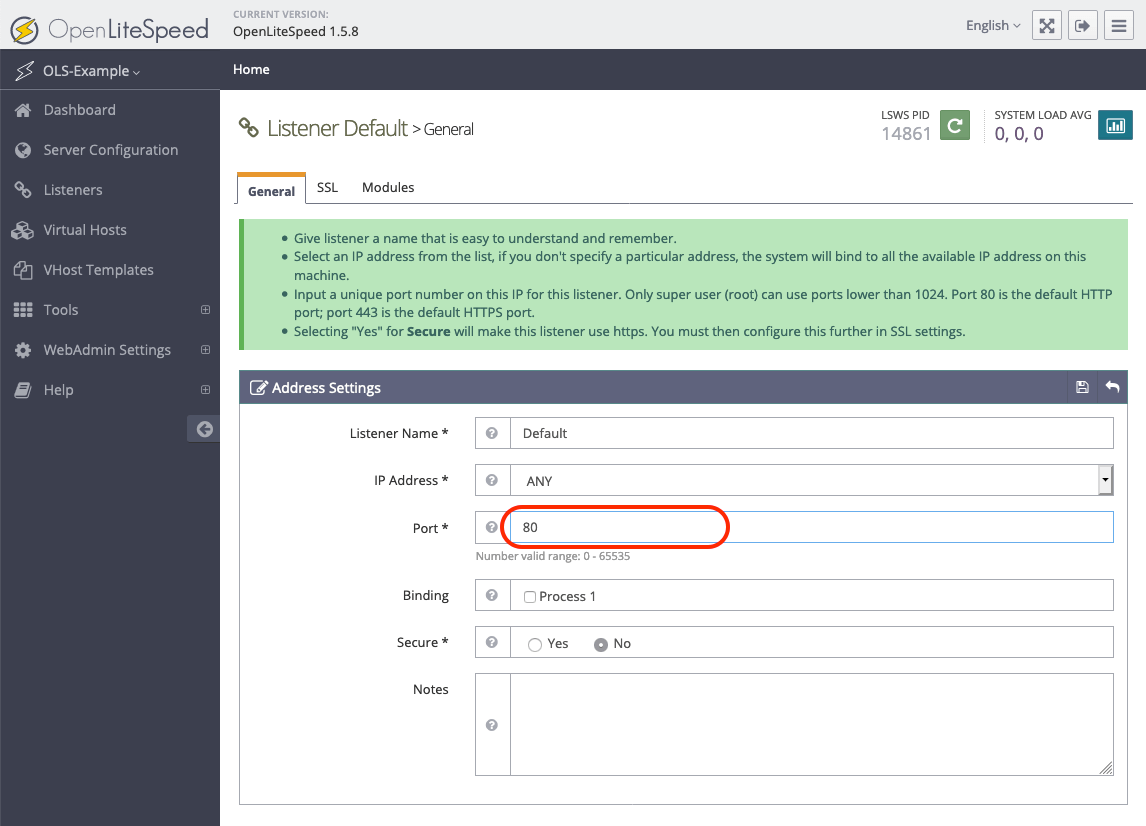
2) Now, you'll see more details about the Default listener. Click on the top right corner of the “Address Settings” in order to change its value.
3) Next, change the port 8088 to port 80, then Save by clicking on the floppy icon.
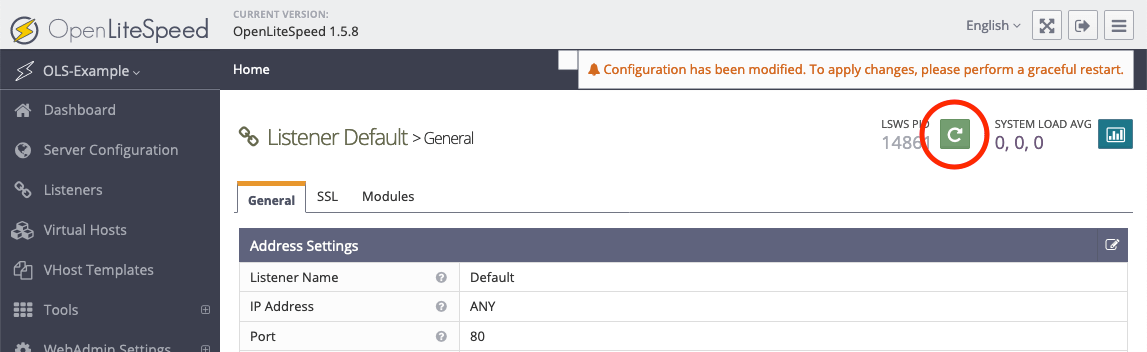
4) Now, you need to "restart" the server. Click on the "Reload" button for the same:
5) Next, you need to open up a port 80 on your firewall:
sudo ufw allow 80
6) The default site will be accessible on port 80 instead of port 8088. Visiting your domain or IP address without any extensions will lead you to the site.
7) These are certain important points you should keep in mind with respect to the OpenLiteSpeed server:
- All files associated with OpenLiteSpeed will be found under the
/usr/local/lswsdirectory. - The document root for the default virtual host is at
/usr/local/lsws/DEFAULT/html. The configuration and logs for this virtual host are under the/usr/local/lsws/DEFAULTdirectory. - Create new virtual hosts for different sites using the admin interface. OpenLiteSpeed is not able to create the directories, all the directories that you will reference when setting up your configuration must be created ahead of time on your server.
- You can even set up virtual host templates for hosts that share the same general format.
- It is easier to copy the default virtual host’s directory structure and configuration to use as a starting point for new configurations.
- The admin interface has a built-in tooltip that helps the system with almost all fields. There is also a Help menu option in the left-hand menu that links to the server documentation. You can consult these sources of information during configuration if you need more help.
- To secure your OpenLiteSpeed installation with HTTPS, check the official documentation section on SSL Setup.
FAQs to Install OpenLiteSpeed on Ubuntu 20.04
Does OpenLiteSpeed support PHP?
Yes, OpenLiteSpeed has built-in support for PHP, making it compatible with PHP-based websites and applications.
Can I manage OpenLiteSpeed using a control panel?
Yes, OpenLiteSpeed is compatible with popular control panels like cPanel and DirectAdmin, allowing for easy management of websites.
Is OpenLiteSpeed secure?
Yes, OpenLiteSpeed provides advanced security features such as SSL/TLS encryption, DDoS protection, and access controls, ensuring website and data security.
Does OpenLiteSpeed support HTTP/3?
Yes, OpenLiteSpeed is compatible with the latest HTTP/3 protocol, offering enhanced speed and efficiency.
Can I run multiple websites on OpenLiteSpeed?
Absolutely! OpenLiteSpeed supports hosting multiple websites on a single server, allowing you to manage and serve different domains.
Can I configure caching with OpenLiteSpeed?
Yes, OpenLiteSpeed supports various caching mechanisms, including built-in LiteSpeed Cache, which can significantly improve website performance.
Conclusion
We hope this detailed tutorial helped you understand how to install OpenLiteSpeed on Ubuntu 20.04 server. To learn more about OpenLiteSpeed installation on Ubuntu 20.04 server, check out the official OpenLiteSpeed installation document.
If you have any queries, please leave a comment below, and we’ll be happy to respond to them for sure.
