
Choose a different version or distribution
Introduction
Before we begin talking about how to install OpenShot on Ubuntu 20.04, let's briefly understand – What is OpenShot?
OpenShot is a powerful and user-friendly video editing software renowned for its simplicity. It enables both beginners and professionals to create stunning videos effortlessly. With a range of features like trimming, transitions, effects, and animations, OpenShot empowers users to unleash their creativity.
This open-source tool supports various platforms, making it accessible to users worldwide. Whether you want to edit home movies or produce professional content, OpenShot is an excellent choice for all your video editing needs.
In this tutorial, you will install OpenShot on Ubuntu 20.04. We will also address a few FAQs on how to install OpenShot on Ubuntu 20.04.
Advantages of OpenShot
- Easy-to-use interface: OpenShot offers a user-friendly interface, making it accessible for both beginners and experienced editors.
- Advanced features: With a wide range of features like animations, transitions, and effects, OpenShot allows users to create professional-looking videos.
- Cross-platform compatibility: OpenShot is compatible with multiple platforms, including Windows, Mac, and Linux, ensuring accessibility for users on various devices.
- Open-source software: As an open-source tool, OpenShot is continuously improved and updated by a community of contributors, providing users with new features and enhancements.
- Free of cost: OpenShot is available for free, offering a cost-effective solution without compromising on quality or functionality.
How to install OpenShot on Ubuntu 20.04 LTS
- using Flatpak
- using the APT package manager
Method 1: Install Flatpak
Installing OpenShot via Flatpak is the recommended method, as installing APT packages could lead to dependencies problems. Thus, install the Flatpak first.
sudo apt install flatpak
flatpak remote-add --if-not-exists flathub https://flathub.org/repo/flathub.flatpakrepo
Restart your system
reboot
Get OpenShot on Ubuntu 20.04
Now install OpenShot on your PC using the Flatpak command line.
flatpak install flathub org.openshot.OpenShot
Run this Video Editor:
After the installation is finished, we can use the command below to launch the application using the command terminal:
flatpak run org.openshot.OpenShot
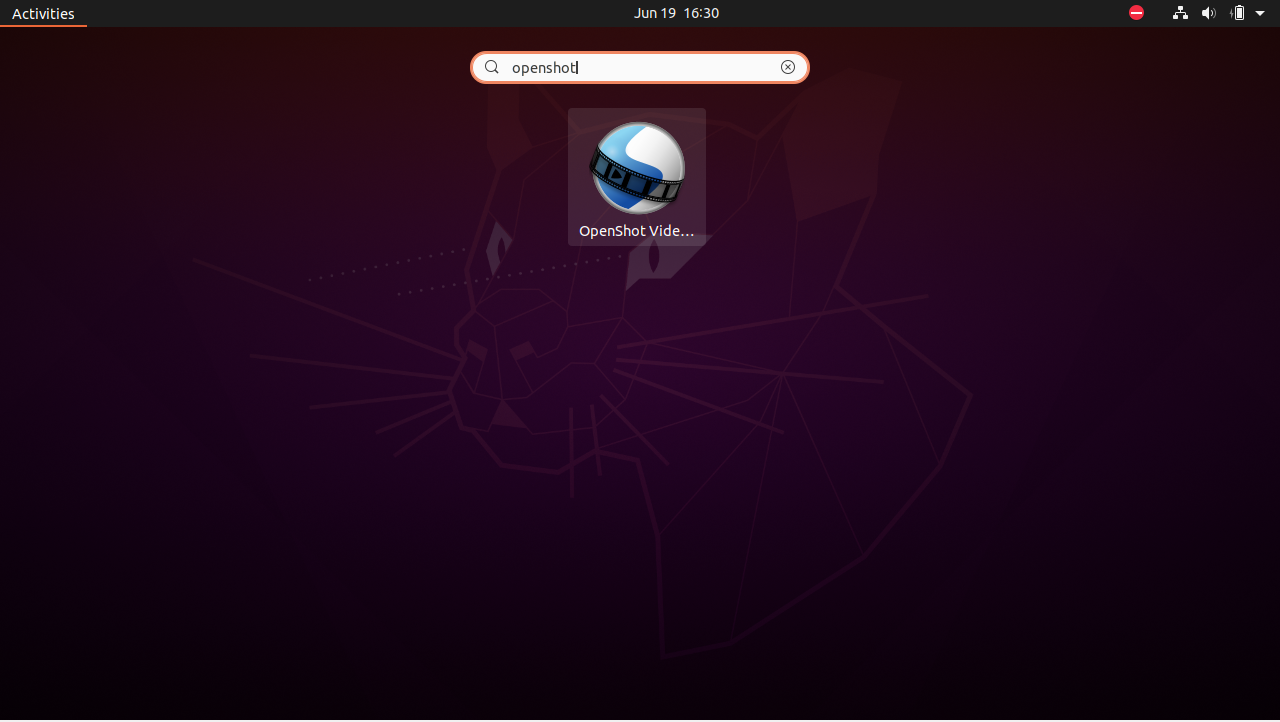
As an alternative, use the Application Launcher to look up Openshot. You should soon see this application's icon in the search results; click it to open it.
Update:
Run the following code to install the app later using Flatpak:
flatpak update
Method 2: APT package manager
Update system
We update the system's current packages as the first thing. This will also rebuild the repository cache on our system.
sudo apt update
Install OpenShot
On Ubuntu 20.04, there is no need to add a third repository in order to install OpenShot. To install it, we can use the installation command. Consequently, launch the command terminal and enter:
sudo apt install openshot-qt python3-openshot
If you are using an older version of the program and the OpenShot packages cannot be downloaded straight from the official repository, you can manually add the PPA repository to our Linux system. Use the following commands to do that:
sudo add-apt-repository ppa:openshot.developers/ppa
sudo apt-get update
sudo apt install openshot-qt python3-openshot
Run OpenShot
Go to Applications and look for it. Click the OpenShot icon when it displays.
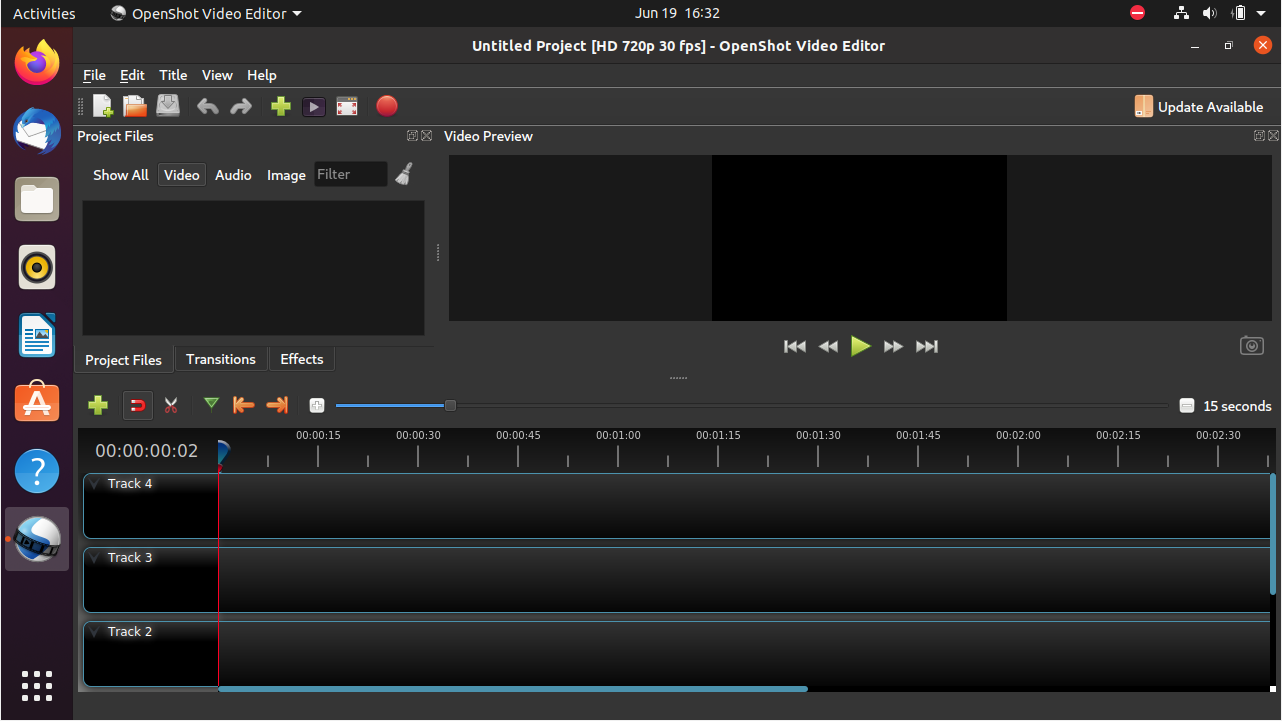
Start Editing on Linux
After choosing the Import Files option and the video file, click on the File. Now begin by selecting the basic effects and editing choices you wish to use in your videos.
Uninstall or Remove
In the future, use the following command to remove OpenShot from your Ubuntu 20.04 LTS Jammy:
For 1st method using Flatpak:
flatpak remove flathub org.openshot.OpenShot
For the second method:
sudo apt autoremove --purge openshot-qt
To remove the PPA repository:
sudo add-apt-repository --remove ppa:openshot.developers/ppa
FAQs to Install OpenShot on Ubuntu 20.04
Can I install OpenShot using the Ubuntu Software Center?
Yes, you can search for "OpenShot" in the Ubuntu Software Center, select it, and click "Install" to install OpenShot on Ubuntu 20.04.
Is OpenShot available in the official Ubuntu repositories?
Yes, OpenShot is available in the official Ubuntu repositories, ensuring easy installation and updates.
What are the system requirements for OpenShot on Ubuntu 20.04?
OpenShot requires a minimum of 4GB RAM, a multi-core processor, and Ubuntu 20.04 or later to run smoothly.
Are there any additional dependencies required for OpenShot?
OpenShot has some additional dependencies that are automatically installed along with the software during the installation process.
Can I update OpenShot after installing it on Ubuntu 20.04?
Yes, OpenShot can be updated along with other system updates by running the command sudo apt-get update followed by sudo apt-get upgrade.
How do I remove OpenShot from my Ubuntu 20.04 system?
To remove OpenShot, run sudo apt-get remove openshot in the terminal. This will remove OpenShot and its associated packages from your system.
Does OpenShot support additional codecs for video editing?
Yes, OpenShot supports a wide range of codecs for video editing, including popular formats like MP4, AVI, and MPEG.
Conclusion
We hope this tutorial helped you understand how to install OpenShot on Ubuntu 20.04.
If you have any queries, please leave a comment below, and we’ll be happy to respond to them for sure.