
Introduction
Before we begin talking about how to install PHP Imagemagick on Ubuntu 22.04, let's briefly understand – What is Imagemagick?
Imagemagick is a powerful open-source software tool used to manipulate and convert images. With just a few lines of code, you can resize, crop, rotate, and even apply filters or special effects to images. Imagemagick supports a wide range of image formats, making it incredibly versatile.
It is widely used in web development, graphic design, and other industries to enhance and optimize images. This comprehensive software simplifies image processing tasks and enables developers to create stunning visuals effortlessly.
In this tutorial, you will install PHP Imagemagick on Ubuntu 22.04. We will also address a few FAQs on how to install PHP Imagemagick on Ubuntu 22.04.
Advantages of Imagemagick
- Versatility: Imagemagick supports a multitude of image formats and offers a wide range of image manipulation capabilities.
- Ease of Use: With its simple command-line interface, Imagemagick allows developers to perform complex image operations with just a few lines of code.
- Efficiency: Imagemagick is known for its fast and efficient image processing capabilities, making it an ideal choice for handling large volumes of images.
- Extensibility: Imagemagick provides extensive support for scripting and can be easily integrated into various programming languages and frameworks.
- Wide Adoption: Imagemagick is highly popular and widely used in web development, graphic design, and other industries, ensuring good community support and resources.
Install PHP IMAGICK Extension on Ubuntu 22.04 LTS
It's not as though the instructions provided here for installing PHP's Imagick extension and the ImageMagick library are exclusive to Ubuntu 22.04 LTS Jammy. They work with Debian, Linux Mint, POP OS, and other comparable Linux distributions.
1. Start with Ubuntu 22.04 Update
While the server users are already on the terminal display, open the command terminal application. To make sure all installed packages are current, simply run the system update command from there.
sudo apt update && sudo apt upgrade
2. Installing IMAGICK software
You can skip this and go to the next one if all you're looking for is a PHP extension. On the other hand, developers and regular users can install the complete package of ImageMagick if they wish to try out the command for editing images.
The best part is that there is no need to add any third-party repositories when installing ImageMagick on Ubuntu 22.04 or earlier versions. All you have to do is use the APT package manager, which will use Ubuntu's official default repositories to download the necessary packages.
sudo apt install imagemagick imagemagick-doc
You can use to determine whether imagemagick is installed on your Ubuntu system:
convert -version
You can see the program's version details, ensuring that it is compatible with your system and operating correctly.
3. Installing php-imagick module on Ubuntu 22.04
The above command can now be used by users of PHP-based programs, such as WordPress, that need the php-imagick package or extension installed on their Ubuntu 22.04 server in order to enable image manipulation features.
sudo apt-get install php-imagick
Depending on the available installation version of PHP, it will install the ImageMagick extension for PHP.
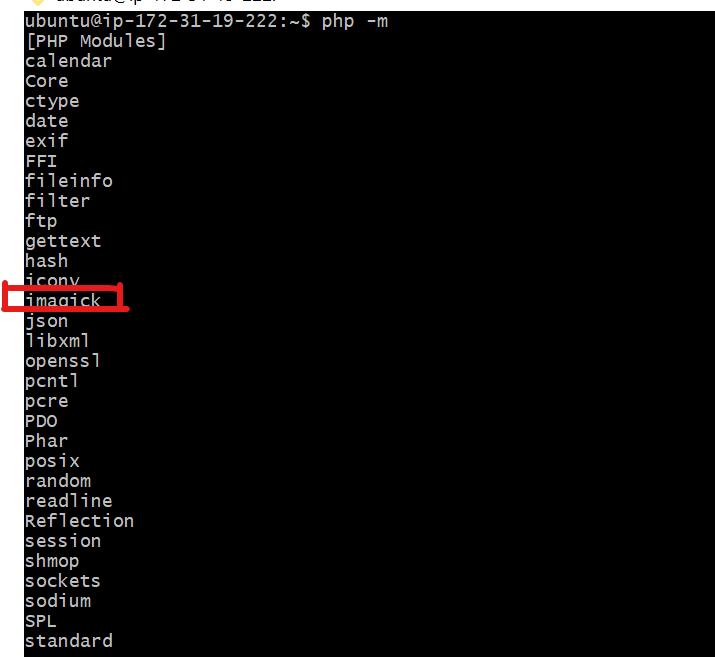
To check the extension is installed successfully, use:
php -m | grep imagick
4. Current or Previous version of the PHP IMAGICK Extension: Ondrej
Older versions were needed for certain PHP-based applications. Thus, you can use the Ondrej Sury if you're interested in obtaining the very latest or older Imagick module for PHP versions like 5.6, 7.0, 7.1, 7.2, 7.3, 7.4, or the most recent 8.3 (as of writing this tutorial), which isn't available through the official base repository of Ubuntu 22.04. It is a PPA repository for installing PHP versions that are either the most recent or older.
In order to run it, add:
sudo add-apt-repository ppa:ondrej/php
In order to verify which PHP versions are accessible via it, we can utilize the following syntax:
sudo apt search php
To find the ones that are available, scroll up.
Let's now examine how to install ImageMagick and the PHP Imagick extension on various PHP versions:
php -v
These commands correspond to the version that is set up on your system; if you have more than one, install php-Imagick in the appropriate version.
For PHP5.6
sudo apt install imagemagick php5.6-Imagick
- For php7.0
sudo apt install imagemagick php7.0-Imagick
- For php7.1
sudo apt install imagemagick php7.1-Imagick
- For PHP7.2
sudo apt install imagemagick php7.2-Imagick
- For PHP7.3
sudo apt install imagemagick php7.3-Imagick
- For PHP7.4
sudo apt install imagemagick php7.4-Imagick
- For PHP8.0
sudo apt install imagemagick php8.0-Imagick
- For PHP8.1
sudo apt install imagemagick php8.1-Imagick
- For PHP8.2
sudo apt install imagemagick php8.2-Imagick
- For PHP8.3
sudo apt install imagemagick php8.3-Imagick
Installing php-fpm
sudo apt install php-fpm
5. Check Imagick.so whether the PHP extension is loaded
We now know how to install Imagick and its PHP extension, so let's look at how to make sure our PHP web applications are loading and functioning properly.
Use the following command to accomplish that, and it will list every module that is available, including the one you just installed:
php -m
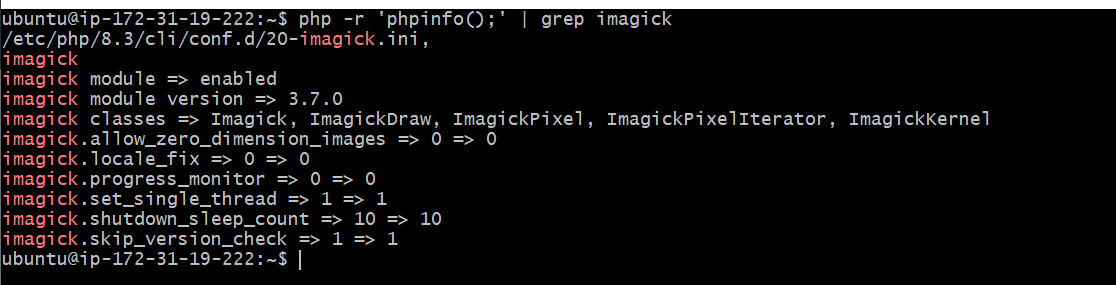
or in order to obtain precise information about the extension you're seeking, we can use:
php -r 'phpinfo();' | grep imagick
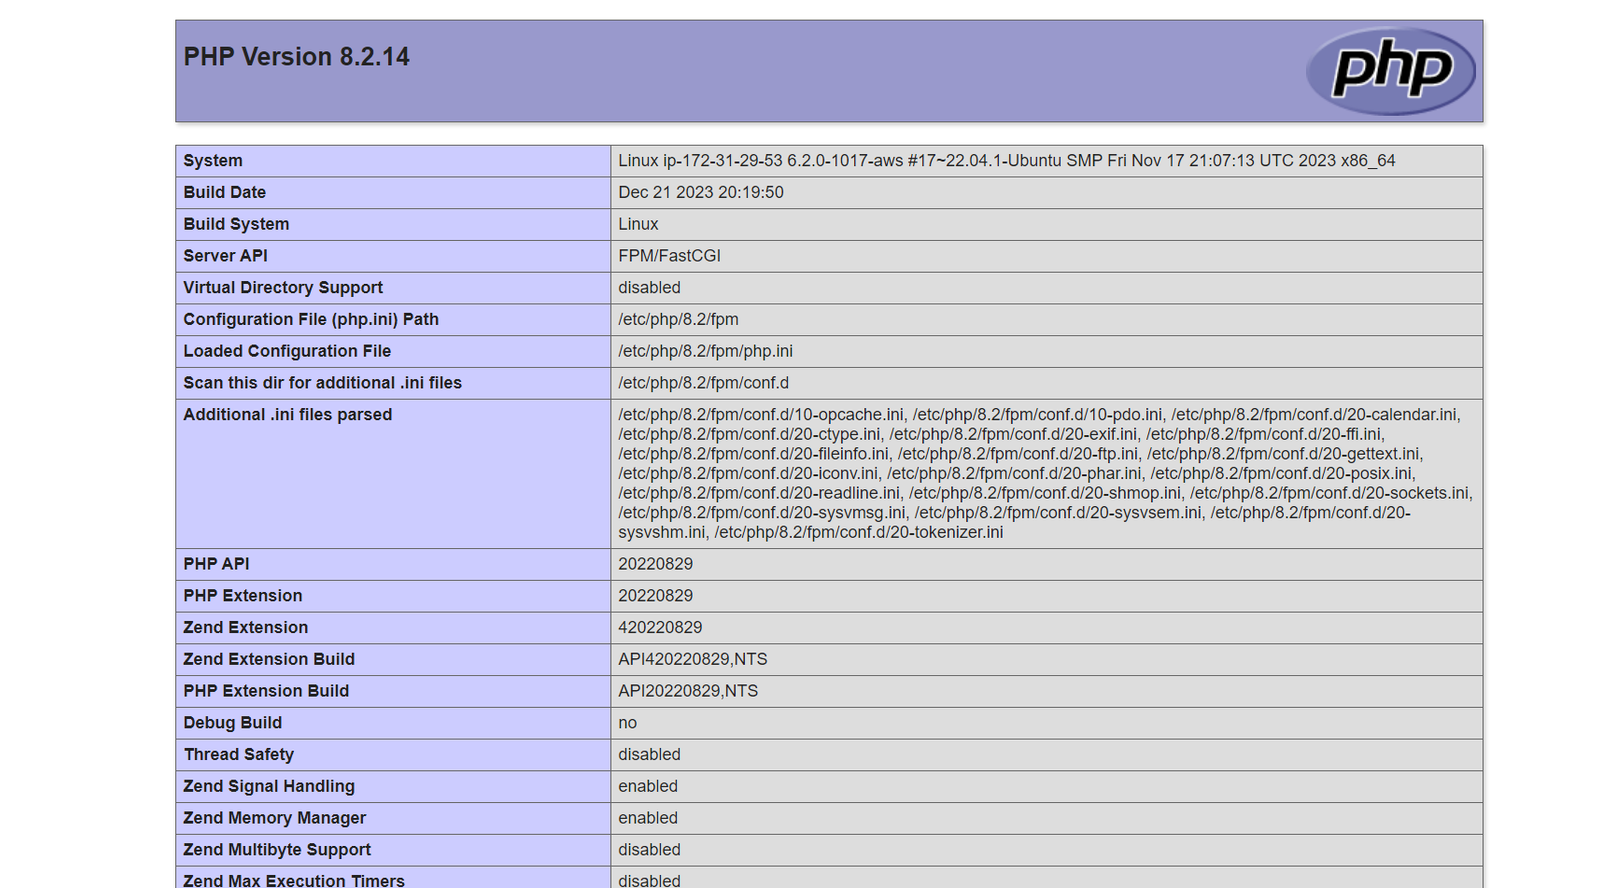
If this is insufficient, we can make a file to load and view the current PHP configuration in a web browser in order to confirm. On your Ubuntu 22.04 system, however, make sure you have Nginx (sudo apt install nginx) or Apache (sudo apt install apache) installed.
Under the www web-root directory, create a PHP file:
sudo nano /var/www/html/info.php
Press Ctrl+X, type Y, and press Enter to save the file after adding the following PHP code line.
<?php phpinfo(); ?>
6. Webserver Configuration
You can use either apache2 or nginx, In this tutorial we using nginx.
Installing Nginx
sudo apt install nginx
Unlinking the default configuration file
unlink /etc/nginx/sites-available/default
Creating Nginx Configuration file
touch /etc/nginx/sites-available/myapp.com
Installing mlocate
It is essential to know where php-fpm is located.
sudo apt install mlocate
Checking php-fpm version
Remember, we have to use php-fpm version later in the nginx configuration file.
/usr/sbin/php-fpm8.2 --version
Add the following in Nginx Configuration file (myapp.com)
server {
            listen 80 default_server;
            listen [::]:80 default_server;

            root /var/www/html;
            index index.html index.htm index.nginx-debian.html;
            server_name _;

            location / {
              try_files $uri $uri/ =404;
            }

            location ~ \.php$ {
              include snippets/fastcgi-php.conf;
              fastcgi_pass unix:/run/php/php8.2-fpm.sock;
            }
          }
Make sure you have to add proper php-fpm version, that you checked in previous step.
Linking Nginx Configuration
ln -s /etc/nginx/sites-available/myapp.com /etc/nginx/sites-enabled
Reloading the Nginx Service
sudo systemctl reload nginx
Next, launch your web browser and go to the following IP address or domain of the Ubuntu 22.04 server where the file was created:
http://your-server-ip-addres/info.php
Note: Use your real IP address or domain instead of your-server-ip-addres.
You will soon be able to observe how this small PHP code generates a webpage containing all the details about other configurations and installed PHP extensions. Locate the imagick section by scrolling down; if it appears, the module is loaded and operating properly.
FAQs to Install PHP Imagemagick
Can I install a specific version of Imagemagick on Ubuntu 22.04?
Ubuntu repositories typically provide the latest stable version. To install a specific version, you may need to compile it manually or use a third-party repository.
How can I verify if Imagemagick is installed correctly?
Open a terminal and run the command convert -version. If Imagemagick is installed correctly, it will display the version and other details.
Are there any additional packages required for Imagemagick on Ubuntu 22.04?
Usually, the default installation includes all necessary dependencies. However, if you encounter any issues, you can try installing additional libraries like libmagickwand-dev.
Can I install Imagemagick via GUI on Ubuntu 22.04?
While Imagemagick is typically installed via the terminal, you can also use package managers like Synaptic or Ubuntu Software Center for a graphical installation.
Is it possible to update Imagemagick on Ubuntu 22.04?
Ubuntu repositories provide updates for Imagemagick. To update, run sudo apt update followed by sudo apt upgrade imagemagick.
How can I check if Imagemagick is installed correctly?
You can run the command convert -version in the terminal. If Imagemagick is installed correctly, it will display the version information.
What additional libraries are required for Imagemagick?
Imagemagick requires certain libraries such as libpng, libjpeg, libtiff, and libwebp. These dependencies are automatically installed during the Imagemagick installation process.
Conclusion
We hope this tutorial helped you understand how to install PHP Imagemagick on Ubuntu 22.04.
If you have any queries, please leave a comment below, and we’ll be happy to respond to them for sure.