

Introduction
Before we begin talking about how to install phpBB with LEMP on Debian 12, let's briefly understand – What is phpBB?
phpBB is a popular open-source forum software that allows users to create online communities. It powers millions of websites and offers a user-friendly interface for discussions and interactions. With phpBB, you can easily manage categories, threads, user registrations, and more.
Its customizable templates and extensive plugin system provide flexibility to meet specific needs. Whether you're a novice or an expert, phpBB provides a secure and reliable platform to foster engagement and build vibrant communities.
In this tutorial, you will install phpBB with LEMP on Debian 12. We will also address a few FAQs on how to install phpBB with LEMP on Debian 12.
Advantages of phpBB with LEMP
- Simplified Setup: phpBB with LEMP (Linux, Nginx, MySQL, PHP) offers a straightforward installation process, making it quick and efficient to get your forum up and running.
- Enhanced Performance: The LEMP stack provides excellent speed and scalability, ensuring smooth forum functionality even with high user traffic.
- Advanced Security: With regular updates and a robust security framework, phpBB with LEMP offers solid protection against vulnerabilities and malicious attacks.
- Customization Options: phpBB's wide range of themes and extensions combined with LEMP's flexibility allows you to customize your forum to match your brand and meet specific requirements.
- Active Development Community: Benefit from continuous improvements and access to a large community of developers and enthusiasts, ensuring ongoing support and functionality enhancements.
Install LEMP (Nginx, MariaDB, PHP) on Debian 12
Step 1: Update Debian Before phpBB Installation
Make sure your Debian system is up to date before installing the LEMP stack. This step guarantees that subsequent processes run smoothly and helps prevent package conflicts. Additionally, it updates your system to the most recent security patches and software enhancements. In order to update your system, run this command:
sudo apt update && sudo apt upgrade
sudo apt update modifies the list of available packages and their versions, sudo apt upgrade installs the most recent versions of the packages you already have.
Step 2: Install NGINX (LEMP Stack Part 1)
The core of the LEMP stack is NGINX, an open-source, fast HTTP server and reverse proxy. You can run the following command to install NGINX:
sudo apt install nginx
NGINX typically launches the service automatically after installation. But it's a good idea to double-check that everything is functioning as it should. You can use the following command to check the NGINX service's status:
systemctl status nginx
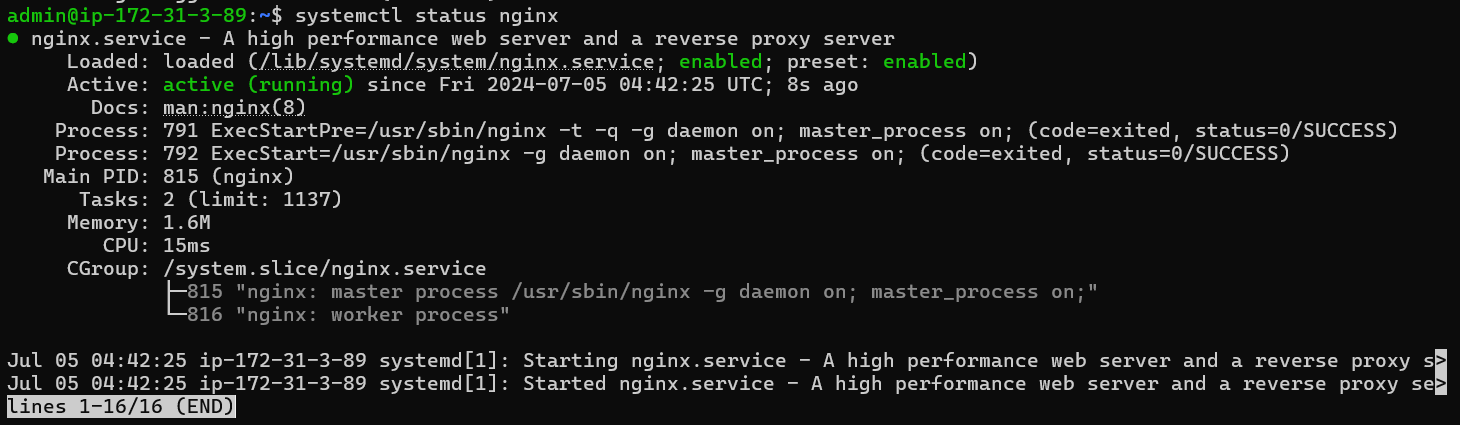
After successfully starting NGINX, you ought to see an output showing the service's active (running) state. The following command can start the server if it hasn't started for any reason, and configure NGINX to start automatically when the system reboots:
sudo systemctl enable nginx --now
With this command, you can make sure that the NGINX service is started immediately (–now) and enabled to start at boot (enable).
You can optionally check if Nginx is installed by going to the server's IP address; you ought to see a test page like this one:

Step 3: Install MariaDB (LEMP Stack Part 2)
Installing the database module completes the setup of the LEMP stack. In the LEMP stack, MariaDB is favored over MySQL due to its performance and other additional features. Use these instructions to run the MariaDB installer:
sudo apt install mariadb-server mariadb-client
Step 4: Verify MariaDB Service
It's critical to verify the MariaDB service's status after MariaDB has been installed. Making sure the MariaDB service is enabled and functioning properly is crucial. To check the status of the service, use the following command:
systemctl status mariadb
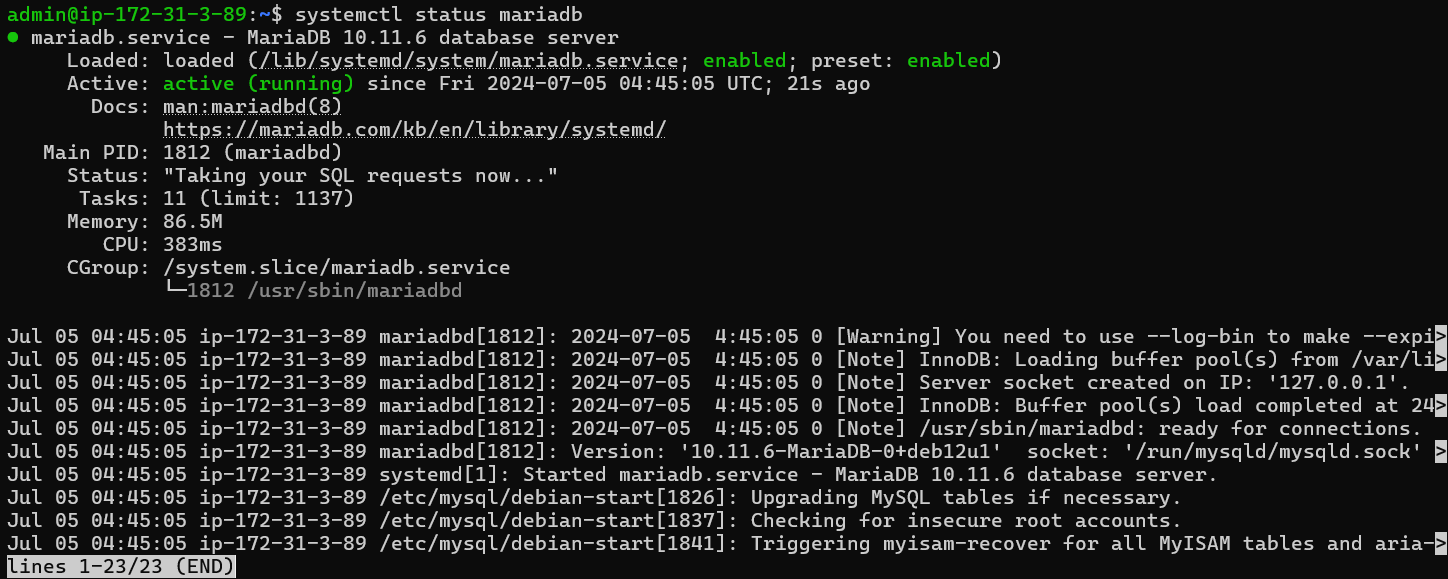
In the event that the server is not yet activated, you can run the following command. By doing this, you can make sure that MariaDB starts right away and is configured to start automatically every time the system reboots.
sudo systemctl enable mariadb --now
Step 5: Secure MariaDB Installation (Security Run-Script)
Building a stable and dependable system requires securing your database, and MariaDB is no different. It is strongly advised that you run the included security script after the installation. By changing the MariaDB installation's default settings, which are frequently regarded as unsafe, this script fortifies the installation and guards against potential unauthorized access or exploitation.
Use the following command to launch the mysql_secure_installation MariaDB security script:
sudo mysql_secure_installation
The next step is to tweak a few settings to improve the security of your MariaDB installation after the security script has been run. These modifications include deleting the test database, limiting access remotely, establishing the root password, and doing away with anonymous user accounts. With each of these changes, your MariaDB installation gains an extra layer of protection against potential security risks.
Now let's explore each of these modifications:
- Setting up the root password: This is the password for your MariaDB installation's root user. Selecting a strong password is essential to preventing unwanted access.
- Restricting remote access: By default, the database can be accessed by the root user from anywhere. By limiting access remotely, one can lower the risk of remote attacks by ensuring that the root user can only access the database from their local computer.
- Eliminating anonymous user accounts: User accounts that are anonymous lack names. Because these accounts can be used to access the database without authorization, they present a security risk. These accounts can be deleted thanks to the security script.
- Removing the test database: Any user can access the test database maintained by MariaDB. To lessen the attack surface, this database can be safely removed as it is not needed for production use.
A big step toward guaranteeing the integrity and security of your data is taking the time to secure your MariaDB installation.
Step 6: Install PHP (LEMP Stack Part 3)
The PHP service, which serves as a conduit between Nginx and MariaDB, is the last element of the LEMP stack. The PHP-FPM service and additional modules needed by phpMyAdmin perform this bridging. Use the following command to install PHP, PHP-FPM, and the necessary modules on your Debian system:
sudo apt install php-fpm php php-cli php-mysql php-curl php-common php-mbstring php-xml
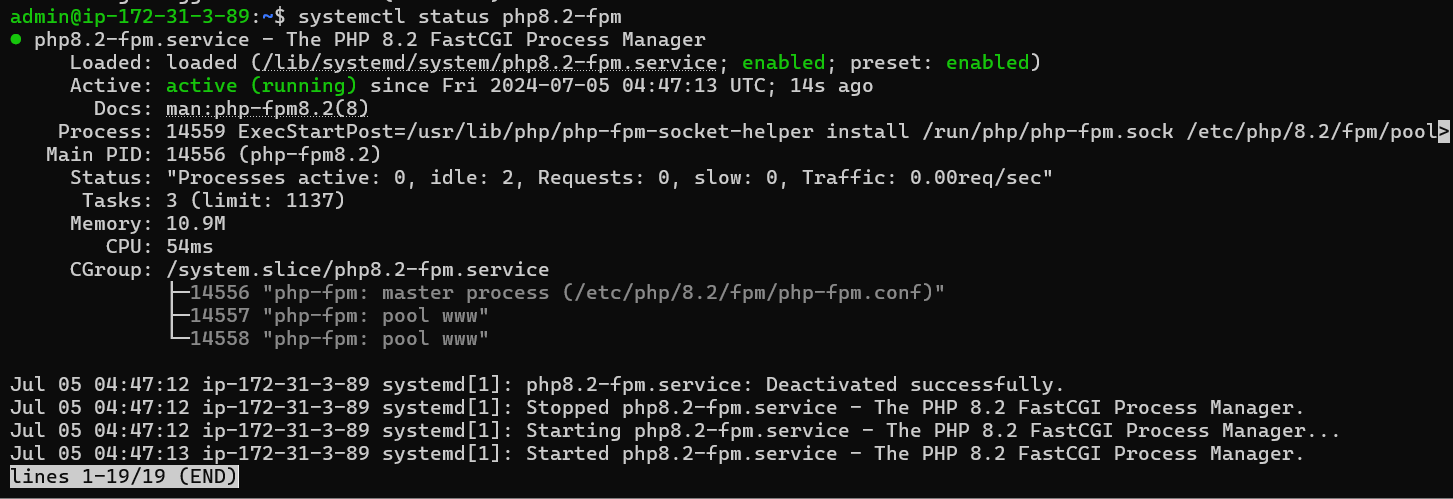
Step 7: Verifying PHP Service Status
It's crucial to verify the PHP service's status after installation. This validation makes sure that PHP is enabled and running error-free. The command relies on the installed PHP version, which in our case was PHP 8.2.
systemctl status php8.2-fpm
Step 8: Activating PHP Service
The following command turns on the PHP service and makes sure it launches automatically whenever the system reboots if it isn't running.
sudo systemctl enable php-fpm --now
With the help of this command, the PHP-FPM service will be enabled and made sure to launch automatically whenever the system boots up.
phpBB Backend Installation on Debian 12
Now that the LEMP stack has been installed successfully, the phpBB forums can be installed. The most recent version of phpBB is 3.3.10 as of the time this tutorial was written. Nevertheless, since new releases are generally released every six months, this could alter in the future. Go to the phpBB downloads page to make sure you are using the most recent version.
Step 1: Download phpBB and Setting Up Directories
Firstly, download the package for phpBB:
cd /tmp && wget https://download.phpbb.com/pub/release/3.3/3.3.10/phpBB-3.3.10.zip
unzip phpBB-3.3.10.zip
sudo mv phpBB3 /var/www/html/phpbb
Next, change the NGINX directory permissions:
sudo chown -R www-data:www-data /var/www/html/phpbb
sudo chmod -R 755 /var/www/html/phpbb
Step 2: Configuring MariaDB for phpBB
Create a database now for your installation of phpBB. Start by logging into the MariaDB terminal as root.
sudo mysql -u root -p
Establish the forums' database:
CREATE DATABASE phpbb;
Make phpbbuser a new database user and set a new password for him:
CREATE USER 'phpbbuser'@'localhost' IDENTIFIED BY 'new_password_here';
Give the user complete database access:
GRANT ALL ON phpbb.* TO 'phpbbuser'@'localhost' IDENTIFIED BY 'user_password_here' WITH GRANT OPTION;
To implement the changes, flush the privileges:
FLUSH PRIVILEGES;
Exit the MariaDB terminal:
EXIT;
Your phpBB database is now prepared. During the tutorial's web UI installation section, you will input these details.
Step 3: Configuring PHP for phpBB
A few settings in the php.ini configuration file need to be changed to guarantee a successful phpBB installation and optimal functionality.
Open the file php.ini:
sudo nano /etc/php/{version}/fpm/php.ini
Kindly ensure that you substitute {version} with the particular PHP-FPM version you have installed, for example, 8.2, 8.1, 8.0, or 7.4, among others.
Find the following settings and make the necessary adjustments:
max_execution_time = 180
max_input_time = 90
memory_limit = 256M
upload_max_filesize = 64M
These settings are usually standard, but you might need to decrease them if you're using shared hosting or a VPS with constrained resources. Keep in mind that, much like any other CMS system, every phpBB installation is unique.
Save the file and close it when finished. For the changes to take effect, you must restart PHP FPM:
sudo systemctl restart php8.2-fpm
Step 4: Configuring Nginx for phpBB
Declare the PHP locations first, followed by the PHP upstream, in your Nginx server block. Using a subdomain like forums or community to establish a new server block is the most effective way to accomplish this.
Make the server block first:
sudo nano /etc/nginx/sites-available/phpbb.conf
In the server block, copy and paste the following, changing the root path, SSL, domain name, and anything else to fit your requirements. PHP and the locations should not be altered unless you are an experienced user.
Take note: The annotations in the following Nginx configuration syntax markdown are meant to assist you in customizing the configuration to meet your unique needs. We strongly advise going over each section in great detail and modifying as necessary to fit your system setup. We really appreciate you taking the time to consider these details.
# Upstream to abstract backend connection(s) for PHP
upstream phpbb {
    # Path to PHP 8.2 FPM socket, replace this with your own socket path
    server unix:/run/php/php8.2-fpm.sock;
}

server {
    listen 80;
    listen [::]:80;

    # Change this to your specific server name
    server_name example.com;

    # Replace this with your site root directory
    root /var/www/html/example.com/;
    index index.php index.html index.htm index.nginx-debian.html;

    # Change this to your specific server name
    server_name forums.vegastack.com;  # IP, if FQDN not available

    # Replace this with your site root directory
    root /var/www/html/phpbb/;
    index index.php index.html index.htm index.nginx-debian.html;

    # Log files, replace these paths if you have different log file paths
    access_log /var/log/nginx/forums-access.log;
    error_log /var/log/nginx/forums-error.log;

    location / {
        try_files $uri $uri/ @rewriteapp;

        # PHP processing, make sure to use your own upstream name if different
        location ~ \.php(/|$) {
            include fastcgi.conf;
            fastcgi_split_path_info ^(.+\.php)(/.*)$;
            fastcgi_param PATH_INFO $fastcgi_path_info;
            fastcgi_param SCRIPT_FILENAME $realpath_root$fastcgi_script_name;
            fastcgi_param DOCUMENT_ROOT $realpath_root;
            try_files $uri $uri/ /app.php$is_args$args;
            fastcgi_pass phpbb;
            fastcgi_intercept_errors on;
        }

        # Deny access to certain PHPBB files
        location ~ /(config\.php|common\.php|cache|files|images/avatars/upload|includes|(?<!ext/)phpbb(?!\w+)|store|vendor) {
            deny all;
            internal;
        }
    }

    location @rewriteapp {
        rewrite ^(.*)$ /app.php/$1 last;
    }

    location /install/ {
        try_files $uri $uri/ @rewrite_installapp =404;

        # PHP processing for installer
        location ~ \.php(/|$) {
            include fastcgi.conf;
            fastcgi_split_path_info ^(.+\.php)(/.*)$;
            fastcgi_param PATH_INFO $fastcgi_path_info;
            fastcgi_param SCRIPT_FILENAME $realpath_root$fastcgi_script_name;
            fastcgi_param DOCUMENT_ROOT $realpath_root;
            try_files $uri $uri/ /install/app.php$is_args$args =404;
            fastcgi_pass phpbb;
            fastcgi_intercept_errors on;
        }
    }

    location @rewrite_installapp {
        rewrite ^(.*)$ /install/app.php/$1 last;
    }

    # Deny access to version control system directories
    location ~ /\.svn|/\.git {
        deny all;
        internal;
    }

    gzip on;
    gzip_comp_level 6;
    gzip_min_length 1000;
    gzip_proxied any;
    gzip_disable "msie6";

    # Gzip compression types
    gzip_types
        application/atom+xml
        application/geo+json
        application/javascript
        application/x-javascript
        application/json
        application/ld+json
        application/manifest+json
        application/rdf+xml
        application/rss+xml
        application/xhtml+xml
        application/xml
        font/eot
        font/otf
        font/ttf
        image/svg+xml
        text/css
        text/javascript
        text/plain
        text/xml;

    # Static assets, media
    location ~* \.(?:css(\.map)?|js(\.map)?|jpe?g|png|gif|ico|cur|heic|webp|tiff?|mp3|m4a|aac|ogg|midi?|wav|mp4|mov|webm|mpe?g|avi|ogv|flv|wmv)$ {
        expires    90d;
        access_log off;
    }

    # SVG, fonts
    location ~* \.(?:svgz?|ttf|ttc|otf|eot|woff2?)$ {
        add_header Access-Control-Allow-Origin "*";
        expires    90d;
        access_log off;
    }
}
Once configured, turn on the new server block:
sudo ln -s /etc/nginx/sites-available/phpbb.conf /etc/nginx/sites-enabled/
Checking the configuration is now possible:
sudo nginx -t
If every setting is accurate, you will observe:
nginx: the configuration file /etc/nginx/nginx.conf syntax is ok
nginx: configuration file /etc/nginx/nginx.conf test is successful
To enable web UI access to phpBB, restart the Nginx server:
sudo systemctl restart nginx
With this, the phpBB backend installation is finished.
Step 5: Implementing SSL Encryption with Let’s Encrypt (Optional)
It would be wise to use Let's Encrypt if you plan to secure your Nginx server via HTTPS. Under the nonprofit Internet Security Research Group (ISRG), Let's Encrypt is a reliable, fully automated, and free certificate authority.
Installing Certbot
We need to install the Certbot package first. With zero downtime, Certbot is an effective Let's Encrypt client that can automate certificate installation and issuance. Certbot boasts a fairly sophisticated CLI as well.
You can use the following command to install the Certbot package:
sudo apt install python3-certbot-nginx -y
Creating Your Certificate
We can now create your SSL certificate because Certbot is installed. To carry out this process, execute the following command:
sudo certbot --nginx --agree-tos --redirect --hsts --staple-ocsp --email [email protected] -d forums.example.com
The command we've issued makes it easier to set up optimally, which includes OCSP Stapling, Strict-Transport-Security header, and force HTTPS 301 redirects. Every one of these components helps to keep your server secure.
It's important to change "forums.example.com" and "[email protected]" to your domain name and email address.
Transition to HTTPS
Your forum should now be reachable via HTTPS at https://forums.example.com rather than the previous http://forum.example.com after these commands have been successfully executed. The secure HTTPS version will be seamlessly redirected to any attempts to access the old HTTP URL.
Complete the phpBB Web UI Installation on Debian 12
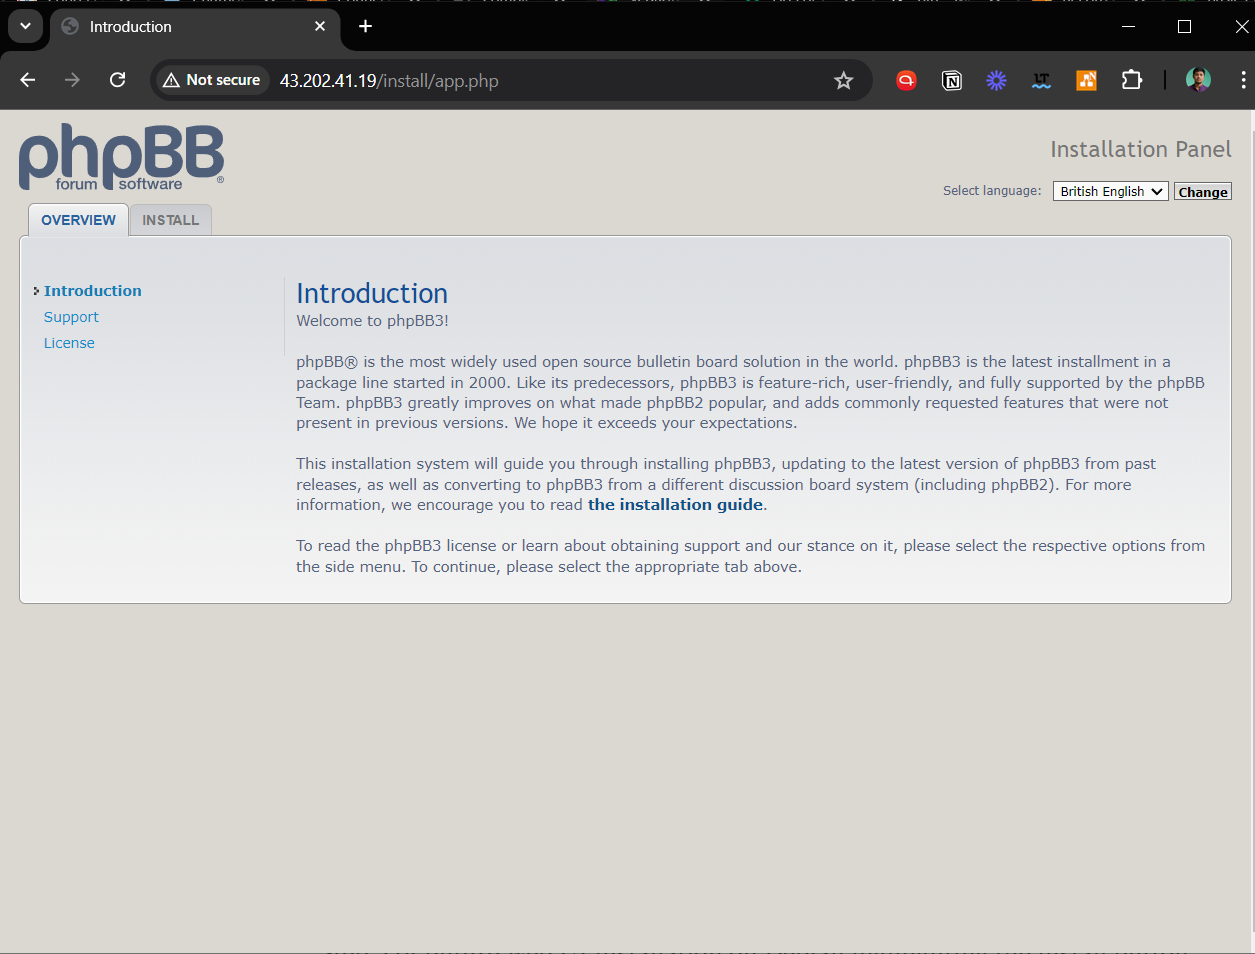
After the backend has been successfully configured, we will move on to the frontend to finish the phpBB installation. You can go to the installation page by typing the URL of your chosen phpBB forum. We're using https://forums.vegastack.com as an example.
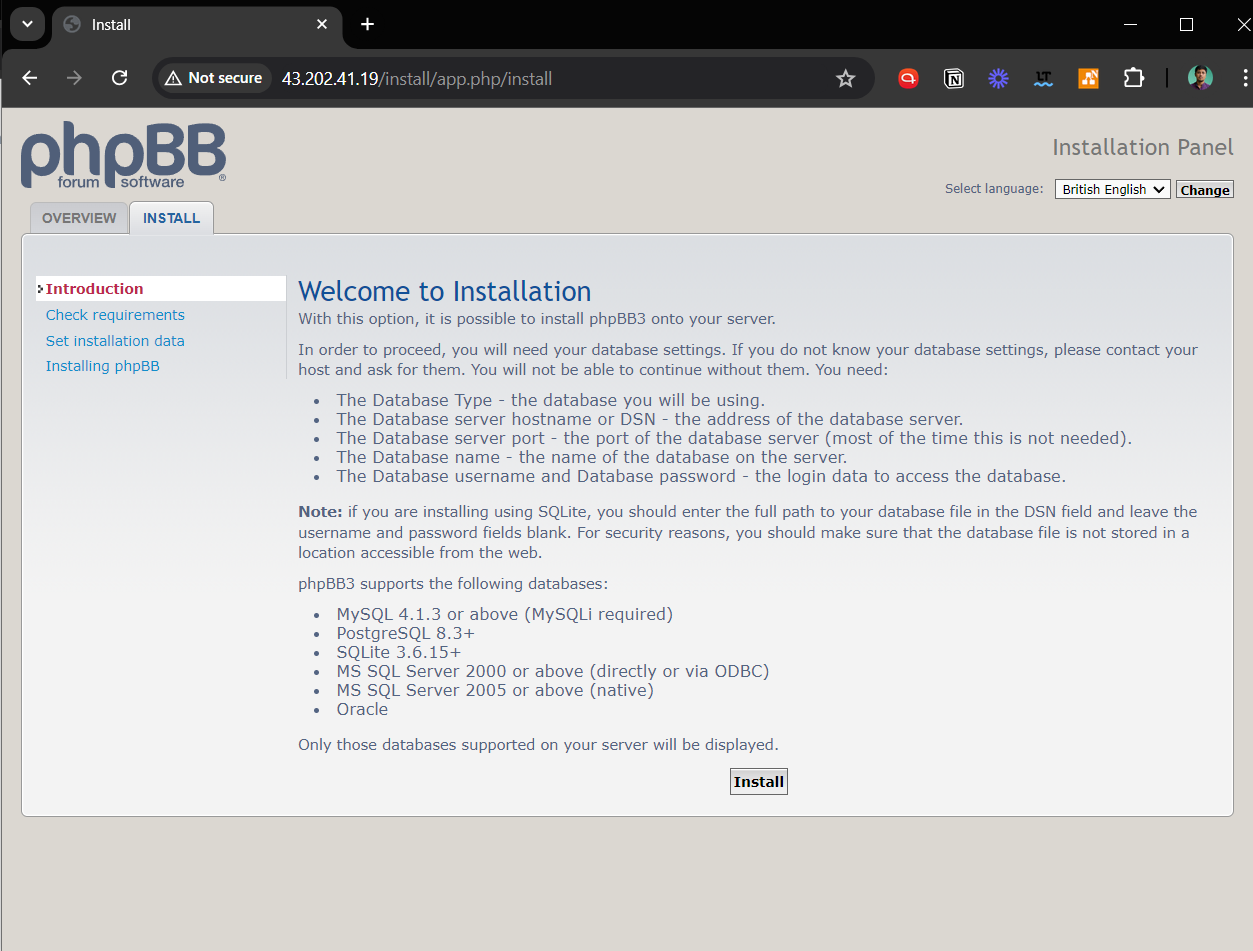
Step 1: Initiating the Installation
You will be directed to the installation page for phpBB after clicking on the given URL. Clicking the "Install" button in the upper left corner of the page will start the installation process.
After that, a page with the minimum system requirements and other crucial technical details for phpBB will be displayed to you.
After making sure your system satisfies these requirements, select "Install" at the bottom of the screen.
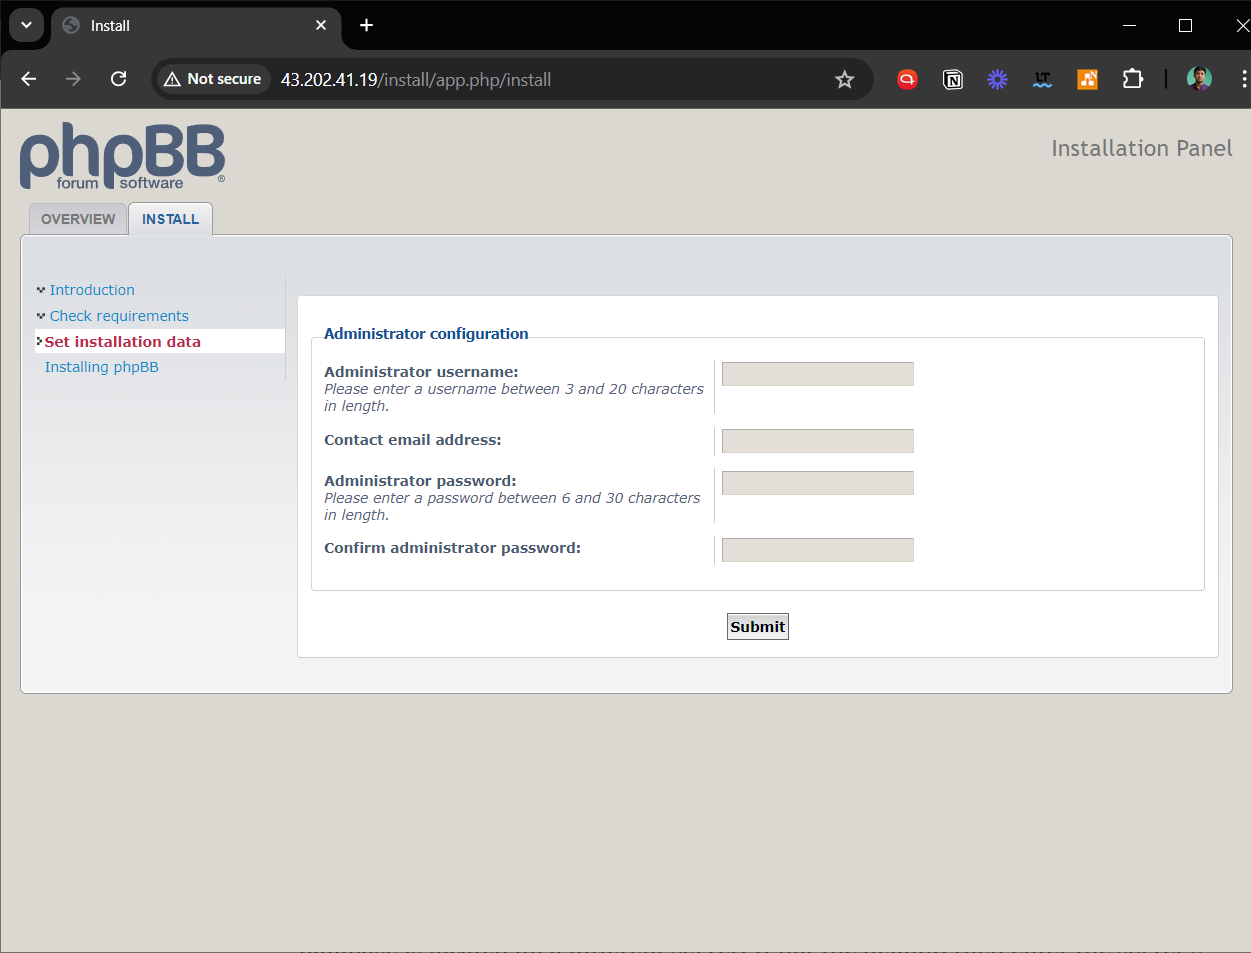
Step 2: Setting Up the Admin Account
The next step is to create an admin account for phpBB. For the sake of recovery and general security, it is imperative that you use a strong password for this account.
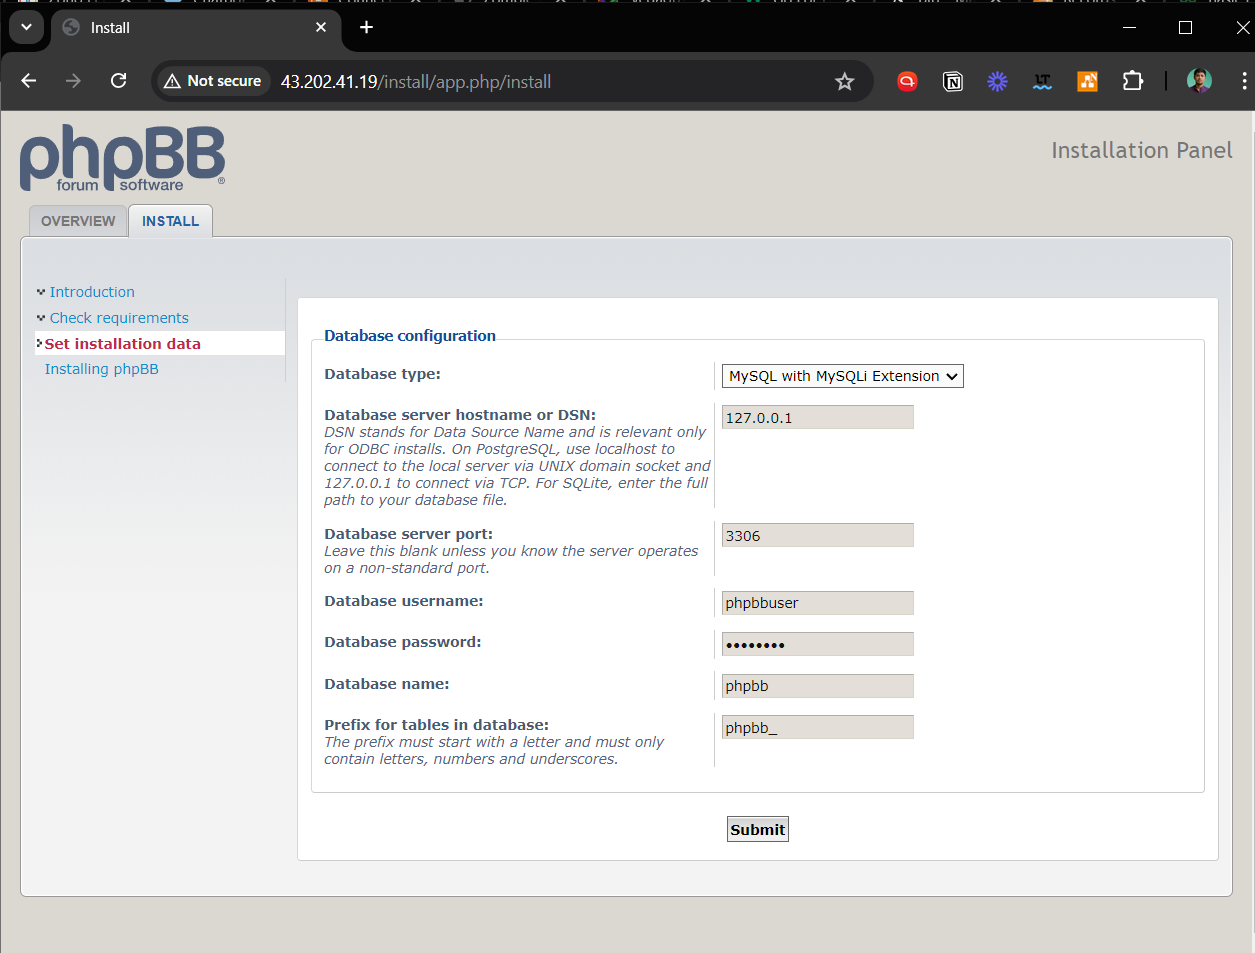
Step 3: Configuring Database Details
After creating your admin account, you'll be asked for database information. Enter "localhost" and leave the default "MySQL with MySQLi Extension" unless your database is located on a different server. If not the default, then enter the server's IP address and port.
Our tutorial makes use of a database called "phpbb," to which the user "phpbbuser" has been granted access (in addition to root). Unless you intend to host multiple forums, in which case changing the prefix can help distinguish them, keep the default prefix "phpbb_."
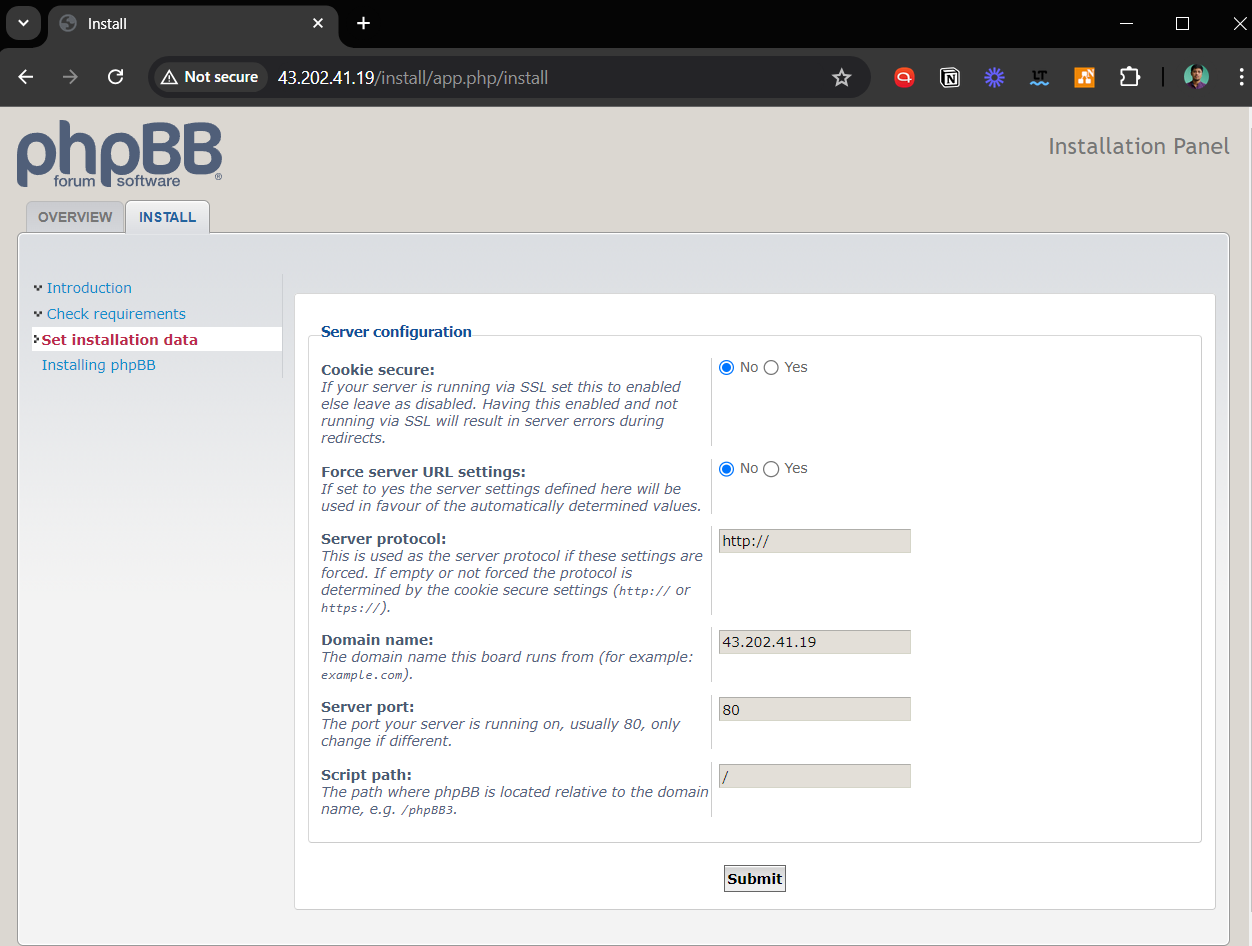
Step 4: Finalizing Server Configuration
After that, you'll be able to adjust the server settings. In the event that SSL is not being used, the default settings ought to be adequate. If SSL has been installed, though, make sure the configurations suit your unique needs.
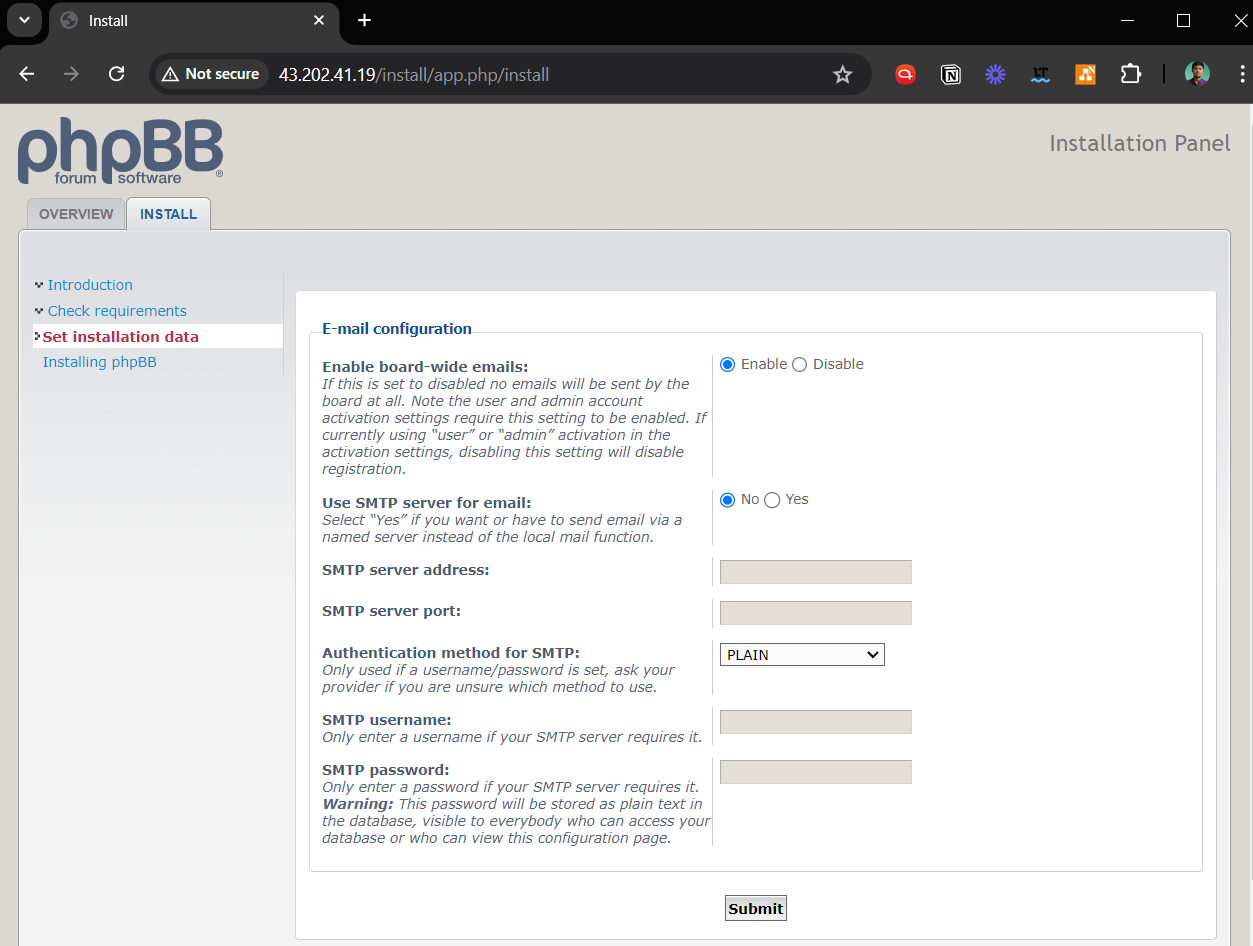
Step 5: SMTP Setup
You can set up SMTP settings after server configuration, if necessary. If not, you can move on to the default settings and skip this step.
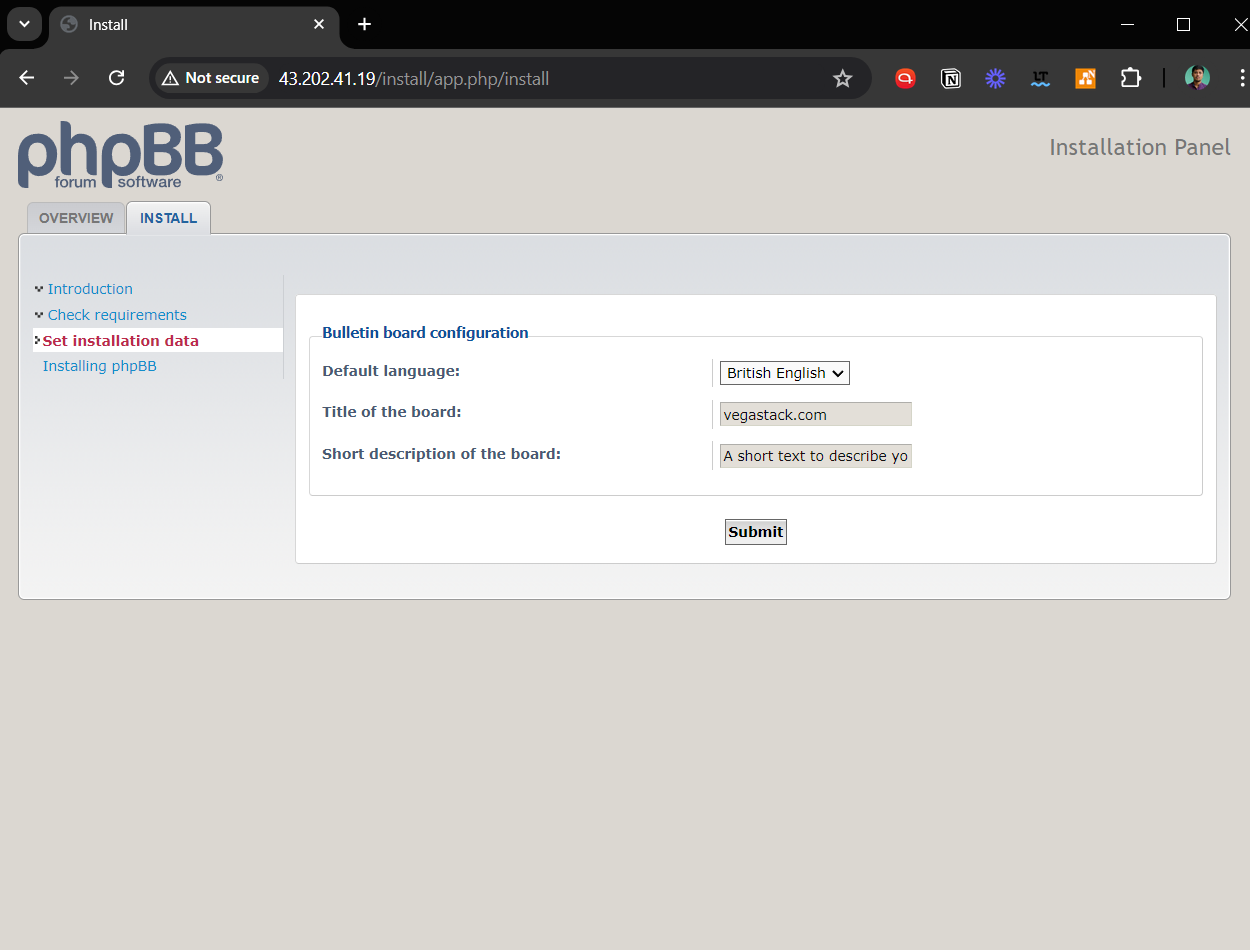
Step 6: Establishing Forum Details
Lastly, select the language you want to use and give your forum a title. You can always change this later if you're not sure about the forum title. For now, you can use the default option.
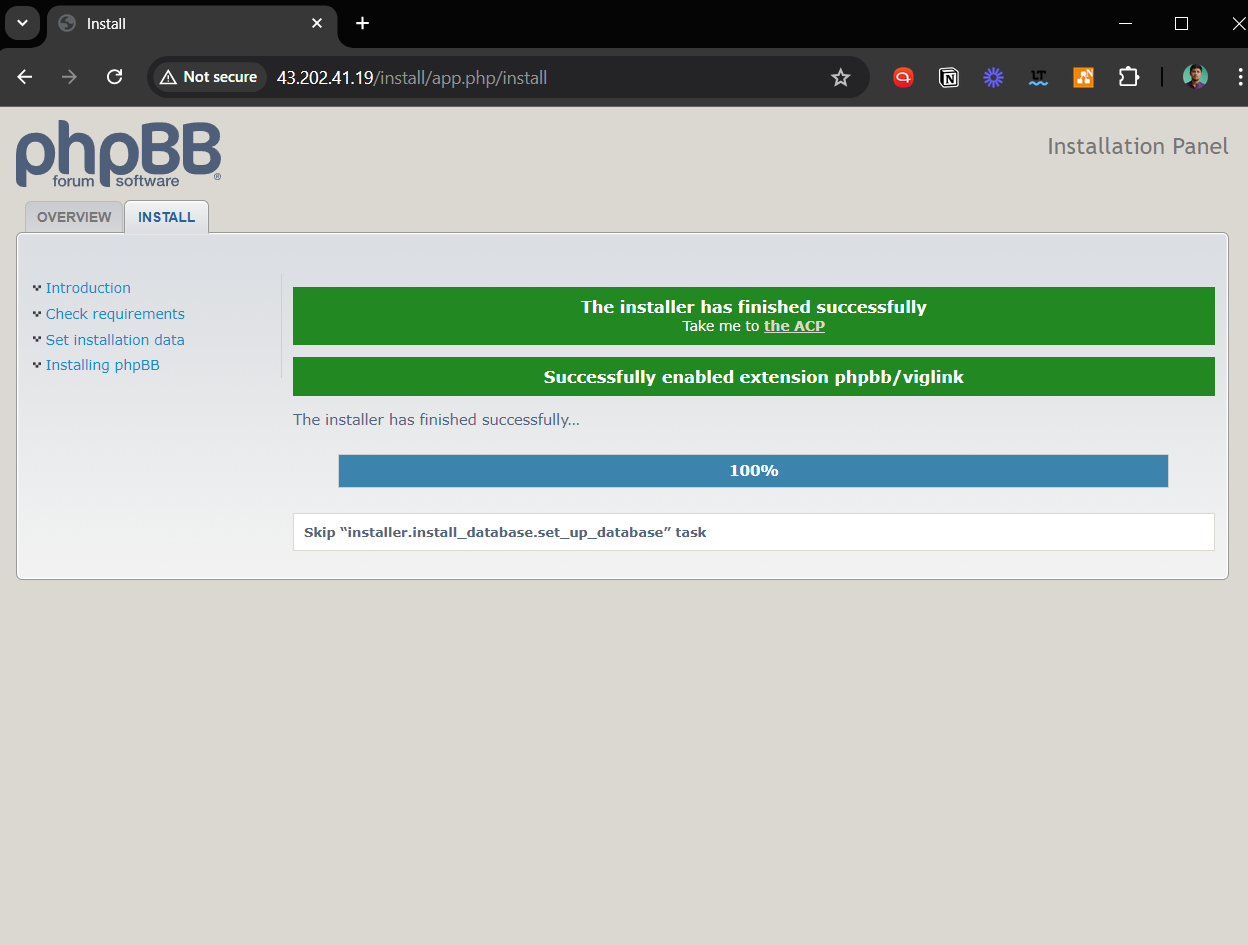
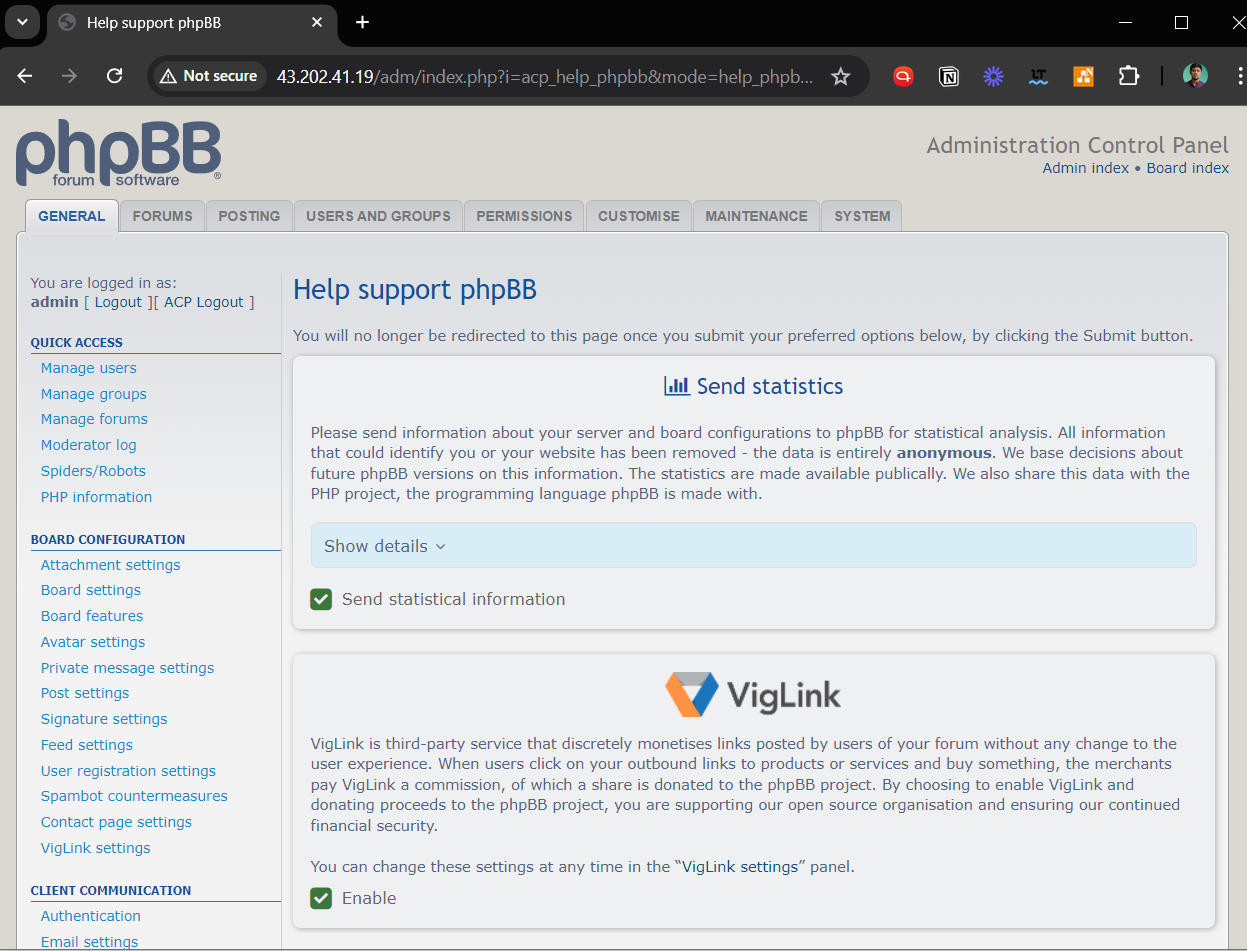
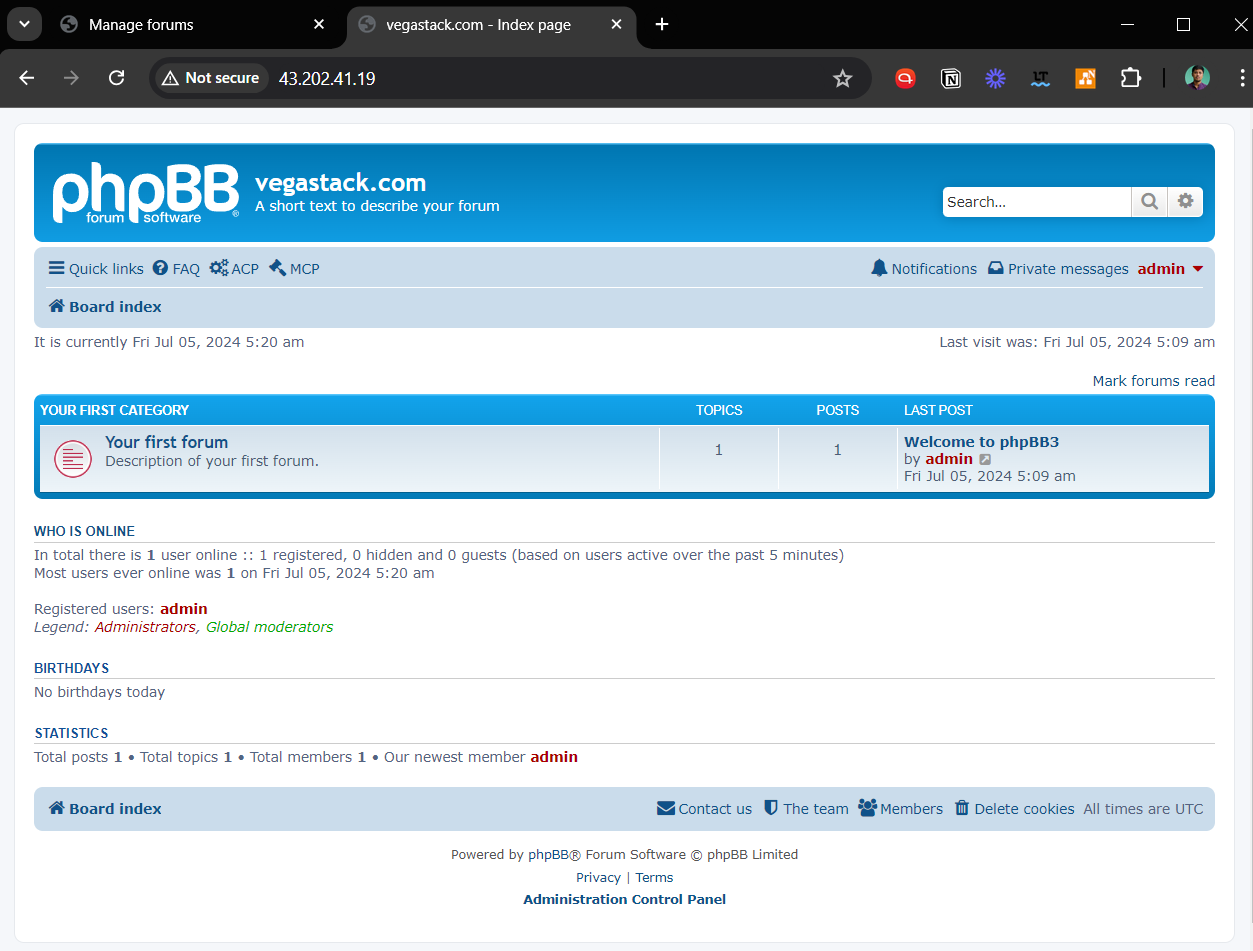
When you finish these steps, you should see a final screen indicating that your phpBB forum has installed successfully. It will also include a link that will take you to the Admin Control Panel, or ACP. You may need to go back and review earlier steps if you run into any problems to make sure no permissions or steps were missed.
Completion of phpBB Installation and Configuration
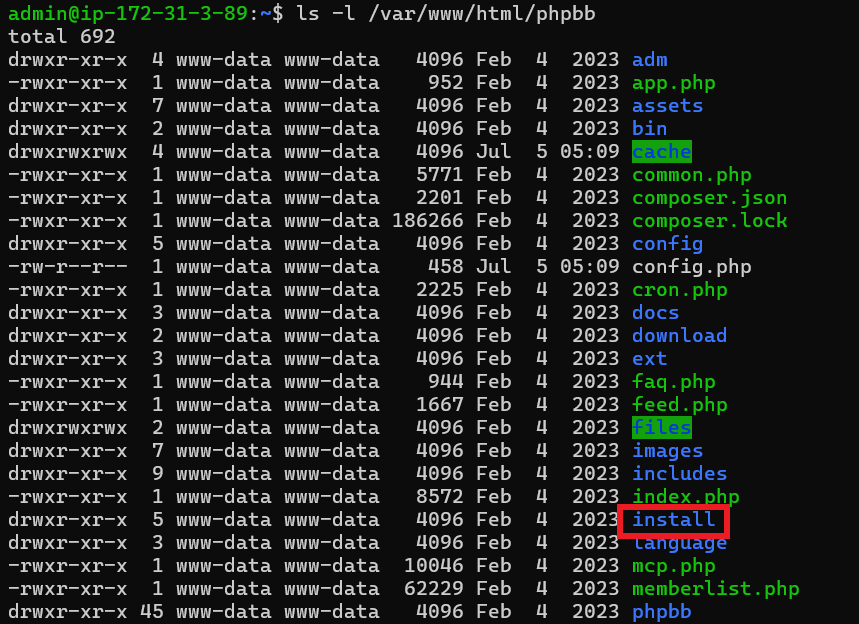
Delete phpBB Installation Directory
Well done on making it this far. When you first log into the phpBB Admin Control Panel (ACP), a big red warning will appear and tell you to change the name of your install directory or remove it. Rather than merely moving this directory, it is strongly advised that it be deleted. Use the following command in your terminal to achieve this:
sudo rm -R /var/www/html/phpbb/install
If you don't do this, you'll probably discover that your forum won't work until the install directory has been deleted:
Setting the Correct CHMOD Permissions (Vital Step)
It's important to assign the proper CHMOD permissions after installation while we're working with terminal commands. This is covered in detail in the official phpBB guide, which is available here. Ignoring this step could leave your system vulnerable to serious security flaws, so please follow the instructions exactly or use your own approach if you think it works better, but don't leave the default permissions in place!
Run the following commands:
sudo find /var/www/html/phpbb -type d -exec chmod 755 {} \;
sudo find /var/www/html/phpbb -type f -exec chmod 644 {} \;
Consequently, we must grant specific directories and files the following extra permissions:
sudo chmod 777 -R /var/www/html/phpbb/files
sudo chmod 777 -R /var/www/html/phpbb/cache
sudo chmod 777 -R /var/www/html/phpbb/store
sudo chmod 777 -R /var/www/html/phpbb/images/avatars/upload
Your board's operations will be disrupted if you neglect to do this. Make sure you follow these paths precisely, or else you might unintentionally allow read and write access to the entire phpBB directory, which would be a security risk again.
Instituting a Cronjob for phpBB (Recommended)
The creation of a cronjob is the last step in this tutorial. As per phpBB guidelines, it is advised to set up cron jobs to run every 5 minutes on forums with high traffic or slow response times. This is how you do it.
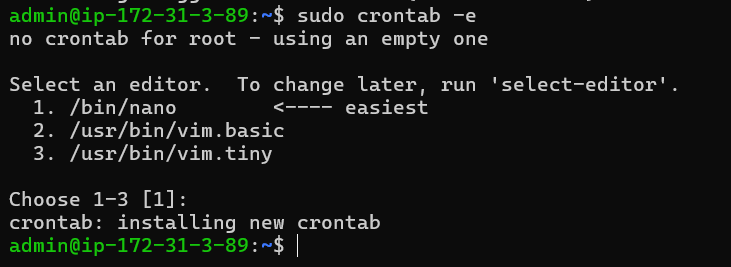
Use this command to open crontab:
sudo crontab -e
The first cronjob's option is:
*/5 * * * * /usr/bin/php /var/www/html/phpbb/bin/phpbbcli.php cron:run > /dev/null 2>&1
Press CTRL+O to save, and CTRL+X to exit. If everything is done correctly, your terminal should display the following response:
crontab: installing new crontab
This reply shows that the cronjob is running and operational. You can change the frequency of cronjobs to fit your requirements, even though phpBB suggests running them every five minutes.
Lastly, go back to your phpBB Admin Panel and select your server settings to enable the server cron job.
You've finished the post-installation stage of your Debian phpBB installation by following these steps.
FAQs to Install phpBB with LEMP on Debian 12
What is LEMP?
LEMP is a software stack that stands for Linux (operating system), Nginx (web server), MySQL (database management system), and PHP (programming language). It provides a robust and high-performance environment for running web applications like phpBB.
What are the system requirements for phpBB with LEMP on Debian 12?
The system requirements may vary based on factors such as user traffic and extensions used. However, commonly recommended requirements include Debian 12, Nginx, MySQL/MariaDB, PHP, and necessary dependencies.
Are there any pre-requisites for installing phpBB with LEMP on Debian 12?
Yes, before installing phpBB, you need to have the LEMP stack properly set up on your Debian 12 system. Additionally, you may need to install other software or configurations based on your specific needs or system requirements.
Is phpBB compatible with Nginx?
Yes, phpBB is compatible with Nginx web server. You can configure Nginx to work seamlessly with phpBB and take advantage of its performance benefits.
How can I access phpBB after installation?
Once installed, you can access your phpBB forum by entering the URL of your website into a web browser. The installation process will guide you through the initial setup, including creating an administrative account.
Can I migrate an existing phpBB installation to phpBB with LEMP on Debian 12?
Yes, it is possible to migrate an existing phpBB forum to a LEMP-based server. Detailed steps for migration are available in the phpBB documentation, which you can follow to ensure a smooth transition.
How do I secure my phpBB forum with LEMP on Debian 12?
You can enhance the security of your phpBB forum by implementing best practices such as secure passwords, regular software updates, enabling SSL encryption, using a firewall, and installing security-related extensions.
Conclusion
We hope this tutorial helped you understand how to install phpBB with LEMP on Debian 12.
If you have any queries, please leave a comment below, and we’ll be happy to respond to them for sure.