
Choose a different version or distribution
Introduction
Before we begin talking about how to install phpMyAdmin on Debian 11, let's briefly understand – What is phpMyAdmin?
The phpMyAdmin is a popular web-based tool used for managing MySQL databases. It provides a user-friendly interface to easily perform tasks like creating, modifying, and deleting databases, tables, and records. The phpMyAdmin utility is a graphical database management tool that is accessible through the web. You can administer databases without using the built-in command-line interface by installing phpMyAdmin.
In this tutorial, you will install phpMyAdmin on Debian 11. We will also address a few FAQs on how to install phpMyAdmin on Debian 11.
Advantages of phpMyAdmin
- User-Friendly Interface: phpMyAdmin offers an intuitive interface, making it easy for users to manage MySQL databases efficiently.
- Database Management: It simplifies tasks like creating, modifying, and deleting databases, tables, and records.
- SQL Query Execution: Users can execute SQL queries directly in phpMyAdmin, making it convenient for database management.
- Import/Export Data: phpMyAdmin allows effortless import and export of data, facilitating efficient data management.
- User Privileges Management: With phpMyAdmin, users can manage database users and their privileges seamlessly.
Prerequisites
- Running and installed Debian 11.
- A user account with root or sudo access.
- Access to a command line or terminal window.
Step 1: Install the LAMP Stack on Debian 11
The LAMP stack is necessary for phpMyAdmin to function properly.
Step 1.1: Upgrade Software Packages and Install wget
The following command will open a terminal window where you can update your software package lists:
sudo apt update
For the wget tool to be installed, type the following command:
sudo apt install wget -y
You can download files straight from the terminal window using the wget utility.
You have successfully acquired the tools needed to install a LAMP stack and phpMyAdmin.
Step 1.2: Install Apache
An HTTP network is used by the web server software Apache to handle requests and send data. Use the following command in the terminal to install Apache:
sudo apt install apache2 -y
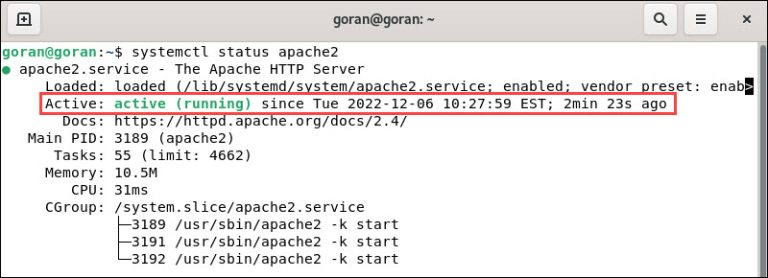
It may take a while to complete the process. If you want to make sure the Apache service is operating, type the following command:
systemctl status apache2
The report displays an active (running), green status message.
To get back to the command prompt, use Ctrl+z.
Step 1.3: Install PHP on Debian 11
For the purpose of operating a web application like phpMyAdmin, the PHP programming language and coding environment are necessary. Use the following command to install Apache and MySQL plugins, as well as core PHP packages:
sudo apt -y install php php-cgi php-mysqli php-pear php-mbstring libapache2-mod-php php-common php-phpseclib php-mysql
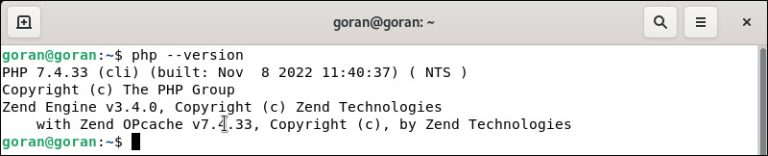
Check that PHP has been installed after the installation is finished:
php --version
The system shows the release date and the current PHP version.
Step 1.4: Install and Configure MariaDB on Debian 11
Instead of MySQL, this tutorial makes use of the open-source MariaDB relational database management system. There are many similar commands and features between MariaDB and MySQL.
The following command should be entered to install MariaDB:
sudo apt install mariadb-server mariadb-client -y
Verify the MariaDB installation after the procedure is finished:
systemctl status mariadb
You see an active (running) state, similar to Apache.

You must set up the MariaDB database before you can install phpMyAdmin.
Secure MariaDB
Launch an inbuilt script to set up the fundamental security settings for MariaDB:
sudo mysql_secure_installation
To bypass the initial query, since you haven't yet created a root password for your database, press Enter. Answer the following questions:
- Swap to unix socket authentication [Y/n] : Enter n to skip.
- Set root password? [Y/n]: Enter y to create a secure root password for your database. Answer "n" to the question "Change the root password" if you already have one.
- Remove anonymous users? [Y/n]: Enter after typing
y. - Disallow remote root logins? [Y/n]: Enter after typing
y. - Remove test database and access to it? [Y/n]: Enter after typing
yto confirm. - Reload privilege tables now? [Y/n]: Enter after typing
yto confirm.
The output indicates that the installation of MariaDB is now secure.

Create a New MariaDB User
A specified user is required in order for the phpMyAdmin utility to connect to your database. Adding a new MariaDB user increases security and enables you to control the level of permissions granted to this user.
Create a new MariaDB user and provide permissions. After creating a MariaDB user, launch the installation of phpMyAdmin.
Step 2: Download phpMyAdmin
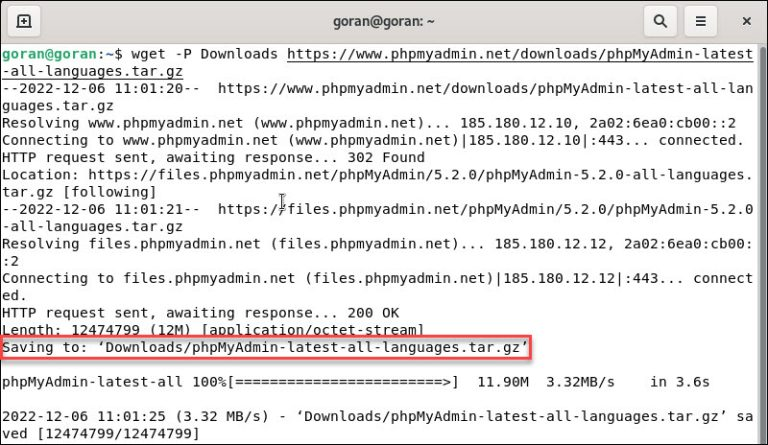
To get the most recent stable version of phpMyAdmin, use the wget command:
wget -P Downloads https://www.phpmyadmin.net/downloads/phpMyAdmin-latest-all-languages.tar.gz
Use the following command instead to download just the English version:
wget -P Downloads https://www.phpmyadmin.net/downloads/phpMyAdmin-latest-english.tar.gz
When using wget, the -P option tells it to save the files directly to the Downloads directory. To download the file, use any directory and note the path.
Step 3: Check phpMyAdmin GPG Key
Every downloaded archive has an associated .asc file with its own key signature. The signature can be checked once both files are in the same folder.
1) Download the phpMyAdmin keyring to the previous location you used in order to verify the GPG key for phpMyAdmin. In this instance, Downloads:
wget -P Downloads/ https://files.phpmyadmin.net/phpmyadmin.keyring
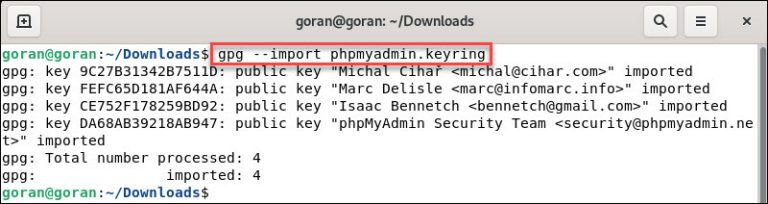
2) Go to the Downloads directory, then import the keyring:
cd Downloads
gpg --import phpmyadmin.keyring
3) Keeping in the same directory, get the relevant GPG .asc file for your phpMyAdmin version:
wget https://www.phpmyadmin.net/downloads/phpMyAdmin-latest-all-languages.tar.gz.asc
4) Verify the .asc file against the keyring you downloaded by remaining in the same directory (in this case, Downloads):
gpg --verify phpMyAdmin-latest-all-languages.tar.gz.asc
In response, the system shows GPG key information.
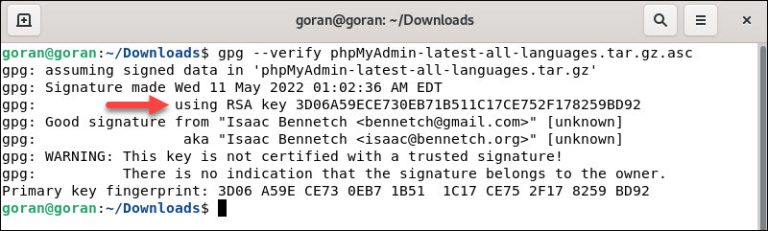
Now, you can compare the developer credentials on the phpMyAdmin documentation page with the GPG key.
Step 4: Unpack and Configure phpMyAdmin
1) In the Apache web root directory, create a phpMyAdmin directory:
sudo mkdir /var/www/html/phpMyAdmin
2) Unpack the phpMyAdmin tar.gz files to the newly created directory by navigating to the Downloads directory:
sudo tar xvf phpMyAdmin-latest-all-languages.tar.gz --strip-components=1 -C /var/www/html/phpMyAdmin
When the file is unpacked, the terminal displays no answer.
3) Set up a default configuration file:
sudo cp /var/www/html/phpMyAdmin/config.sample.inc.php /var/www/html/phpMyAdmin/config.inc.php
4) In the config.inc.php file, use the nano text editor (or your chosen text editor) to create a secure passphrase:
sudo nano /var/www/html/phpMyAdmin/config.inc.php
Find the following line:
$cfg['blowfish_secret'] = '';
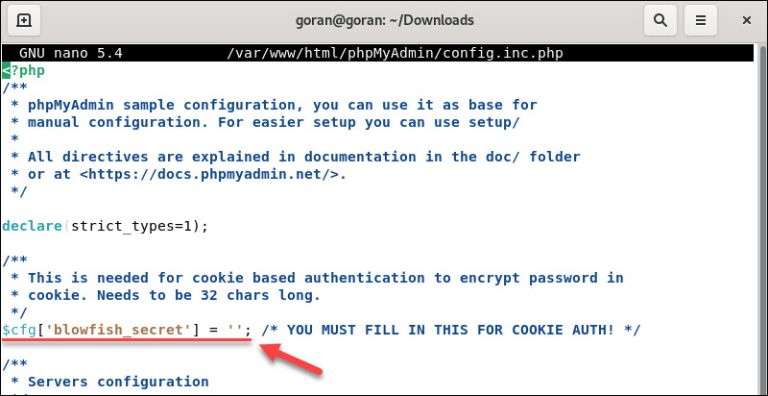
Between the single quotes, insert a secret passphrase. For instance:
$cfg['blowfish_secret'] = 'My_Secret_Passphras3!';
Choose a complex passphrase, exit, and save the file (Ctrl+x).
5) Modify the config.inc.php file's permissions:
sudo chmod 660 /var/www/html/phpMyAdmin/config.inc.php
6) Modify the phpMyAdmin directory's owner:
sudo chown -R www-data:www-data /var/www/html/phpMyAdmin
7) Start the Apache again:
sudo systemctl restart apache2
Step 5: Access phpMyAdmin from Browser
To access phpMyAdmin, open a web browser and navigate to the localhost/your_phpMyAdmin_directory address. In our example:
localhost_or_ip/phpMyAdmin
After connecting to the local Apache, MariaDB, and PHP files you've created, the system displays the phpMyAdmin login screen.
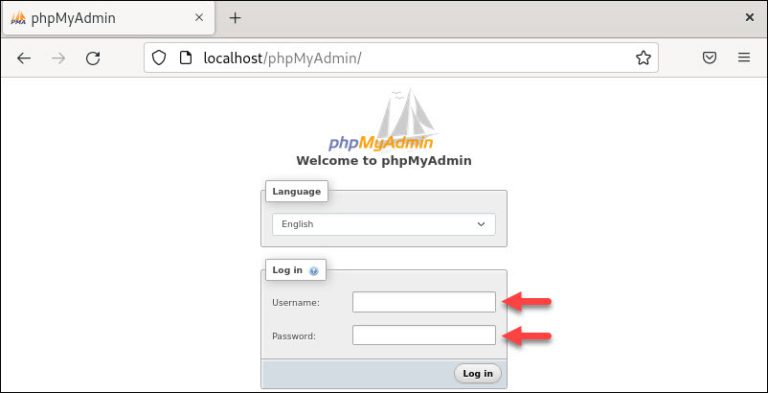
Use the username and password you created for the MariaDB user to access phpMyAdmin.
FAQs to Install phpMyAdmin on Debian 11
What are the system requirements for phpMyAdmin on Debian 11?
phpMyAdmin requires a web server (like Apache or Nginx), PHP, and MySQL to be installed on Debian 11.
Can I access phpMyAdmin via a web browser?
Yes, after installing phpMyAdmin, you can access it through your web browser by entering the server's IP address followed by "/phpmyadmin".
How can I configure phpMyAdmin after installation?
During installation, you'll be prompted to configure phpMyAdmin. You can also reconfigure it later using sudo dpkg-reconfigure phpmyadmin command.
What are the default login credentials for phpMyAdmin?
By default, the username is "root," and there is no password. It is recommended to set a password for the MySQL root user.
Can I use phpMyAdmin to create multiple databases?
Yes, phpMyAdmin allows you to create, modify, and delete multiple databases, making it easy to manage your MySQL databases.
How can I import a database using phpMyAdmin?
In phpMyAdmin, click on the desired database, navigate to the "Import" tab, choose the database file, and click "Go" to import it.
Can I export a database using phpMyAdmin?
Yes, you can export a database by selecting the desired database, clicking on the "Export" tab, choosing export options, and clicking "Go".
Conclusion
On your Debian 11 system, phpMyAdmin has now been installed. Use the GUI through a browser to start more effectively managing your databases. If you have any suggestions or queries, kindly leave them in the comments section.