
Choose a different version or distribution
Introduction
Before we begin talking about how to install Plex Media Server on Debian 12, let's briefly understand – What is Plex Media Server?
Plex Media Server is a powerful tool that organizes and streams media files to various devices. It allows you to access your movies, TV shows, music, and photos anytime, anywhere. With an intuitive interface, Plex makes it easy to browse and play your favorite content on your TV, computer, or mobile device.
It also offers neat features like automatic media organization, rich metadata, and remote access. Whether you want to enjoy your collection alone or share it with others, Plex Media Server is a perfect solution for all your media needs.
In this tutorial, you will install Plex Media Server on Debian 12. We will also address a few FAQs on how to install Plex Media Server on Debian 12.
Advantages of Plex Media Server
- Easy media organization: Plex automatically organizes your media library, making it simple to browse and find your favorite movies, TV shows, and music.
- Remote access: Enjoy your media on the go with remote access, allowing you to stream content from your Plex server to any device, anywhere.
- Rich metadata: Plex gathers detailed information about your media, including movie posters, episode summaries, and artist bios, enhancing your viewing experience.
- Multi-device streaming: Stream your media to multiple devices simultaneously, including TVs, computers, smartphones, and tablets, catering to everyone's preferences.
- Sharing capabilities: Share your media library with friends and family, allowing them to access and enjoy your collection with their Plex accounts, fostering a sense of community.
Install Plex Media Server on Debian 12 via APT
Step 1: Update the Debian System Prior to Installing Plex
Update your Debian system first to guarantee a seamless installation. This guarantees that all current packages are current:
sudo apt update && sudo apt upgrade
Step 2: Install Initial Required Packages For Plex
Certain additional packages are needed for Plex installation. Use the following command to install them:
sudo apt install dirmngr ca-certificates software-properties-common apt-transport-https curl -y
The tools for managing the Plex repository, such as secure connections and GPG key management, will be included in these packages.
Step 3: Import Plex APT Repository on Debian
Installing Plex from the official source requires adding the Plex repository to your Debian system. This guarantees that you use the APT package manager to install and update the software straight from the official repository.
Initially, launch your terminal and use the following command to import the Plex GPG key:
curl -fsSL https://downloads.plex.tv/plex-keys/PlexSign.key | gpg --dearmor | sudo tee /usr/share/keyrings/plex.gpg > /dev/null
The Plex GPG key, which is needed to confirm the legitimacy of the packages from the repository, is downloaded using this command.
The Plex repository should then be added to your system:
echo "deb [signed-by=/usr/share/keyrings/plex.gpg] https://downloads.plex.tv/repo/deb public main" | sudo tee /etc/apt/sources.list.d/plexmediaserver.list
With the help of this command, a new file containing the relevant Plex repository details is created in the sources.list.d directory.
Step 4: Install Plex Media Server using APT Command on Debian
Update your package index to include the recently added Plex repository before installing Plex:
sudo apt update
Using the following command, you can now install Plex Media Server on Debian:
sudo apt install plexmediaserver
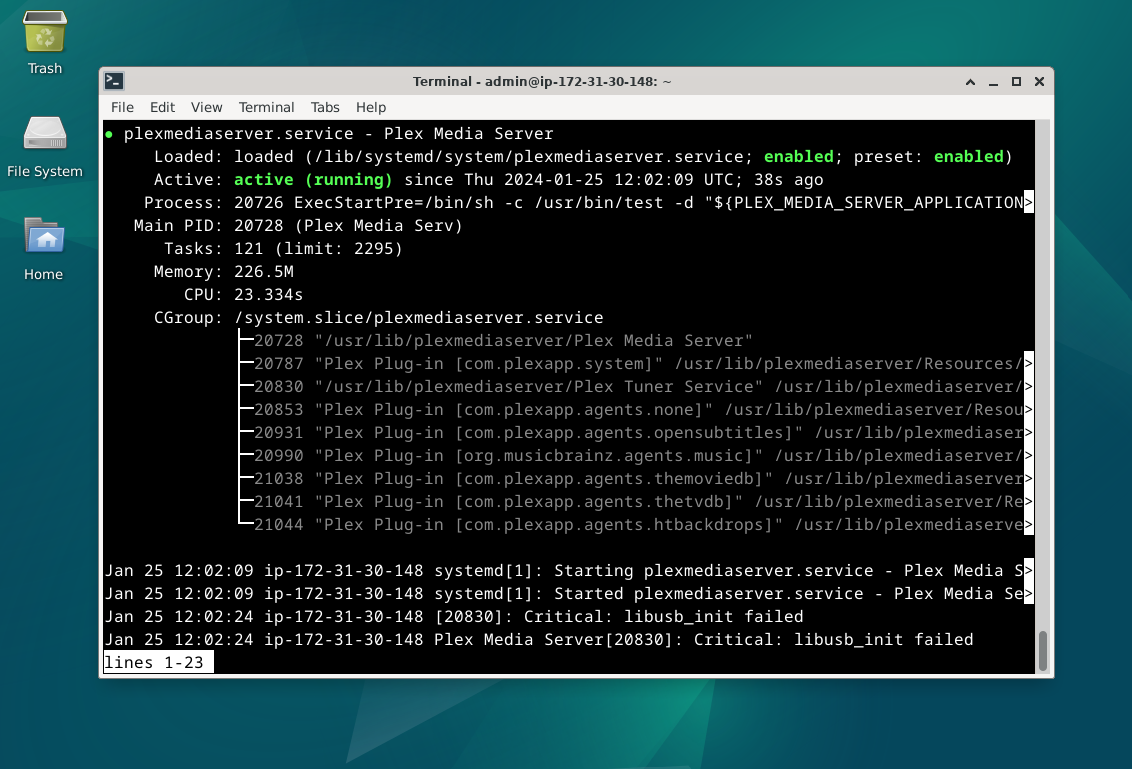
Step 5: Verify Plex Media Server Installation
It should start the Plex Media service automatically by default. Use the systemctl command below to check the status and confirm this:
systemctl status plexmediaserver
To start Plex Media Server if it's not running, run the following command:
sudo systemctl start plexmediaserver
Use this command to enable Plex Media Server in order to make sure it launches automatically when the system boots up:
sudo systemctl enable plexmediaserver
Use the following command to restart the Plex Media Server service if necessary:
sudo systemctl restart plexmediaserver
Set up Plex Media Server's UFW Firewall on Debian 12
It's important to secure your Plex Media Server, particularly if you intend to use it remotely or grant others access. Protecting your server with an Uncomplicated Firewall (UFW) is highly recommended.
Step 1: Enable the UFW Firewall
First, see if your system has UFW installed. If not, run the following command to install it:
sudo apt install ufw -y
Next, use this command to enable UFW:
sudo ufw enable
Step 2: Add Plex Media Server Port Rules
Include the Plex Media Server port (32400) by default in the UFW rules. If you'd like, you can alter the port afterwards. Do not forget to remove this rule and add a new one if you modify the Plex Media Server dashboard port.
sudo ufw allow 32400
Step 3: Additional UFW Rules for Plex
Plex Media Server makes use of a number of extra ports for various connections and services. Use these commands to allow them through the UFW firewall:
sudo ufw allow 1900/udp
sudo ufw allow 3005/tcp
sudo ufw allow 5353/udp
sudo ufw allow 8324/tcp
sudo ufw allow 32410:32414/udp
Here is a quick rundown of the ports' functions:
- 1900/udp: Used by clients over the network to find Plex Media Server.
- 3005/tcp: Necessary for Plex Companion, a feature that lets you manage Plex playback from a smartphone.
- 5353/udp: Used for Plex's mDNS (Multicast Domain Name System) discovery of local network devices.
- 8324/tcp: Essential to operate the Plex DLNA server.
- 32410:32414/udp: Used to stream media to customers.
If you customize any of the above ports, make adjustments to your UFW rules. If your Debian system has public connections, setting up the UFW firewall for your Plex Media Server can guarantee a safer and more secure media hub experience.
Set Up SSH on Debian 12 for Plex Media Server
You must first establish an SSH tunnel on your local computer if you installed Plex Media Server on a remote headless server or another Debian desktop that you don't always have local access to. This makes the Plex server accessible from outside connections.
Step 1: Set up the SSH Tunnel
Change {server-ip-address} to your server's real IP address, such as 192.168.50.1.
Example:
ssh {server-ip-address} -L 8888:localhost:32400
The following commands can be used to install SSH if you're unfamiliar with it:
sudo apt install openssh-server -y
sudo systemctl enable ssh --now
Step 2: Access Plex Media Server using SSH Tunnel
Now, open the following URL in your browser to gain access to the Plex Media Server:
http://localhost:8888/web
If the above address is inoperable, try using this one instead:
https://localhost:8888/web/index.html#!/setup
Through the SSH tunnel, the HTTP request will be forwarded to http://localhost:32400/web on the remote server.
Step 3: Access Plex Media Server Remotely
After completing the initial setup, use the IP address of your remote server to access your Plex Media Server:
http://{server-ip-address}:32400
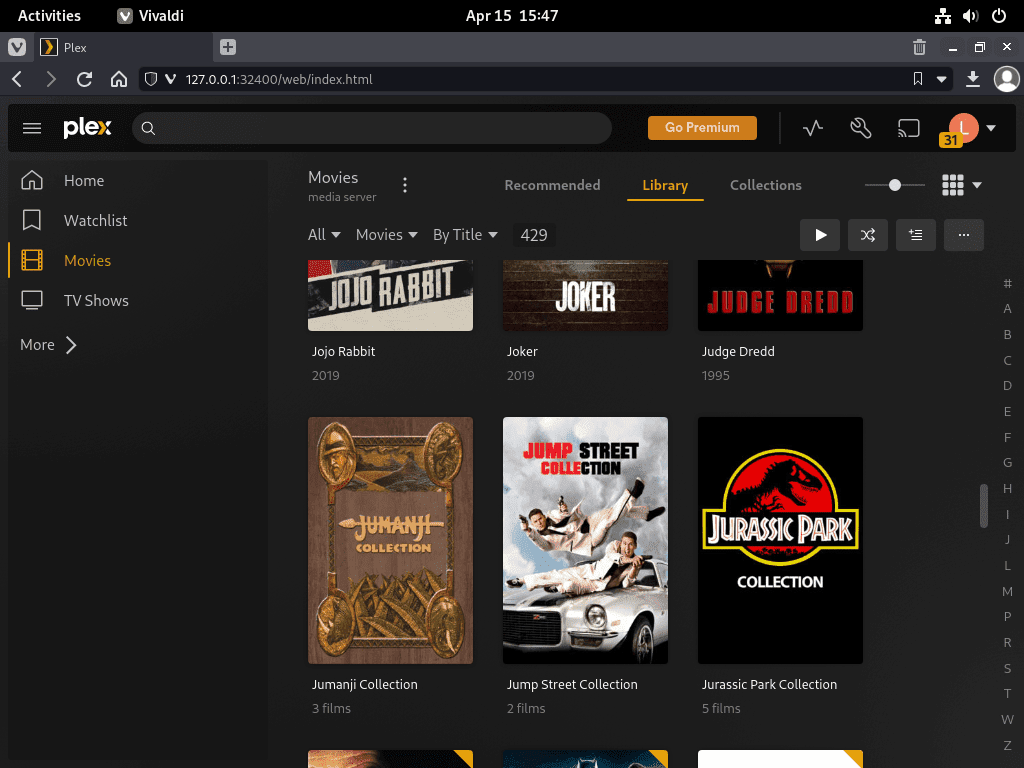
Section 5: Setting up Plex Media Server in the Debian WebUI
After installing Plex on your system, you need to use the WebUI to finish configuring and setting everything up. You can alter your server settings and manage your media library using the WebUI. To access and configure the Plex Media Server in WebUI, take the following steps:
Step 1: Access the WebUI
Open your favorite web browser and go to one of the following addresses to access the WebUI:
http://127.0.0.1:32400/web
or
http://localhost:32400/web
If neither of these works, try the following address:
http://localhost:32400/web/index.html#!/setup
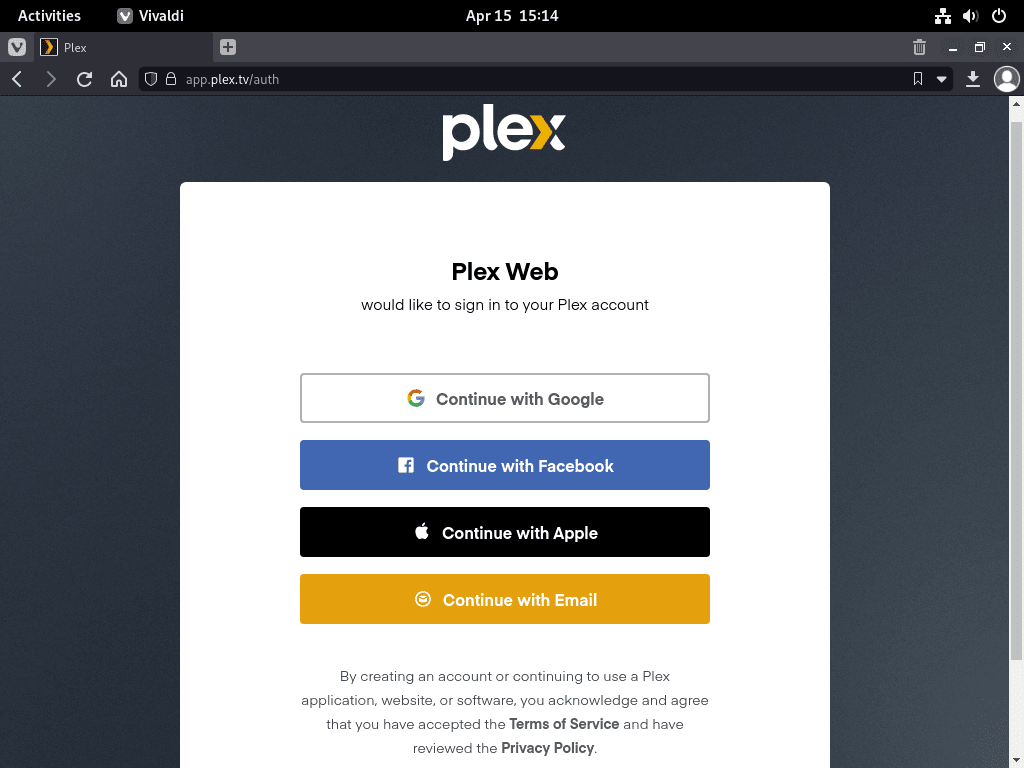
Now, if you are new to Plex, you can register a new account with your email or log in with an existing social media account listed above. You will start the initial configuration setup after logging in.
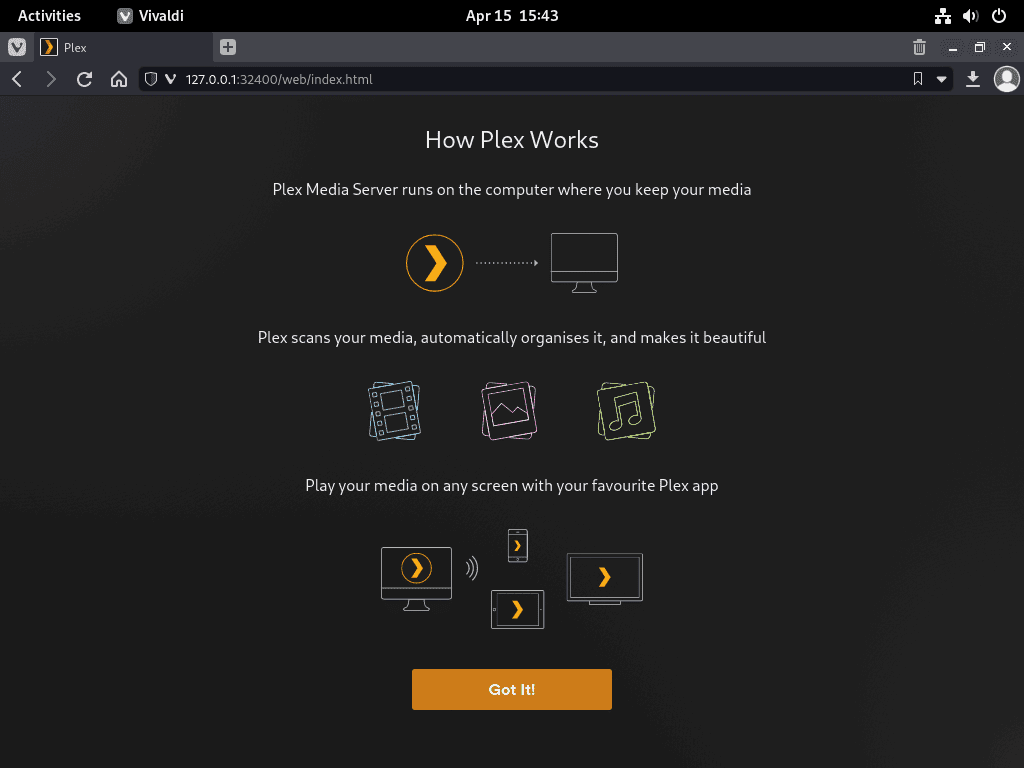
Step 2: Understanding Plex
Plex's definition and operation are briefly explained on the first configuration page.
Click GOT IT! to continue.
Step 3: Optional Plex Pass
You will then be given the option to upgrade to Plex Pass. Benefits from Plex Pass include access to beta builds and HDR options.
To bypass this, simply click the X in the upper right corner. This can always be configured later.

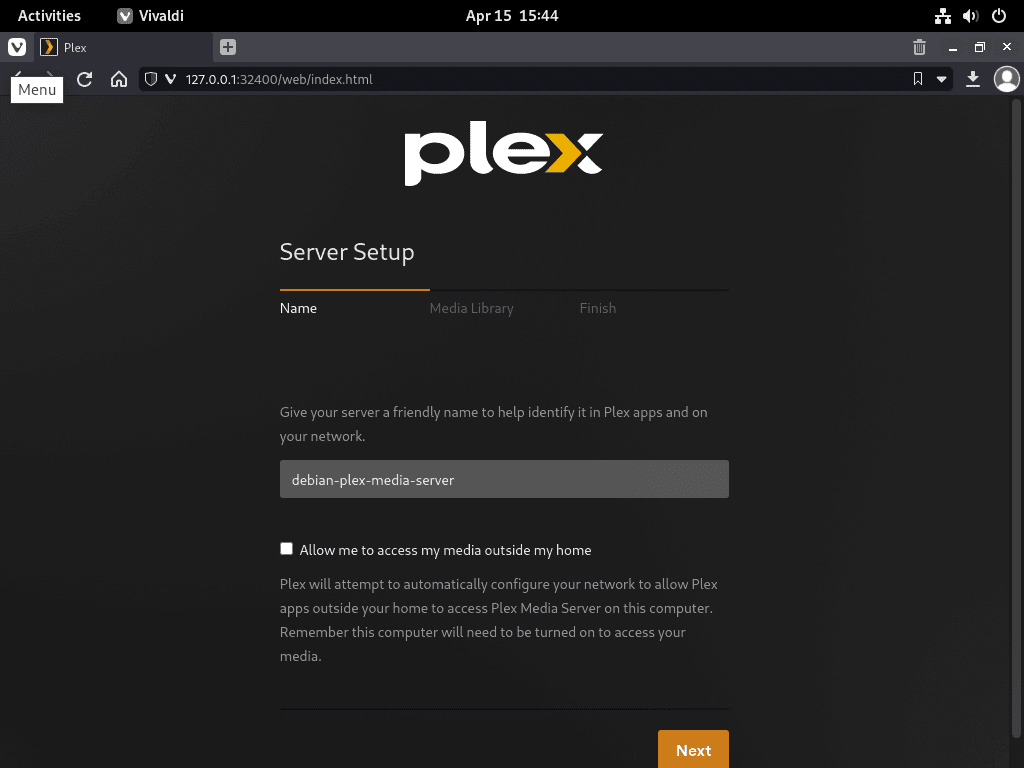
Step 4: Server Setup
Set up the name of your server, which is completely customizable. Allow me to access my media outside my home is another option that you can turn off. If you don't intend to use external media, uncheck the feature that allows access to it by default.
Press the NEXT button after configuring.
Step 5: Media Library
You can choose to pre-add your media directories from the Media Library page.
Click ADD LIBRARY if you are ready with a media drive or folder.

Choose now the category of media (TV series, movies, music, etc.) that you want your folders to be in. Tap the NEXT button to continue adding folders.
Choose the media directory by clicking the BROWSE FOR MEDIA FOLDER button. You can further tailor Plex to your preferences in the Advanced options that will appear once the folder has been added.
Click ADD LIBRARY to move on to the Finish tab once you're finished.

Step 6: Finishing up
After that, click NEXT to complete the initial setup, either with or without a Media Library. You're all set, according to the screen that appears next.
Go to the Plex Dashboard by clicking the DONE button.
Configure Files & Folders Permissions on Debian 12
It's possible that during the initial setup, your media did not show up. If Plex is unable to locate the content on your current internal and external secondary hard drives, you might experience issues adding content that will not be retrieved. A portion of this can be attributed to Plex's creation of the plex user account, which requires read and execute permissions on your media directories.
Both setfacl and chown are useful commands for setting Debian permissions. Here are some illustrations of how to use these commands to guarantee correct access.
Step 1: Set permissions using setfacl
Use the following commands to set permissions using setfacl, substituting the path to your media directory for /media/yourfolder/:
sudo setfacl -R -m u:plex:rx /media/yourfolder/
sudo setfacl -R -m u:plex:rx /media/yourfolder/tv
sudo setfacl -R -m u:plex:rx /media/yourfolder/movies
Step 2: Set permissions using chown
Use the following commands to set permissions using chown, substituting the path to your media directory for /media/yourfolder/:
sudo chown -R plex:plex /media/yourfolder/
If there are other folders on the hard drive that you do not want Plex to access, you can also set permissions for individual files on the drive:
sudo chown -R plex:plex /media/yourfolder/tv
sudo chown -R plex:plex /media/yourfolder/movies
Step 3: Install ACL package (if necessary)
In the event that the aforementioned commands are ineffective, you might need to reinstall the ACL package if it is absent from your system:
sudo apt install acl -y
Configure Nginx Reverse Proxy for Plex Media Server on Debian 12
Using a reverse proxy, you can access Plex Media Server from a network or distant PC. We will configure a Nginx proxy server in this example.
Step 1: Install Nginx
First, use the following command to install Nginx:
sudo apt install nginx -y
Nginx ought to be enabled by default. Should it not be enabled, utilize the subsequent command:
sudo systemctl start nginx
Now verify that Nginx is turned on and error-free:
sudo systemctl enable nginx
Now check to status:
systemctl status nginx
Step 2: Create a Plex Nginx Server Block
In the following manner, create a new server block:
sudo nano /etc/nginx/conf.d/plex.conf
In addition to creating a subdomain, you'll need an active domain name. After that, update the server block file with the following:
server {
      listen 80;
      server_name plex.example.com;

      location / {
          proxy_pass http://127.0.0.1:32400;
          proxy_set_header Host $host;
          proxy_set_header X-Real-IP $remote_addr;
          proxy_set_header X-Forwarded-For $proxy_add_x_forwarded_for;

          #upgrade to WebSocket protocol when requested
          proxy_set_header Upgrade $http_upgrade;
          proxy_set_header Connection "Upgrade";
      }
}
Save the file (CTRL+O), then exit (CTRL+X).
Step 3: Test Nginx Configuration
To make sure there are no mistakes in your server block or the Nginx configuration, do a dry run:
sudo nginx -t
In the event that everything functions as intended, the sample output would be:
nginx: the configuration file /etc/nginx/nginx.conf syntax is ok
nginx: configuration file /etc/nginx/nginx.conf test is successful
For the modification to take effect, reload Nginx:
sudo systemctl reload nginx
Now that your domain and DNS records are pointed at your server IP, you can use plex.example.com to access your Plex Media Server.
Step 4: With the Let's Encrypt SSL Free Certificate, Secure Nginx Reverse Proxy
With an SSL certificate, it is advised to run Nginx over HTTPS. Internet Security Research Group (ISRG), a nonprofit organization, offers Let's Encrypt, a free, automated, open certificate authority.
The certbot package should first be installed as follows:
sudo apt install python3-certbot-nginx -y
After installation, launch the following command to begin certificate creation:
sudo certbot --nginx --agree-tos --redirect --hsts --staple-ocsp --email [email protected] -d www.example.com
This configuration involves OCSP Stapling, a Strict-Transport-Security header, and force HTTPS 301 redirects. Make sure the domain name and email address meet your needs.
Instead of http://plex.example.com , your URL will now be https://plex.example.com . The old HTTP URL will automatically reroute to HTTPS if you use it.
Step 5: Set Up Nginx Automatic SSL Certificate Renewal
You have the option to automatically renew the certificates by setting up a cron job. A script provided by Certbot accomplishes this automatically. First, conduct a dry run to ensure that everything is operational:
sudo certbot renew --dry-run
If everything is operating as it should, use the following terminal command to launch your crontab window:
sudo crontab -e
Next, indicate the time that the certificate ought to renew itself. At the very least, this needs to be checked every day. The script will update the certificate if it needs to be renewed.
Include this line in your crontab:
00 00 */1 * * /usr/sbin/certbot-auto renew
Every day at midnight, this command will look for a certificate renewal. A certificate will automatically be updated if its renewal is approaching. This guarantees the security of your reverse proxy and the maintenance of your SSL certificate.
Introduction to Setting Up Plex Media Server on Debian 12
Some pointers and techniques to improve your Plex Media Server on Debian Linux experience are covered in this section.
General Plex Media Server Tips with Debian
- Organize your media: For your media files, use a consistent folder structure and naming convention. Plex will find it simpler to identify and classify your content as a result. See the Plex Naming Guide for additional details.
- Optimize database performance: Optimize the Plex database on a regular basis to boost efficiency and lower the likelihood of problems. Go to
Settings>Server>Scheduled Tasks, then selectOptimize DatabaseandClean Bundlesto accomplish this.
Plex Media Server Customizations with Debian
- Customize your Dashboard: Modify the Plex Dashboard to suit your needs by rearranging items, adding or removing sections, and pinning or unpinning libraries. Click the
Customizebutton located in the upper-right corner of your Dashboard to make changes. - Enable or disable automatic media analysis: Plex automatically examines the duration, quality, and other details of your media files. Toggle
Analyze media filesunderSettings>Server>Libraryif you would rather manage this process manually. - Adjust video quality settings: Go to
Settings>Qualityand change the streaming quality settings according to your device's capabilities and network conditions to maximize the quality and performance of your video playback.
Other Plex Media Server Tips with Debian
- Use keyboard shortcuts: Discover and utilize the keyboard shortcuts for Plex to navigate and control playback quickly. Typical short cuts include the following:
- Spacebar: Play/PauseF: Full-screen toggleS: Stop playbackM: Mute/Unmute
- Enable subtitles: Subtitles in multiple formats, including SRT, SSA, and ASS, are supported by Plex. During playback, click the speech bubble icon and choose the desired subtitle track to enable subtitles.
- Control Plex with your smartphone: To manage your server and control playback from your smartphone, download the Plex mobile app. There are Android and iOS versions of the Plex mobile app.
You can maximize the performance of your Plex Media Server on Debian Linux by using the advice in this article.
Additional Debian 12 Commands for the Plex Media Server
Update Plex Media Server on Debian
To guarantee you have the newest features, security updates, and bug fixes, keep your Plex Media Server up to date.
Use the following command to see if there are any updates:
sudo apt update
To upgrade Plex Media Server, use the upgrade command if one is available:
sudo apt upgrade plexmediaserver
Alternately, upgrade Plex Media Server and all packages simultaneously:
sudo apt upgrade
Removing Plex Media Server From Debian
Use these instructions to remove Plex from your Debian system if you decide you no longer want to use it.
Step 1: Uninstall Plex Media Server
Run the subsequent command to uninstall Plex Media Server from your computer:
sudo apt remove plexmediaserver
Step 2: Disable Nginx reverse proxy (if applicable)
Remember to disable the Nginx reverse proxy if you installed one and, if necessary, remove the configuration file linked to your domain.
Use the following command to deactivate the Nginx reverse proxy:
sudo systemctl disable nginx --now
Use these instructions to remove the configuration file:
sudo rm /etc/apt/sources.list.d/plexmediaserver.list
To apply the changes, reload Nginx at the end:
sudo rm usr/share/keyrings/plex.gpg
FAQs to Install Plex Media Server on Debian 12
Are there any system requirements for installing Plex on Debian 12?
Plex recommends at least a dual-core processor, 2GB of RAM, and sufficient storage space to accommodate your media files.
Is Plex Media Server free to use on Debian 12?
Plex offers both free and paid subscription options. The base functionality of Plex Media Server is free, but additional features can be accessed through a paid Plex Pass subscription.
Can I access my Plex library remotely after installation?
Yes, once Plex Media Server is installed and set up correctly, you can access your media library remotely from any device with an internet connection.
Can I configure Plex Media Server through a web interface?
Yes, Plex Media Server provides a web-based interface called Plex Web, which allows you to manage and customize various server settings conveniently.
How can I add media to my Plex library?
Plex can automatically scan and add media from designated folders on your Debian 12 system. You can also manually add media by specifying the appropriate folder paths.
Is it possible to share my Plex library with others?
Absolutely! Plex allows you to share your library with friends and family members by inviting them to create their own Plex accounts and providing them access to your shared content.
Can I customize the metadata for my media in Plex Media Server?
Yes, Plex provides options to edit or enhance metadata. You can manually match media with correct titles, posters, subtitles, and more.
Conclusion
We hope this tutorial helped you understand how to install Plex Media Server on Debian 12.
If you have any queries, please leave a comment below, and we’ll be happy to respond to them for sure.