
Choose a different version or distribution
Introduction
Before we begin talking about how to install Python 3.12 on Windows, let's briefly understand – What is Python?
Python is a popular high-level programming language known for its readability and simplicity. It is widely used in web development, data analysis, artificial intelligence, and more. Python's clean syntax and extensive libraries make it easy for both beginners and professionals to write efficient code. With its versatility and community support, Python is a top choice for those looking to learn programming or develop complex software projects.
In this tutorial, you will install Python 3.12 on Windows. We will also address a few FAQs on how to install Python 3.12 on Windows.
Advantages of Python 3.12
- Readable Syntax: Python's clear structure makes it easy to understand and write code.
- Extensive Libraries: Python offers a vast collection of libraries for various tasks.
- Versatility: Ideal for web development, data analysis, AI, and more.
- Error Messages: Even more improved error messages. More exceptions potentially caused by typos now make suggestions to the user.
- Beginner-Friendly: Suitable for newcomers due to its simple and intuitive nature.
Python Installation on Windows
Here you have to install official Python. You just have to download the .exe installer on your computer and that's it. Throughout the different sections below, we'll explain many options and details during the installation process. We will Install Python on Windows by using 2 Methods:
Method1 : Windows executable installer
Method2: From Microsoft Store
Method1 : Windows executable installer
Step 1: Download Python Windows executable installer
1. Open your web browser and head to the Downloads for Windows section of the official Python website.
2. Select the version of Python you would like to use.
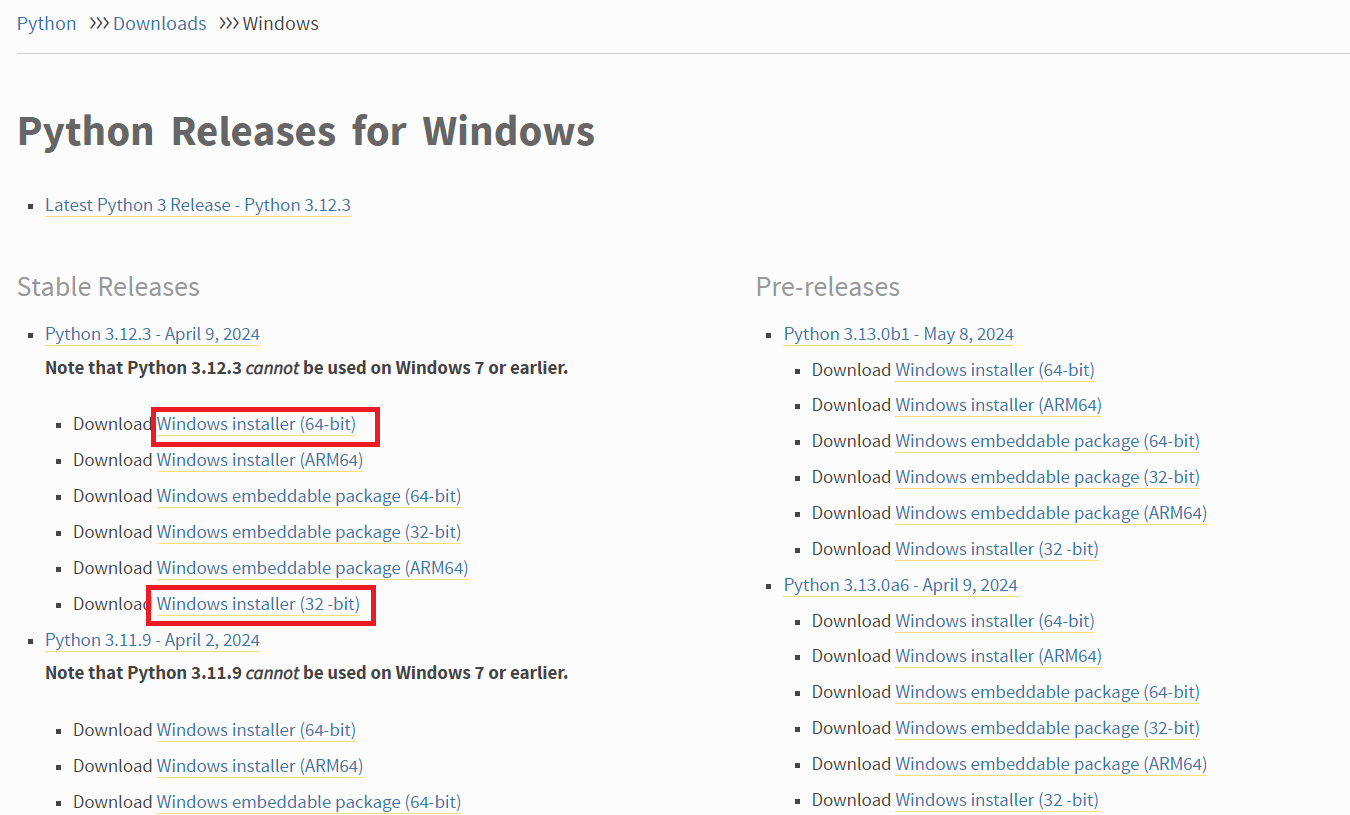
3. To download the file, click the link. Select the 32-bit or 64-bit Windows installation.
Step 2: Run Executable Installer
The following instructions walk you through the installation process:
- Launch the Python Installer that you downloaded.
- There are two checkboxes in the installation window:
Administrator Rights. Whether Python is installed for all system users or only the current user is determined by this argument. You can modify the Python installation folder with this option.
Include Python in PATH. After installation, the executable is added to the PATH variable by using the second option. Later on, you can explicitly add Python to the PATH environment variable.
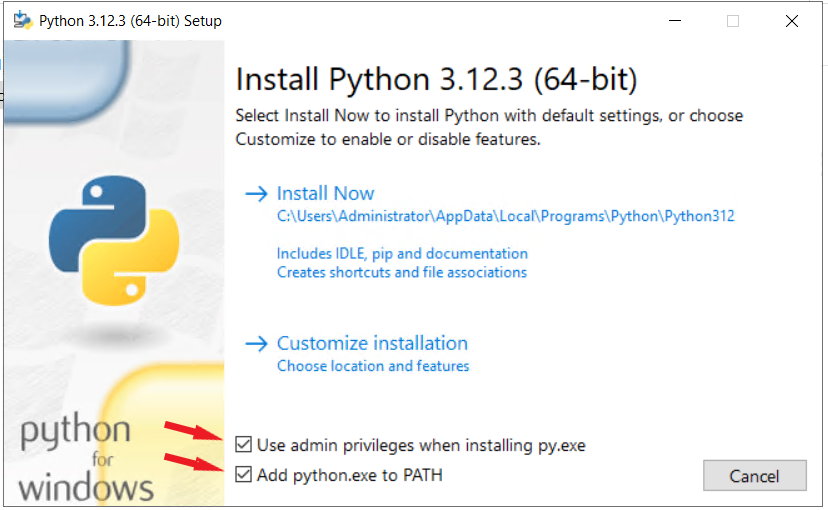
We advise checking both items for the easiest installation.
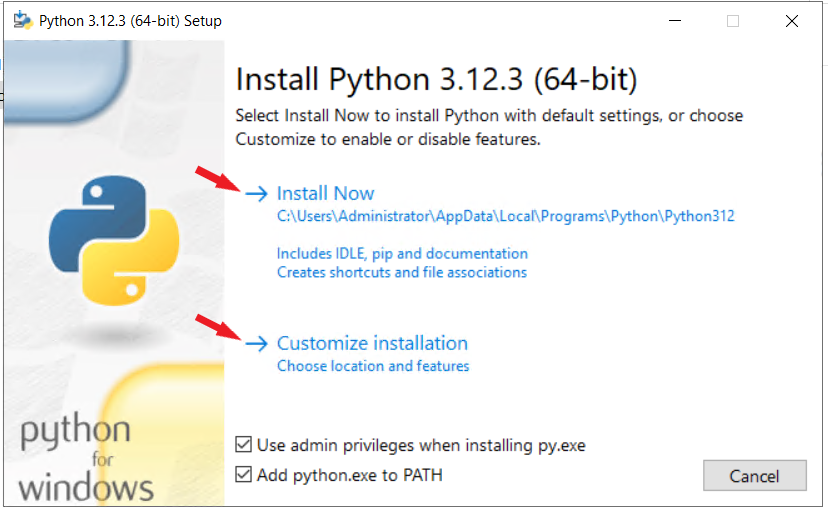
3. To proceed with the suggested installation, select Install Now (if you choose to skip the next two steps).
Select Customize installation instead, then move on to the next step to modify the default installation settings.
Python is installed by default for the current user at C:\Users\[user]\AppData\Local\Programs\Python\Python[version]. It comes with extra documentation, the PIP package manager, and the standard Python editor, IDLE. Additionally, the installer sets up the required file associations and shortcuts when possible.
Modifying the installation enables you to alter these parameters and options.
4. Select the installation features that are optional. Although Python functions without these features, having them adds to the program's usefulness.

To go to the screen with the Advanced Options, click Next.
5. Advanced options are included in the installation customization section.
Make the decision to install Python for every user or not. The install location is altered by this option to C:\Program Files\Python[version]. Since it doesn't have spaces in the path and is accessible by all users, C:\Python[version] is a popular option when choosing the location manually. Both routes could result in problems installing packages because of administrative rights.
Additional advanced options are to add Python to PATH, create file associations, and create shortcuts.
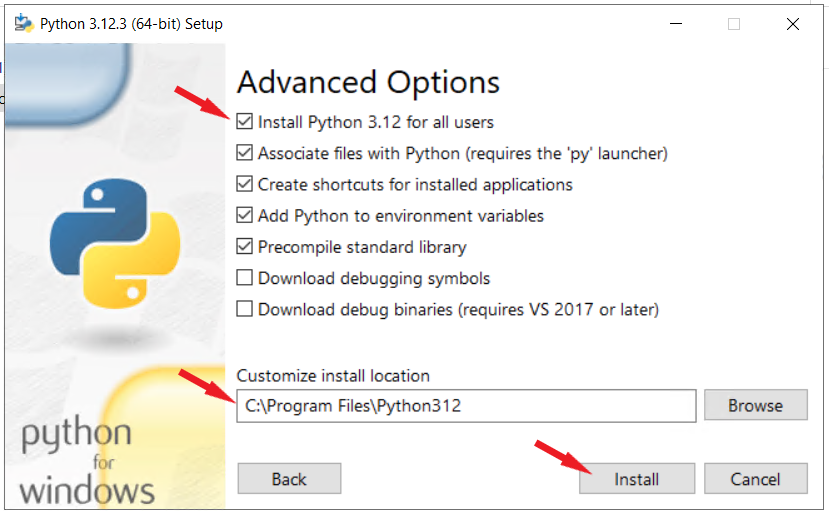
Click Install to begin the installation after making the necessary selections.
6. Choose whether to turn off the path length restriction. By selecting this option, Python can get around the 260-character MAX_PATH limit.
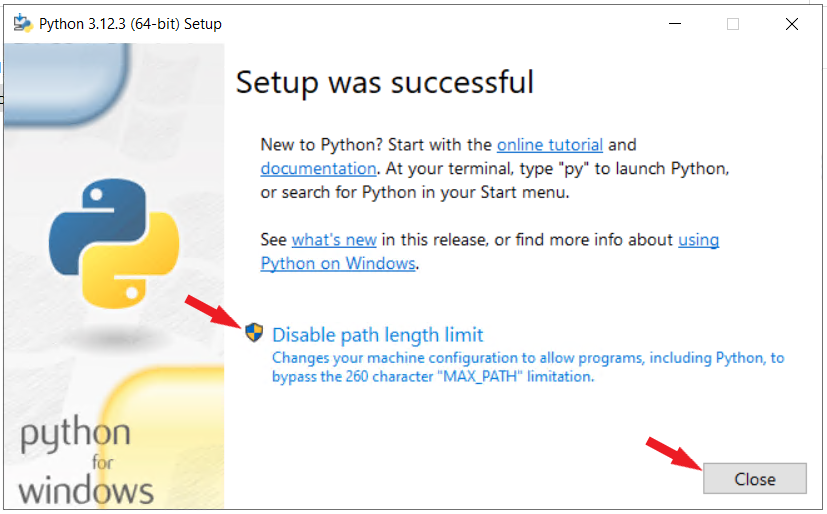
Disabling the option fixes any potential name-length issues and has no effect on other system settings. It is advised that you choose the option and end the setup.
Step 3: Add to Python to Path
Proceed to the next step if the Add Python to PATH checkbox is not present in the Python installer or if you haven't checked it. If not, move on to the following action.
It is no longer necessary to use the entire path to access the Python program in the command line when the Python path is added to the PATH variable. It tells Windows to check every folder that has been added to the PATH environment variable and to search each folder for the Python.exe application.
Do the following to add Python to PATH:
1. Type "Environment Variables" into the Start menu and hit Enter.
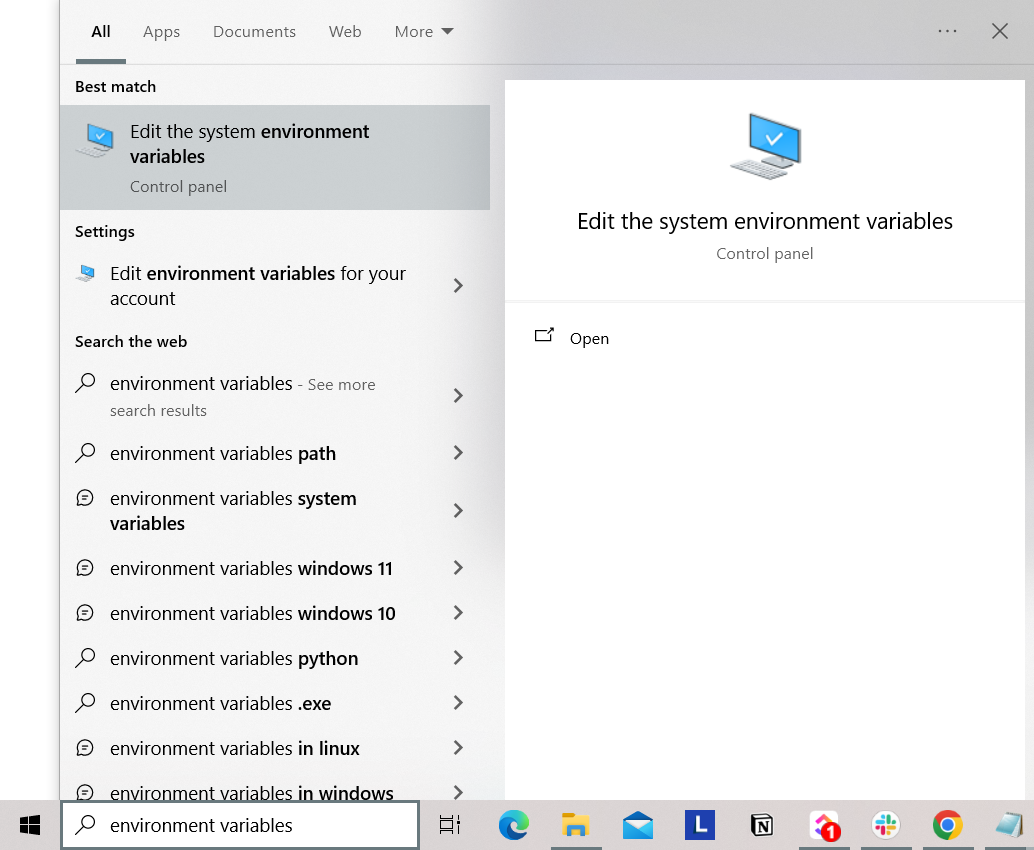
2. The overview screen will appear when you click Environment Variables.
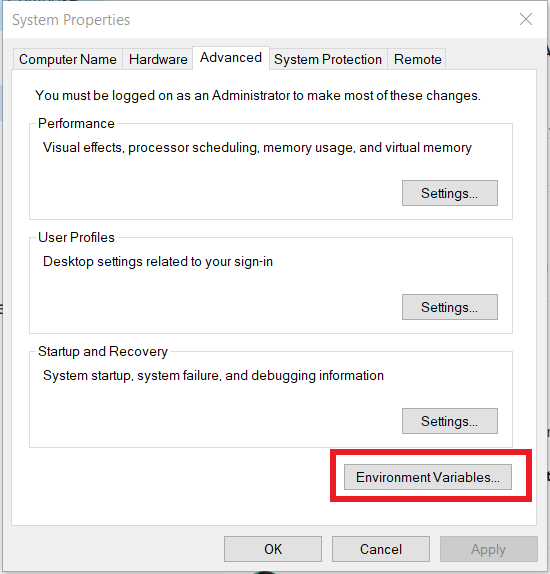
3. To edit Path, double-click on it in the list.
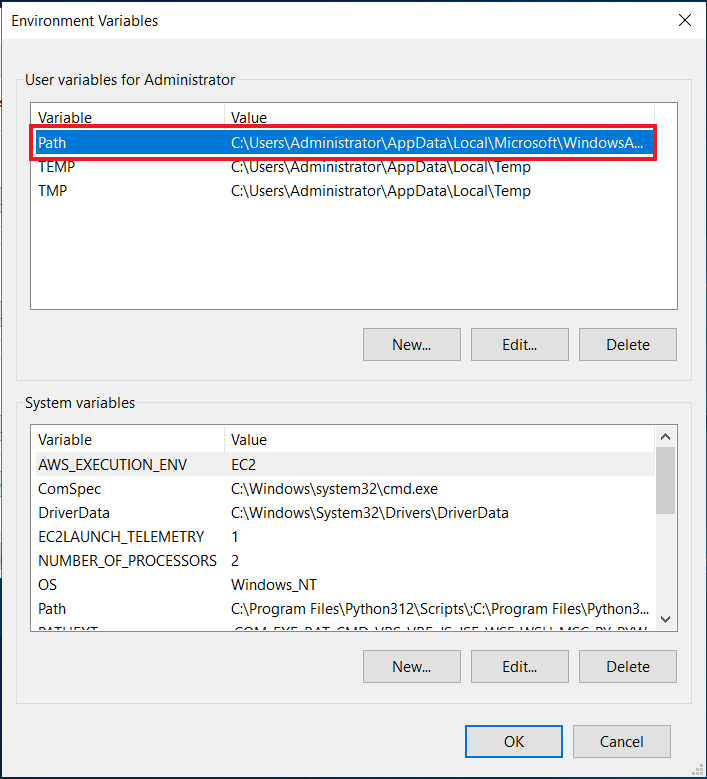
As an alternative, pick the variable and press the Edit icon.
4. Copy the path to the Python installation folder and double-click the first blank field.
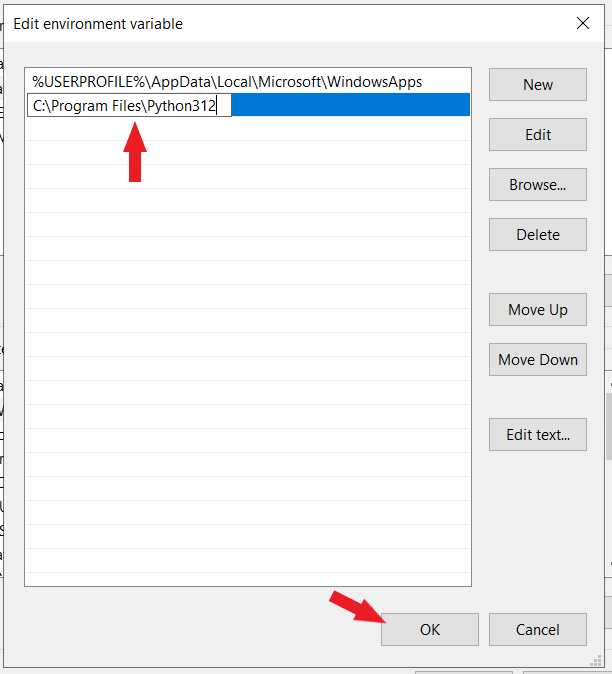
Alternatively, paste the path and click the New button.
5. To save the modifications, click OK. Restart the command prompt if it is open in order to proceed to the next step.
Step 4: Verify Python was Installed on Windows
Using the command line is the first method to confirm that Python was installed successfully. Execute the subsequent command after launching the command prompt:
python --version

The second method is to confirm the Python installation using the GUI. To launch the IDLE, or Python interpreter, take the following actions:
- Locate the system directory where Python was installed.
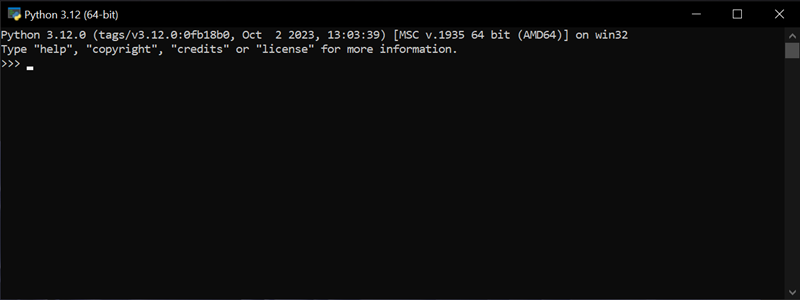
- Double-click IDLE or python.exe, which is the Python interpreter.
- The interpreter displays the following window when the command prompt opens:
The built-in Python IDE opens when IDLE is run:
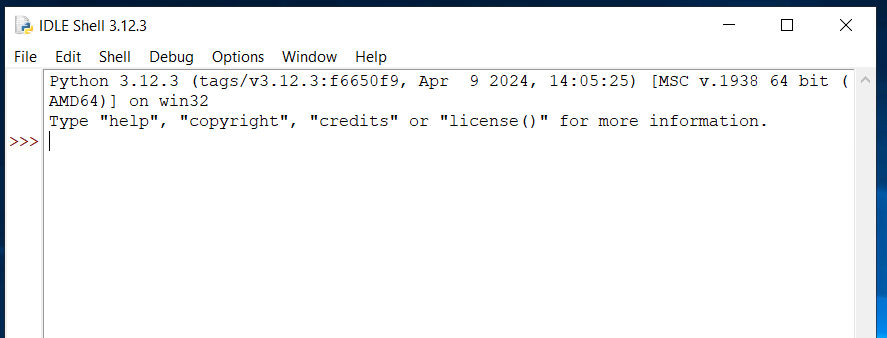
The installed Python version appears on the screen in both scenarios, and the editor is operational.
Step 4: Verify PIP was installed
Enter the following command in the command prompt to see if PIP was installed:
pip --version
The executable path, Python version, and PIP version number should appear if the installation was successful:

Step 5: Install virtualenv (Optional)
Python software packages automatically install on the entire system. As a result, any changes made to a single project-specific package affect all of your Python projects.
For Python projects, the virtualenv package makes it possible to create separate local virtual environments. Package conflicts can be avoided, and specific package versions can be chosen for each project with the use of virtual environments.
Use the following command at the command prompt to install virtualenv:
pip install virtualenv
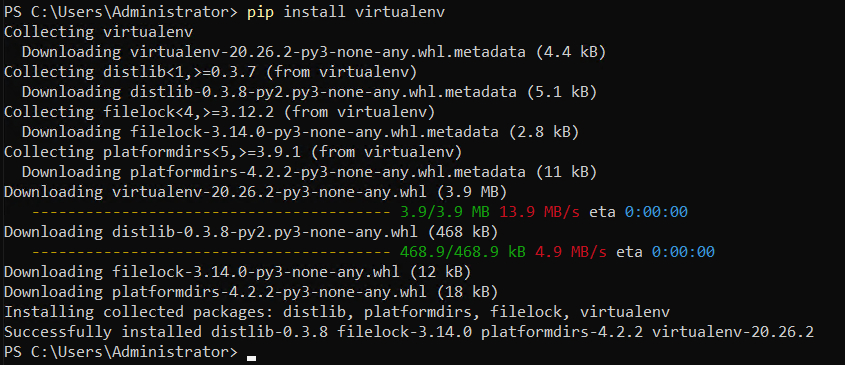
Hold off until the installation is finished. After that, it is installed on the computer and made usable.
Method 2: From Microsoft Store
Installing Python on Windows 11 might be the easiest method because most users are accustomed to downloading apps from the Microsoft Store. Just adhere to the instructions listed below.
Step 1: In the Taskbar, click the lens icon, type store, and select Microsoft Store.

Step 2: In the search bar, type Python, then press Enter.

Step 3: Select any Python version you want to use, though the most recent version is advised.

Step 4: For the download to start, click the Get button.

Note that downloading apps from the Store should require logging into your Microsoft account.
FAQs to Install Python 3.12 on Windows
Is Python 3.12 compatible with all Windows versions?
Python 3.12 is compatible with Windows versions starting from Windows 7 and newer.
Can I customize the installation path for Python 3.12 on Windows?
Yes, during installation, you can select a custom installation path if needed.
Should I choose the 32-bit or 64-bit version for Windows?
Choose the 64-bit version if your Windows system supports it for better performance.
Do I need administrator privileges to install Python 3.12 on Windows?
Yes, administrative rights are usually required to install software on Windows.
Are additional packages included with Python 3.12 installation for Windows?
Python 3.12 includes standard libraries; additional packages can be installed using pip.
Are there any post-installation steps required for Python 3.12 on Windows?
Ensure Python is added to the system path and consider installing a code editor for a smoother development experience.
How can I update Python 3.12 to future versions on Windows?
You can update Python using the pip package manager or by downloading and installing the newer version.
Conclusion
We hope this tutorial helped you understand how to install Python 3.12 on Windows.
If you have any queries, please leave a comment below, and we’ll be happy to respond to them for sure.