Choose a different version or distribution
Introduction
Before we discuss how to install Timeshift on Ubuntu 22.04, let's first understand-What is TimeShift?
Timeshift is a powerful backup and restore tool for Ubuntu that allows you to take snapshots of your system at different points in time. These snapshots can then be used to revert your system to a previous working state if any issues arise.
TimeShift backs up its configuration files and uses Rsync to handle system file maintenance in the background while leaving users' private files intact in their home directories. Not only does restoring a previous system status preserve user settings, but it also doesn't overwrite any documents. Also, supports the BTRFS Snapshot mode.
This tutorial will explain how to install Timeshift on Ubuntu 22.04. We will also address a few FAQs on how to install Timeshift on Ubuntu 22.04.
Advantages
- Easy System Restoration: Timeshift allows you to easily restore your system to a previous snapshot in case of any issues, including software conflicts, system failures, or accidental data deletion.
- Flexible Snapshot Options: You can choose to take snapshots of the entire system or only specific directories, allowing you to customize your backup strategy according to your needs.
- Incremental Snapshots: Timeshift uses an incremental backup method, which means that subsequent snapshots only capture changes since the previous snapshot, reducing storage space requirements.
- System-wide Snapshots: Timeshift captures the entire state of your system, including system files, packages, configurations, and user data, ensuring a comprehensive backup solution.
- User-Friendly Interface: Timeshift provides a simple and intuitive interface that allows users of all levels of expertise to easily manage and restore system snapshots.
Steps to install TimeShift on Ubuntu 22.04 LTS Linux
1. Requirements
• Ubuntu or Debian Linux
• A non-root user with sudo rights
• Terminal Access
• Internet Connection
2. Run Apt update command
Although it is not required, it is advised if you haven't used the system update command in a while. This aids in the system's rebuilding of the repository cache and helps it detect which new package versions are available for download.
sudo apt update && sudo apt upgrade
3. Install TimeShift on Ubuntu 22.04
Installing TimeShift doesn't require adding any additional repositories because its packages are already present in the default system repository for Ubuntu. So, just install TimeShift using the APT package manager.
sudo apt install timeshift
4. Run TimeShift Application
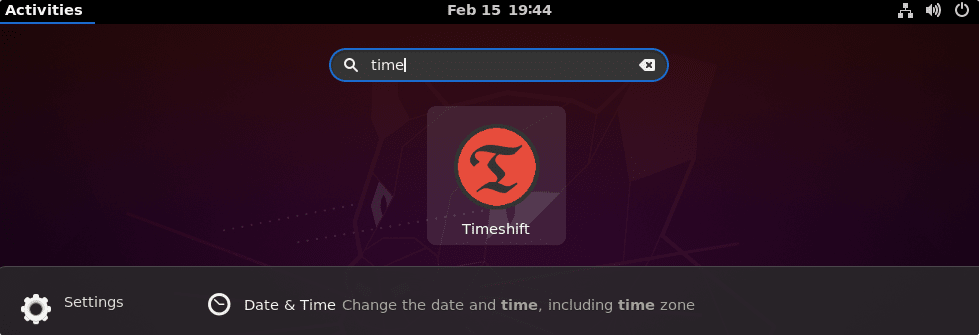
Once the installation is finished, launch the application on Ubuntu or your chosen Debian-based system. Moreover, look for "TimeShift"; when its icon shows, click it to launch the same.
The system will prompt you to enter your user password in order to run it.

5. Select SnapShot Type
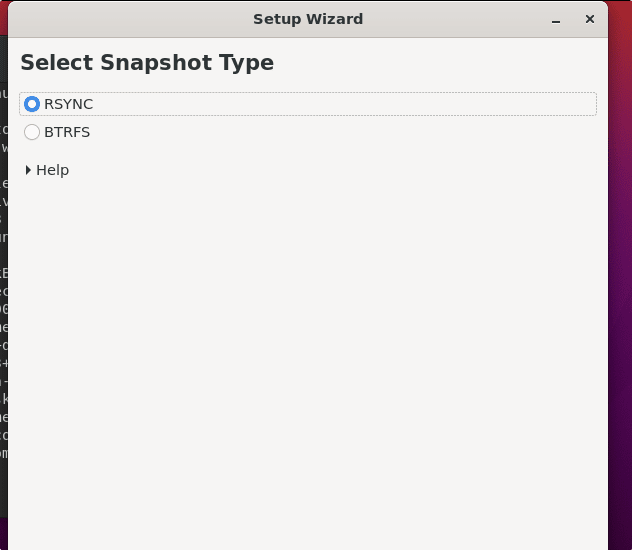
When this backup software runs on your computer, it will prompt you to choose between BTRS and Rsync for the snapshot type. Rsync will be chosen by default. Examine the information provided below and make a selection.
Note: Your Linux file system needs to be formatted in BTRFS in order to use the BTRFS snapshot type. Alternatively, use rsync.
RSYNC Snapshots
- Snapshots are made by hard-linking the unaltered files from earlier snapshots and using rsync to make copies of the system files.
- When the initial snapshot is made, all files are duplicated. Next snapshots are taken one after the other. If available, unmodified files will be hard-linked from the most recent snapshot.
- Any disk that has been formatted with a Linux file system can store snapshots. In the event that the system disk is damaged or re-formatted, the system can still be restored by saving snapshots to external or non-system disks.
- To conserve disk space, files and directories can be excluded.
BTRFS snapshots
- The BTRFS file system's built-in features are used to create snapshots.
- Snapshots are made instantaneously and restored. A file system-level atomic transaction is the creation of a snapshot.
- System subvolume replacement is how snapshots are recovered. There is no chance of data loss because files are never overwritten, erased, or copied. After restore, the current system is kept as a fresh snapshot.
- Complete, byte-by-byte replicas of the system are known as snapshots. Nothing is left out.
- The system disk, from which snapshots are made, is where they are saved. Other disk storage is not supported. Snapshots kept on the system disk will be lost if it fails, along with the system.
- BTRFS snapshots start out with zero size. Data is written to new data blocks as system files progressively change over time, requiring disk space (copy-on-write). Files in the snapshot maintain their copy-on-write pointer to disk space. Ales in the snapshot still refer to the original blocks of data.
Visit its GitHub Page to learn more about this tool.

6. Create Ubuntu 22.04 Snapshot
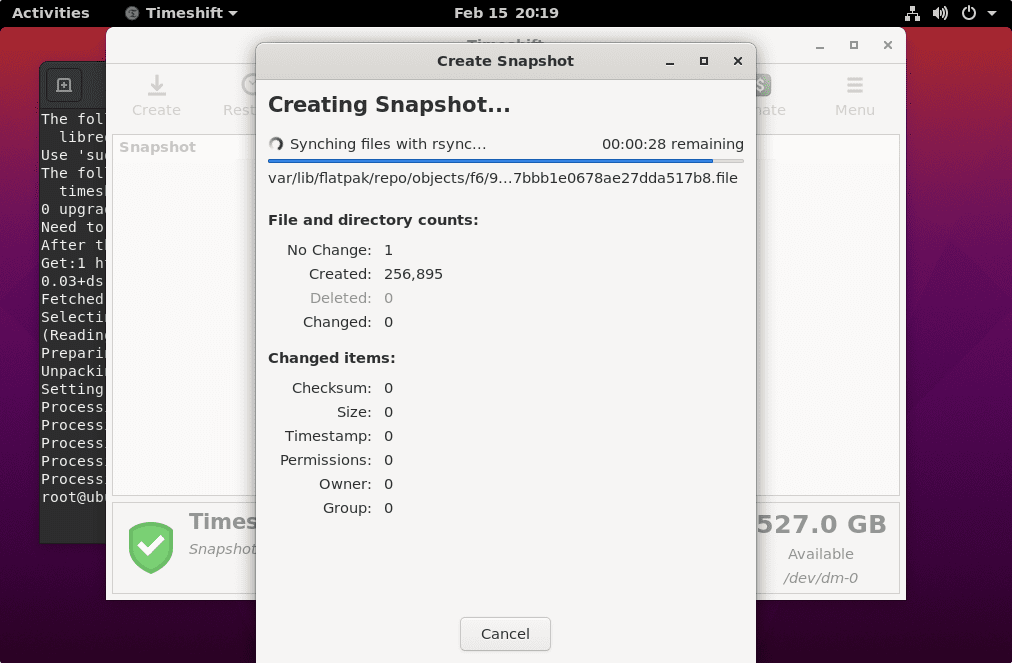
After accessing the TimeShift's graphical user interface, click the "Create" button to begin using the Snapshot of your first system.

7. To schedule System backup
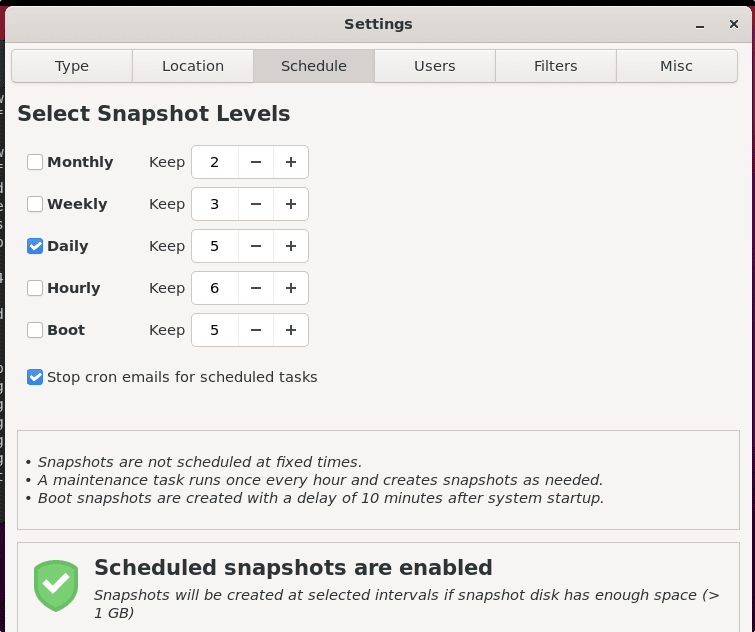
Use this tool's Schedule option if you would like Timeshift to take a system snapshot automatically at a specific time.
- Select the "Setting" option from the menu.
- Click the Schedule Tab.
- Decide on the desired backup frequency.

8. How to update
Since we installed TimeShift using the system default repository and the APT package manager, if the most recent version of TimeShift is available, it will also install when we run the system update and upgrade command.
sudo apt update && sudo apt upgrade
9. Uninstall or Remove Timeshift
If, after a while, you decide you no longer want Timeshift, we can remove it using the APT package manager's remove option. This is it:
sudo apt remove timeshift -y
FAQs to Install Timeshift on Ubuntu 22.04
Where are Timeshift snapshots stored?
By default, Timeshift stores the snapshots on the system's root partition. However, you can configure it to use a separate partition or an external storage device.
Can I exclude specific files or directories from being included in the snapshots?
Yes, Timeshift provides an option to exclude specific files or directories from the snapshots, allowing you to focus the backup on essential system components.
Does Timeshift backup user data and configurations?
Yes, Timeshift captures not only system files but also user data and configurations, ensuring a complete backup of your system state.
Can I restore individual files or directories from a Timeshift snapshot?
Yes, Timeshift allows you to browse the contents of each snapshot and selectively restore individual files or directories as needed.
Does Timeshift create bootable restore media?
No, Timeshift does not directly create bootable restore media. However, you can restore your system using a live Ubuntu installation media and then install Timeshift to access your snapshots.
Can I schedule Timeshift backups to an external storage device?
Yes, you can configure Timeshift to store snapshots on an external storage device such as a USB drive or network-attached storage (NAS).
Is Timeshift an alternative to regular data backups?
Timeshift is primarily focused on system-level backups and restoration. It is recommended to have additional regular data backups for important personal files to ensure comprehensive data protection.
Conclusion
We have gone through multiple steps on how to install Timeshift on Ubuntu 22.04 in this tutorial.
If you have any queries you can ask them in the comments section and, we would be happy to respond to them.....

