Introduction
Before we begin talking about how to install Vue.js on Ubuntu 22.04, let's briefly understand – What is Vue.js?
A well-liked JavaScript framework for creating user interfaces is called Vue.js. It makes it simple for developers to create interactive web applications. With its simple syntax and intuitive design, Vue.js offers a smooth learning curve for beginners. This framework emphasizes the component-based approach, enabling developers to build reusable and modular UI elements.
It also supports declarative rendering, data binding, and state management. Vue.js provides excellent performance, making it ideal for small to large-scale projects. Its flexibility and extensive documentation make it a top choice for web developers.
In this tutorial, you will install Vue.js on Ubuntu 22.04. We will also address a few FAQs on how to install Vue.js on Ubuntu 22.04.
Advantages of Vue.js
- Simple Syntax: Vue.js has a straightforward syntax that makes it easy to understand and use for developers of all skill levels.
- Component-Based Structure: Vue.js encourages a component-based architecture, allowing for reusability and maintainability of code.
- Flexibility: Vue.js can be integrated into existing projects without any hassle, making it adaptable and flexible for developers.
- Performance: Vue.js prioritizes performance, providing fast and efficient rendering for smooth user experiences.
- Comprehensive Documentation: Vue.js offers comprehensive and well-documented resources, making it easy to learn and troubleshoot issues.
Install Node.js on Ubuntu 22.04
We need Node.js in order to install Vue.js because it enables server-side execution of JavaScript code. We'll walk you through the Node.js installation process on your Ubuntu system in this section.
Step 1: Updating Your Ubuntu System
It is best practice to update the packages that are already installed on your system before we start the installation process. By making sure you have the most recent versions of all installed software, this helps avoid any conflicts.
The command to update your system is as follows:
sudo apt update && sudo apt upgrade
Using sudo apt update, you can first update the package lists for updates, and then use sudo apt upgrade to upgrade all the updatable packages.
Step 2: Installing Necessary Packages
We'll install a few more packages that might be required in order to make sure the Node.js installation goes smoothly. These consist of wget for network down linking, git for version control, and curl for data transfers with URLs.
To install these packages, execute the following command:
sudo apt install curl git wget -y
By automatically responding "yes" to any prompts, the -y flag enables the installation to continue without the need for manual intervention.
Step 3: Importing the NodeSource APT Repository
We will use the NodeSource repository to install Node.js. This repository is a great option for our setup because it offers the most recent versions of Node.js.
First, we must use a script supplied by NodeSource to import the repository. This command runs the script after downloading it:
curl -fsSL https://deb.nodesource.com/setup_lts.x | sudo bash -
This command, curl -fsSL https://deb.nodesource.com/setup_lts.x retrieves the script via the given URL, and | sudo bash - pipes it to bash, which executes the script with root permissions.
Next, we'll add packages from the recently added NodeSource repository to the system's package lists:
sudo apt update
Step 4: Installing Node.js via APT Command
It's now necessary to install Node.js. Node.js is installed from the NodeSource repository using this command:
sudo apt install nodejs
Step 5: Verifying the Node.js Installation
It's a good idea to check the installed version of Node.js after the installation is finished. This stage guarantees that Node.js is operational and that the installation was successful.
To find out your Node.js version, run the following command:
node --version
The installed version of Node.js will be displayed by this command, verifying that the installation was successful.
Install Vue.js on Ubuntu 22.04
We now concentrate on setting up a test project and integrating Vue.js into your Ubuntu environment. There will be two primary sections to this procedure. First, we will concentrate on updating Node.js' package manager, npm. To start a new Vue.js project, we'll use the official project scaffolding tool for Vue.
Step 1: Updating npm to its Most Recent Version
It is essential to make sure that Node Package Manager, or npm, is up to date before installing Vue.js. The standard Node.js package manager, npm, is a necessary tool for managing Node.js packages. We can access the newest features and security updates by keeping npm up to date, which guarantees a secure and easy installation process.
You must run the following command to update npm to the most recent version:
sudo npm install npm@latest -g
The most recent version of npm is retrieved using the command npm install npm@latest. The new version of npm is now accessible throughout your system, since the -g flag indicates that this installation is global.
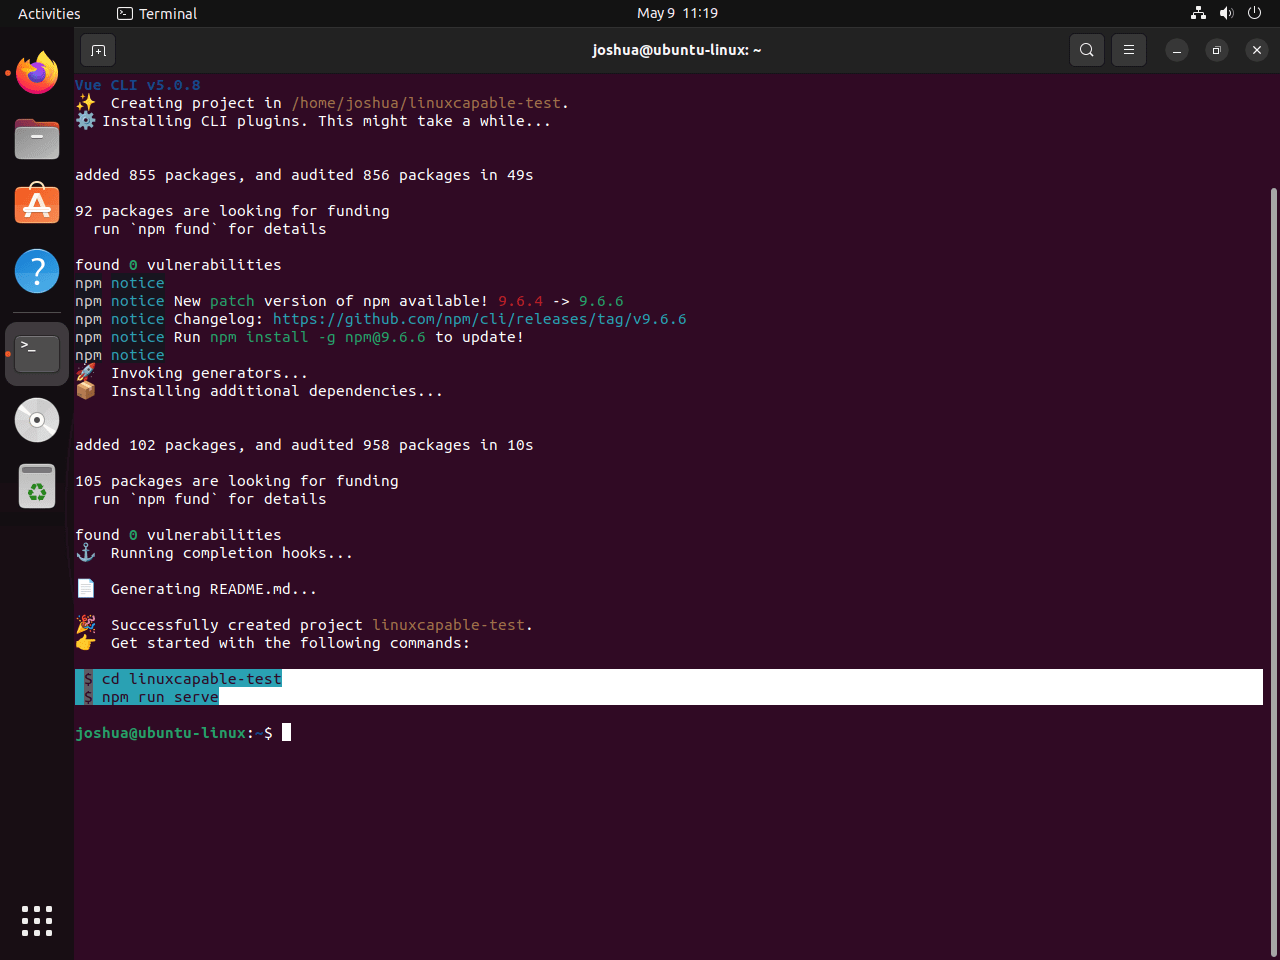
Step 2: Generating a New Vue.js Project
We can now proceed to the next step, which is to create a new Vue.js project, with an updated npm. For this, we'll make use of the official Vue project scaffolding tool, "create-vue." One of the many features that Vue 3 provides is this tool, which lets you customize your project in a number of ways from the very beginning.
Start the procedure by running the subsequent command:
npm init vue@latest
'create-vue' will be installed and executed by this command. You will be prompted to configure various optional features during its execution, including TypeScript, JSX Support, Vue Router for developing single-page applications, Pinia for managing states, Vitest for unit testing, and so on. In case you're unsure about any option, you can opt for 'No' by pressing the Enter key.
Step 3: Finalizing the Setup
After the scaffolding procedure is finished, you must navigate to the directory for your project. For that, use the following command:
cd <your-project-name>
Next, use the following command to install the required dependencies:
npm install
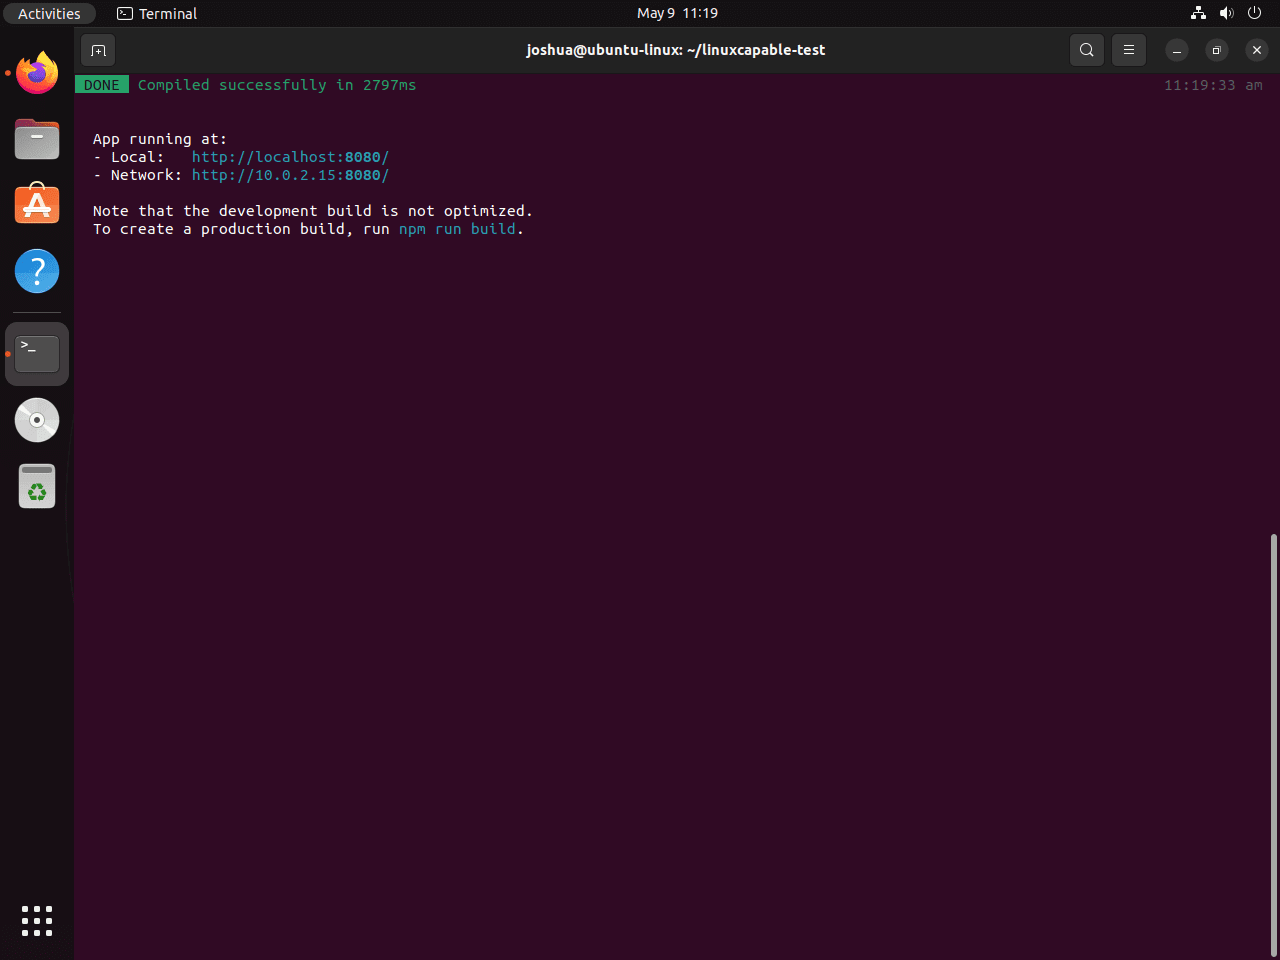
Once the dependencies are installed, use these instructions to launch the development server:
npm run dev
Accessing the Vue.js Web Interface on Ubuntu 22.04
It's time to access the Vue.js web interface after your Vue.js test project has been successfully created, and the local development server has been started. Users interact with this interface, which is also referred to as the frontend of the application. It is an essential part of every web application. We'll walk you through accessing the web interface of your Vue.js project through a web browser in this section.
Step 1: Identifying the Local Development Server’s URL
The terminal ought to have printed an output containing the URL of the local development server when you launched your Vue.js development server using the npm run serve command in the preceding section. Unless you are using this port for another application that is already running, this URL is typically http://localhost:8080/.
The machine you are using is referred to as localhost, and the port on which the server is waiting for connections is 8080. These pieces come together to form your local development server's URL.
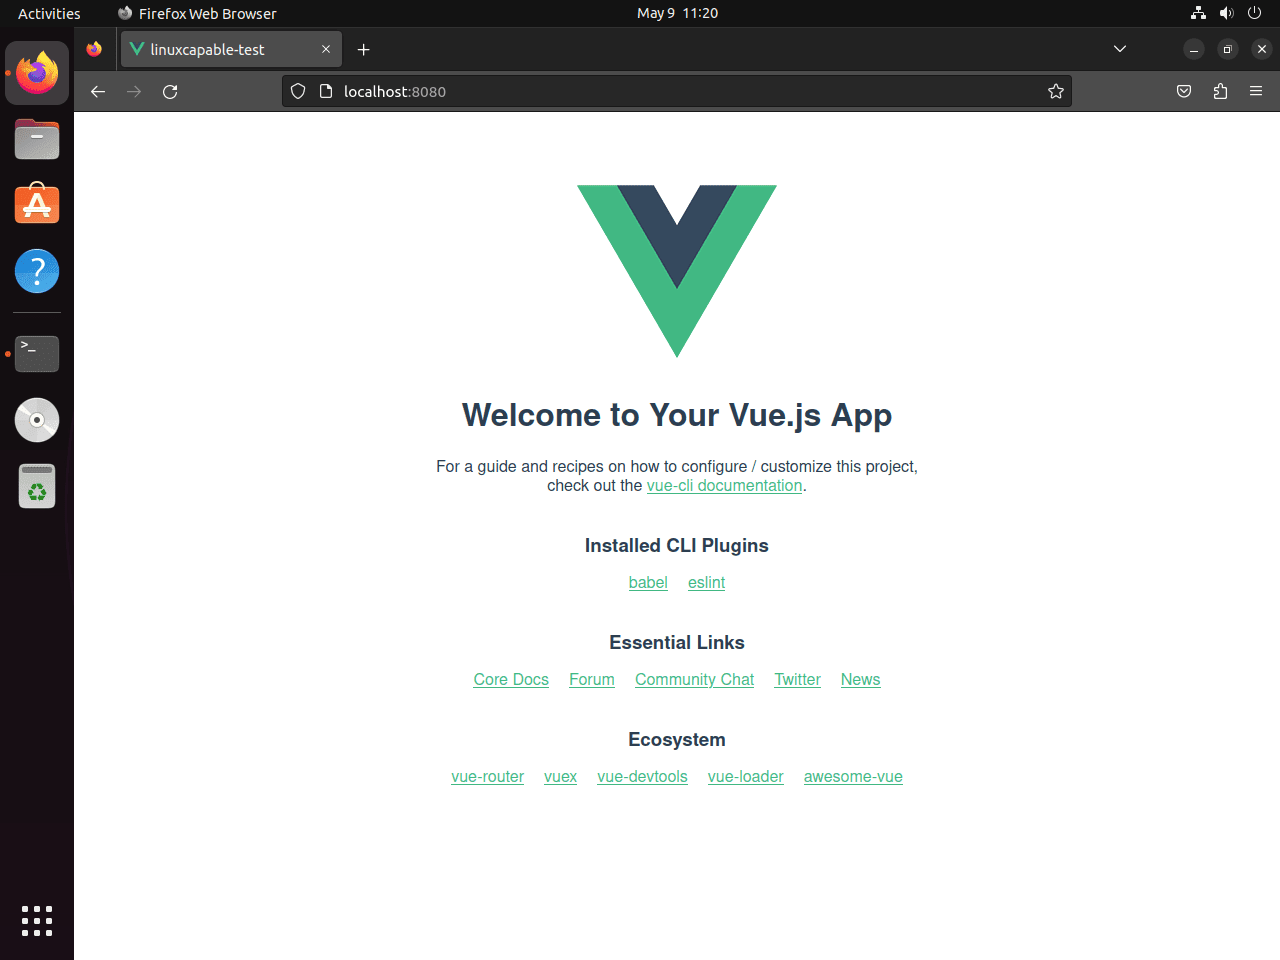
Step 2: Using a Web Browser to Access the Vue.js Project
Now, open your preferred web browser and type the URL of the local development server into the address bar of the browser to access the Vue.js web interface. Once you hit Enter, the web interface for your Vue.js test project should appear.
FAQs to Install Vue.js on Ubuntu 22.04
What version of Vue.js will be installed?
The version installed depends on the latest available version in the npm registry. To check the installed version, use the command vue --version.
Are there any prerequisites for installing Vue.js on Ubuntu?
Yes, you need to have Node.js and npm installed on your Ubuntu system before installing Vue.js. You can install them using the apt package manager.
How can I update Vue.js to the latest version?
To update Vue.js to the latest version, run npm update vue in the terminal. This will update Vue.js to the latest available version.
Can I use Vue.js with other frontend frameworks?
Yes, Vue.js can be seamlessly integrated with other frontend frameworks like React or Angular, allowing you to combine their features as needed.
Are there any alternative ways to install Vue.js?
Yes, you can also install Vue.js using a Content Delivery Network (CDN) by including the Vue.js script tag in your HTML file.
Does Vue.js require a web server to run on Ubuntu?
No, Vue.js is a client-side JavaScript framework, so it doesn't require a dedicated web server to run on Ubuntu. You can simply open your HTML file in a browser.
Conclusion
We hope this tutorial helped you understand how to install Vue.js on Ubuntu 22.04.
If you have any queries, please leave a comment below, and we’ll be happy to respond to them for sure.