Introduction
Before we discuss how to install WebStorm on Ubuntu 22.04, let's briefly understand-What is WebStorm?
WebStorm is a popular-integrated development environment (IDE) specifically designed for web development with JavaScript, HTML, and CSS. It offers a wide range of features and tools to enhance your productivity and streamline the web development workflow.
This tutorial will walk you through the installation process of WebStorm on Ubuntu 22.04. We will also address a few FAQs on how to install WebStorm on Ubuntu 22.04.
Advantages
- JavaScript Development: WebStorm provides powerful features and intelligent code assistance for JavaScript development, including syntax highlighting, code completion, refactoring tools, and integrated debugging.
- Web Technologies Support: WebStorm offers comprehensive support for popular web technologies like HTML, CSS, and various frameworks, making it easier to develop and maintain web applications.
- Efficient Productivity Tools: With WebStorm, you can benefit from built-in productivity tools such as code navigation, version control integration, live editing, code inspection, and quick fixes to streamline your development process.
- Integrated Testing Environment: WebStorm includes testing tools, such as test runners, code coverage analysis, and debugging support, allowing you to write tests and ensure the quality of your code.
- Extensibility and Integration: WebStorm supports a wide range of plugins and integrations with popular development tools and frameworks, extending its functionality and adapting to your specific development needs.
Section 1: Install WebStorm on Ubuntu 22.04 via APT PPA
The Advanced Packaging Tool (APT) is a package management system that forms the backbone of Ubuntu and other Debian-based distributions. We will harness APT’s capabilities to install WebStorm, a premier Integrated Development Environment (IDE) by JetBrains.
Step 1: Refreshing the Ubuntu System Before WebStorm Installation
We must keep our system’s local package database updated to ensure the smooth installation of new software. This activity ensures that your Ubuntu system is aware of the latest versions of available software. Here’s the command to update the package database:
sudo apt update
After updating the package database, we should also upgrade the system. This action ensures that all your installed software is up-to-date, which results in a more secure and stable operating environment. Here’s how to perform the system upgrade:
sudo apt upgrade
Step 2: Install Essential Packages
Our installation journey includes adding some essential packages to our system. These packages, namely dirmngr, ca-certificates, software-properties-common, apt-transport-https, curl, and LSB-release, are instrumental in managing secure file transfers, handling repositories, and other critical package-related tasks.
Execute the following command to install these packages:
sudo apt install dirmngr ca-certificates software-properties-common apt-transport-https curl lsb-release -y
Step 3: Integrating the JetBrains PPA by Jonas Groeger
Next, we need to add the JetBrains Personal Package Archive (PPA) to the system’s list of repositories. Adding this repository will allow APT to fetch WebStorm directly from JetBrains’ PPA.
To ensure the authenticity of the packages from this repository, we’ll import the GPG key for the JetBrains repository. The GNU Privacy Guard (GPG), an implementation of the OpenPGP standard, verifies that the packages in the repository are genuinely from JetBrains. Run the following command to import the GPG key:
curl -s https://s3.eu-central-1.amazonaws.com/jetbrains-ppa/0xA6E8698A.pub.asc | gpg --dearmor | sudo tee /usr/share/keyrings/jetbrains-ppa-archive-keyring.gpg > /dev/null
With the GPG key now imported, run the following command to add the repository:
echo "deb [signed-by=/usr/share/keyrings/jetbrains-ppa-archive-keyring.gpg] http://jetbrains-ppa.s3-website.eu-central-1.amazonaws.com any main" | sudo tee /etc/apt/sources.list.d/jetbrains-ppa.list > /dev/null
Step 4: Refreshing the APT Package Index
Updating the APT package database is essential when integrating a new repository. This action ensures your system can fetch the latest package information from the newly added JetBrains PPA. Here’s how to perform this update:
sudo apt update
Step 5: Install WebStorm on Ubuntu 22.04 via APT Command
Finally, we are ready to install WebStorm. Your system is familiar with the WebStorm package from the JetBrains PPA and is prepared to retrieve and install it. Use the following APT install command to commence the installation process:
sudo apt install webstorm
The command above prompts APT to download WebStorm, resolve any required dependencies, and install them on your system. This step marks the successful completion of the WebStorm installation process.
Section 2: Install WebStorm on Ubuntu 22.04 via Snap
Snap is a powerful software deployment and package management system developed by Canonical, the organization behind Ubuntu. Its design aims to simplify the software installation process and maintenance tasks across different Linux distributions. This section provides a detailed guide on how to install WebStorm utilizing the Snap package manager.
Step 1: Confirming the Presence of Snap on Your Ubuntu System
Being a Canonical product, Snap comes pre-installed on most Ubuntu distributions. However, there could be scenarios where Snap isn’t pre-loaded or has been manually removed. If you encounter such a situation, you can reinstall Snap onto your system using the command below:
sudo apt install snapd -y
This command installs the Snap Daemon (snapd), a background service that manages and maintains Snap packages on your system.
Step 2: Enabling Classic Snap Support for WebStorm on Ubuntu
Some Snap packages require ‘classic’ confinement – a feature that gives the Snap package access to your system’s resources, akin to conventional software. To facilitate broad compatibility and seamless operation of these packages, we create a symbolic link (symlink) using the command below:
sudo ln -s /var/lib/snapd/snap /snap
Executing the command above creates a symlink between /var/lib/snapd/snap and /snap, effectively enabling classic Snap support on your system.
Step 3: Install the Core Snap for WebStorm on Ubuntu
Before initiating the WebStorm installation, installing the ‘core’ Snap is crucial. This core Snap serves as a base for other Snaps, offering the required libraries and services they depend upon. This proactive step can help prevent potential conflicts or issues that might arise later. To install the core Snap, use the following command:
sudo snap install core
Step 4: Install WebStorm on Ubuntu 22.04 via Snap Command
With the prerequisites in place, we are now prepared to install WebStorm. This can be accomplished by executing the following command:
sudo snap install webstorm --classic
In the above command, sudo is used to provide elevated privileges, snap calls upon the Snap package manager, install is the action to install a package, and webstorm is the package we’re targeting for installation. The --classic option allows WebStorm to access your system’s resources like a traditionally packaged application.
Section 3: Install WebStorm on Ubuntu 22.04 via Flatpak and Flathub
Flatpak is a universal package management system specifically tailored for Linux. It shares standard functionalities with Snap but distinguishes itself with a unique sandboxing feature. This feature isolates applications from the rest of the system, enhancing security and reducing potential software conflicts. This section presents a step-by-step guide on installing WebStorm via Flatpak and Flathub.
Step 1: Activating the Flathub Repository for WebStorm on Ubuntu
The first step towards installing WebStorm through Flatpak is to activate the Flathub repository. Flathub serves as a reputable distribution platform that hosts Flatpak applications. It functions like an online marketplace, providing access to various applications ready for installation.
To integrate the Flathub repository into your system, execute the following command in your terminal:
sudo flatpak remote-add --if-not-exists flathub https://flathub.org/repo/flathub.flatpakrepo
The command above weaves the Flathub repository into your Flatpak configuration, thus extending access to a wide range of applications, including WebStorm.
Step 2: Install WebStorm on Ubuntu 22.04 via Flatpak Command
Once you’ve successfully incorporated the Flathub repository, the next step involves installing WebStorm. This is achieved using the flatpak install command. The specific command for installing WebStorm is:
flatpak install flathub com.jetbrains.WebStorm -y
Running this command initiates the installation of WebStorm from the Flathub repository, ensuring the application’s latest stable version is available.
Section 4: Launching WebStorm on Ubuntu 22.04
After successfully installing WebStorm on your Ubuntu system, you are ready to take the next step: starting the application. Two primary ways to launch WebStorm are the command-line interface (CLI) and the graphical user interface (GUI). Both methods cater to different user preferences, providing flexibility in interacting with the system. This section provides a detailed explanation of how to launch WebStorm using both these methods.
Launching WebStorm through the Command-Line Interface (CLI) on Ubuntu
In the realm of Linux, the command-line interface is an integral tool, and launching applications like WebStorm is no exception. The following subsections outline how to initiate WebStorm using various command sets, depending on your installation method—APT, Snap, and Flatpak.
Launching WebStorm Using the APT Command on Ubuntu
To launch WebStorm with the APT command, open your terminal and input:
webstorm
This command will initiate the Integrated Development Environment (IDE), preparing it for your coding tasks.
Launching WebStorm Using the Snap Command on Ubuntu
If you have installed WebStorm using Snap, the command to launch it will be:
snap run webstorm
Once executed, this command will start WebStorm, assuming the installation was successful.
Launching WebStorm Using the Flatpak Command on Ubuntu
If you have chosen Flatpak as your preferred installation method, the following command in your terminal will launch WebStorm:
flatpak run com.jetbrains.WebStorm
This command will set WebStorm into action, provided that the installation was executed correctly.
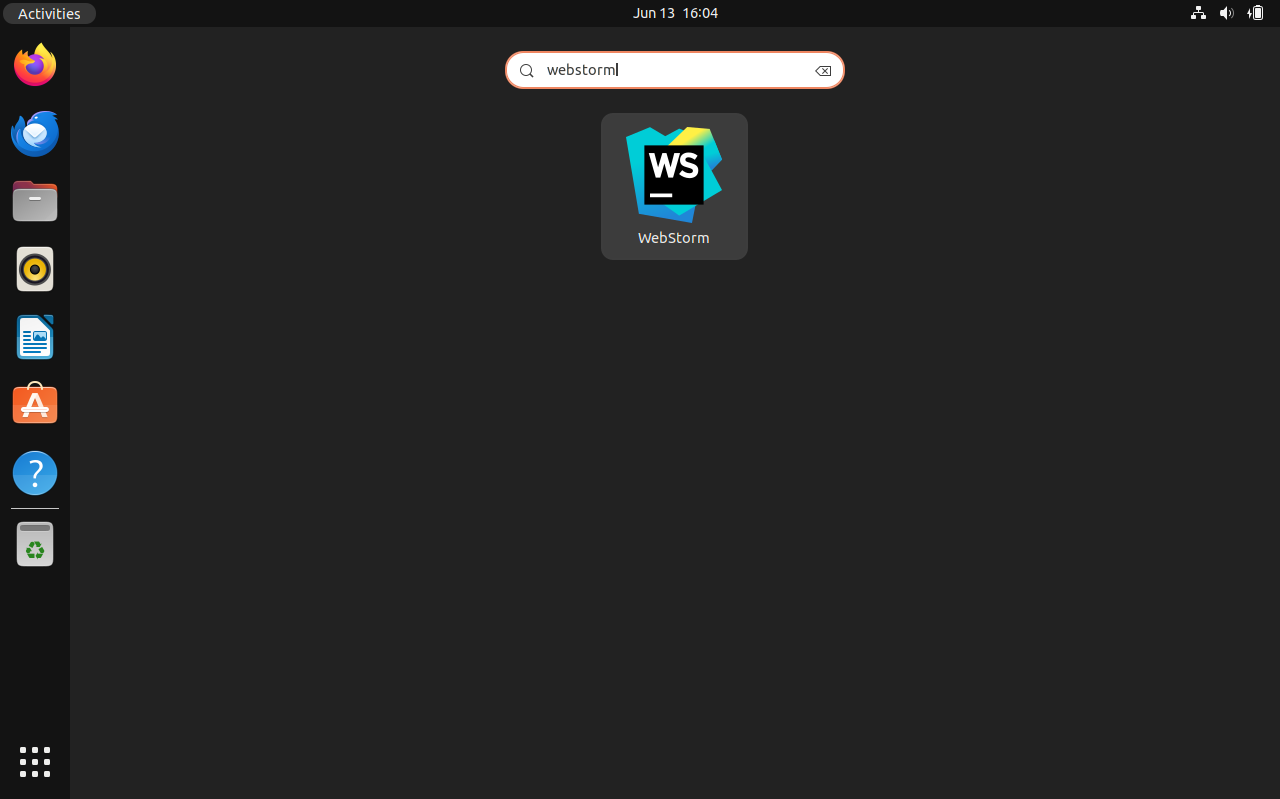
Step 2: Launching WebStorm through the Graphical User Interface (GUI) on Ubuntu
Ubuntu’s graphical user interface (GUI) offers an alternative way to start WebStorm for users who are more at ease with a visual approach. The procedure involves the following steps:
- Activities Menu: Start by clicking on the
Activitiesmenu, located at the top-left corner of your desktop screen. - Show Applications: Next, select the
Show Applicationsicon at the bottom of the Activities overlay. - Search for WebStorm: You can scroll through your applications or use the search bar to find WebStorm quickly.
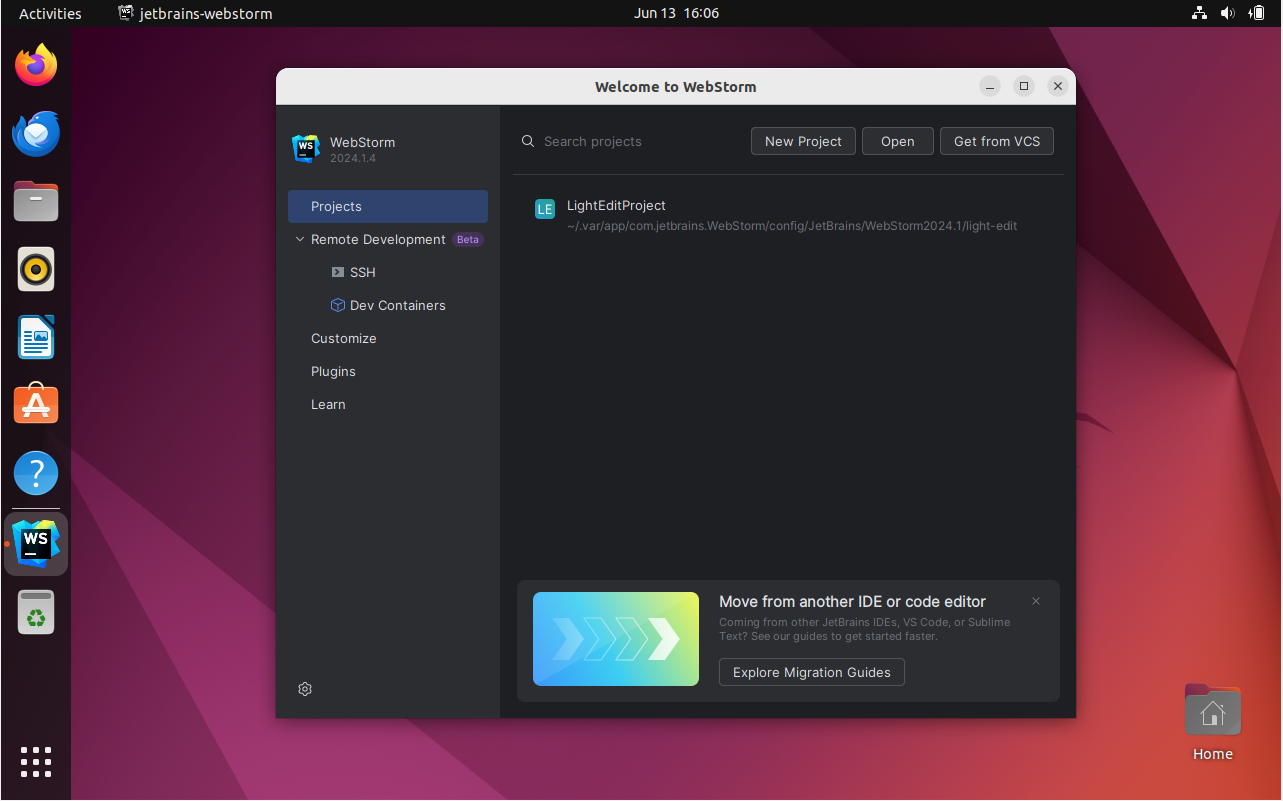
- Launch WebStorm: Finally, click the WebStorm icon to launch the IDE, readying it for your coding work.

Section 5: Getting Started with WebStorm on Ubuntu 22.04
You might wonder what’s next after successfully installing and launching WebStorm on your Ubuntu system. How can you make the most out of this powerful IDE? Here are some tips and tricks that can help enhance your productivity and ease your coding tasks in WebStorm.
General Tips with WebStorm on Ubuntu
- Useful Shortcuts: WebStorm has many keyboard shortcuts to streamline your coding process. For instance, Ctrl + Shift + F allows you to search the entire project. Spend some time learning these shortcuts to improve your productivity significantly.
- Version Control: WebStorm has built-in support for version control systems like Git. You can perform Git operations from the IDE without needing a separate Git client.
- Code Completion: WebStorm’s intelligent code completion feature can be a significant time-saver. As you type, WebStorm suggests suitable code snippets or variables to use.
- Refactoring: WebStorm allows you to refactor your code efficiently. With the
Ctrl + Alt + Shift + Tshortcut, you can refactor your code by renaming symbols, extracting methods, inline variables, and more.
Customization Tips with WebStorm on Ubuntu
- Editor Themes: WebStorm allows you to customize the look and feel of your IDE with various editor themes. You can choose a theme that best suits your preference from
File > Settings > Appearance & Behavior > Appearance. - Code Style: You can customize the code style WebStorm uses to match your personal preference or your team’s coding standards. Go to
File > Settings > Editor > Code Style. - Plugins: WebStorm supports many plugins that add extra functionality to your IDE. You can install these plugins from
File > Settings > Plugins.
Other Tips with WebStorm on Ubuntu
- Integrated Terminal: WebStorm has an integrated terminal that can be very useful. You can open it by pressing
Alt + F12. This saves you from switching between the IDE and a separate terminal window. - Live Templates: WebStorm comes with several pre-defined live templates for various languages. You can also create custom templates to automate repetitive coding tasks.
- Debugging: WebStorm has excellent debugging tools. You can set breakpoints, step through your code, and inspect variables in the IDE.

Section 6: WebStorm Additional Commands on Ubuntu 22.04
In this guide segment, we’ll delve into the methods of managing WebStorm on your Ubuntu Linux platform. This involves utilizing distinct command-line procedures to update and uninstall the IDE. Our primary focus will be on the unique steps required by package managers such as APT, Snap, and Flatpak.
Update WebStorm on Ubuntu 22.04
In the realm of software applications, maintaining an up-to-date status is of paramount importance. Regular updates deliver cutting-edge features, vital security patches, and performance improvements. Therefore, getting to grips with updating WebStorm using different package managers is an essential skill to acquire.
Utilizing the APT Command for WebStorm Update on Ubuntu
Advanced Package Tool, more commonly known as APT, is a widely adopted package management system in Ubuntu. The process of updating WebStorm using APT encompasses two main steps. The first is to refresh the package list to ensure it reflects the most current status of all packages. Following this, an upgrade command is issued to apply the updates. Here are the commands that facilitate these operations:
sudo apt update
sudo apt upgrade
Updating WebStorm via the Snap Command on Ubuntu
Snap, conceived by Canonical, is a software packaging and deployment framework. Regarding updating WebStorm, the Snap command provides a straightforward approach. To execute this operation, the following command is required:
sudo snap refresh webstorm
Please note if you installed WebStorm as a snap package, it will manage updates automatically. All snaps are updated automatically in the background every day.
Leveraging the Flatpak Command to Update WebStorm on Ubuntu
Flatpak is a versatile tool for software deployment, package management, and application virtualization on Linux systems. To perform an update of WebStorm via Flatpak, the subsequent command needs to be invoked:
sudo flatpak update
Notably, these commands update all outdated packages, reinforcing the best practices to maintain your system’s security and optimal performance.
Remove WebStorm on Ubuntu 22.04
You might need to uninstall WebStorm from your Ubuntu Linux system in certain circumstances. The following subsections will outline the steps for accomplishing this task.
Removing WebStorm Using the APT Command on Ubuntu
To disengage WebStorm using APT, the command given below should be executed:
sudo apt remove webstorm
In case you do not intend to reinstall WebStorm or use the JetBrains third-party APT PPA, the repository and GPG, key can also be purged with these commands:
sudo rm /etc/apt/sources.list.d/jetbrains-ppa.list
sudo rm /usr/share/keyrings/jetbrains-ppa-archive-keyring.gpg
Uninstalling WebStorm via the Snap Command on Ubuntu
The process of uninstalling WebStorm using Snap is straightforward. Run the following command:
sudo snap remove webstorm
Utilizing the Flatpak Command to Remove WebStorm on Ubuntu
Lastly, to disengage WebStorm using Flatpak, you need to run the command below:
sudo flatpak uninstall com.jetbrains.WebStorm
FAQs to Install WebStorm on Ubuntu 22.04
Is WebStorm free?
No, WebStorm is a commercial IDE developed by JetBrains. It offers a 30-day free trial, and after that, a license needs to be purchased for continued use.
Can I use WebStorm for web development with frameworks like React or Angular?
Yes, WebStorm provides excellent support for popular JavaScript frameworks, including React, Angular, Vue.js, and more. It offers specific features and integrations tailored to these frameworks.
Does WebStorm support version control systems like Git?
Yes, WebStorm has built-in support for version control systems, including Git, Subversion, and Mercurial. You can perform various VCS operations within the IDE.
Can I customize the WebStorm interface and settings?
Yes, WebStorm is highly customizable. You can change the appearance, key bindings, code style, and various other settings to match your preferences and improve your workflow.
Does WebStorm integrate with package managers like npm or Yarn?
Yes, WebStorm has built-in support for npm and Yarn. It can automatically detect npm or Yarn projects in your workspace and provide features like package management, scripts, and dependencies management.
Can I debug my JavaScript code in WebStorm?
Yes, WebStorm provides a powerful built-in JavaScript debugger that allows you to set breakpoints, inspect variables, and step through your code for efficient debugging.
Can I use WebStorm with my existing Node.js projects?
Yes, WebStorm seamlessly integrates with Node.js projects. It can automatically detect and configure your Node.js environment, allowing you to work efficiently with Node.js-based applications.
Conclusion
In this tutorial, we walked through the steps to install WebStorm on Ubuntu 22.04.
If you have any queries, feel free to ask them in the comments section, and we would be happy to respond to them.......

