

Choose a different version or distribution
Introduction
Before we begin talking about how to install WonderCMS with Nginx on Debian 12, let's briefly understand – What is WonderCMS?
WonderCMS is a lightweight and user-friendly Content Management System (CMS) designed for simplicity and ease of use. It offers an intuitive interface and requires no database, making it quick to set up and manage. WonderCMS lets you easily create and update websites without any technical knowledge.
With its SEO-friendly features, including clean URLs and customizable meta tags, WonderCMS helps your website rank higher in search engine results. Embrace the simplicity of WonderCMS to build a professional website hassle free.
In this tutorial, you will install WonderCMS with Nginx on Debian 12. We will also address a few FAQs on how to install WonderCMS with Nginx on Debian 12.
Advantages of WonderCMS with Nginx
- Fast Performance: WonderCMS with Nginx ensures lightning-fast website loading times, providing an excellent user experience.
- Low Resource Usage: Nginx's efficiency combined with WonderCMS's lightweight nature helps conserve server resources, making it highly efficient.
- Enhanced Security: Nginx's robust security measures, paired with WonderCMS's security-focused approach, protect your website from potential vulnerabilities.
- Flexible Configuration: Enjoy easy customization options with Nginx's powerful configuration capabilities and WonderCMS's flexible settings.
- SEO-friendly: WonderCMS with Nginx supports SEO features like clean URLs, helping your website rank higher in search engine results.
Install Nginx on Debian 12 for WonderCMS
Step 1: Update the Debian System Before the Nginx Installation
It is essential to have an updated system before we begin the WonderCMS installation. This guarantees that your system will operate as smoothly and steadily as possible by using the most recent security patches, bug fixes, and software features. To update all the current packages, execute the following command:
sudo apt update && sudo apt upgrade
Rebooting your server is a good idea if your system asks for any major updates, like those to the Linux kernel, to ensure the updates are applied correctly.
Step 2: Install Nginx via APT Command on Debian
Now that we've confirmed the updates for your Debian system, let's install Nginx. We will use Nginx, a reverse proxy and high-performance HTTP server, to serve the WonderCMS website. Run the following command to install Nginx:
sudo apt install nginx
When installation is successful, the Nginx service is usually started by default. However, we need to make sure it's working properly to prevent any problems down the road. To find out Nginx's current state, use the following command:
systemctl status nginx
Nginx should be running and active, as shown by the output that you see. The command below can be used to enable the Nginx service if it hasn't been turned on for any reason:
sudo systemctl enable nginx --now
The uptime of your WonderCMS website depends on Nginx starting automatically each time the server is rebooted, which is ensured by turning on the service.
Fine-tuning UFW Firewall for Nginx
Step 1: Installation of UFW
It's critical to correctly configure your firewall settings if you want to increase the security of your Nginx server. An easy-to-use interface for controlling iptables firewall rules is called the Uncomplicated Firewall (UFW). It offers a simple method for constructing a powerful firewall with minimal configuration complexity.
The following command can be used to add UFW to your Debian system if it isn't already installed:
sudo apt install ufw
Step 2: Enable UFW
Now that UFW is installed, your system needs to be activated. UFW is configured by default to accept all outgoing connections while blocking all incoming ones. Until you can allow external traffic to access services, this setting aids in creating a secure default environment.
To enable UFW, run the following command:
sudo ufw enable
Step 3: Review Available Nginx Profiles
Let's concentrate on configuring UFW especially for Nginx now that it's operational. Application profiles, or preset configurations for different apps, are a feature of UFW. This procedure is made easier by the profiles that Nginx comes with. To see the available Nginx profiles, execute the following command:
sudo ufw app list
Three Nginx profiles are visible in the output. Traffic on port 80 (HTTP) is allowed by the Nginx HTTP profile, traffic on port 443 (HTTPS) is allowed by Nginx HTTPS, and traffic on both HTTP and HTTPS is allowed by Nginx Full.
Step 4: Configuring UFW with an Nginx Profile
Your unique requirements will determine which profile to use. Use the Nginx Full profile if your website needs to handle both HTTP and non-HTTPS traffic:
sudo ufw allow 'Nginx Full'
Use the Nginx HTTPS profile, though, if your goal is to only deliver secure traffic:
sudo ufw allow 'Nginx HTTPS'
Use the Nginx HTTP profile if your use case just calls for HTTP access:
sudo ufw allow 'Nginx HTTP'
It's also important to note that you can do the following to permit a particular port, like 8080, for a particular application:
sudo ufw allow 8080
Install PHP and PHP-FPM for WonderCMS on Debian 12
Step 1: Proceed to Install PHP on Debian
WonderCMS requires PHP, an open-source scripting language, to function because PHP reads and processes your website's code. It is frequently advised to use the most recent stable version of PHP in order to support newer features and achieve better security and performance.
Use this command to install PHP on your Debian system along with PHP-FPM (FastCGI Process Manager) and the required modules:
sudo apt install php php-fpm php-mbstring php-bcmath php-common php-cli php-curl php-zip
Step 2: Verifying PHP Service Status
It's critical to check the PHP service's status after installation to make sure everything is operating as it should. This can be done similarly to how you checked Nginx and MariaDB's status. Here, we'll examine PHP 8.2, which is what Debian 12 Bookworm comes with by default. Use the subsequent command to confirm the current state:
systemctl status php8.2-fpm
Confirming the PHP Version
Finally, you may want to make sure that the particular version of PHP that is installed on your system. If you are getting ready for updates or need to troubleshoot, this can be helpful. Use the following command to see the installed PHP version:
php -v
Once PHP and PHP-FPM are configured correctly on your Debian system, you can proceed with installing WonderCMS. Ensuring that your WonderCMS setup is operating on the correct PHP version is crucial for its overall functionality and effectiveness. Recall that you can get the newest features and enhancements, increased security, and improved performance by updating your PHP version.
Install WonderCMS on Debian 12
Step 1: Download WonderCMS on Debian
The software archive package needs to be downloaded in order to begin WonderCMS installation. The official GitHub releases page for WonderCMS.
You will use the wget or curl commands in the terminal to download the file straight to your Debian system.
wget https://github.com/WonderCMS/wondercms/releases/download/x.x.x/wondercms-xxx.zip
for example:
https://github.com/WonderCMS/wondercms/releases/download/3.4.1/wondercms-341.zip
You can find a template at the above link. It needs to be changed to the most recent URL from the official release page.
Step 2: Create WonderCMS Folder Structure
Now that the WonderCMS archive has been downloaded, open the package, extract the contents, and move them to the www directory. Make a new directory just for WonderCMS to start:
sudo mkdir -p /var/www/wondercms
The WonderCMS files should then be extracted to the www directory:
sudo unzip wondercms*.zip -d /var/www/
Installing the zip package might be required if you experience problems running the aforementioned command:
sudo apt install zip unzip
Step 3: Configuring Proper Permissions for WonderCMS
Next, it's important to set WonderCMS's directory owner permissions correctly. WonderCMS might have write permission problems if www-data isn't given the correct permissions. The following commands will guarantee that the permission and ownership settings are correct:
sudo chown -R www-data:www-data /var/www/wondercms/
sudo find /var/www/wondercms -type d -exec chmod 755 {} \;
sudo find /var/www/wondercms -type f -exec chmod 644 {} \;
Step 4: Create Nginx Server Block Configuration for WonderCMS
Make a new server block file in order to configure the server block for WonderCMS:
server {
    listen 80;
    server_name www.wonder-example.com;  # to use on default IP use _
    root /var/www/wondercms;
    index index.php;
    autoindex off;

    location / {
        try_files $uri $uri/ @rewrite;
    }

    location @rewrite {
        rewrite ^/(.+)$ /index.php?page=$1 last;
    }

    location ~ database.js {
        return 403;
    }

    location ~ cache.json {
        return 403;
    }

    location ~ \.php$ {
      fastcgi_pass unix:/run/php/php8.2-fpm.sock;
      fastcgi_param SCRIPT_FILENAME $document_root$fastcgi_script_name;
      include fastcgi_params;
      include snippets/fastcgi-php.conf;
      fastcgi_buffer_size 128k;
      fastcgi_buffers 4 128k;
      fastcgi_intercept_errors on;
    }
}
This is an important step because, for users switching from Apache-based web applications, the Nginx server block functions as a virtual host. It specifies how to reply to inquiries about a particular website.
www.wonder-example.com, example.com, etc.).Step 5: Enable WonderCMS Nginx Server Block
It's time to enable your server block configuration file after you've created it. A symbolic link must be made between the sites-available directory and the sites-enabled directory in order to complete this process. Run the following command:
sudo ln -s /etc/nginx/sites-available/example.com.conf /etc/nginx/sites-enabled/
Change example.com.conf to the name of your real configuration file.
Next, run a test run to verify that your Nginx configuration is working:
sudo nginx -t
You can restart Nginx if the configuration test completes successfully and returns no errors:
sudo systemctl restart nginx
Step 6: Adjusting the PHP.ini Configuration
It is recommended that you optimize your PHP settings to support WonderCMS before moving on to the web-based setup. Let's modify a few parameters in the PHP.ini file to enhance your CMS's overall performance.
Open the PHP.ini file to get started. Please take note that depending on your PHP version, its location may vary:
sudo nano /etc/php/{version}/fpm/php.ini
The following suggestions can help you improve the functionality of your CMS:
upload_max_filesize = 100MB
post_max_size = 100MB
max_execution_time = 120
max_input_vars = 5000
memory_limit = 256M
Restart your PHP-FPM server after making the required adjustments:
sudo systemctl restart php{version}-fpm
Step 7: Update Nginx Server Block
In order to support larger body sizes, the last step is to revisit your Nginx server block. Open your server block file again to accomplish this:
sudo nano /etc/nginx/sites-available/example.com
To increase the permitted body size, add the following line:
client_max_body_size 100M;
Make sure the value of client_max_body_size corresponds to the settings in your PHP file.
Finally, give your changes a test:
sudo nginx -t
To implement the modifications, restart your Nginx service if everything checks out:
sudo systemctl restart nginx
You can now move on to the GUI section of the setup process after successfully configuring your Debian system for WonderCMS with this step.
Access WonderCMS on Debian 12
Now that the backend configurations are finished, we can focus on the WonderCMS platform's front end, the Web User Interface (WebUI). This is where the majority of the content management on your website takes place.
Step 1: Accessing the Installation Page
To get started, launch your favorite browser and go to the domain where WonderCMS is installed:
https://www.yoursite.com OR http://your-IP
Substitute your actual domain name for yoursite.com. The installation of WonderCMS will begin as a result.
Step 2: Logging Into WonderCMS
An initial page with a temporary password and a "Login" button will greet you.
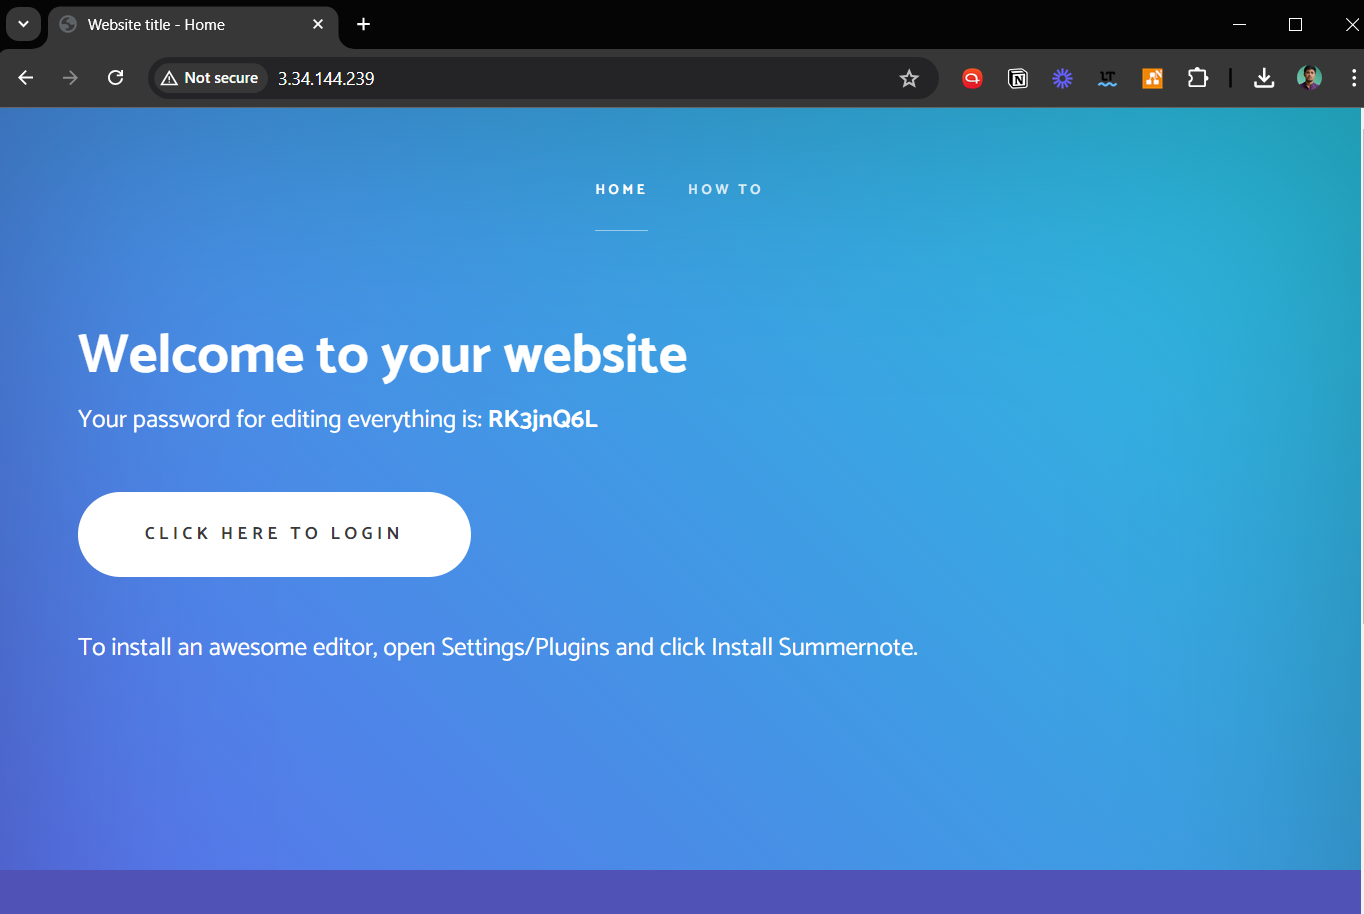
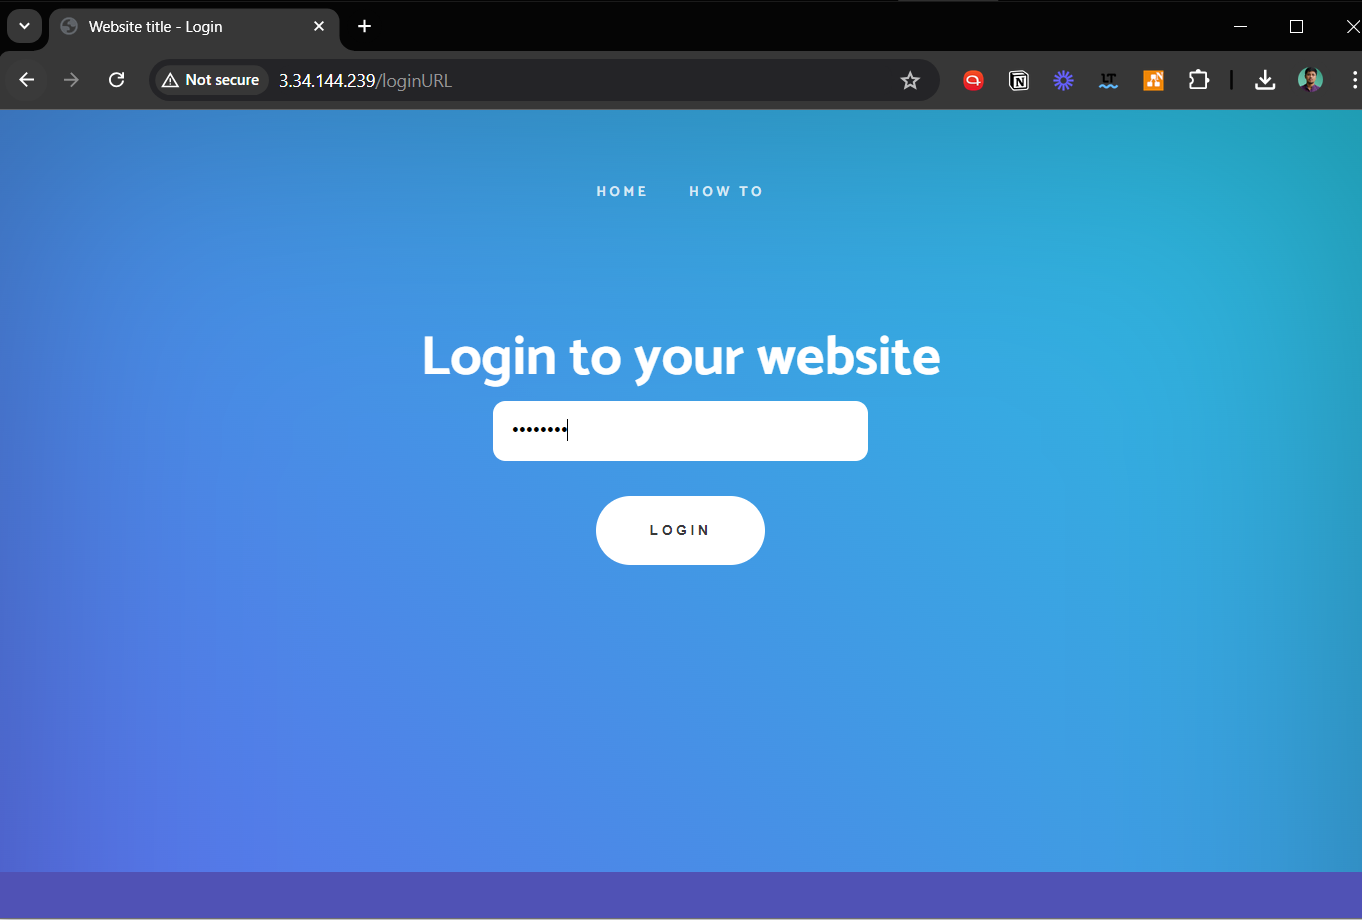
Click the "Login" button and enter the given temporary password to continue. In the event that you lose or forget the password, go back, copy the temporary password once more, and try to log in again.
Step 3: Configuring Your Website
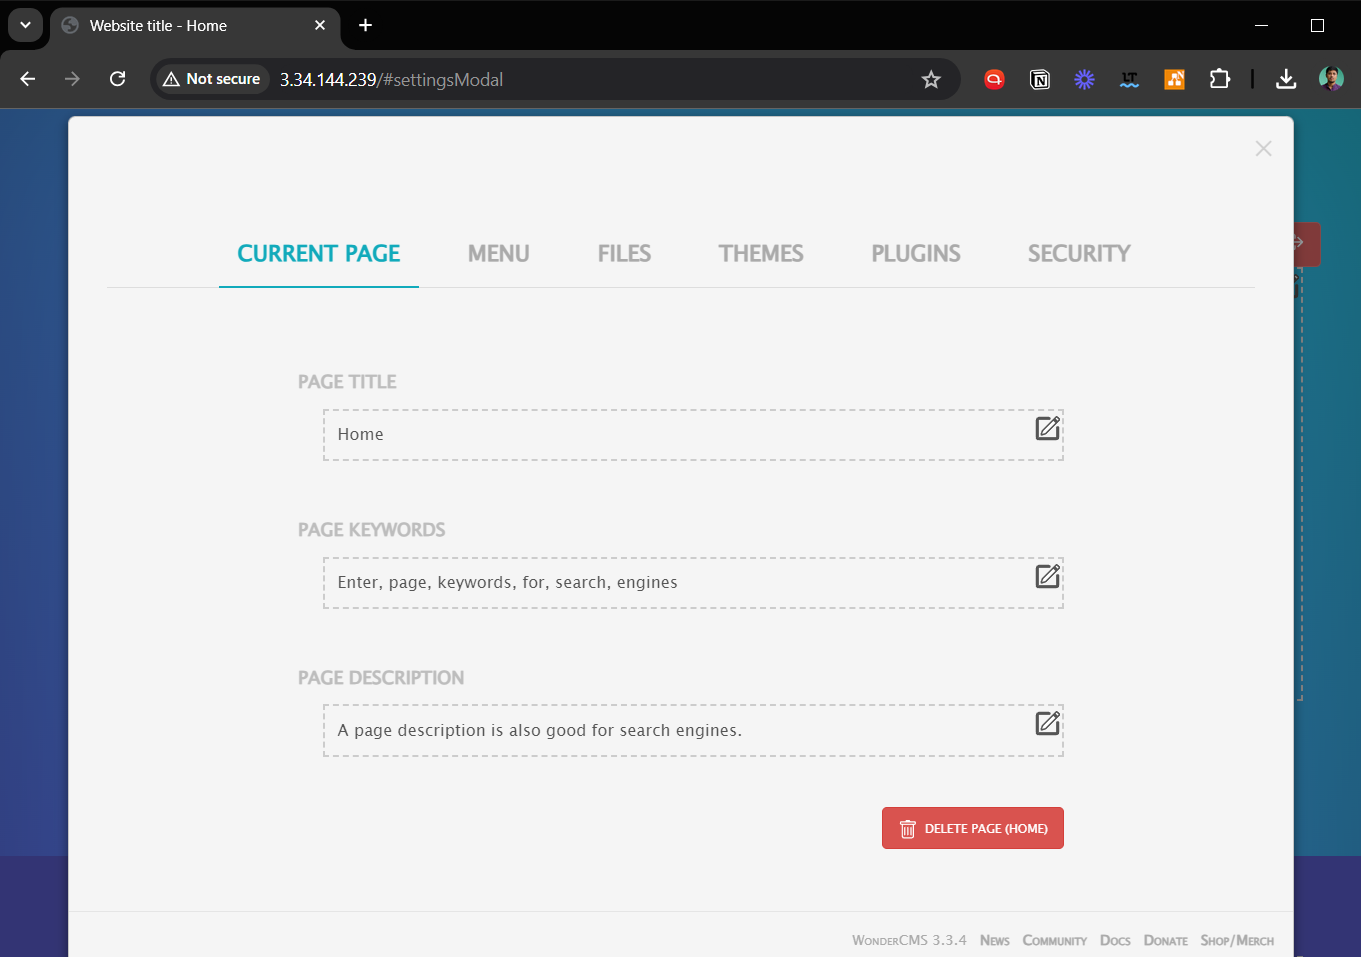
You will arrive on a page that replicates the original login page after logging in successfully. On the other hand, this new interface is an editable CMS page. This page's top will have an option marked "Change settings".
To view your site's configuration panel, click "Change settings". To improve the security of your website, it is highly advised that you update your settings as soon as possible.
Step 4: Customizing Your WonderCMS Website
Now that your website is secure, it's time for the exciting part: personalization! There are numerous ways to customize your website with WonderCMS. To fit your own tastes, you can change the site's overall aesthetics, add new pages, and change themes.

Please explore and play around with the customization settings. Ultimately, your website ought to showcase your unique style and meet the demands of your target market.
Optional: Configure HTTPS with Let’s Encrypt for WonderCMS
To guarantee user privacy and data protection, website security is essential. One such method of website security is to use HTTPS; Let's Encrypt offers a free, open, and automated certificate authority for this purpose. The nonprofit Internet Security Research Group (ISRG) is in charge of running it. This tutorial will walk you through setting up HTTPS on your WonderCMS website running on Nginx using Let's Encrypt.
Step 1: Installation of the Certbot Package
Installing the Certbot package will initiate the process. Getting SSL certificates from Let's Encrypt and setting up HTTPS on the server require the Certbot package. Apply the subsequent command:
sudo apt install python3-certbot-nginx -y
Step 2: Generating an SSL Certificate
The next step is to generate your SSL certificate after the Certbot package installation is successful. This can be done with the command displayed below. Don't forget to enter your real information in the placeholders for the email address and domain name:
sudo certbot --nginx --agree-tos --redirect --hsts --staple-ocsp --email [email protected] -d www.example.com
The above command creates a secure configuration and generates the SSL certificate. It consists of OCSP Stapling, Strict-Transport-Security headers, and forced HTTPS 301 redirects. Don't forget to modify the domain name and email to suit your unique requirements.
Instead of using http://www.example.com, your website URL will now be https://www.example.com. The new HTTPS version will be automatically redirected in the event that an attempt is made to access the old HTTP URL.
Setting up Automatic Certificate Renewal
Regular renewal is necessary for SSL certificates to remain valid. Your SSL certificate renewal and update can be automated by setting up a cron job. A script that handles this procedure is included with Certbot.
Do a dry run to test the renewal procedure first. When the certificate is about to expire, this test helps to make sure that the automatic renewal process will work as planned:
sudo certbot renew --dry-run
The crontab window needs to be opened if the dry run runs successfully:
sudo crontab -e
In the crontab window, create a new cron job to run daily checks for certificate renewals. The script will handle the update automatically if a renewal is necessary. Make necessary modifications to the schedule using the command below as a template:
00 00 */1 * * /usr/sbin/certbot-auto renew
FAQs to Install WonderCMS with Nginx on Debian 12
What are the prerequisites for installing WonderCMS with Nginx on Debian 12?
Before installing WonderCMS with Nginx on Debian 12, make sure you have a functioning Debian 12 server with Nginx properly installed and configured.
What is the recommended version of WonderCMS for Debian 12?
It is recommended to use the latest stable version of WonderCMS available on their official website, which is compatible with Debian 12.
Can I use a different web server instead of Nginx?
Yes, you can use other web servers like Apache or LiteSpeed, but the configuration steps may differ.
Are there any specific permissions required for WonderCMS files on Debian 12?
Ensure that the WonderCMS files and directories have proper read and write permissions for the user running the Nginx process (often www-data).
How can I secure my WonderCMS installation on Debian 12 with Nginx?
Implement security best practices, such as using HTTPS with a valid SSL certificate, restricting access to sensitive files, and applying regular security updates.
What can I do if I encounter any issues during the installation or setup?
In case of any issues, refer to the Nginx error logs and consult the official WonderCMS documentation or user forums for troubleshooting steps tailored to your situation.
Conclusion
We hope this tutorial helped you understand how to install WonderCMS with Nginx on Debian 12.
If you have any queries, please leave a comment below, and we’ll be happy to respond to them for sure.