
Introduction
Before we begin talking about how to make a TeamSpeak Server, let's briefly understand – What is TeamSpeak?
TeamSpeak 3 is a voice-over-internet-protocol application that enables real-time speech collaboration and voice communication between users. It is a dependable and portable tool with special capabilities like AES-256 encryption, reduced latency, and outstanding audio quality.
The TeamSpeak VoIP application is used by people for a variety of things. Often, it is used as a communication tool for gamers, allowing players to cooperate with others through voice chat while playing games.
In this tutorial, you will make a TeamSpeak Server. We will also address a few FAQs on how to make a TeamSpeak Server.
How to Create a Linux TeamSpeak 3 Server
Let us start by configuring a TeamSpeak server on a Linux VPS using the Ubuntu 20.04 OS.
Access your VPS through SSH to begin the process. This process can be divided into six easy steps:
- Create a new system user.
- Download and extract the TeamSpeak server using the wget command.
- Accept the License Agreement for TeamSpeak 3.
- Set the system to automatically launch the TeamSpeak server when it boots up.
- Receive the privilege key.
- Use the TeamSpeak client to connect.
Before moving on, use the following command in the terminal to see if your system is up-to-date:
sudo apt-get update && apt-get upgrade -y && sudo apt install bzip2 -y
1. Create a New System User
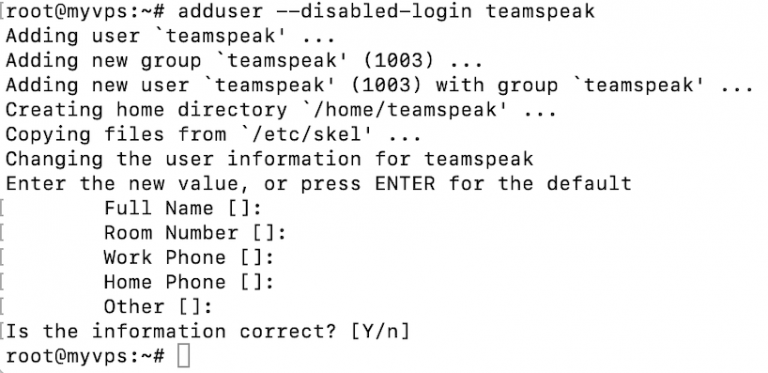
First off, use the following command to add a new user:
adduser --disabled-login teamspeak
You will be asked to enter personal user information and verify that it is accurate. Remember that you can leave any field blank.
Change to the newly created user:
sudo su teamspeak
sudo su teamspeak command, if you find yourself in the root directory, use cd.. before executing the command once more.Finally, go to the home directory:
cd /home/teamspeak
2. Download and Extract TeamSpeak 3 Server
Get the most recent TeamSpeak server software using the download link next. Choose the 64-bit edition. To directly download TeamSpeak to the VPS, we advise using the wget command:
wget https://files.teamspeak-services.com/releases/server/3.13.7/teamspeak3-server_linux_amd64-3.13.7.tar.bz2
When done, extract the file:
tar xvf teamspeak3-server_linux_amd64-3.13.7.tar.bz2
The folder teamspeak3-server_linux_amd64 will include every item. The useless archive can then be safely deleted:
rm teamspeak3-server_linux_amd64-3.13.7.tar.bz2
Enter the commands in accordance with the TeamSpeak software version you are using. TeamSpeak will not launch if the version number is entered incorrectly.
Run the ls command. You should see something like this:

3. Accept the TeamSpeak 3 License Agreement
The license agreement must be accepted as of the 3.1.0 release of TeamSpeak server. Running the next command is the quickest way to accomplish it. But, ensure that you are in the teamspeak3-server_linux_amd64 directory first.
touch .ts3server_license_accepted
This will produce a new empty file called .ts3server_license_accepted, indicating that you have approved the license terms.
4. Start the TeamSpeak Server on Startup
It is time to configure TeamSpeak so that it launches as soon as the server does. A file called teamspeak.service must be created in the /lib/systemd/system directory. In order to switch to the root user, enter the following command:
su -
Then, using your chosen text editor, create a new empty file. For our example, we will use nano:
sudo nano /lib/systemd/system/teamspeak.service
Here is an example of what the file should look like:
[Unit]
Description=TeamSpeak 3 Server
After=network.target
[Service]
WorkingDirectory=/home/teamspeak/teamspeak3-server_linux_amd64
User=teamspeak
Group=teamspeak
Type=forking
ExecStart=/home/teamspeak/teamspeak3-server_linux_amd64/ts3server_startscript.sh start inifile=ts3server.ini
ExecStop=/home/teamspeak/teamspeak3-server_linux_amd64/ts3server_startscript.sh stop
PIDFile=/home/teamspeak/teamspeak3-server_linux_amd64/ts3server.pid
RestartSec=15
Restart=always
[Install]
WantedBy=multi-user.target
Copy and paste the content into the newly generated file, then save it. Next, we will set the script for TeamSpeak Server to run when the server boots up:
systemctl enable teamspeak.service
systemctl start teamspeak.service
Run the next command to confirm the script was added successfully:
systemctl | grep teamspeak.service
If the TS 3 server is functioning properly, you should see the following:

By using the following command, you may also get a thorough report on the status of the TeamSpeak server:
service teamspeak status

5. Retrieve the Privilege Key
The privilege key is still required even though the TeamSpeak server is currently operational. When connecting for the first time to the server, you must paste it. Change to the teamspeak user first:
sudo su teamspeak
Finally, run the command below to view the privilege key:
cat /home/teamspeak/teamspeak3-server_linux_amd64/logs/ts3server_*
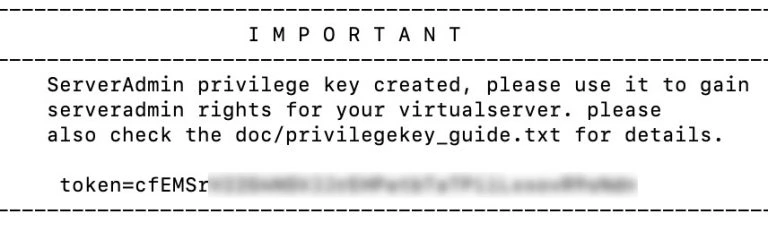
Copy the token from the ServerAdmin line. It will resemble something like this:
ServerAdmin privilege key created, please use the line below
token=ZyQqAIGrZyQqAIGrZyQqAIGrZyQqAIGrZyQqAIGr
6. Connect via the TeamSpeak Client
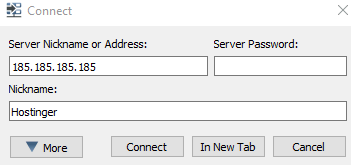
The privilege key application and connection to the newly established TS3 server are the final steps. When connecting, provide the server address of your dedicated VPS.
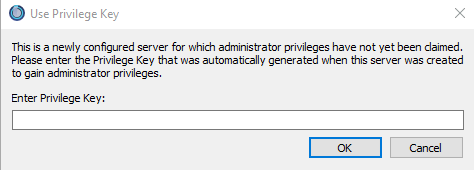
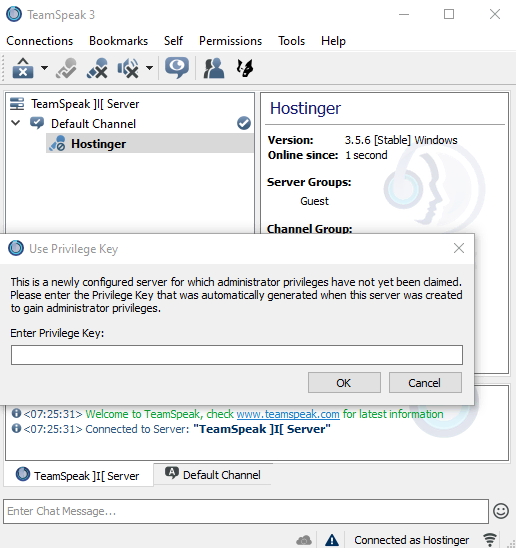
You will be asked to enter the server admin token right away:
Congratulations! You have used the Ubuntu 20.04 operating system to successfully install and connect to a TeamSpeak server.

How to Make a TeamSpeak Server on Windows
A TeamSpeak server can be easily set up on Windows. In truth, it only requires three simple actions to complete:
- From their website, download and extract the TeamSpeak server.
- Start the installation of the TeamSpeak server.
- Connect using the TeamSpeak client.
First, let's start about the TeamSpeak server.
1. Download and Extract the TeamSpeak Server
Download the Windows TeamSpeak server files first. After that, extract it to the proper location.
2. Run the TeamSpeak Server Installer
Open the extracted TeamSpeak server files and launch the ts3server.exe executable file.
The Windows firewall should be asked to safelist the software once you accept the license agreement. Following that, you will be given your login name, server password, API key, and server admin token. To save all four values for later use, copy them into an empty .txt file.
3. Connect via the TeamSpeak Client
The last step is to establish a connection to the TS3 server after the installation process is complete.
Run the .exe installer after downloading the TeamSpeak client from the official website.
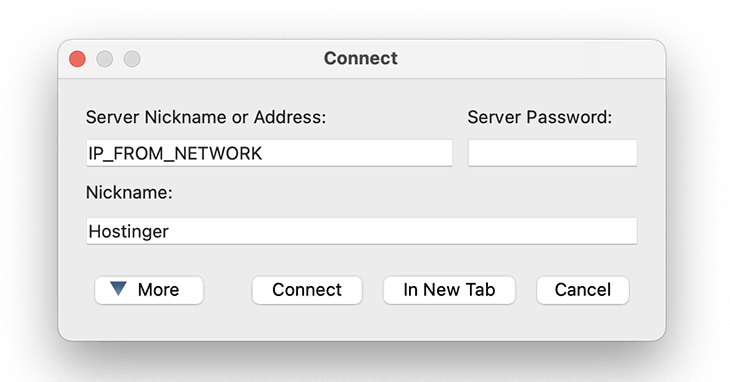
Open the client after that, then select Connections -> Connect.
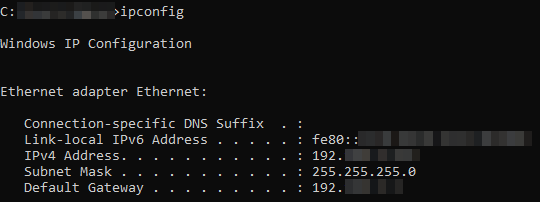
Open the Command Prompt and enter the following commands if you are unsure of the IP address to use when connecting:
ipconfig
Look for the IPv4 Address value because we will need it to connect.
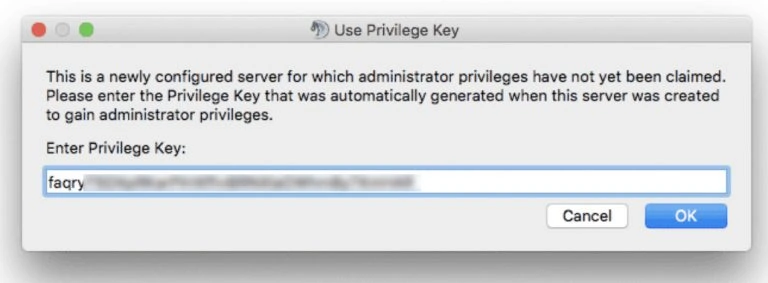
To finish, you must paste the privilege key to gain admin rights.
You have now successfully configured a TeamSpeak server on Windows.
How to Make a TeamSpeak Server on macOS
It is also feasible to set up a TeamSpeak 3 server on the macOS operating system. Four easy steps can be taken to finish the entire setup:
- Extract the TeamSpeak server after downloading it.
- Accept the TeamSpeak 3 license agreement.
- Start TeamSpeak and get your privilege key.
- Connect using the TeamSpeak 3 client.
Let us get started with the steps.
1. Download and Extract the TeamSpeak Server
Start by downloading the Mac version of the TeamSpeak server setup file. Double-click to extract it once it is finished.
2. Accept the TeamSpeak 3 License Agreement
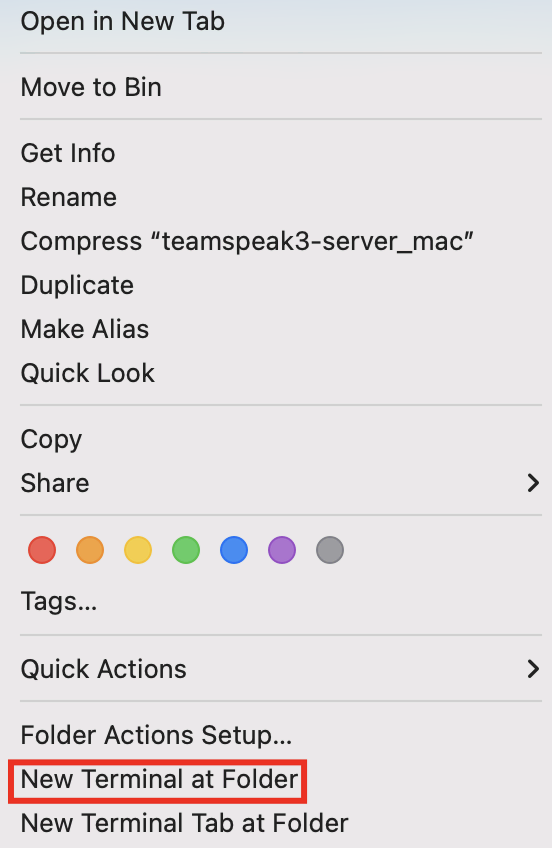
To accept the license agreement, open a terminal and enter the command below:
touch .ts3server_license_accepted
3. Start the TeamSpeak Server and Retrieve Your Privilege Key
Enter the following to launch the server:
./ts3server
Make sure to temporarily override the security settings in System Preferences if you receive a warning about TeamSpeak not being recognized as an identified developer.
Wait a short while for the process to complete. You will be given your privilege key:
4. Connect via the TeamSpeak Client
You can now access the TeamSpeak server. Use the IP address listed in the System Preferences -> Network section to connect. To start the TeamSpeak application, you might need to once again override your security settings.
For server admin rights, do not forget to paste the privilege key.
Congrats! You have successfully set up a TeamSpeak server on the macOS operating system and connected to it.
How to Point a Domain to a TeamSpeak Server
This section will show you how to point your existing domain to your newly created TeamSpeak server.
You will only need to know the domain name instead of the IP address and port combination, which will simplify the process of logging into the server.
Go to your domain registrar account's DNS Zone Editor before moving on to the next step. In this example, we will use a domain name registered through Hostinger. Nonetheless, the steps should be identical when using other registrars.
The procedure can be finished in only two easy steps:
- Create an A record subdomain.
- Establish an SRV record.
Let us begin with a subdomain.
1. Create a Subdomain Using A Records
Go to Domains after logging into hPanel. Choose DNS / Nameservers by clicking on the chosen domain name.
Create a subdomain and point it to the TeamSpeak server next to the Manage DNS records section.
- Type – Select A.
- Name - Provide the name of the subdomain.
- Points to – Enter the IP address of your TeamSpeak 3 server, replacing the sample 185.185.185.185 address.
- TTL - stands for time-to-live, and it specifies how long a record can exist. Leave the default setting.

Click Add Record to complete.
Before moving on to the next step, make sure the A record is pointed appropriately and propagated effectively.
2. Create an SRV record
Add a new SRV record in the same Manage DNS records section.
- Type – select SRV.
- Name - Include the protocol _udp and the service name _ts3, separated by a full stop. The end product should resemble the following:
_ts3. udp.teamspeak.domain.tld - Weight - Set it to 5 for records with the same priority.
- Port – Type your server’s port. Alternately, 9987 is the default TeamSpeak 3 server port.
- Target - Enter the subdomain you created in Step 1 rather than teamspeak.yourdomain.com.
- Priority - Set the value to 0.
- TTL - Use the default setting
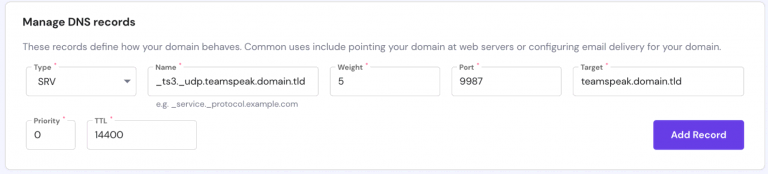
Lastly, select Add Record.
You have successfully used the DNS SRV record to point a domain at the TeamSpeak 3 server. You may easily connect to your server by using a simple subdomain.
FAQs to Make a TeamSpeak Server
What are the system requirements for running a TeamSpeak Server?
The system requirements depend on the number of users and the usage intensity. Generally, a stable internet connection and a reasonably powered server or computer are sufficient.
How do I start the TeamSpeak Server after installation?
Once installed, you can start the TeamSpeak Server by running the server executable file or using the provided command-line commands.
Is there a default login or password for the TeamSpeak Server?
No, there is no default login or password. After the server is started, you need to connect to it using the TeamSpeak client software and obtain the server's authentication key.
How can I manage users and permissions on my TeamSpeak Server?
TeamSpeak provides an administrative interface, either through the TeamSpeak client or web-based server interfaces, which allows you to manage users, create channels, assign permissions, and control server settings.
Can I host a TeamSpeak Server on my local computer?
Yes, you can host a TeamSpeak Server on your local computer as long as you meet the system requirements, have a stable internet connection, and configure any necessary network settings.
How can I make my TeamSpeak Server accessible over the internet?
To make your TeamSpeak Server accessible over the internet, you need to configure port forwarding on your router, allowing incoming connections to your server's port.
Are there any licensing requirements for hosting a TeamSpeak Server?
Yes, commercial use of TeamSpeak requires a valid license. For non-commercial use, you may use the TeamSpeak Server software for free within the specified terms and limitations stated in the TeamSpeak license agreement.
Conclusion
TeamSpeak 3 is a voice chatting tool that is popular among gamers and IT professionals. It offers an easy-to-use interface and enables users to easily set up a server in a matter of minutes.
This tutorial showed you how to set up a TeamSpeak 3 server on three distinct operating systems: Ubuntu, Windows, and macOS.
If you have any suggestions or queries, kindly leave them in the comments section.