Choose a different version or distribution
Introduction
Before we begin talking about how to install NextCloud on Ubuntu 20.04 with Apache (Lamp Stack), let’s briefly understand – What NextCloud is?
Nextcloud is a powerful and secure self-hosted cloud platform that lets you store, sync, and share your files and data with ease. It offers features like file hosting, collaboration tools, and calendar and contact management.
Nextcloud gives you complete control over your data and privacy, as you can host it on your own server or choose a trusted provider. With Nextcloud, you can access your files from anywhere, collaborate with others, and enjoy peace of mind knowing that your data is protected.
In this tutorial, you will install and configure NextCloud on Ubuntu 20.04 with Apache (Lamp Stack).
Advantages of Nextcloud
- Self-hosted cloud: Nextcloud allows you to host your own cloud server, giving you complete control over your data and privacy.
- File sharing: Easily store, sync, and share files with others, whether it's for personal or collaborative purposes.
- Collaboration tools: Work together with colleagues on documents, spreadsheets, and presentations in real-time.
- Calendar and contact management: Keep your schedules and contacts organized and accessible from any device.
- Data security: Nextcloud prioritizes the security of your data, ensuring that it remains protected and encrypted, giving you peace of mind.
Prerequisites to Install NextCloud on Ubuntu 20.04 with Apache (LAMP Stack)
- The major requirement for this tutorial is Lamp Stack since NextCloud is written in PHP.
- You can install NexCloud on your home server or a Virtual Private Server (VPS). You'd also need a domain name in order to enable HTTPS and to encrypt HTTP traffic. You can even register your domain name at NameCheap since they offer low price services along with privacy protection for life.
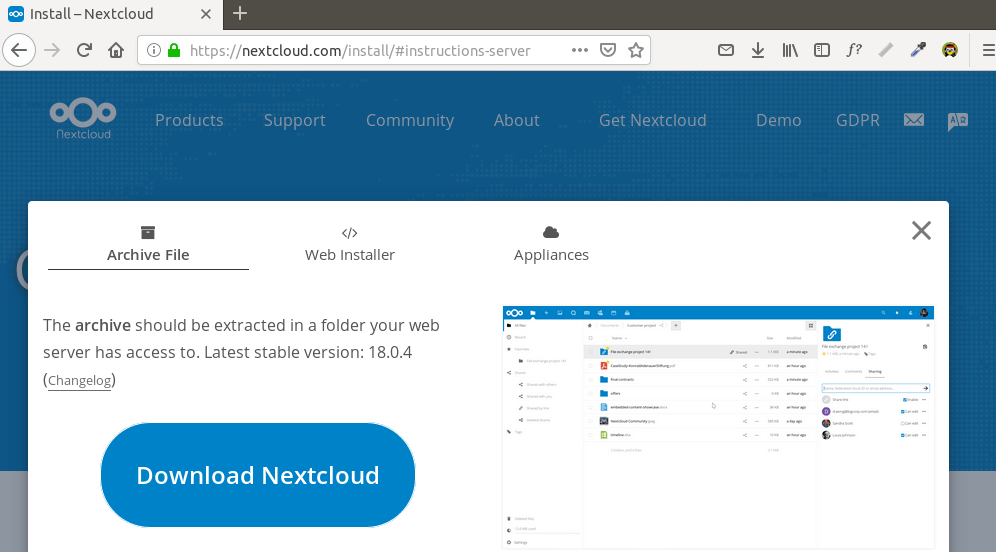
Step 1 - Download NextCloud
1) Start with downloading the latest stable version of NextCloud. You can check for the latest version here. Then click download for server.
2) You can run the following command to download it:
wget https://download.nextcloud.com/server/releases/nextcloud-18.0.4.zip
3) Next, download the archive using unzip.
sudo apt install unzip
sudo unzip nextcloud-18.0.4.zip -d /var/www/
4) -d specifies the directory. The NextCloud files are extracted to /var/www/nextcloud/. Next, change the owner of the directory to www-data in order enable Apache to write to this directory.
sudo chown www-data:www-data /var/www/nextcloud/ -R
Step 2 - Create a Database in MariaDB
1) You then need to log in to MariaDB using the following command. MariaDB uses unix_socket plugin for login authentication, therefore there is no requirement for a root password. All you need to do is prefix the mysql command with sudo.
sudo mysql
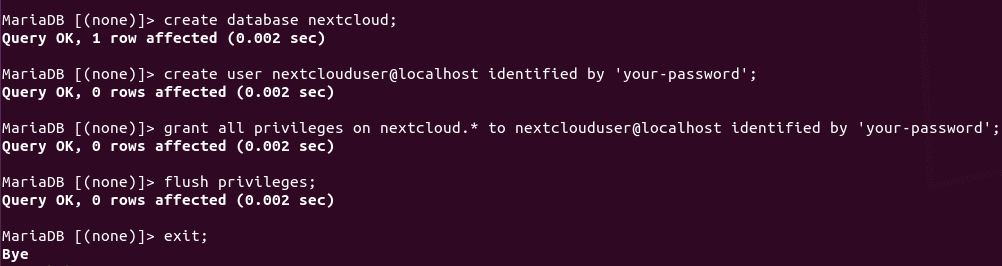
2) Then, create a database. Here, the name used is NextCloud, you can use a name of your choice.
create database nextcloud;
3) Next, create a database user and make sure to replace your-password with your own desired password.
create user nextclouduser@localhost identified by 'your-password';
4) Then, grant all permissions to nextcloud database
grant all privileges on nextcloud.* to nextclouduser@localhost identified by 'your-password';
5) You then need to flush privileges and exit.
flush privileges;
exit;

Step 3 - Create an Apache Virtual Host
1) This is followed by creating a nextcloud.conf file in /etc/apache2/sites-available/ directory, with the following command:
sudo nano /etc/apache2/sites-available/nextcloud.conf
2) Next, copy and paste the following text. Don't forget to replace nextcloud.example.com with your own domain name. Also, do not forget to create a DNS A record for the sub-domain in the DNS-zone editor.
<VirtualHost *:80>
        DocumentRoot "/var/www/nextcloud"
        ServerName nextcloud.example.com

        ErrorLog ${APACHE_LOG_DIR}/nextcloud.error
        CustomLog ${APACHE_LOG_DIR}/nextcloud.access combined

        <Directory /var/www/nextcloud/>
            Require all granted
            Options FollowSymlinks MultiViews
            AllowOverride All

           <IfModule mod_dav.c>
               Dav off
           </IfModule>

        SetEnv HOME /var/www/nextcloud
        SetEnv HTTP_HOME /var/www/nextcloud
        Satisfy Any

       </Directory>

</VirtualHost>
3) You can press Ctrl+O to initiate saving in Nano Text editor, then press Enter to confirm. To exit, press Ctrl+X.
4) You then have to enable the virtual host and disable the default page.
sudo a2ensite nextcloud.conf
sudo a2dissite 000-default
5) Then test Apache configurations:
sudo apache2ctl -t
6) If there are no syntax errors, reload Apache for the changes to be applied.
sudo systemctl restart apache2
Step 4 - Install and Enable PHP Modules
1) You need to run the following command in order to install the modules required and recommended by NextCloud.
sudo apt install php-imagick php7.4-common php7.4-mysql php7.4-fpm php7.4-gd php7.4-json php7.4-curl php7.4-zip php7.4-xml php7.4-mbstring php7.4-bz2 php7.4-intl php7.4-bcmath php7.4-gmp
2) Next, reload Apache in order to use these modules
sudo systemctl reload apache2
Step 5 - Enable HTTPS
1) Now, you can enter the NextCloud installation domain name and access the install wizard.
nextcloud.example.com
2) In case the webpage can't load, try opening port 80 in the firewall:
sudo iptables -I INPUT -p tcp --dport 80 -j ACCEPT
3) Also, open port 443:
sudo iptables -I INPUT -p tcp --dport 443 -j ACCEPT
4) It is recommended that you enable a secure HTTPS connection on NextCloud before entering any sensitive information. You need to install Let's Encrypt for obtaining a free TSL certificate. Install it with Certbot (client) from Ubuntu 20.04 repository.
sudo apt install certbot python3-certbot-apache
5) The Apache plug-in is Python3-certbot-apache. Now, run the command given below to obtain a free TSL
sudo certbot --apache --agree-tos --redirect --staple-ocsp --email [email protected] -d nextcloud.example.com
6) The following are the locations:
- -apache2: Use Apache authenticator and installer
- -agree-tos: Agree to Let’s Encrypt terms of service
- -redirect: Enforce HTTPS by adding 301 redirects.
- -staple-ocsp: Enable OCSP Stapling.
- -email: Email used for registration and recovery contact.
- -d flag is followed by a list of domain names, separated by a comma. You can add up to 100 domain names.
You will then be asked whether you want to receive emails from EFF (Electronic Frontier Foundation). You can select either Y or N. Then, you will get your free TSL and the following message will testify the same.
7) Certbot can't automatically add the HSTS header in the Apache config file for NextCloud. To enable HTTP Strict Transport Security(HSTS), edit the file:
sudo nano /etc/apache2/sites-enabled/nextcloud-le-ssl.conf
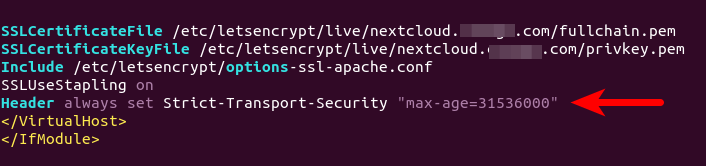
8) You need to add the following line in the SSL server block to enable the HSTS header:
Header always set Strict-Transport-Security "max-age=31536000"
It will look something like this:
9) Save and Close the file. Then, see the Apache configurations:
sudo apache2ctl -t
10) Next, reload Apache for the changes to take effect:
sudo systemctl reload apache2
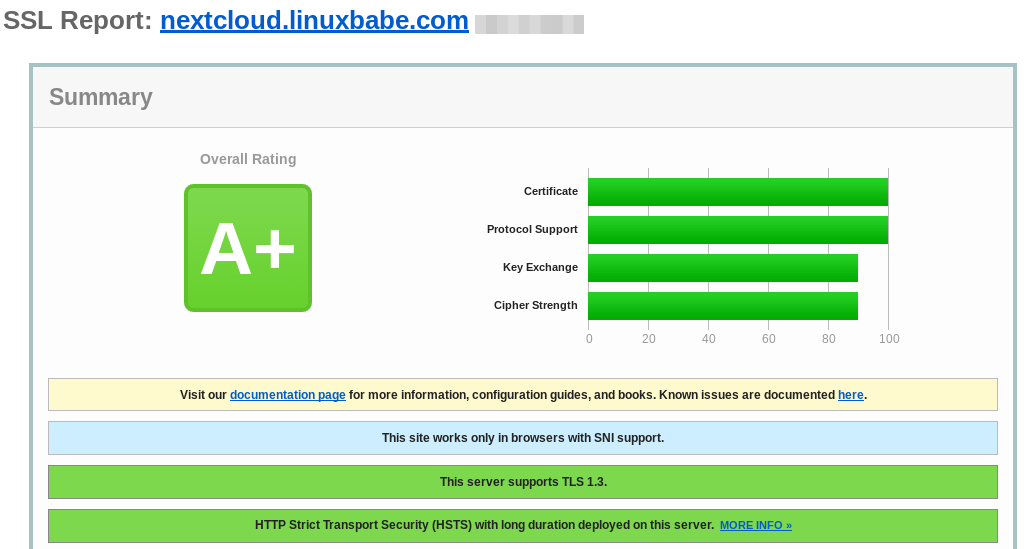
11) This will get you an A+ score on SSL Test
Step 6 - Finish the Web Setup
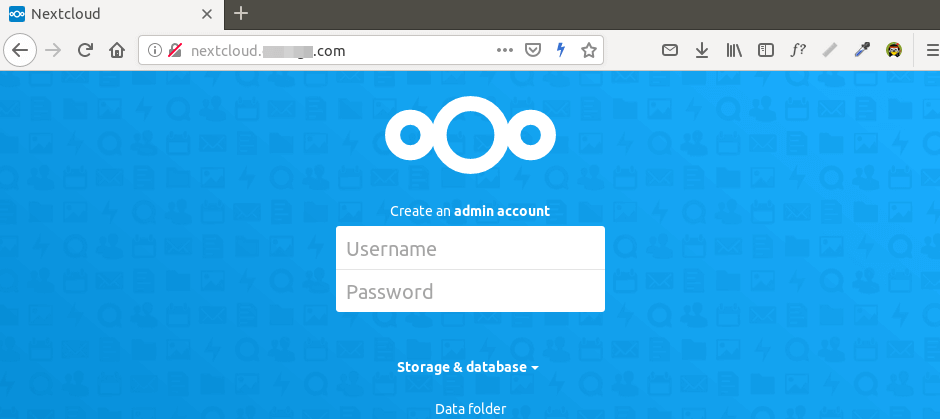
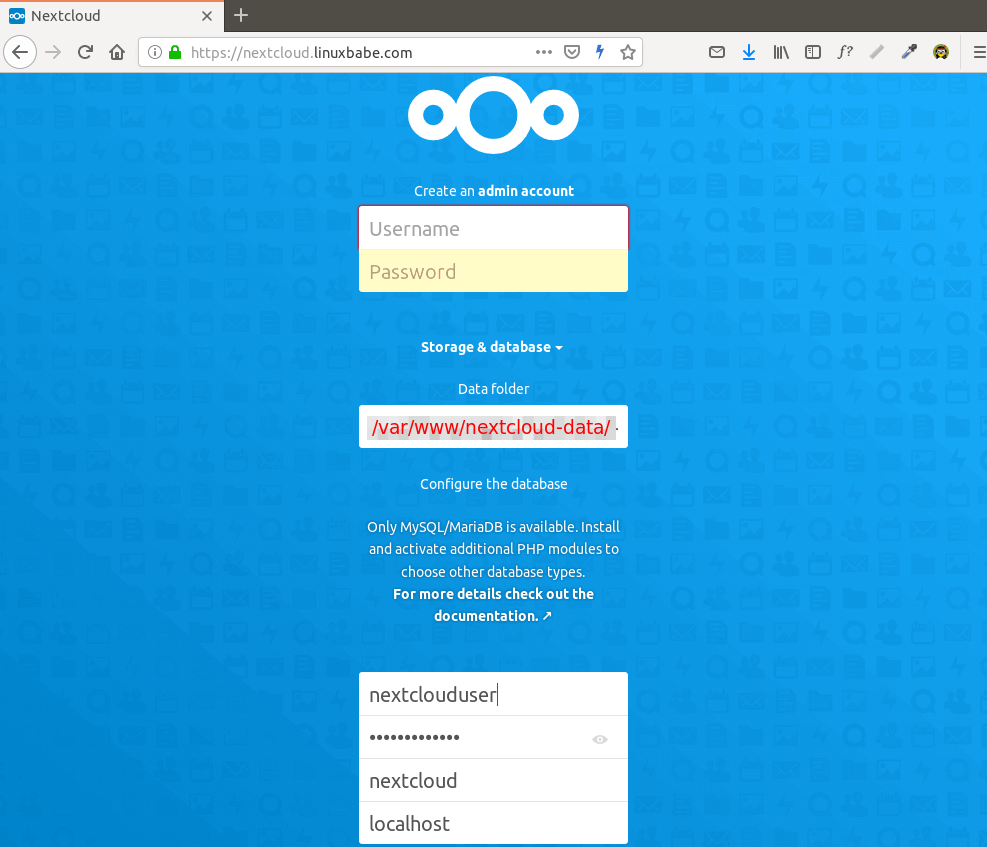
1) You can now access the NextCloud web install wizard using an HTTPS connection.
https://nextcloud.example.com
2) You then have to create an admin account, thus you need to enter the path of the NextCloud folder along with the database details. You can also use the default localhost as a host address or simply enter localhost:3306 (MariaDB listens on port 3306).
3) It would be better to change /var/www/nextcloud/data/ to /var/www/nextcloud-data so that the data is out of NextCloud's Web root directory.
sudo mkdir /var/www/nextcloud-data
4) After this, make sure that Apache user (www-data) has write permission to the directory.
sudo chown www-data:www-data /var/www/nextcloud-data -R
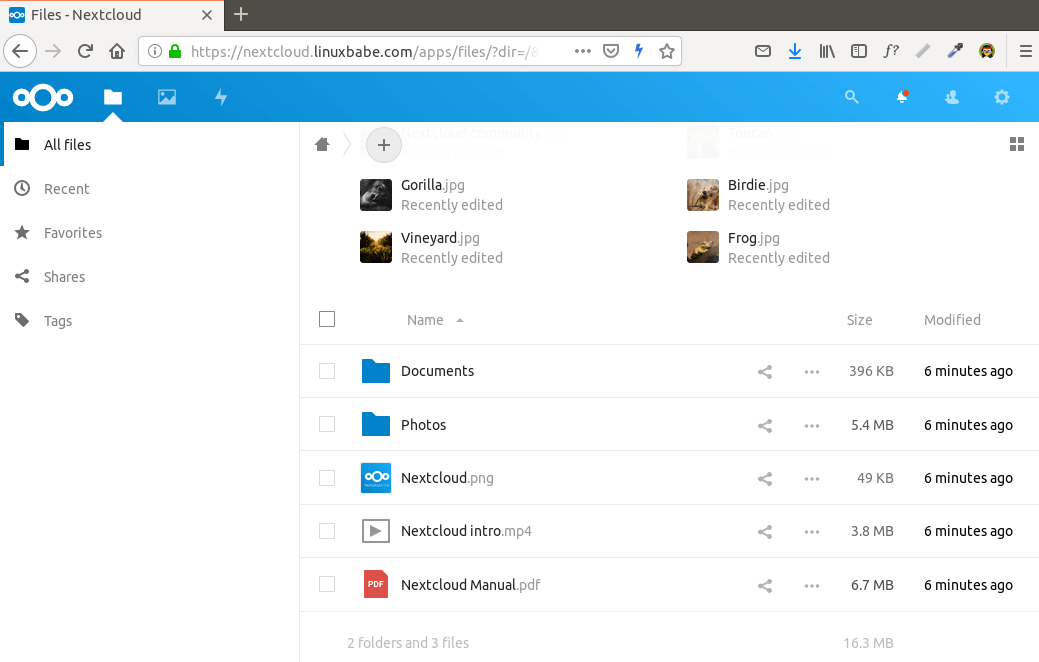
5) Then click the Finish Setup button and you'll be all set to use NextCloud.
How to Set Up NextCloud Email Notification
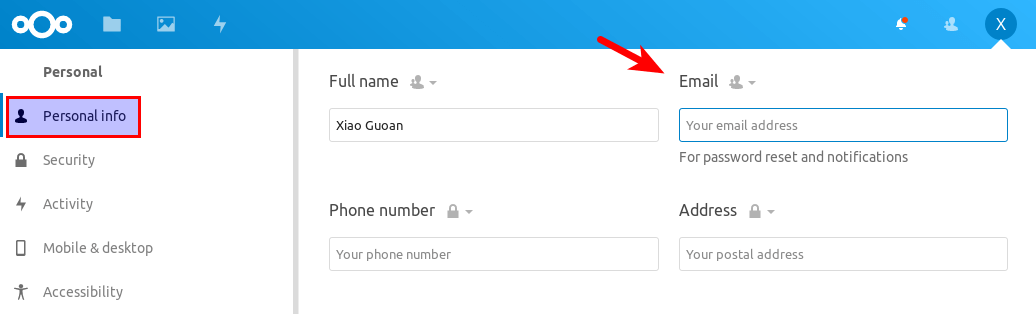
1) Go to Settings -> Personal Info and then add an email address for your account so that you can receive mails for all activities performed through the NextCloud account. This is helpful when multiple users use the same account.
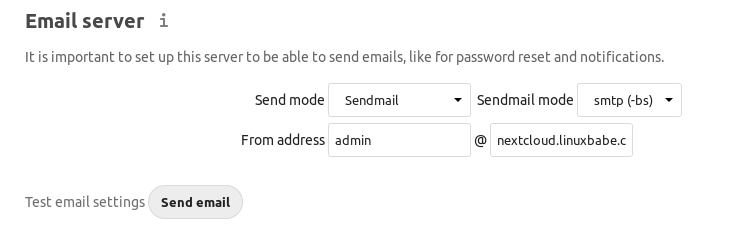
2) Next, go to Settings -> Basic settings, you'll find two options sendmail and smtp. You can choose sendmail if the SMTP server is running.
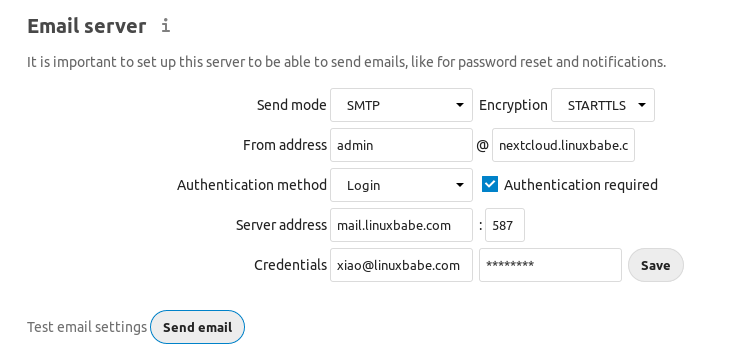
3) In case you want an SMTP server, choose the smtp option
How to Reset NextCloud User Password from Command Line
1) In case you lose your password and didn't set up email delivery in NextCloud, you'll have to run the following command. Replace nextcloud_username with your username:
sudo -u www-data php /var/www/nextcloud/occ user:resetpassword nextcloud_username
How to Move the Data Directory
1) You need to run the following commands to move the NextCloud data directory. Use the cp command to copy the data directory to the new location. For instance, for the mount point of an external hard driver /media/linuxbabe/b43e4eea-9796-4ac6-9c48-2bcaa46353731:
sudo mkdir /media/linuxbabe/b43e4eea-9796-4ac6-9c48-2bcaa46353731/nextcloud-data/
2) Then the original data directory is to be copied onto the data directory. -R flag refers to the copy operation being Recursive
sudo cp /var/www/nextcloud-data/* /media/linuxbabe/b43e4eea-9796-4ac6-9c48-2bcaa46353731/nextcloud-data/ -R
3) Then copy the .ocdata file:
sudo cp /var/www/nextcloud-data/.ocdata /media/linuxbabe/b43e4eea-9796-4ac6-9c48-2bcaa46353731/nextcloud-data/
4) After that, set www-data (Apache user) as the owner:
sudo chown www-data:www-data /media/linuxbabe/b43e4eea-9796-4ac6-9c48-2bcaa46353731/nextcloud-data/ -R
5) You then need to edit the config.php file.
sudo nano /var/www/nextcloud/config/config.php
6) Next, find the line given below and change the value of datadirectory:
'datadirectory' => '/var/www/nextcloud-data',
Save and close the file. Reload NextCloud to apply the changes made.
Step 7 - Increase PHP Memory limit
1) By default, the PHP memory limit is 128MB, while NextCloud recommends 512MB for better functioning. For this, you have to edit the php.ini file:
sudo nano /etc/php/7.4/apache2/php.ini
2) Find the following (line 409)
memory_limit = 128M
3) Change its value, then save and close the file.
memory_limit = 512M
4) Alternatively, you can run the following commands in order to change the value without having to change it manually.
sudo sed -i 's/memory_limit = 128M/memory_limit = 512M/g' /etc/php/7.4/apache2/php.ini
5) Reload Apache for the changes to take effect:
sudo systemctl reload apache2
6) If the server has the /etc/php7.4/fpm/php.ini file, your server also runs PHP FPM. It is recommended to change the memory_limit in PHP-FPM too.
sudo nano /etc/php/7.4/fpm/php.ini
7) Look for the memory_limit parameter and change its value. Save the file, then reload PHP FPM for the changes to take effect.
sudo systemctl reload php7.4-fpm
Step 8 - Configure Redis Cache for NextCloud
1) Now go to settings -> overview page, and you should be seeing the following warning:
No memory cache has been configured. To enhance your performance please configure a memcache if available.2) Run the command given below to enable memory caching by Redis
sudo apt install redis-server
3) Check the version using:
redis-server -v
4) The following will be the output:
Redis server v=5.0.7 sha=00000000:0 malloc=jemalloc-5.2.1 bits=64 build=636cde3b5c7a3923
5) Then, check if the Redis server is running:
systemctl status redis
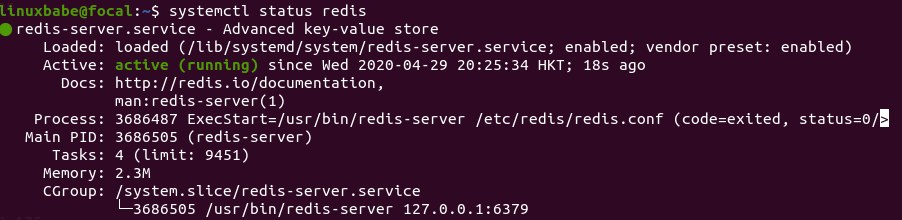
6) The above result substantiates that Redis is running and auto-start is enabled. In case that is not the case, execute the following:
sudo systemctl start redis-server
7) Use the following command to enable auto-start:
sudo systemctl enable redis-server
8) Now, you have to install PHP extensions for Redis interfacing in order to configure it as a cache for NextCloud.
sudo apt install php-redis
9) Check whether the extension is enabled:
php --ri redis

10) Redis extension is enabled and that can be seen in the output. If not, use:
sudo phpenmod redis
11) You may reload Apache if the Redis extension is still not enabled:
sudo systemctl reload apache2
12) Then, edit the NextCloud configuration file:
sudo nano /var/www/nextcloud/config/config.php
13) Then, add the following lines above the ending ); line
'memcache.distributed' => '\OC\Memcache\Redis',
'memcache.local' => '\OC\Memcache\Redis',
'memcache.locking' => '\OC\Memcache\Redis',
'redis' => array(
     'host' => 'localhost',
     'port' => 6379,
     ),
'appstoreenabled' => true,
'appstoreurl' => 'https://apps.nextcloud.com/api/v1',
'appsallowlist' => [],
'apps_paths' => [
        [
                'path'=> '/var/www/nextcloud/apps',
                'url' => '/apps',
                'writable' => true,
        ],
],
'appcodechecker' => true,

14) Save and close, then restart Apache and PHP FPM for the changes to take effect.
sudo systemctl restart apache2 php7.4-fpm
15) If you visit the NextCloud settings -> overview page, you won't find the Warning.
Adding missing indexes
1) You may also see the following message if you visit NextCloud settings -> overview page:
The database is missing some indexes. Due to the fact that adding indexes on big tables could take some time they were not added automatically.
2) You need to manually add those indexes, Change them to the NextCloud webroot directory.
cd /var/www/nextcloud/
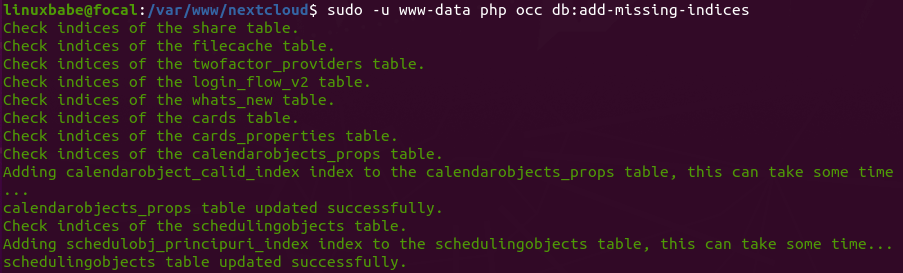
3) Run the following in order to add indices to the NextCloud database:
sudo -u www-data php occ db:add-missing-indices
4) If you refresh the NextCloud Settings -> Overview page, you won't find the Warning.
Conversion to Big Int
1) You may also see the following message if you visit NextCloud settings -> overview page:
Some columns in the database are missing a conversion to big int. Due to the fact that changing column types on big tables could take some time they were not changed automatically.
2) Manually change the column type and change to the NextCloud webroot directory.
cd /var/www/nextcloud/
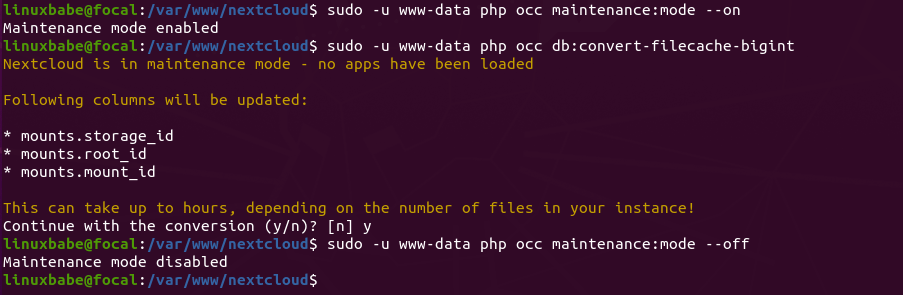
3) Change NextCloud to Maintenance Mode so that other users can't login and make changes.
sudo -u www-data php occ maintenance:mode --on
4) Next, use the following command to change the column type:
sudo -u www-data php occ db:convert-filecache-bigint
5) On completion, switch off the Maintenance Mode.
sudo -u www-data php occ maintenance:mode --off
6) If you refresh the NextCloud Settings -> Overview page, you won't find the Warning.
How to install NextCloud Client on Ubuntu 20.04 Desktop
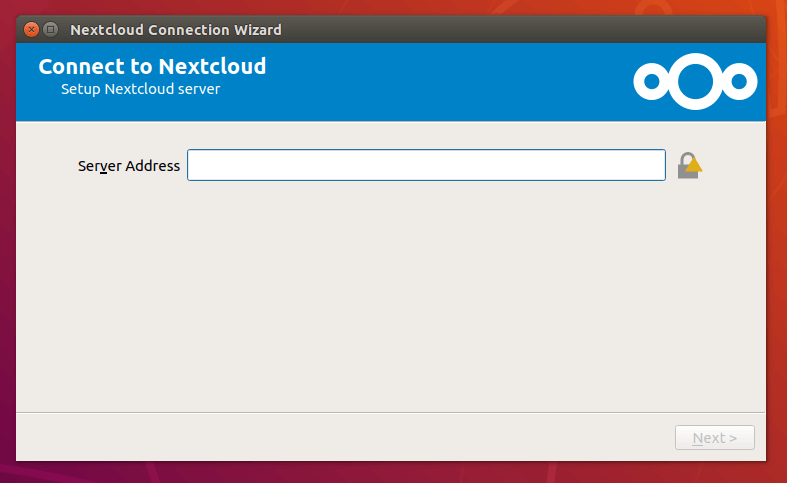
1) You can install NextCloud Client on Ubuntu 20.04 Desktop with the help of the following command:
sudo apt install nextcloud-client
2) NextCloud Client, Ubuntu 20.04, You may find them here.
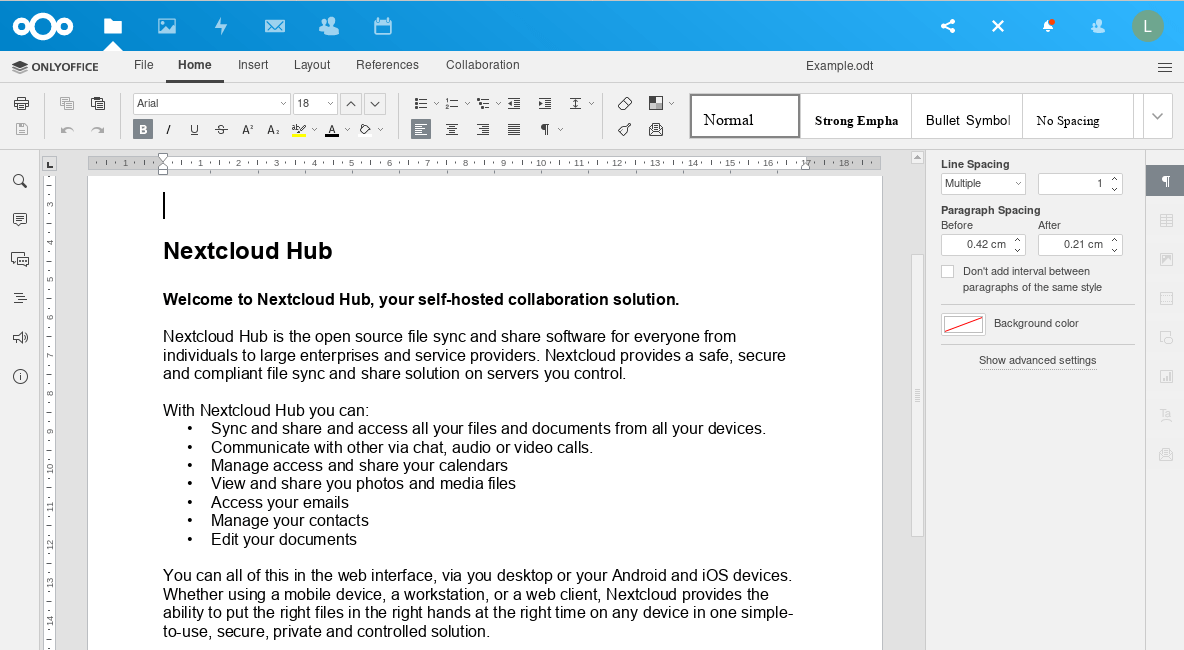
How to Enable OnlyOffice
1) NextCloud comes with support for OnlyOffice, which as the name suggests allows you to edit doc, xls, and ppt files directly from NextCloud. For this you need to go toApps -> Office & Text. Find and enable the community document server app.
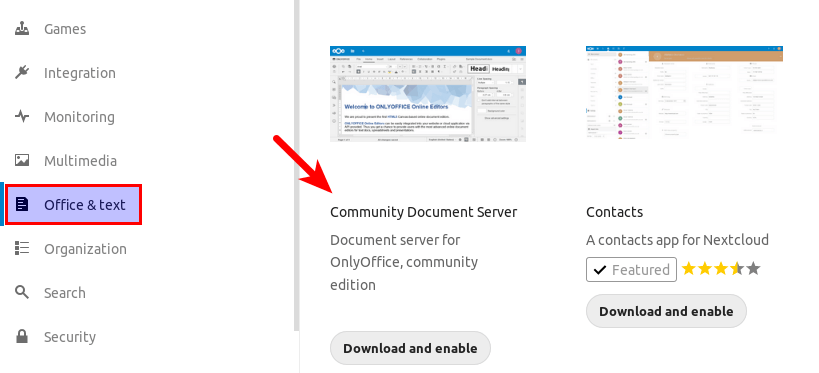
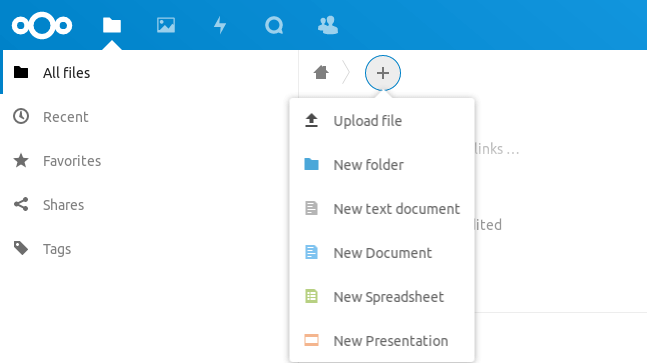
2) When you click (+) in Nextcloud, you'll be able to edit spreadsheets, documents, etc.
Increase Upload File Size Limit
1) You need to change the file size limit if you are using PHP FPM to run PHP scripts. The default size is 2MB. You can change it with the following commands:
sudo nano /etc/php/7.4/fpm/php.ini
2) Find the following (line 846)
upload_max_filesize = 2M
3) Change its value as shown below, then save and close.
upload_max_filesize = 1024M
4) Alternatively, you can run the following commands in order to change the value without having to change it manually.
sudo sed -i 's/upload_max_filesize = 2M/upload_max_filesize = 1024M/g' /etc/php/7.4/fpm/php.ini
5) Restart PHP FPM
sudo systemctl restart php7.4-fpm
Troubleshooting
You can check for certain common errors mentioned below and solve them:
- Apache error log:
/var/log/apache2/error.log - Apache error logs for the Nextcloud virtual host:
/var/log/apache2/nextcloud.error - Nextcloud application log:
/var/www/nextcloud/data/nextcloud.log
FAQs to Install NextCloud on Ubuntu 20.04 with Apache (LAMP Stack)
What is the LAMP stack?
LAMP stack refers to the combination of Linux (operating system), Apache (web server), MySQL (database server), and PHP (programming language) used to host web applications like Nextcloud.
Is it necessary to have a dedicated server to install Nextcloud?
No, you can install Nextcloud on a dedicated server or even on a virtual private server (VPS) that meets the minimum system requirements.
Do I need technical expertise to install Nextcloud?
Basic knowledge of Linux and server administration is helpful, but with proper guidance and following installation instructions, you can successfully install Nextcloud on Ubuntu 20.04.
Can I customize the installation of Nextcloud?
Yes, during the installation process, you can customize various aspects such as the database settings, file storage location, and user authentication method to suit your needs.
How can I access Nextcloud after installation?
After installation, you can access Nextcloud by opening a web browser and entering the server's IP address or domain name, followed by the appropriate Nextcloud URL.
Is it possible to integrate Nextcloud with existing user directories?
Yes, Nextcloud supports integration with external user directories like LDAP or Active Directory, allowing you to leverage existing user accounts and authentication systems.
Is Nextcloud suitable for personal or business use?
Nextcloud is suitable for both personal and business use, offering features like file sharing, collaboration tools, and data security, making it versatile for various scenarios.
Conclusion
We hope this detailed tutorial helped you understand how to install and configure NextCloud on Ubuntu 20.04. To learn more about NextCloud installation on Ubuntu 20.04 server, check out the official NextCloud installation document.
If you have any queries, please leave a comment below and we’ll be happy to respond to them for sure.
