
Choose a different version or distribution
Introduction
Before we begin talking about how to install RabbitMQ on Ubuntu 20.04 | 18.04, let’s briefly understand - What is RabbitMQ?
RabbitMQ is a popular open-source message broker that enables efficient communication between different software applications. It acts as a reliable middleman, allowing systems to exchange data and messages in a distributed and scalable manner. RabbitMQ supports various messaging protocols and patterns, making it versatile and flexible.
It offers high performance, fault tolerance, and robustness, ensuring messages are delivered reliably. With its easy-to-use interface and extensive community support, RabbitMQ simplifies complex messaging tasks and helps businesses build resilient and scalable systems.
In this tutorial, you will install RabbitMQ on Ubuntu 20.04 or 18.04. We will also address some FAQs related to the RabbitMQ installation.
Advantages of RabbitMQ
- Efficient Communication: RabbitMQ enables fast and reliable communication between software applications, facilitating seamless data exchange.
- Scalability: It supports distributed systems, allowing for easy scalability as the number of applications and messages grows.
- Versatility: RabbitMQ supports multiple messaging protocols and patterns, providing flexibility to meet diverse application requirements.
- Reliability: It ensures message delivery with built-in fault tolerance and robustness, minimizing the risk of data loss.
- Easy Integration: With its user-friendly interface and extensive community support, RabbitMQ simplifies integration into existing systems, saving development time and effort.
Prerequisites Install RabbitMQ Server on Ubuntu 20.04 | 18.04
- RabbitMQ requires Erlang so that it can operate smoothly.
Step 1 - Add RabbitMQ Repository to Ubuntu
1) First, you need to import RabbitMQ:
sudo apt update && sudo apt install wget -y
sudo apt install apt-transport-https -y
wget -O- https://dl.bintray.com/rabbitmq/Keys/rabbitmq-release-signing-key.asc | sudo apt-key add -
wget -O- https://www.rabbitmq.com/rabbitmq-release-signing-key.asc | sudo apt-key add -
2) After that, add RabbitMQ repository to Ubuntu 20.04 | 18.04
--- Ubuntu 20.04 ---
echo "deb https://dl.bintray.com/rabbitmq-erlang/debian focal erlang-22.x" | sudo tee /etc/apt/sources.list.d/rabbitmq.list

--- Ubuntu 18.04 ---
echo "deb https://dl.bintray.com/rabbitmq-erlang/debian bionic erlang-22.x" | sudo tee /etc/apt/sources.list.d/rabbitmq.list
Step 2 - Install RabbitMQ Server Ubuntu 20.04 | 18.04
1) You then need to update the apt list and install rabbitmq-server package:
sudo apt update
sudo apt install rabbitmq-server
2) Press Y to initiate installation:
Reading package lists... Done
Building dependency tree
Reading state information... Done
The following additional packages will be installed:
  socat
The following NEW packages will be installed:
  rabbitmq-server soca
3 upgraded, 1 newly installed, 0 to remove and 13 not upgraded.
Need to get 12.3 MB of archives.
After this operation, 10.1 MB of additional disk space will be used.
Do you want to continue? [Y/n] y
3) After that, RabbitMQ starts and is enabled on boot. You can check this by using:
systemctl status rabbitmq-server.service
4) You can confirm if the service is configured to initiate on boot using the following command:
systemctl is-enabled rabbitmq-server.service
5) If it reverts back disabled, enable it with the following command:
sudo systemctl enable rabbitmq-server
Step 3 (Optional) - Enable the RabbitMQ Management Dashboard
1) For easy management, you can even enable the RabbitMQ Management Dashboard.
sudo rabbitmq-plugins enable rabbitmq_management
2) Normally the web server listens on TCP port 15672
ss -tunelp | grep 15672
tcp   LISTEN  0       128                    0.0.0.0:15672        0.0.0.0:*      users:(("beam.smp",pid=9525,fd=71)) uid:111 ino:39934 sk:9 <->
3) Open both ports 5672 and 15672, in case you have a UFW Firewall enabled:
sudo ufw allow proto tcp from any to any port 5672,15672
4) Then, access the port with the help of http://[serverIP|Hostname]:15672
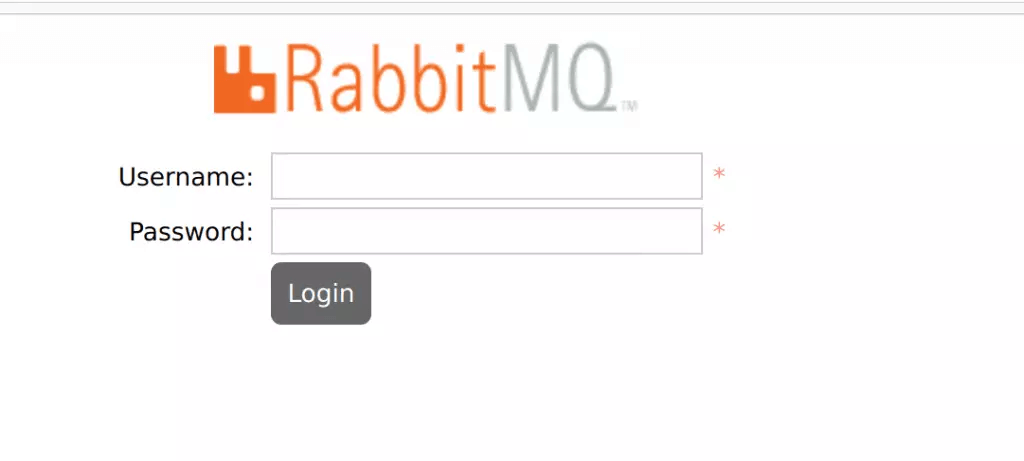
5) The guest can login only from the localhost by default. The password "guest" will grant you access locally.
6) To log into the network, create an admin user. Then login with the username and assigned password.
rabbitmqctl add_user admin StrongPassword
rabbitmqctl set_user_tags admin administrator
Rabbit User Management Commands
1) For deleting a user:
rabbitmqctl delete_user user
2) For changing user password:
rabbitmqctl change_password user strongpassword
3) For Creating new Virtual hosts:
rabbitmqctl add_vhost /my_vhost
4) In order to list available Virtual hosts:
rabbitmqctl list_vhosts
5) For deleting a Virtual Host:
rabbitmqctl delete_vhost /myvhost
6) To grant the user permission to Virtual host:
rabbitmqctl set_permissions -p /myvhost user ".*" ".*" ".*"
7) To list Virtual host permissions:
rabbitmqctl list_permissions -p /myvhost
8) To list user permissions:
rabbitmqctl list_user_permissions user
9) To Delete user permissions:
rabbitmqctl clear_permissions -p /myvhost user
FAQ's to Install RabbitMQ on Ubuntu 20.04 | 18.04
How can I verify if RabbitMQ is running on my Ubuntu system?
You can check the status of the RabbitMQ service by running the command: sudo service rabbitmq-server status. If it's running, you'll see a message indicating the service is active.
How do I enable RabbitMQ management plugin on Ubuntu?
To enable the RabbitMQ management plugin, use the following command: sudo rabbitmq-plugins enable rabbitmq_management. Then, restart the RabbitMQ service: sudo service rabbitmq-server restart.
How can I access the RabbitMQ management interface?
After enabling the management plugin, you can access the RabbitMQ management interface by visiting http://localhost:15672 in your web browser. Log in with the default credentials (guest/guest), and you'll have access to the management dashboard.
How can I change the default RabbitMQ management interface port?
To change the default port (15672), modify the RabbitMQ configuration file located at /etc/rabbitmq/rabbitmq.conf. Look for the line containing listeners.tcp.default and update the port number accordingly. Afterward, restart the RabbitMQ service.
How can I secure my RabbitMQ installation?
RabbitMQ supports various security mechanisms. You can configure SSL/TLS encryption, enable authentication, create user accounts with specific permissions, and configure access control lists (ACLs). Refer to the RabbitMQ documentation for detailed instructions on securing your installation.
How can I create a new user in RabbitMQ?
To create a new user, use the following command: sudo rabbitmqctl add_user <username> <password>. Replace <username> and <password> with your desired values. Then, assign appropriate permissions to the user using the set_permissions command.
How can I start or stop the RabbitMQ service manually?
To start the RabbitMQ service manually, run: sudo service rabbitmq-server start. To stop it, use: sudo service rabbitmq-server stop. You can also use the restart option to restart the service.
How can I uninstall RabbitMQ from Ubuntu?
To uninstall RabbitMQ, run the command: sudo apt remove rabbitmq-server. This will remove the RabbitMQ package from your system. Additionally, you can use sudo apt purge rabbitmq-server to remove any configuration files associated with RabbitMQ.
Conclusion
We hope this detailed tutorial helped you understand how to install RabbitMQ on Ubuntu 20.04 or 18.04 server. To learn more about RabbitMQ installation, check out the official RabbitMQ Installation Document.
If you have any queries, please leave a comment below, and we’ll be happy to respond to them for sure.