
Introduction
Before we begin talking about how to run Apache2 on Ubuntu 20.04 LTS to make it a virtual host, let's briefly understand – What is Apache2?
Apache2 is a popular open-source web server used to host websites. It enables serving content over the internet, handling web traffic efficiently and securely. Developed by the Apache Software Foundation, Apache2's flexibility and reliability make it a top choice for websites worldwide.
It supports various programming languages, such as PHP and Python, allowing the creation of dynamic websites and applications. With its extensive community support and regular updates, Apache2 remains a trusted solution for web hosting needs, offering stability and performance for websites of all sizes.
In this tutorial, you will run Apache2 on Ubuntu 20.04 LTS to make it a virtual host. We will also address a few FAQs on how to run Apache2 on Ubuntu 20.04 LTS to make it a virtual host.
Running Apache2 on Ubuntu 20.04 LTS to make it a virtual host
There are several steps that you need to follow in order to launch your website with help of Apache on an Ubuntu Server. Here is the step-by-step guide that will help you launch your site on an Ubuntu machine with help of apache2.
Make sure you follow the steps thoroughly, line by line.
First, you run the sudo command in the first place to get root access privileges. The command reads as follows:
sudo su

Then you get the system updates by running apt get a command like this:
apt update
You will get a lot of output, but the ending of it is going to look something like this.

Then you need to install apache2 for hosting multiple website on your Ubuntu server.
apt install apache2
Apache was found already installed in my system. After installation of apache2 check the status of apache2 whether it is running or not.
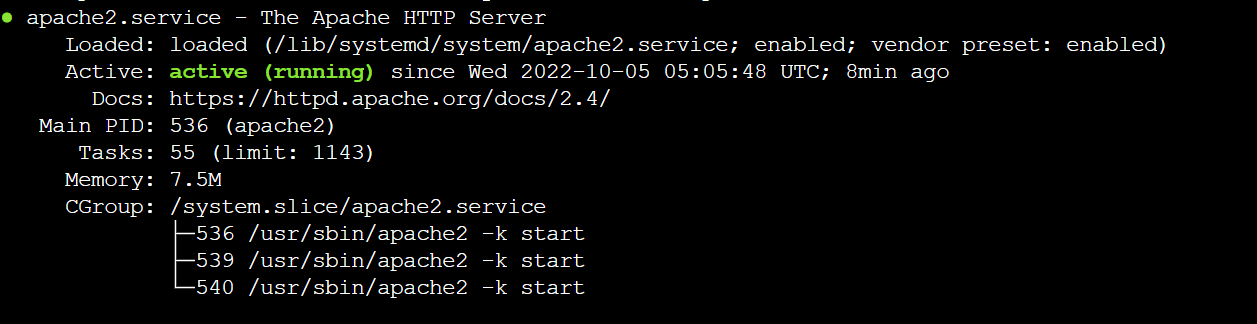
systemctl status apache2
apache2 is found up and running in the system, so the following output can be seen on screen:
Here after we are supposed to create /var/www/ folder in which two subdirectories video_tutorial and text_tutorial are made to host two different websites from those folders.
mkdir -p /var/www/video_tutorial
mkdir -p /var/www/text_tutorial
After creating the folders, permissions are given in /var/www/ level using -R meaning that permissions are supposed to be given recursively this way they get assigned to the subdirectories within the parent directory in this case both video_tutorial, and text_tutorial subdirectories within /var/www/:
chmod -R 755 /var/www
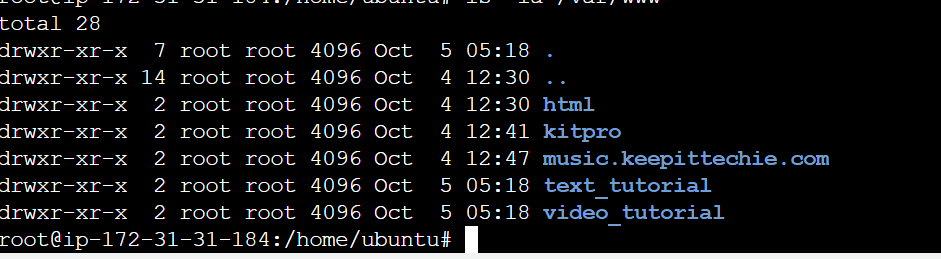
Now to take a look at the new permissions assigned to the directories within /var/www we will run the below command which will give the following output
ls -la /var/www
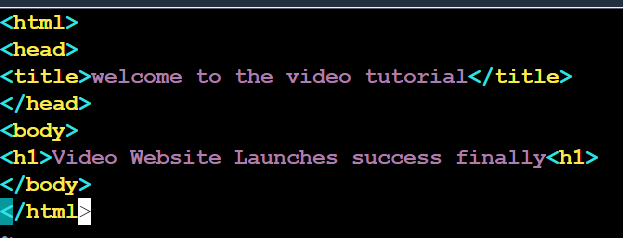
Now that we have checked the permissions assigned to the directories, we will create index.html files respectively by making use of the below command and type the following contents into the HTML files.
vim /var/www/video_tutorial/index.html
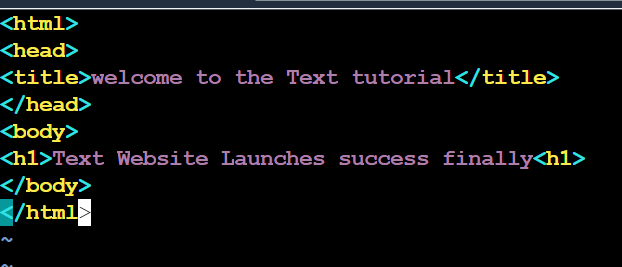
Similarly, for the text tutorial directory. Follow the same step.
vim /var/www/test_tutorial/index.html
Here with the below command we are checking the permission assigned to index.html file in the video_tutorial directory, the same is supposed to be checked for text_tutorial directory.
ls -ls /var/www/video_tutorial
Output
total 4
4 -rw-r--r-- 1 root root 137 Oct  5 05:33 index.html
Now we are going to switch the directory with the cd command and there we will make necessary changes to the config file.
cd /etc/apache2/sites-available/
After reaching in the directory, we can take a look at all the config files present in the directory by ls command as shown below
ls
Below are the config files you will be able to see
Output
000-default.conf  default-ssl.conf
Now we are going to copy the contents of the default config file in the config files we are going to create which are respectively ./video_tutorial.com.conf and ./text_tutorial.com.conf:
sudo cp 000-default.conf ./video_tutorial.com.conf
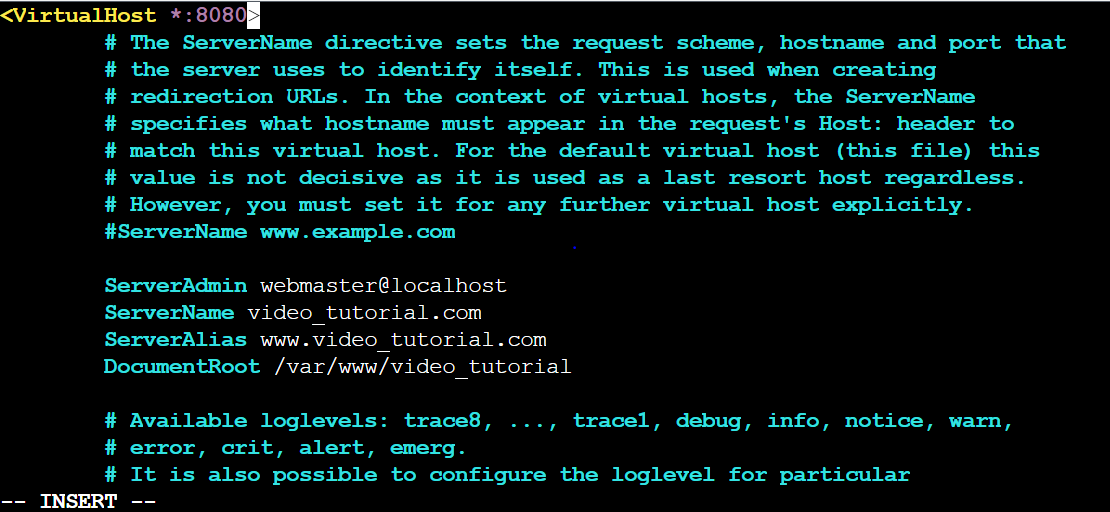
Write the following lines of code in the ./video_tutorial.com.conf with the help of your favorite editor also change the port to 8080 from 80
vim ./video_tutorial.com.conf
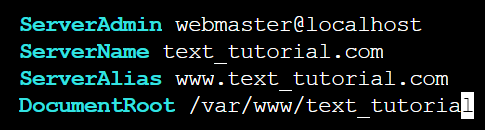
Similarly do for ./text_tutorial.com.conf. Here we are copying the content from the first file and pasting it to ./text_tutorial.com.conf and then we will make necessary changes.
cp ./video_tutorial.com.conf ./text_tutorial.com.conf
vim ./text_tutorial.com.conf
Now that all the .conf files are updated successfully, we are going to enable the site with the .conf file we have created
a2ensite video_tutorial.com.conf
a2ensite text_tutorial.com.conf
the following output can be seen after having run the above commands for both of them separately
Output
Enabling site video_tutorial.com.
To activate the new configuration, you need to run:
  systemctl reload apache2
Earlier we were in this site-available directory. We want to come one step up in order to the upcoming changes:
root@ip-172-31-31-184:/etc/apache2/sites-available#
Hence, we are going to do a cd ..
cd ..
ls -la
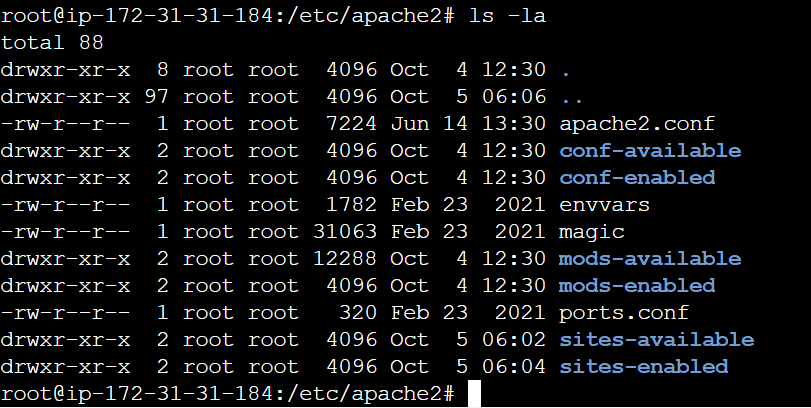
Here we can see many directories, the one for which we are worried are sites-enable. First we are supposed to disable the 000-defualt.conf file which we have copied and enable the .conf file we have created, so following will be the sequence of commands we will follow.
a2dissite 000-default.conf
Output
Site 000-default disabled.
To activate the new configuration, you need to run:
  systemctl reload apache2
Do a systemctl to reload the apache2
systemctl reload apache2
systemctl status apache2
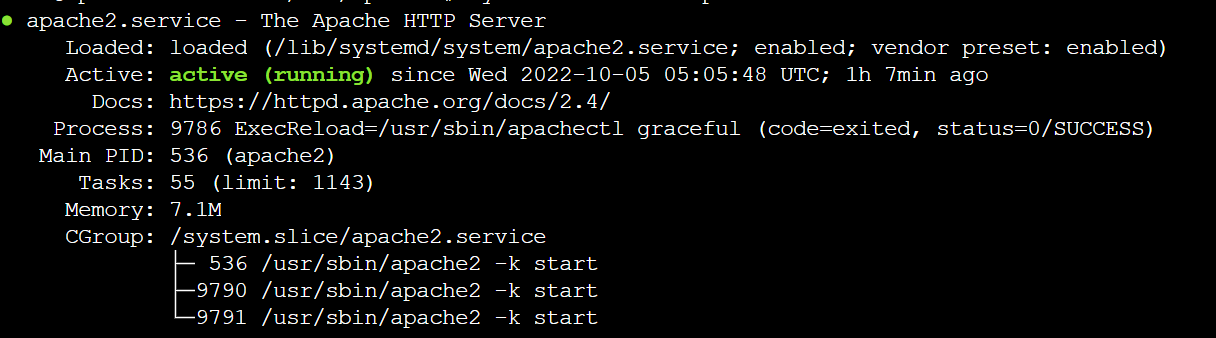
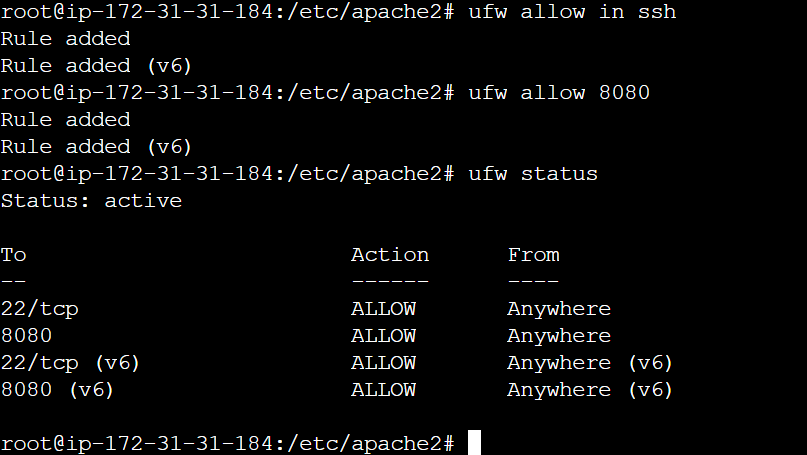
Now when we have made sure that apache2 is running fine we are supposed to give permission to some of the ports that the website is going to use. The ports are port 22 (ssh) and port 8080
ufw status
Output
Status: inactive
ufw enable

ufw allow in ssh
ufw allow 8080
With ufw status we are going to check whether the port we have enabled are up and running or not
ufw status
After having allowed the ports you can easily go to your favorite browser and type www.video_tutorial.com:8080 and hit and enter you will see your website running in the browser.
A similar thing you can do for text_tutorial.com and this leads us to the fact that two or more websites can run simultaneously on the same virtual host.
This brings us to the end of the tutorial.
FAQs to Run Apache2 on Ubuntu 20.04 LTS
What is a virtual host in Apache2?
A virtual host allows hosting multiple domains on a single server, creating isolated environments.
How can I configure a virtual host on Apache2 in Ubuntu 20.04 LTS?
You can configure a virtual host by editing Apache configuration files located in /etc/apache2/sites-available/.
What is the default document root for virtual hosts in Apache2 on Ubuntu 20.04 LTS?
The default document root is /var/www/html/ for setting up virtual hosts in Apache2 on Ubuntu 20.04 LTS.
How do I enable a virtual host after configuration in Apache2 on Ubuntu 20.04 LTS?
After configuring a virtual host, enable it by using the a2ensite command followed by the virtual host configuration filename.
Can I have multiple virtual hosts on a single Apache2 server in Ubuntu 20.04 LTS?
Yes, you can host multiple websites using virtual hosts on a single Apache2 server instance.
Do I need to restart Apache2 after setting up a new virtual host on Ubuntu 20.04 LTS?
Yes, you must restart Apache using the command sudo systemctl restart apache2 to apply changes after configuring a new virtual host.
Can I secure my Apache2 virtual host with SSL on Ubuntu 20.04 LTS?
Yes, you can secure your virtual host with SSL by configuring SSL certificates and enabling HTTPS on your Apache2 server for enhanced security and encryption.
Conclusion
We hope this tutorial helped you understand how to run Apache2 on Ubuntu 20.04 LTS to make it a virtual host.
If you have any queries, please leave a comment below, and we’ll be happy to respond to them for sure.
