
Introduction
Before, we begin talking about how to deploy Mattermost on Ubuntu 20.04. Let's briefly understand - What is Mattermost?
Mattermost is a powerful open-source team collaboration platform designed for businesses to enhance communication and productivity. With its secure and self-hosted nature, it provides a private chat environment for teams to exchange messages, share files, and collaborate effectively.
Mattermost is customizable, making it ideal for diverse industries seeking a flexible and secure solution to streamline teamwork and foster innovation.
In this tutorial, you will deploy Mattermost on Ubuntu 20.04 server. We will also address few FAQs related to Mattermost installation.
Advantages of Mattermost
- Open-source: Mattermost is open-source software, allowing customization and integration to meet specific team needs.
- Secure Communication: With end-to-end encryption and self-hosting options, Mattermost ensures secure and private team communication.
- File Sharing: Easily share files within the platform, enabling efficient collaboration and knowledge exchange.
- Team Productivity: Real-time messaging, task management, and integrations enhance team productivity and efficiency.
- Customizable: Mattermost can be tailored to suit various industries and team structures, fostering seamless collaboration and innovation.
Prerequisites to Deploy Mattermost on Ubuntu 20.04
1) Log in as a user with sudo privileges
2) Have a domain name pointing to your server IP address. Here, we will use example.com
3) Should have Nginx installed
4) Need to have an SSL certificate installed for your domain
Step 1 - Creating MySQL Database
We will be using the MySQL database for Mattermost in this article. If MySQL or MariaDB is not installed in your system then follow this link.
1) Firstly, log in to the MySQL shell using the following command:
sudo mysql -u root
2) Now create a new user and database for your Mattermost installation:
CREATE DATABASE mattermost;
GRANT ALL ON mattermost.* TO mattermost@localhost IDENTIFIED BY 'P4ssvv0rD';
EXIT;
Step 2 - Creating a New System User
1) Now you have to create a user as well as a group that can run on Mattermost instance. Here we are keeping the user's name mattermost.
sudo useradd -U -M -d /opt/mattermost mattermost
Step 3 - Installing Mattermost Server
1) At the time of writing this article, the latest stable version of Mattermost is version 5.39.0. So, download the archive with the below curl command:
sudo curl -L https://releases.mattermost.com/5.39.0/mattermost-5.39.0-linux-amd64.tar.gz -o /tmp/mattermost.tar.gz
2) Once completed, extract the archive and move it to the /opt directory.
sudo tar zxf /tmp/mattermost.tar.gz -C /opt
3) Then, you will need to create the storage directory for files:
sudo mkdir -p /opt/mattermost/data
4) After that, change the directory ownership to mattermost user, by:
sudo chown -R mattermost: /opt/mattermost
5) Now open the /opt/mattermost/config/config.json file and set the database driver to mysql and enter the database information, by:
"SqlSettings": {
    "DriverName": "mysql",
    "DataSource": "mattermost:P4ssvv0rD@tcp(localhost:3306)/mattermost?charset=utf8mb4
6) To make sure that the Mattermost instance will work as expected, you need to test the Mattermost server. Navigate into the /opt/mattermost directory and start the server with the below command:
cd /opt/mattermost
sudo -u mattermost bin/mattermost
7) If everything works, then the server will start, and you will get the following output:
Output

{"level":"info","ts":1532546921.941638,"caller":"app/server.go:115","msg":"Starting Server..."}
{"level":"info","ts":1532546921.9421031,"caller":"app/server.go:154","msg":"Server is listening on [::]:8065"}
{"level":"info","ts":1532546921.9541554,"caller":"app/web_hub.go:75","msg":"Starting 2 websocket hubs"}
8) If you want to proceed to the next steps, then press CTRL+C to stop the server.
Step 4 - Creating a Systemd unit
1) To run the Mattermost instance as a service, create a mattermost.service file in the /etc/systemd/system/ directory.
2) Now, open your text editor and create the below file:
[Unit]
Description=Mattermost
After=network.target
After=mysql.service
Requires=mysql.service

[Service]
Type=notify
ExecStart=/opt/mattermost/bin/mattermost
TimeoutStartSec=3600
Restart=always
RestartSec=10
WorkingDirectory=/opt/mattermost
User=mattermost
Group=mattermost
LimitNOFILE=49152

[Install]
WantedBy=mysql.service
3) Now, you will have to notify systemd that a new unit file has been created and start the service with the following commands:
sudo systemctl daemon-reload
sudo systemctl start mattermost
4) You can now check the service status:
sudo systemctl status mattermost
Output

● mattermost.service - Mattermost
   Loaded: loaded (/etc/systemd/system/mattermost.service; disabled; ven
   Active: active (running) since Wed 2018-07-25 18:39:05 UTC; 41s ago
 Main PID: 3091 (mattermost)
    Tasks: 18 (limit: 507)
   CGroup: /system.slice/mattermost.service
           ├─3091 /opt/mattermost/bin/mattermost
5) You can configure the Mattermost service to automatically start at boot time if no errors are found:
sudo systemctl enable mattermost
Step 5 - Setting up a Reverse Proxy with Nginx
1) If you don't have Nginx installed, then follow this guide.
Open your text editor and create the following file to set up a new server block for the Mattermost instance /etc/nginx/sites-available/mattermost.conf.
proxy_cache_path /var/cache/nginx levels=1:2 keys_zone=mattermost_cache:10m max_size=3g inactive=120m use_temp_path=off;

upstream mattermost_backend {
  server 127.0.0.1:8065;
}

server {
    listen 80;
    server_name example.com www.example.com;

    include snippets/letsencrypt.conf;
    return 301 https://example.com$request_uri;
}

server {
    listen 443 ssl http2;
    server_name www.example.com;

    ssl_certificate /etc/letsencrypt/live/example.com/fullchain.pem;
    ssl_certificate_key /etc/letsencrypt/live/example.com/privkey.pem;
    ssl_trusted_certificate /etc/letsencrypt/live/example.com/chain.pem;
    include snippets/ssl.conf;

    return 301 https://example.com$request_uri;
}

server {
    listen 443 ssl http2;
    server_name example.com;

    ssl_certificate /etc/letsencrypt/live/example.com/fullchain.pem;
    ssl_certificate_key /etc/letsencrypt/live/example.com/privkey.pem;
    ssl_trusted_certificate /etc/letsencrypt/live/example.com/chain.pem;
    include snippets/ssl.conf;

    access_log /var/log/nginx/example.com-access.log;
    error_log /var/log/nginx/example.com-error.log;

    location ~ /api/v[0-9]+/(users/)?websocket$ {
       proxy_set_header Upgrade $http_upgrade;
       proxy_set_header Connection "upgrade";
       client_max_body_size 50M;
       proxy_set_header Host $http_host;
       proxy_set_header X-Real-IP $remote_addr;
       proxy_set_header X-Forwarded-For $proxy_add_x_forwarded_for;
       proxy_set_header X-Forwarded-Proto $scheme;
       proxy_set_header X-Frame-Options SAMEORIGIN;
       proxy_buffers 256 16k;
       proxy_buffer_size 16k;
       proxy_read_timeout 600s;
       proxy_pass http://mattermost_backend;
    }

    location / {
       proxy_http_version 1.1;
       client_max_body_size 50M;
       proxy_set_header Connection "";
       proxy_set_header Host $http_host;
       proxy_set_header X-Real-IP $remote_addr;
       proxy_set_header X-Forwarded-For $proxy_add_x_forwarded_for;
       proxy_set_header X-Forwarded-Proto $scheme;
       proxy_set_header X-Frame-Options SAMEORIGIN;
       proxy_buffers 256 16k;
       proxy_buffer_size 16k;
       proxy_read_timeout 600s;
       proxy_cache mattermost_cache;
       proxy_cache_revalidate on;
       proxy_cache_min_uses 2;
       proxy_cache_use_stale timeout;
       proxy_cache_lock on;
       proxy_pass http://mattermost_backend;
    }
}
If you don't have an SSL certificate, then you can use the below configuration:
proxy_cache_path /var/cache/nginx levels=1:2 keys_zone=mattermost_cache:10m max_size=3g inactive=120m use_temp_path=off;

upstream mattermost_backend {
  server 127.0.0.1:8065;
}


server {
    listen 80;
    server_name example.com;


    access_log /var/log/nginx/example.com-access.log;
    error_log /var/log/nginx/example.com-error.log;

    location ~ /api/v[0-9]+/(users/)?websocket$ {
       proxy_set_header Upgrade $http_upgrade;
       proxy_set_header Connection "upgrade";
       client_max_body_size 50M;
       proxy_set_header Host $http_host;
       proxy_set_header X-Real-IP $remote_addr;
       proxy_set_header X-Forwarded-For $proxy_add_x_forwarded_for;
       proxy_set_header X-Forwarded-Proto $scheme;
       proxy_set_header X-Frame-Options SAMEORIGIN;
       proxy_buffers 256 16k;
       proxy_buffer_size 16k;
       proxy_read_timeout 600s;
       proxy_pass http://mattermost_backend;
    }

    location / {
       proxy_http_version 1.1;
       client_max_body_size 50M;
       proxy_set_header Connection "";
       proxy_set_header Host $http_host;
       proxy_set_header X-Real-IP $remote_addr;
       proxy_set_header X-Forwarded-For $proxy_add_x_forwarded_for;
       proxy_set_header X-Forwarded-Proto $scheme;
       proxy_set_header X-Frame-Options SAMEORIGIN;
       proxy_buffers 256 16k;
       proxy_buffer_size 16k;
       proxy_read_timeout 600s;
       proxy_cache mattermost_cache;
       proxy_cache_revalidate on;
       proxy_cache_min_uses 2;
       proxy_cache_use_stale timeout;
       proxy_cache_lock on;
       proxy_pass http://mattermost_backend;
    }
}
2) Link your configuration to sites-enabled, and unlink the default conf.
sudo ln -s /etc/nginx/sites-available/mattermost.conf /etc/nginx/sites-enabled/

sudo unlink /etc/nginx/sites-enabled/default
3) The changes you made will come into effect after reloading the Nginx service.
sudo systemctl reload nginx
Step 6 - Configuring Mattermost
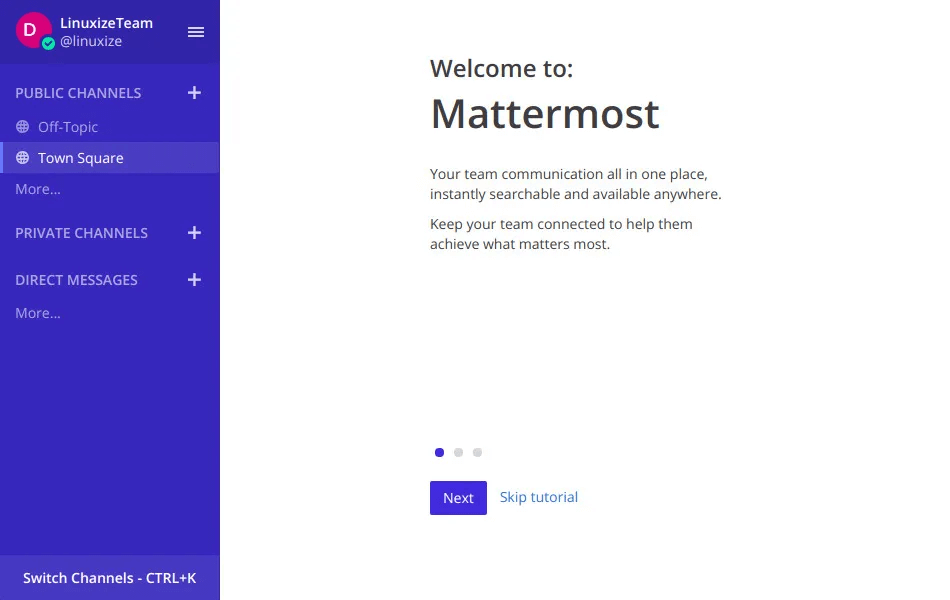
1) Now, visit the domain, and you will be redirected to the signup page.
2) Enter your email, also choose a username and password. Proceed and click on the Create Account button. It will create your new account.
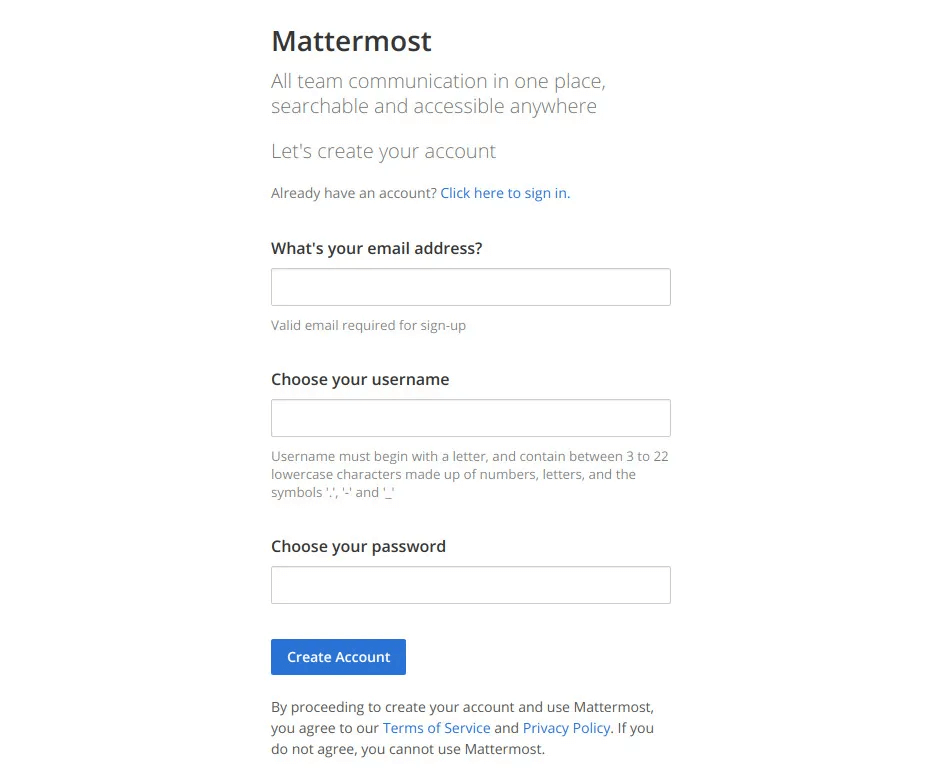
3) The first user in the system will have administrator privileges. Next, the configuration wizard will ask you to create a team.
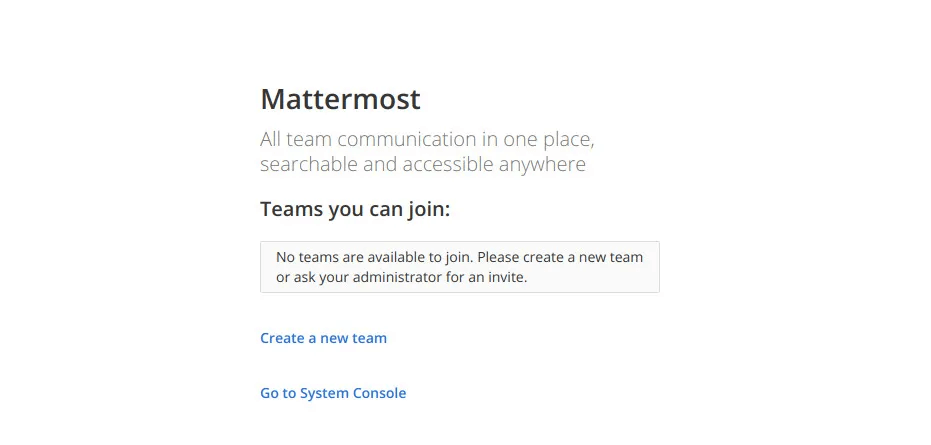
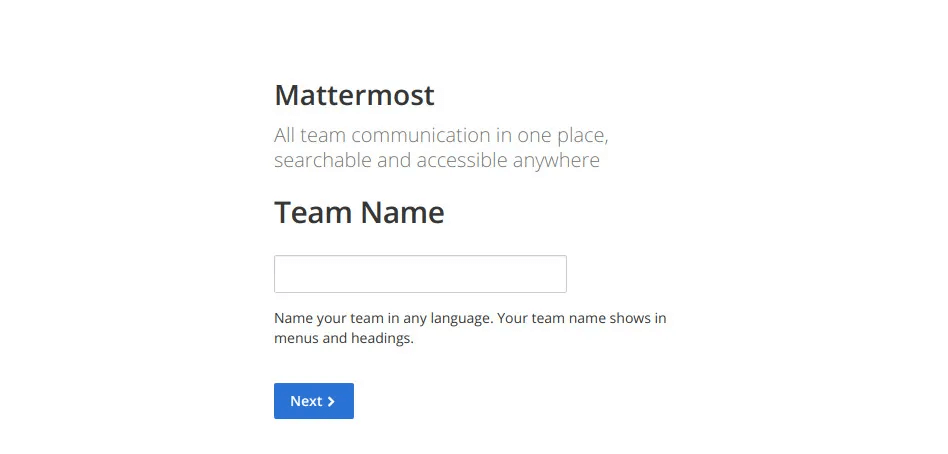
4) Now, click on Create a new team link. Create your first team and click on the Next button.
5) After that, you will get a prompt to choose the web address of your new team:
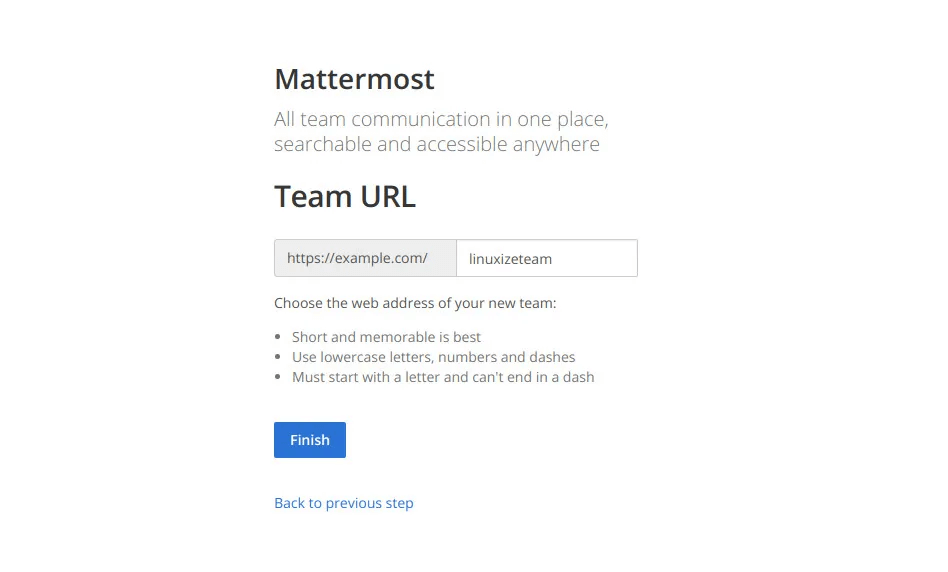
6) Now, click on the Finish button, and you will be redirected to the Mattermost dashboard. Logged in as an administrator.
7) Now, if you want to open the system console then click on your username in the top navigation and then click on System Console link.
8) Set the site URL by going to the Settings General -> Configuration.

9) If you want to enable email notifications then go to Notifications -> EMail and change the Enable Email Notifications value to true and then enter your SMTP parameters.
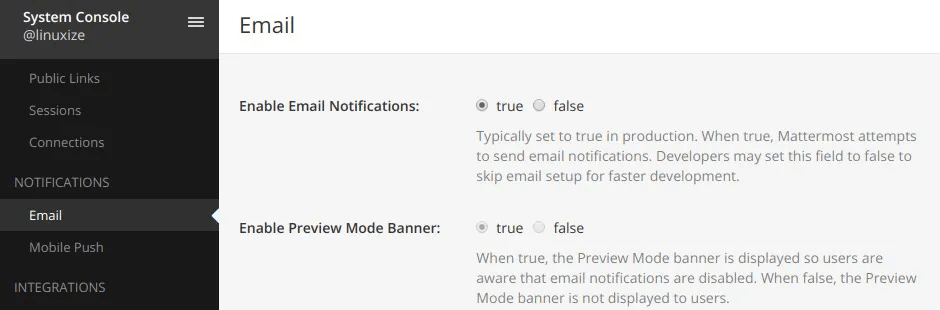
10) You will be able to use any popular transactional email services. Like SendinBlue, SendGrid, the Amazon SES, Mandrill, Mailgun, Mailjet, as well as Postmar or you can set up your own mail server.
11) At last, you will need to restart the Mattermost service for the changes to come into effect:
sudo systemctl restart mattermost
FAQs to Deploy Mattermost on Ubuntu 20.04
Are there any specific system requirements for deploying Mattermost on Ubuntu 20.04?
Yes, Mattermost has certain system requirements, including a minimum amount of RAM, disk space, and specific versions of MySQL or PostgreSQL.
Can I use Docker to deploy Mattermost on Ubuntu 20.04?
Yes, deploying Mattermost using Docker on Ubuntu 20.04 is a common and convenient method. The official Mattermost documentation includes Docker installation instructions.
Is it necessary to have prior experience with Ubuntu or server administration to deploy Mattermost?
While some familiarity with Ubuntu and server administration is helpful, the official installation guide provides clear instructions suitable for both beginners and experienced users.
Can I migrate an existing Mattermost installation to Ubuntu 20.04?
Yes, you can migrate your Mattermost installation to Ubuntu 20.04 by backing up your data, setting up a new instance on Ubuntu 20.04, and restoring the backup.
Is Mattermost on Ubuntu 20.04 scalable for larger teams?
Yes, Mattermost is scalable, and Ubuntu 20.04 provides a stable base for managing growing team sizes and workloads.
How can I ensure the security of my Mattermost deployment on Ubuntu 20.04?
Ensure regular updates of both Ubuntu and Mattermost, use strong passwords, enable HTTPS, and implement firewall rules to bolster security.
Can I integrate other tools with Mattermost on Ubuntu 20.04?
Yes, Mattermost supports a wide range of integrations with popular tools like Jira, GitLab, and more, enhancing collaboration and productivity.
Conclusion
We hope this detailed tutorial helped you to deploy Mattermost on Ubuntu 18.04.
If you have any queries, please leave a comment below, and we’ll be happy to respond to them for sure.