
Choose a different version or distribution
Introduction
Before we begin talking about how to install and secure Grafana on Ubuntu 18.04 OS, let's briefly understand - What is Grafana?
Grafana is a powerful open-source data visualization tool used to monitor and analyze various data sources in real time. It offers a user-friendly interface that allows you to create customizable dashboards and charts, making it easier to understand complex data sets.
Grafana supports integration with numerous data platforms, including databases, cloud services, and monitoring systems. With its intuitive features and extensive plugin ecosystem, Grafana is widely used by businesses and organizations to gain valuable insights and make data-driven decisions.
You'll install and secure Grafana on Ubuntu 18.04 in this tutorial. Also, we will answer some FAQs regarding the Grafana installation.
Advantages of Grafana
- Powerful Data Visualization: Grafana provides stunning visual representations of data, enabling easy analysis and comprehension.
- Real-time Monitoring: With live updates and alerts, Grafana allows you to monitor data in real time, ensuring timely insights and actions.
- Extensive Data Source Integration: Grafana seamlessly connects to various data sources, including databases, cloud platforms, and monitoring systems.
- Customizable Dashboards: Create personalized dashboards and charts with Grafana's flexible interface, tailoring them to your specific needs.
- Large Plugin Ecosystem: Grafana offers a wide range of plugins to extend its functionality, allowing for enhanced data visualization and integration capabilities.
Prerequisites to Install and Secure Grafana on Ubuntu 18.04
- Ubuntu 18.04 64-bit Operating System.
- A registered domain name. We will use
your_domainthroughout this tutorial. Also, you can purchase a domain name on Godaddy. - A non-root user account with sudo privileges.
-
The following DNS records need to be set up for your server:
- An A record with
your_domainwhich will point to your server’s public IP address. - An A record with
www.your_domainwhich will point to your server’s public IP address.
- An A record with
- Nginx setup, including a server block for your domain.
- An Nginx server block that has Let’s Encrypt configured in it.
Step 1 - Install Grafana
In this step, you will install Grafana onto your Ubuntu 18.04 server. Alternatively, you can install Grafana by downloading it directly from its official website or you could also do it by going through an APT repository. Since an APT repository makes it easier to install and manage Grafana’s updates, we’ll use that method in this tutorial.
We advise you to use the official repository of Grafana as the Grafana version available on Ubuntu 180.04 package repository may not be the latest.
Now, download the Grafana GPG key with wget, then pipe the output to apt-key. This will now add the key to your APT installation’s list of trusted keys, which will then allow you to download as well as verify the GPG-signed Grafana package.
wget -q -O - https://packages.grafana.com/gpg.key | sudo apt-key add
In the above command, the option -q helps turn off the status update message for wget, and -O will give the file you downloaded to the terminal. These two options make sure to pipeline only the contents of the downloaded file to apt-key.
Now, add the Grafana repository to your APT sources by typing the following command:
sudo add-apt-repository "deb https://packages.grafana.com/oss/deb stable main"
Then refresh your APT cache to update your package lists using:
sudo apt update
After that, you need to make sure that Grafana gets installed from the Grafana repository.
apt-cache policy grafana
The output of the previous command lets you know the version of Grafana that you are about to install, and where you will get the package from. Make sure that the installation candidate at the top of the list is coming from the official repository if Grafana i.e. https://packages.grafana.com/oss/deb.
Output of apt-cache policy grafana
grafana:
  Installed: (none)
  Candidate: 6.3.3
  Version table:
     6.3.3 500
        500 https://packages.grafana.com/oss/deb stable/main amd64 Packages
...
Now you can go ahead with the installation.
sudo apt install grafana
After the installation is complete, start the Grafana server using systemctl.
sudo systemctl start grafana-server
After that, do verify that Grafana is running by checking the service’s status.
sudo systemctl status grafana-server
You will receive output that'll look like this:
Output of grafana-server status
● grafana-server.service - Grafana instance
   Loaded: loaded (/usr/lib/systemd/system/grafana-server.service; disabled; vendor preset: enabled)
   Active: active (running) since Tue 2019-08-13 08:22:30 UTC; 11s ago
     Docs: http://docs.grafana.org
 Main PID: 13630 (grafana-server)
    Tasks: 7 (limit: 1152)
...
The above output has information about Grafana’s process, such as its status, Main Process Identifier (PID), and more. If you see Active: active (running), it means that the process is running.
After that, you should enable the service to automatically start Grafana on boot.
sudo systemctl enable grafana-server
You will receive the following output:
Output of systemctl enable grafana-server
Synchronizing state of grafana-server.service with SysV service script with /lib/systemd/systemd-sysv-install.
Executing: /lib/systemd/systemd-sysv-install enable grafana-server
Created symlink /etc/systemd/system/multi-user.target.wants/grafana-server.service → /usr/lib/systemd/system/grafana-server.service.
This confirms that the necessary symbolic links now exist by systemd to autostart Grafana.
Voila! Grafana installation is now complete and ready for you to use. Now, you need to secure your connection to Grafana with the help of a reverse proxy and an SSL certificate.
Step 2 - Setting Up the Reverse Proxy
You can secure your data using an SSL certificate. It will encrypt your connection to and from Grafana. You need to reconfigure Nginx as a reverse proxy for Grafana to make use of this connection.
Now, open the Nginx configuration file that you created earlier in the Prerequisites to set up the Nginx Server Block. We'll use nano here, you can use the text editor to make changes.
sudo nano /etc/nginx/sites-available/your_domain
Locate the following block in/etc/nginx/sites-available/your_domain.
...
    location / {
        try_files $uri $uri/ =404;
    }
...
Since you have already configured Nginx to communicate over SSL and as all the web traffic to your server already passes through Nginx, you just need to configure Nginx is a way that it forwards all requests to Grafana. By default, Grafana runs on port 3000.
Now, you need to delete the existing try_files line in this location block and instead, place it with the following proxy_pass option in /etc/nginx/sites-available/your_domain.
...
    location / {
        proxy_pass http://localhost:3000;
    }
...
Now, this will map the proxy to an appropriate port. After this, save and close the file by pressing CTRL+X, followed by Y and then ENTER if you’re using nano.
Now, test the new settings to be assured that everything is configured correctly.
sudo nginx -t
You will receive the following output:
Output

nginx: the configuration file /etc/nginx/nginx.conf syntax is ok
nginx: configuration file /etc/nginx/nginx.conf test is successful
After that, you can activate the changes by reloading Nginx.
sudo systemctl reload nginx
You will now be able to access the default Grafana login screen by directing your web browser to https://your_domain. In case you’re facing issues in reaching to Grafana, make sure the firewall is set to allow traffic on port 443 and then re-trace the previous instructions.
Since the connection to Grafana is encrypted, you can now implement additional security measures, beginning by changing the default administrative credential of Grafana.
Step 3 - Updating Credentials
It is very important to change your login information at the earliest as all Grafana Installations use the same administrative credentials by default.
Visit https://your_domain via your web browser. It will lead you to the default browser screen of Grafana, where it will ask you for your email or username, password, a Login Button, and link to Forgot Password for recovery in case you forgot your password.
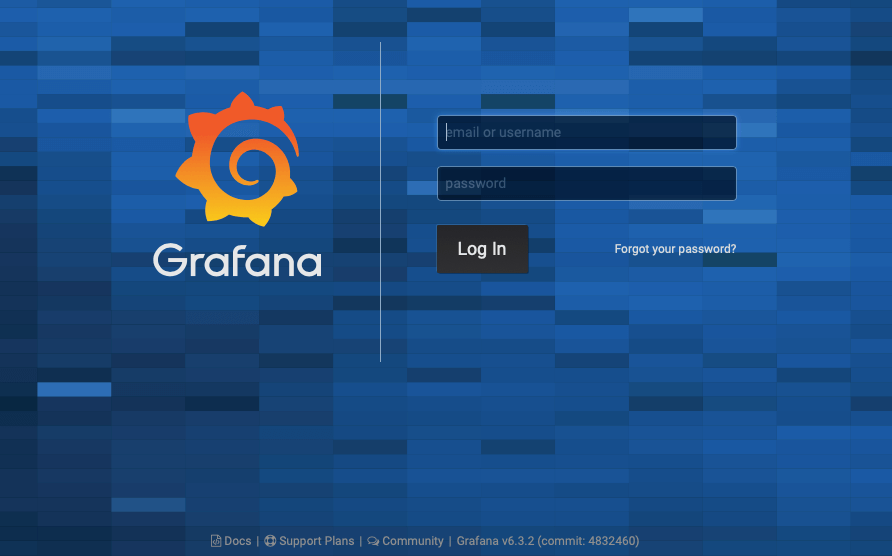
Enter admin into both the User and Password fields after which proceed to click on the Login button.
Now it will take you to another form to change the default password for more security.
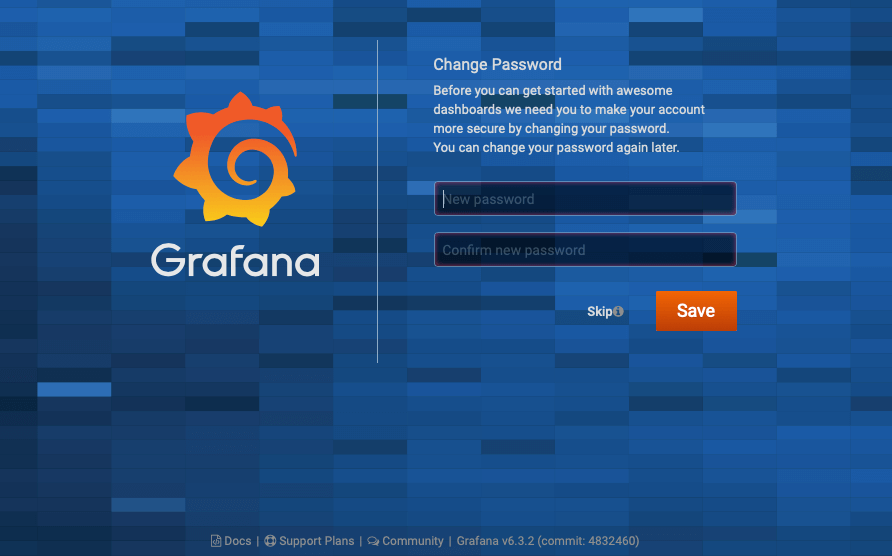
Now enter the password that you’d like to use, into the New password and Confirm new password fields.
From here on, you can click Save in order to save the new information or simply press Skip to skip this step. Changing the default password is mandatory. If you skip, it will prompt you to change your password next time you login.
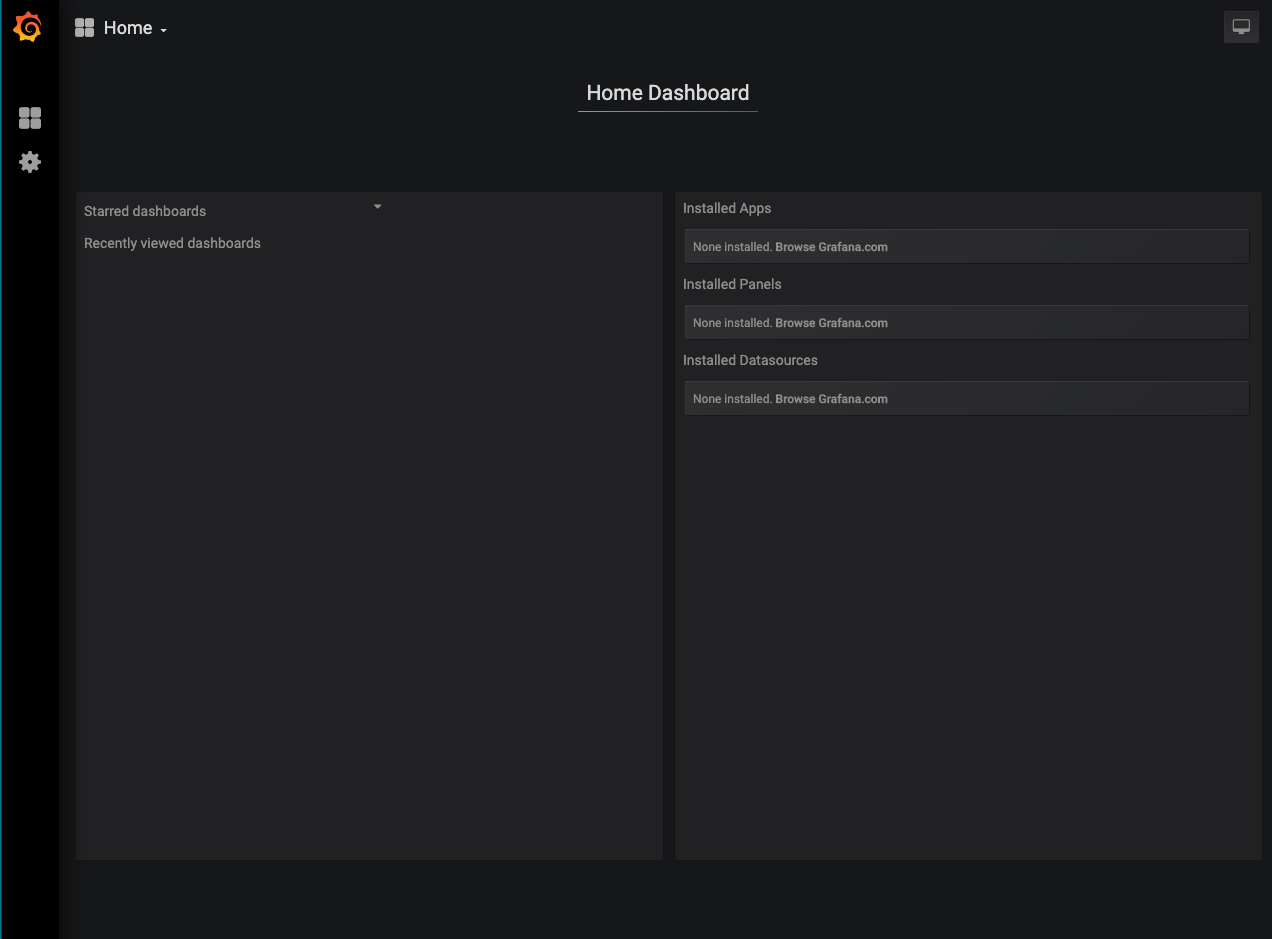
To improve the security of your Grafana setup, click Save. You’ll return to the Home Dashboard page.
Your account is now safe. Now, nobody can create a new account without your permission.
Step 4 - Disable the Grafana Registrations and Anonymous Access
Grafana allows visitors to create user accounts for themselves and preview dashboards without registering as a new user. When Grafana cannot be accessed through the internet or when it’s working with data that is publicly available, such as service statuses, you might want to allow these features. However, when you're using Grafana online while working with sensitive data, anonymous access can lead to a security problem. To fix this problem, ensure you make changes to your Grafana configuration.
Begin by opening Grafana’s main configuration file for editing by typing:
sudo nano /etc/grafana/grafana.ini
After that, find allow_sign_up directive under the [users] heading in /etc/grafana/grafana.ini
...
[users]
# disable user signup / registration
;allow_sign_up = true
...
To add a Sign-Up button to the login screen, enable this directive with true. Now anyone can register themselves and access Grafana which is a security threat while running in production.
Adding false will remove the Sign-Up button which leads to the strong security and privacy of Grafana.
After that, uncomment this directive by removing the ; at the beginning of the line and then setting the option to false:
...
[users]
# disable user signup / registration
allow_sign_up = false
...
As a next step, locate the following enabled directive under the [auth.anonymous] heading.
...
[auth.anonymous]
# enable anonymous access
;enabled = false
...
By setting enabled to true it gives non-registered users access to your dashboards, and by setting this option to false it limits dashboard access to registered users only.
After that, you need to uncomment this by removing the ; at the beginning of the line and then set the option to false.
...
[auth.anonymous]
enabled = false
...
Now, save the file and exit your text editor.
In order to activate the changes, restart Grafana:
sudo systemctl restart grafana-server
To verify that everything is working, do so by checking Grafana’s service status:
sudo systemctl status grafana-server
Like earlier, the output will tell us that Grafana is active (running).
Now, point your web browser to https://your_domain. To return to the Sign-Up screen, bring your cursor to the avatar in the lower left part of the screen and click on the Sign-out option that shows up.
After you have signed out, verify that there is no Sign-Up button and that it doesn't allow you to sign in without entering login credentials.
Now we are at a point where Grafana is fully configured and is ready for use. For your organization, you can make the login process simpler by authenticating via GitHub.
Step 5 - Install plugins (Optional)
In this step, you will install Grafana plugins. There is three types of Grafana plugins you need to know:
- Panel plugins - Using this you can add new data visualizations to Grafana.
- Data Source - These are plugins for Grafana Data Source.
- App - These are bundles with a new UI of panels, data source and, dashboard.
If you want to do plugin installation, Grafana provides a command-line tool known as grafana-cli. Run it here to see the instruction:
grafana-cli
To list all available plugins in the repository, use the following command.
grafana-cli plugins list-remote
In order to install a plugin, use the 'plugins install' option.
grafana-cli plugins install grafana-clock-panel
After the installation is complete, restart the Grafana service.
systemctl restart grafana-server
List all the installed plugins on your system, using the following command.
grafana-cli plugins ls
You can also remove an unwanted plugin, using the 'plugins remove' option as below.
grafana-cli plugins remove grafana-clock-panel
FAQs to Install and Secure Grafana on Ubuntu 18.04
How can I access the Grafana web interface after installation?
Grafana listens on port 3000 by default. You can access the web interface by opening a web browser and navigating to http://your-server-ip:3000.
Can I use a custom domain name instead of an IP address to access Grafana?
Yes, you can configure a custom domain name by setting up DNS records and configuring your reverse proxy server to handle the domain name resolution.
How do I secure access to Grafana with user authentication?
Grafana supports various authentication methods such as LDAP, OAuth, and basic authentication. You can configure user authentication in the Grafana configuration file.
How do I add data sources to Grafana?
In the Grafana web interface, go to Configuration > Data Sources and click on Add data source. From there, you can select the type of data source you want to add and configure the necessary settings.
How do I restrict access to Grafana from specific IP addresses?
You can restrict access to Grafana by configuring firewall rules to allow connections only from specific IP addresses or IP ranges. This can be done using the built-in firewall tool (ufw) or any other firewall management tool.
Can I enable two-factor authentication (2FA) in Grafana?
Yes, Grafana supports two-factor authentication. You can enable it by installing and configuring a plugin like grafana-totp-2fa or grafana-auth0.
Can I use a proxy server like Nginx to secure Grafana?
Yes, using a reverse proxy server like Nginx is a common method to secure Grafana. It allows you to handle SSL/TLS termination, load balancing, and additional security configurations. You can configure Nginx as a reverse proxy for Grafana by following tutorials or guides specific to Nginx and Grafana.
Conclusion
We hope this tutorial has helped you understand how to install and secure Grafana on Ubuntu 18.04.
If you have any further queries or concerns, do leave us a comment down below and we'll make sure we respond without fail.

