Introduction
Before we begin talking about how to install CLion on Ubuntu 22.04, let's briefly understand – What is CLion?
CLion is an advanced integrated development environment (IDE) designed specifically for C and C++ programmers. Developed by JetBrains, it provides a powerful environment with intelligent code analysis, debugging tools, and numerous productivity features.
With CLion, developers can write, debug, and refactor code efficiently, while benefiting from seamless integration with popular version control systems. Whether you're a beginner or an expert, CLion simplifies C/C++ development and enhances your productivity.
In this tutorial, you will install CLion on Ubuntu 22.04. We will also address a few FAQs on how to install CLion on Ubuntu 22.04.
Advantages of CLion
- Intelligent Code Analysis: CLion's advanced code analysis helps identify errors, suggest improvements, and enhance code quality.
- Powerful Debugging Tools: CLion offers a rich set of debugging features for efficient bug fixing and code inspection.
- Seamless Version Control Integration: CLion seamlessly integrates with popular version control systems, simplifying collaboration and code management.
- Productivity Features: CLion provides time-saving features like smart code completion, quick navigation tools, and refactoring options.
- Customizability and Extensibility: CLion can be customized to fit individual preferences, and its functionality can be extended with plugins for enhanced development capabilities.
Section 1: Install CLion on Ubuntu 22.04 via APT PPA
An essential component of Ubuntu and other Debian-based distributions is the package management system known as the Advanced Packaging Tool, or APT. We'll use APT's strength to facilitate the installation of CLion.
Step 1: Refreshing the Ubuntu System Before CLion Installation
It's crucial to update the local package database on your computer before installing any new software. As a result, Ubuntu's repositories always contain the most recent versions of the packages. The following command will help us achieve this:
sudo apt update
Upgrading the system is advised as soon as the package database is current. By installing the most recent versions of all installed software packages, upgrading creates the safest and steadiest environment possible. The command to carry out the upgrade is as follows:
sudo apt upgrade
Step 2: Installing Necessary Packages
We have a few more installation steps left, which include adding a few essential packages to our system. The dirmngr, ca-certificates, software-properties-common, curl, apt-transport-https, and lsb-release are a few of these. Secure file transfers, repository management, and other crucial package handling tasks are made easier by these packages:
sudo apt install dirmngr ca-certificates software-properties-common apt-transport-https curl lsb-release -y
Step 3: Add JetBrains PPA by Jonas Groeger on Ubuntu for CLion
We will now include the JetBrains Personal Package Archive (PPA) in the list of repositories on the system. As a result, APT can now directly retrieve CLion from JetBrains' PPA.
We'll import the GPG key for the JetBrains repository to guarantee the legitimacy of the packages from this repository. An implementation of the OpenPGP standard, the GNU Privacy Guard (GPG), confirms that the packages in the repository are actually from JetBrains:
curl -s https://s3.eu-central-1.amazonaws.com/jetbrains-ppa/0xA6E8698A.pub.asc | gpg --dearmor | sudo tee /usr/share/keyrings/jetbrains-ppa-archive-keyring.gpg > /dev/null
Finally, import the APT repository for CLion and the other JetBrains products by running the following command:
echo "deb [signed-by=/usr/share/keyrings/jetbrains-ppa-archive-keyring.gpg] http://jetbrains-ppa.s3-website.eu-central-1.amazonaws.com any main" | sudo tee /etc/apt/sources.list.d/jetbrains-ppa.list > /dev/null
Step 4: Updating the APT Packages Index After CLion PPA Import on Ubuntu
Upon adding a new repository to the system, the APT package database needs to be updated. By taking this step, your system can get the most recent package details from the recently added JetBrains PPA:
sudo apt update
Step 5: Install CLion on Ubuntu 22.04 via APT Command
We now arrive at the actual CLion installation. This indicates that your system is prepared to download and install the CLion package from the JetBrains PPA. The following APT install command can be used to start this process:
sudo apt install clion
The installation of CLion will be completed by APT after the aforementioned command is executed. It will also take care of any necessary dependencies and install them on your system.
Section 2: Install CLion on Ubuntu 22.04 via Snap
Canonical, the company that makes Ubuntu, created the package management and software deployment system known as Snap. It is intended to make maintenance tasks more efficient and software installation simpler for all Linux distributions. We will go into more detail about installing CLion with the Snap package manager in this section.
Step 1: Verifying Snap’s Presence on Your Ubuntu System
Because Snap is a Canonical creation, Ubuntu distributions ship with it pre-installed. On the other hand, it might not come with it or might have been taken out by hand. If you ever find yourself in a situation like this, you can use the following command to bring Snap back into your system:
sudo apt install snapd -y
Using this command, you can install the Snap Daemon (snapd), a background service that manages and maintains Snap packages on your system.
Step 2: Activating Classic Snap Support for CLion on Ubuntu
Certain Snap packages require "classic" confinement, which is a feature that allows the Snap package to use your system's resources in a manner similar to that of traditional software. In order to guarantee widespread compatibility and seamless functioning of these packages, we establish a symbolic link (symlink) using the subsequent command:
sudo ln -s /var/lib/snapd/snap /snap
By running the aforementioned command, your system will create a symlink connecting /var/lib/snapd/snap and /snap, thereby enabling traditional Snap support.
Step 3: Installation of the Core Snap for CLion on Ubuntu
It is essential to install the "core" Snap before continuing with the CLion installation. With the libraries and services that other Snaps require, the core of Snap serves as a base for them. By taking this proactive measure, possible disputes or problems that might arise later can be avoided. To install the core Snap, run the following command:
sudo snap install core
Step 4: Install CLion on Ubuntu 22.04 via Snap Command
Now that all requirements have been satisfied, we can install CLion. The following command is executed to accomplish this:
sudo snap install clion --classic
The above command uses the following commands: sudo is used to elevate privileges, snap to launch the Snap package manager, install to install a package, and clion to install the package we want to install. With the --classic option, CLion can use the resources of your system in a way that is similar to an application that is packaged traditionally.
Section 3: Install CLion on Ubuntu 22.04 via Flatpak and Flathub
Though fundamentally similar to Snap, Flatpak is a general-purpose package management system created exclusively for Linux. Sandboxing applications allows you to separate them from the rest of your system, which is one of its distinguishing features. By reducing the likelihood of software conflicts, this feature not only improves your system's general security. We'll walk through installing CLion step-by-step in this section using Flatpak and Flathub.
Step 1: Enabling the Flathub Repository for CLion on Ubuntu
Activating the Flathub repository is the first step towards installing CLion using Flatpak. A reputable distribution platform called Flathub is used to host Flatpak apps. Comparable to an internet marketplace, it offers access to a large selection of applications that are prepared for installation.
Enter the following command in your terminal to add the Flathub repository to your system:
sudo flatpak remote-add --if-not-exists flathub https://flathub.org/repo/flathub.flatpakrepo
By integrating the Flathub repository with your Flatpak configuration, you can access a wide range of apps, including CLion, with the command mentioned above.
Step 2: Install CLion on Ubuntu 22.04 via Flatpak Command
Now that the Flathub repository has been successfully integrated, we turn our attention to installing CLion. To accomplish this, run the command "flatpak install." The following is the precise command to install CLion:
flatpak install flathub com.jetbrains.CLion -y
When you run this command, CLion is installed from the Flathub repository, giving you access to the most recent stable version of the program.
Section 4: Initiating CLion on Ubuntu 22.04
The next step is to learn how to launch CLion on your Ubuntu system after it has been successfully installed. The graphical user interface (GUI) and the command-line interface (CLI) are the two main ways to start CLion. Every approach caters to distinct user inclinations and provides adaptability in interacting with the system. This section explains how to use both of these methods to start CLion.
CLI Launch Method for CLion on Ubuntu
The command-line interface is essential in the Linux world, and opening programs like CLion is no exception. The following subsections explain how to launch CLion with different command sets, depending on how you installed it: APT, Snap, and Flatpak.
Initiating CLion using the APT Command
Open your terminal and enter the following commands to start CLion with the APT command:
clion
When you run this command successfully, the Integrated Development Environment (IDE) launches and gets ready to help you with your coding projects.
Initiating CLion using the Snap Command
Launching CLion will require the use of the following command if you installed it using Snap:
snap run clion
If everything went according to plan during installation, this command will activate CLion.
Initiating CLion using the Flatpak Command
The following command in your terminal will work if you have selected Flatpak as your installation method of choice:
flatpak run com.jetbrains.CLion
GUI Launch Method for CLion on Ubuntu
For those who are more at ease using a visual interface, Ubuntu's graphical user interface (GUI) offers an alternative way to launch CLion. The steps are as follows:
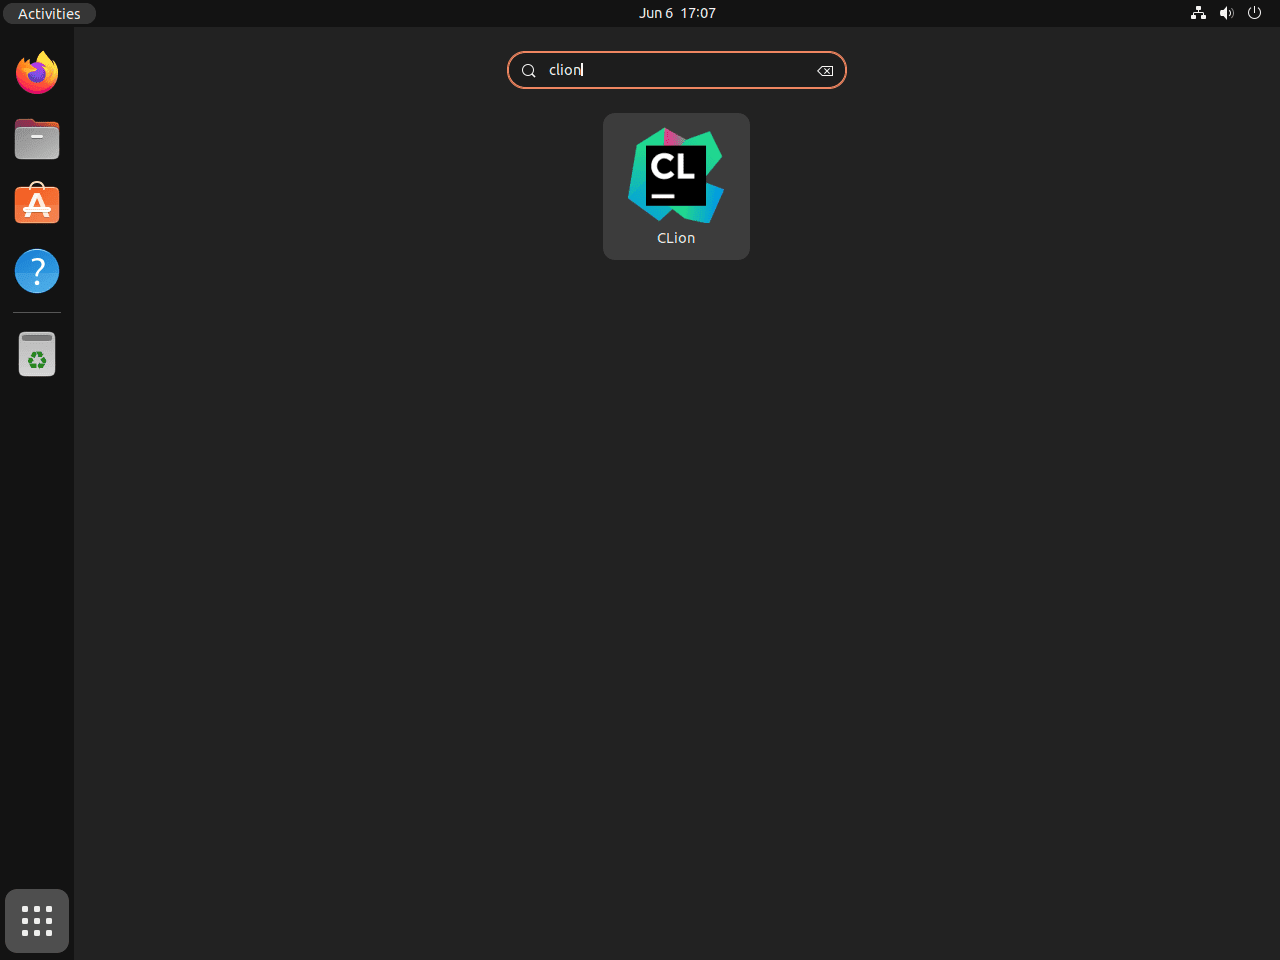
- Activities Menu: Clicking the "Activities" menu in the upper-left corner of your desktop screen will start the process.
- Show Applications: From the Activities overlay, select the "Show Applications" icon located at the bottom.
- Search for CLion: To quickly find CLion, you can either use the search bar or scroll through your applications.
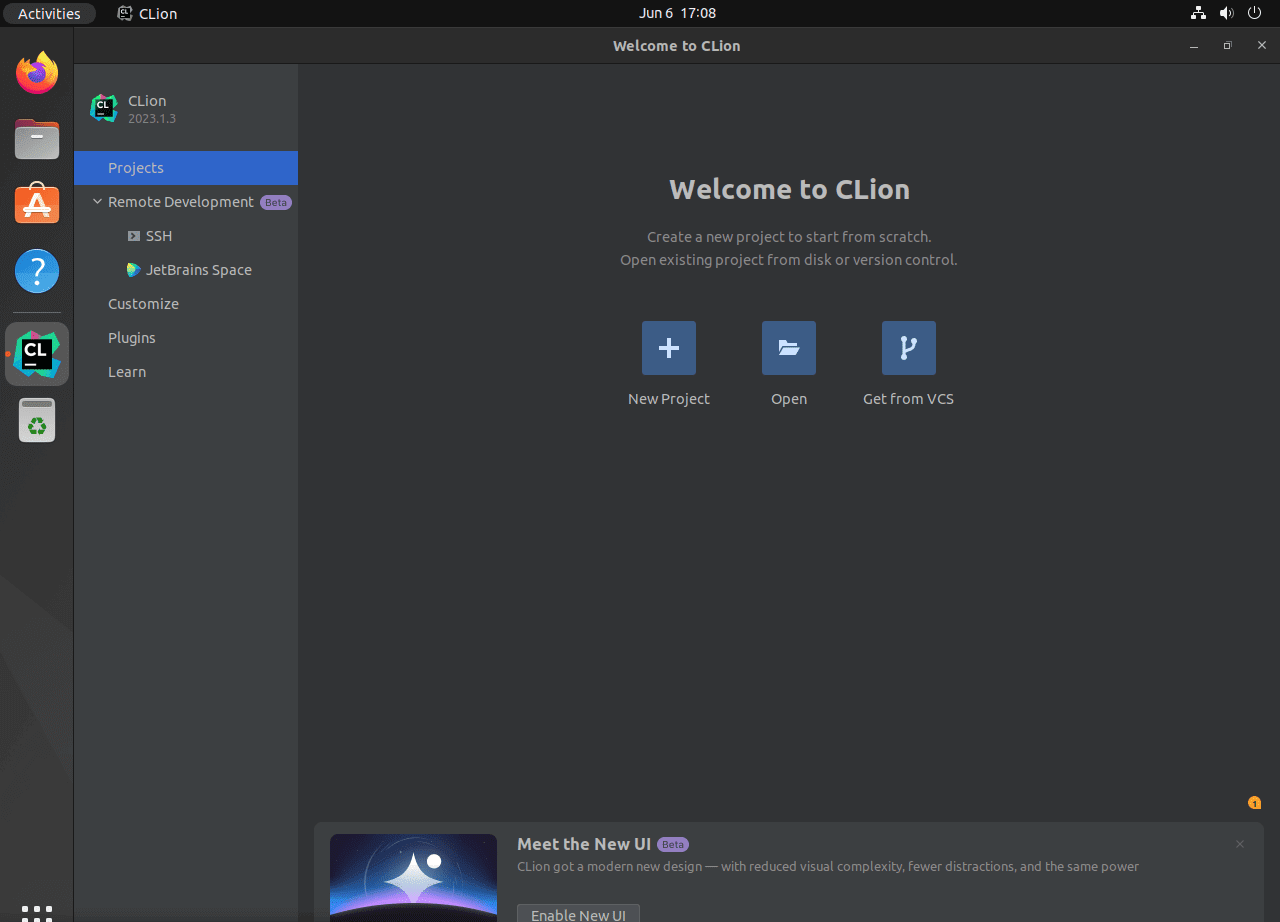
- Launch CLion: To prime the IDE for your coding tasks, click the CLion icon at the end.

Section 5: Getting Started with CLion on Ubuntu 22.04
You need to know a few tricks to make the most of your experience when you first start using CLion in your Ubuntu Linux environment. With an emphasis on general advice and customization techniques, this section offers practical insights on how to make the most of CLion.
Understanding the Basics of CLion on Ubuntu
Here are some key ideas to understand before you go further:
- Workspace: CLion is based on the idea of a workspace. One or more projects, along with all the tasks, configurations, and settings associated with them, are contained in each workspace.
- Project Structure: Comprehending the CLion project structure is essential. For optimal performance, your headers, source files, and other resources should be arranged correctly.
- Building and Running: By default, CLion builds your project automatically and maintains the executables updated for use.
Customize Your Environment with CLion on Ubuntu
There are many customization options available in CLion that can improve your coding experience:
- Code Style: You can alter your coding style to conform to the standards of your team or your personal tastes. Go to File -> Settings -> Editor -> Code Style to access these settings.
- Keymap: You can personalize CLion's keyboard shortcuts for nearly all of its functions. To access these settings, go to File -> Settings -> Keymap.
- Themes and Colors: CLion provides a variety of color schemes and themes. Select the option that aligns with your preferences by going to File -> Settings -> Appearance & Behavior -> Appearance.
Utilizing CLion’s Code Analysis with CLion on Ubuntu
Strong code analysis is offered by CLion, which can identify possible problems and make wise recommendations:
- On-The-Fly Code Analysis: Real-time code analysis is provided by CLion, which can spot possible mistakes while you type. It points out the problems right there in the editor so you can fix them right away.
- Code Inspection: In addition to real-time analysis, CLion provides a comprehensive code inspection feature that looks for potential problems in your project. To launch it, go to the main menu and choose Analyze -> Inspect Code.
Mastering Navigation in CLion on Ubuntu
Using CLion's efficient navigation can greatly boost your productivity:
- Navigating to Declaration: Any symbol can be navigated to its declaration by pressing Ctrl+B.
- Quick File Navigation: You can quickly search for and navigate to any file in your project by pressing Ctrl+Shift+N.
- Navigating to Last Edit Location: You can get back to your last edit location quickly by using the keyboard shortcut Ctrl+Shift+Backspace.
Efficient Debugging and Testing with CLion on Ubuntu
The debugging and testing tools from CLion are a developer's dream come true:
- Debugging: The built-in debugger in CLion can be accessed by hitting Shift+F9 or by clicking the bug icon in the toolbar. Numerous features are available, including memory view, breakpoints, and variable examination.
- Unit Testing: Multiple testing frameworks are supported by CLion. The tests can be executed straight from the editor, and an organized format is used to display the results.
Acquiring proficiency in these facets of CLion will greatly improve your programming efficacy and enable you to fully utilize this formidable IDE.

Section 6: Managing CLion on Ubuntu 22.04
This section will go over the various command-line methods for installing and uninstalling CLion on an Ubuntu Linux system. We will concentrate on using the special APT, Snap, and Flatpak instructions to carry out these tasks.
How to Update CLion on Ubuntu 22.04
It's crucial to keep up with software updates. They offer the most recent security upgrades, patches, and features. Thus, it is essential to understand how to update CLion using various package managers.
APT Update Command for CLion on Ubuntu
The package management system in Ubuntu known as APT, or Advanced Package Tool, is widely used. We need to update the package list before we can use APT to update CLion. This guarantees that all of the packages have the most recent information available. We can then upgrade the packages as a result. For these tasks, the following commands are utilized:
sudo apt update
sudo apt upgrade
Snap Update Command for CLion on Ubuntu
Canonical developed the software packaging and deployment system known as Snap. Updating CLion can be done easily with the Snap command. The following command is required:
sudo snap refresh
Flatpak Update Command for CLion on Ubuntu
For Linux systems, Flatpak is a tool for package management, application virtualization, and software deployment. You must run the following command in order to update CLion with Flatpak:
sudo flatpak update
How to Remove CLion from Ubuntu 22.04
You might occasionally need to uninstall CLion from your Ubuntu Linux system. Let us examine the possible ways to achieve this.
APT Command to Remove CLion from Ubuntu
You can use APT to uninstall CLion by running the following command:
sudo apt remove clion
You can also remove the repository and GPG key with these commands if you don't intend to reinstall CLion or use the third-party APT PPA for other JetBrains products:
sudo rm /etc/apt/sources.list.d/jetbrains-ppa.list
sudo rm /usr/share/keyrings/jetbrains-ppa-archive-keyring.gpg
Snap Command to Remove CLion from Ubuntu
Snap requires the following command to be used in order to uninstall CLion:
sudo snap remove clion
Flatpak Command to Remove CLion from Ubuntu
Lastly, the following command can be used to uninstall CLion using Flatpak:
sudo flatpak uninstall com.jetbrains.CLion
FAQs to Install CLion on Ubuntu 22.04
What are the system requirements for running CLion on Ubuntu 22.04?
CLion requires a system with a minimum of 2 GB RAM and 2 GB of disk space. It is recommended to have a multi-core processor and a screen resolution of at least 1024x768.
Can I use CLion on Ubuntu 22.04 for free?
CLion offers a free trial period, allowing you to evaluate its features. After the trial expires, a paid license is required for continued usage.
Does CLion support version control systems on Ubuntu 22.04?
Yes, CLion supports popular version control systems like Git, Subversion, and Mercurial. You can seamlessly integrate them into your CLion workflow.
Can I customize the CLion interface on Ubuntu 22.04?
Yes, CLion provides various customization options. You can personalize the editor themes, fonts, and keymaps to suit your preferences and make your coding experience more comfortable.
Can I use CLion to develop projects in other programming languages on Ubuntu 22.04?
While CLion is primarily designed for C and C++ programming, it offers support for other languages like Python, JavaScript, and more. You can use it for multi-language projects on Ubuntu 22.04.
Does CLion have debugging capabilities on Ubuntu 22.04?
Yes, CLion provides a comprehensive set of debugging tools. You can set breakpoints, inspect variables, and step through code to troubleshoot and fix issues efficiently.
Can I install CLion alongside other development tools on Ubuntu 22.04?
Yes, CLion can coexist with other development tools without conflicts. You can have multiple IDEs and programming environments installed on Ubuntu 22.04.
Conclusion
We hope this tutorial helped you understand how to install CLion on Ubuntu 22.04.
If you have any queries, please leave a comment below, and we’ll be happy to respond to them for sure.

