Choose a different version or distribution
Introduction
Before we begin talking about how to install Docker on Windows 10 OS, let’s briefly understand – What is Docker?
Docker is a platform that uses OS-level virtualization to deliver software in packages called containers. More than that, it is a popular tool to make build and deployments easier.
You’ll install Docker Community Edition (CE) on Windows 10 in this tutorial. Also, we will answer some FAQs regarding Docker installation.
Prerequisites
- Microsoft Windows 10 (Professional, Enterprise or Education)
- 64-bit OS configuration
- Docker Hub Account
Step 1 – Download Docker Desktop for Windows 10
To install Docker on Windows 10, first visit Docker download page and login to the Docker Hub.

After that, download the latest docker installer as shown in the picture below.

Step 2 – Run Docker Installer
1) After download, double click on the Docker Desktop Installer.exe file to run the Docker installer.
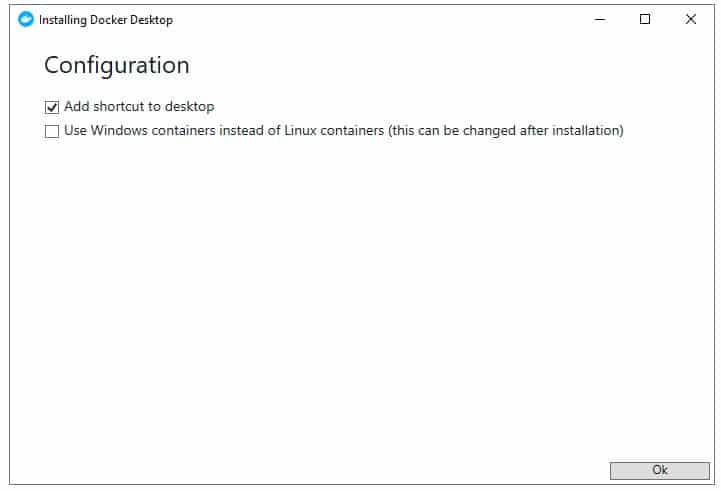
You will get the following prompt that the file is going to make changes on your hard disk. Click YES and proceed. Now, you will receive the following prompt. Again click Ok and proceed. You can configure the container settings after the installation as well.

2) After this you will get a prompt to logout of Windows to complete the installation process.
Step 3 – Enable Hyper-V for Docker
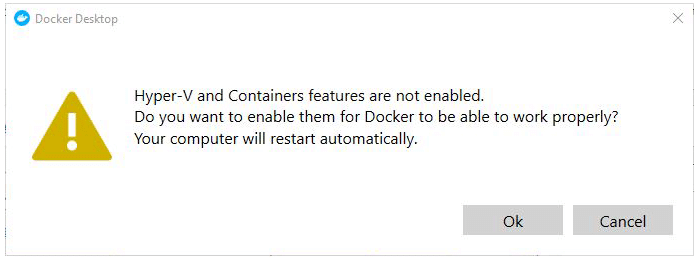
Wait, the installation is not done yet. You need to enable the Hyper-V to complete the installation and you will get the following prompt to enable Hyper-V. Above all, Docker for Windows installer can enable it for you. Click Ok to enable Hyper-V. Now, your computer will reboot to complete the installation process.

Docker is Installed Successfully on Windows 10
If you followed the process and everything went well, you should have Docker installed on your Windows machine, the service should be running and waiting to host containers with various apps.
FAQs to install Docker on Windows 10
1) How to check the Windows version?
- Select the Start. button, type Computer in the search box, right-click on Computer, and then select Properties.
- Under Windows edition, you’ll see the version and edition of Windows that your device is running.
2) What is Windows 10 Hyper-V?
Hyper–V is a virtualization technology tool from Microsoft that is available on Windows 10 Pro, Enterprise, and Education versions. Hyper–V allows you to create one or multiple virtual machines to install and run different OSes on a Windows 10 PC.
3) Which Docker Container can run on Windows 10?
It can run both Windows and Linux containers.
4) How to install Docker on Windows 10 Home?
You cannot install Docker Desktop in your Windows Home edition instead you can install Docker Toolbox.
Make Sure virtualization is enabled – if not please enable it in your BIOS and check virtualization status in Task manager.
Conclusion
We hope this simple guide helped you understand how to install Docker on your Windows 10 machine. To learn more about Docker installation for Windows 10, check out the official Docker install documentation.
If you have any queries, please leave a comment below and we’ll be happy to respond to them for sure.


