

Introduction
Before we begin talking about how to install MusicBrainz Picard on Ubuntu 22.04, let's briefly understand – What is MusicBrainz Picard?
MusicBrainz Picard is a powerful and user-friendly tool for organizing your music library. It helps you manage and tag your music files effortlessly. With its sophisticated algorithms, Picard automatically identifies and matches your tracks with the correct metadata, including artist name, album title, and track number. It also allows you to customize the tagging process according to your preferences. Say goodbye to messy music files and hello to a well-organized library with MusicBrainz Picard.
In this tutorial, you will install MusicBrainz Picard on Ubuntu 22.04. We will also address a few FAQs on how to install MusicBrainz Picard on Ubuntu 22.04.
Advantages of MusicBrainz Picard
- Seamless Music Organization: MusicBrainz Picard effortlessly organizes your music library, ensuring all your files are correctly tagged.
- Accurate Metadata Matching: With advanced algorithms, Picard precisely matches tracks with the correct metadata, including artist names, albums, and track numbers.
- Customizable Tagging: Customize the tagging process according to your preferences, ensuring your music files are organized exactly how you want them.
- Multi-Format Support: Picard supports a wide range of audio formats, making it compatible with various file types in your music collection.
- User-Friendly Interface: With its intuitive interface, Picard is easy to use for beginners and advanced users alike, simplifying the process of organizing your music.
Install MusicBrainz Picard on Ubuntu 22.04 via APT
Step 1: Update Ubuntu System Packages Before MusicBrainz Picard Installation
Keeping your Ubuntu system up to date is the first step in any installation process. This is important because an updated system lowers the possibility of conflicts arising from out-of-date packages during installation.
Use the following command in the terminal to update your system:
sudo apt update && sudo apt upgrade
There are two things this command does. To make sure your system has the most recent versions of all the packages, use the sudo apt update command to refresh the package list. While this is going on, sudo apt upgrade updates all installed packages to the most recent versions.
Step 2: Install Initial Packages for MusicBrainz Picard on Ubuntu
In this step, we're determining whether your system already has the necessary packages installed in order to install MusicBrainz Picard. They will be installed if not.
Execute the following command within your terminal:
sudo apt install software-properties-common apt-transport-https -y
Step 3: Add MusicBrainz Developers PPA on Ubuntu
The MusicBrainz Developers' Personal Package Archive (PPA) needs to be imported at this point. Installing software that might not be available in the official Ubuntu repositories is made easy with PPAs. In this instance, the stable or daily build PPAs will be added.
For most users, the stable build is advised because it has been tested and is less likely to contain bugs. Although it might be less stable, the daily build provides the most recent features and updates.
Use this command to add the stable build PPA:
sudo add-apt-repository ppa:musicbrainz-developers/stable -y
As an alternative, run the following command to make use of the daily build:
sudo add-apt-repository ppa:musicbrainz-developers/daily -y
It should be noted that you can only have one installed version at a time. You will need to uninstall MusicBrainz Picard, re-add the preferred PPA, and reinstall the program if you want to go from one to the other.
Step 4: Refreshing Your Package List After MusicBrainz Picard PPA Import
It's crucial to update your package list to reflect the new PPA after you've added it to your system. By doing this, the system is able to identify the new repository and download packages from it.
In order to update your package list, type the following command into the terminal:
sudo apt update
Step 5: Install MusicBrainz Picard on Ubuntu 22.04 via APT Command
At last, MusicBrainz Picard can be installed on your system. To start the installation procedure, enter the following command:
sudo apt install picard -y
The package handling tool APT is instructed to install the picard package by this command. The -y option indicates that you want to install the software without being prompted.
Install MusicBrainz Picard on Ubuntu 22.04 via Flatpak and Flathub
We will look at an alternate Flatpak installation method for MusicBrainz Picard in this section. With the help of Flatpak, a universal package manager for Linux, you can install programs in a segregated setting, improving system security and stability. It is comparable to Snap, but it has the advantages of a more widely used design and a more simplified implementation across different Linux distributions. Regardless of the release cycle of your distribution, one of the main advantages of installing MusicBrainz Picard via Flatpak is that you can make sure you're running the most recent version.
Step 1: Enable the Flathub Repository For MusicBrainz Picard on Ubuntu
You must enable the Flathub repository prior to using Flatpak to install MusicBrainz Picard. MusicBrainz Picard is one of the many applications available on Flathub, which is the main source for Flatpak applications.
Use the following command in your terminal to enable Flathub:
sudo flatpak remote-add --if-not-exists flathub https://flathub.org/repo/flathub.flatpakrepo
The Flathub repository will be added to your Flatpak configuration by using this command. The --if-not-exists option suppresses the error message if Flathub is already added.
Step 2: Install MusicBrainz Picard on Ubuntu 22.04 via Flatpak Command
You can use the flatpak install command to install MusicBrainz Picard now that Flathub is enabled. Execute the following command within your terminal:
flatpak install flathub org.musicbrainz.Picard
Using this command, MusicBrainz Picard can be installed from the Flathub repository. When a prompt asking for confirmation to install the software appears, the -y option is used to make the system automatically answer yes.
Launching MusicBrainz Picard on Ubuntu 22.04
Now that you have Ubuntu installed and MusicBrainz Picard, let's go over the various ways you can use this sophisticated music tagging application.
CLI Method to Launch MusicBrainz Picard on Ubuntu
It only takes one command to start MusicBrainz Picard if you are comfortable using the terminal:
picard
With this command, MusicBrainz Picard will launch and display its user interface on your screen.
The command to start MusicBrainz Picard from the terminal is a little bit different for users who installed the program using Flatpak:
flatpak run org.musicbrainz.Picard
The identifier of the application, in this case org.musicbrainz.Picard, comes after the flatpak run command. This command instructs MusicBrainz Picard to be run by Flatpak.
GUI Method to Launch MusicBrainz Picard on Ubuntu
You can easily launch MusicBrainz Picard from your desktop if you would rather not use the terminal. Here's how to go about it:
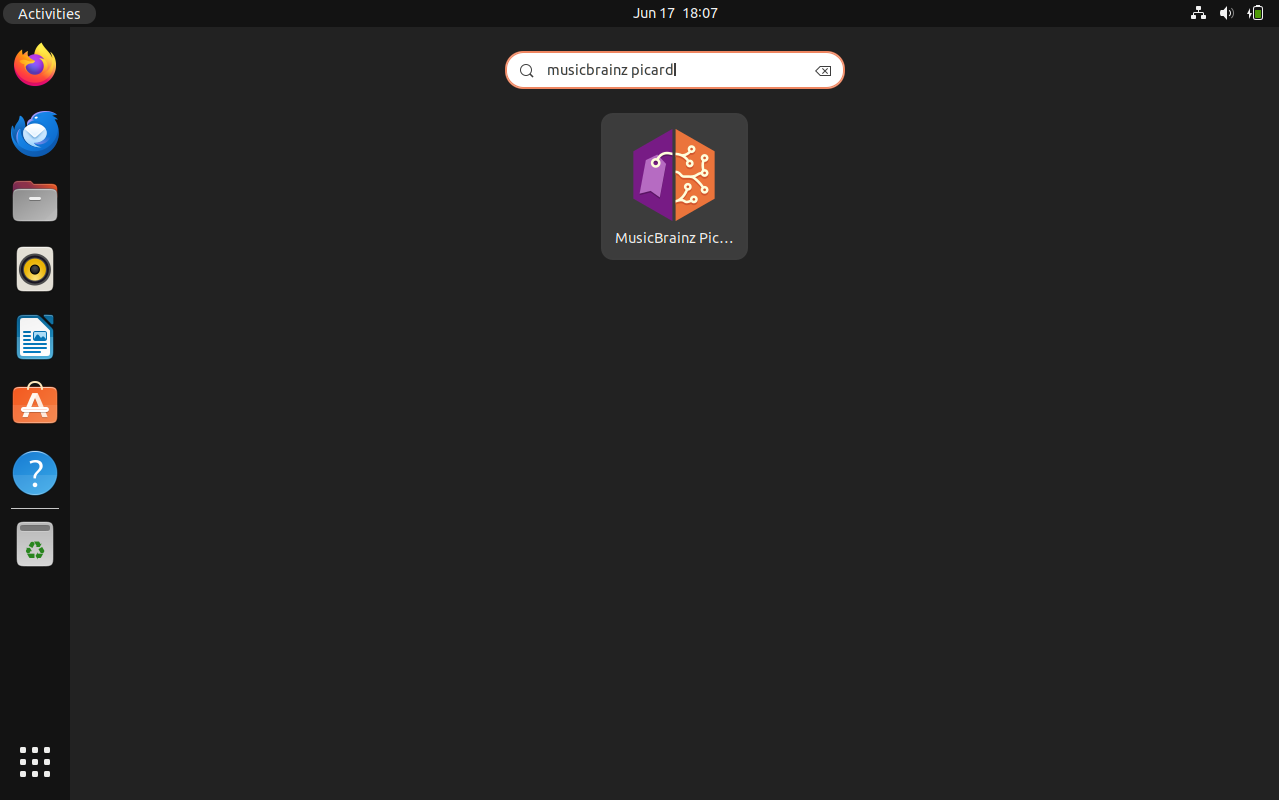
- On your screen, click Activities in the upper left corner.
- On your screen, select Show Applications located in the lower left corner.
- Find MusicBrainz Picard by searching the applications menu.
When the MusicBrainz Picard icon appears, click it to launch the program.
Tips for Getting Started with MusicBrainz Picard on 22.04
Any new software can be intimidating at first. With so many features and options, MusicBrainz Picard may seem overwhelming at first. However, be at ease! Here are some pointers to get you started on Ubuntu Linux with this potent music tagging tool.
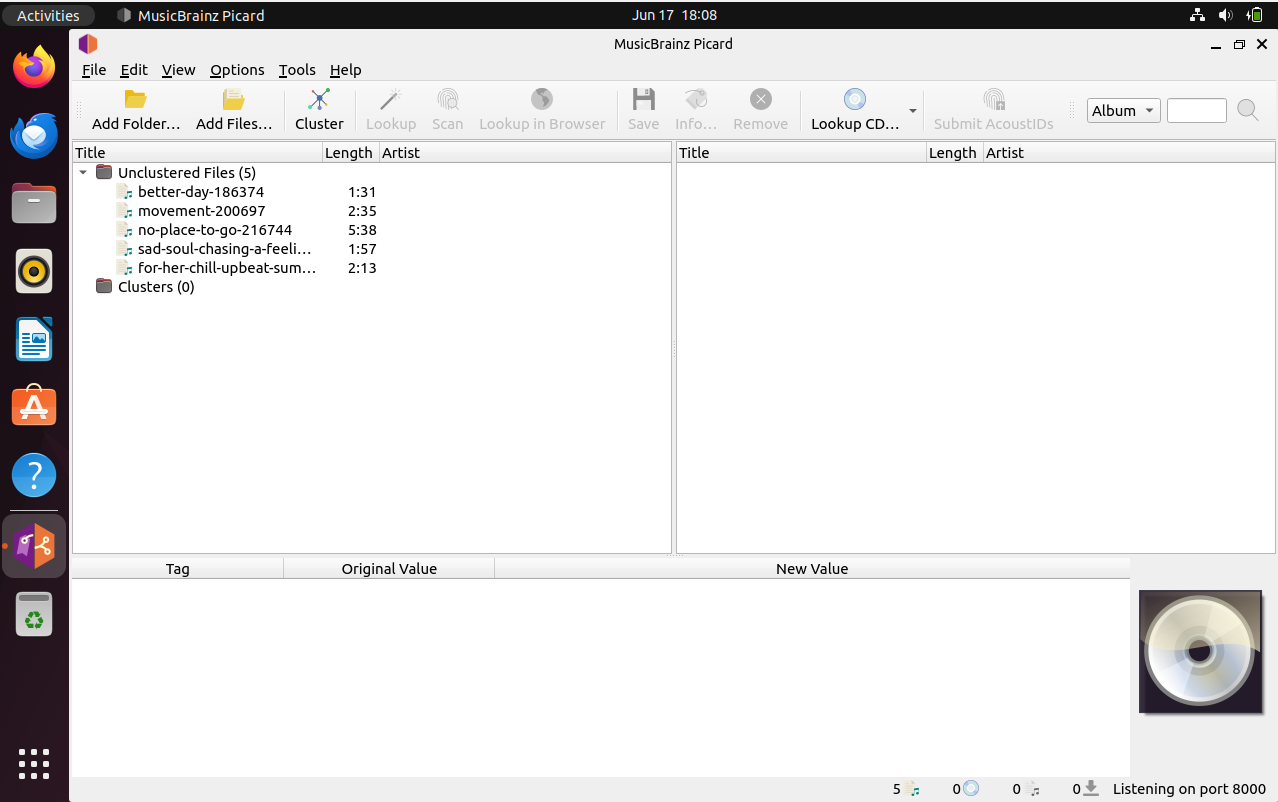
Explore the User Interface with MusicBrainz Picard on Ubuntu
Spend some time getting acquainted with the user interface. The user-friendly and well-structured GUI of MusicBrainz Picard makes tagging your music files a breeze. Here are some crucial areas to pay attention to:
- Left Panel: After you add music files or folders to Picard, this is where they show up.
- Right Panel: The music data that was obtained from the MusicBrainz database is displayed in this panel. It can be compared to the tags you currently have.
- Bottom Panel: You can view and modify a selected track's details here.
Customize Your Preferences with MusicBrainz Picard on Ubuntu
Numerous customization choices are available with MusicBrainz Picard. Go to Options > Options from the main menu to access these. These are a few noteworthy categories:
- Metadata: Tailor the metadata that Picard retrieves and writes.
- Cover Art: Set up the cover art fetching settings for Picard.
- File Naming: Take control of the naming and organization of your music files.
Remember, Picard must restart in order for any changes made to the preferences to take effect.
Use the ‘Cluster’ Function with MusicBrainz Picard on Ubuntu
Using the 'Cluster' function is a good idea before you start tagging. This feature makes it easier to manage and tag files by grouping your music files according to the album to which they belong. To gain access to this, choose your files and then select Cluster from the toolbar.
Utilize the ‘Scan’ Function with MusicBrainz Picard on Ubuntu
A strong feature of Picard is the 'Scan' function, which can accurately fetch tags from your music files by analyzing their audio fingerprints—even if they have no prior metadata. Choose your music files and click the Scan button in the toolbar to activate this feature.
Save Your Changes with MusicBrainz Picard on Ubuntu
Remember to save the tags once you have made all the changes you wanted to. By choosing your files and selecting Save from the toolbar, you can accomplish this.
Additional Commands For MusicBrainz Picard on Ubuntu 22.04
Like any software, there are a few things you need to do in order to manage MusicBrainz Picard on your Ubuntu Linux system. To use new features or enhancements, you might have to update the software, or you might choose to uninstall it completely. We'll walk you through these administrative steps here.
Update MusicBrainz Picard on Ubuntu 22.04
If you installed MusicBrainz Picard using the APT package manager, it should normally update itself automatically as part of your system packages as well. You might occasionally want to manually check for updates, though. Here's how to go about it:
Launch the terminal application and type the following command:
sudo apt update && sudo apt upgrade
First, use sudo apt update to refresh your system's package list. Afterward, use sudo apt upgrade to upgrade all upgradable packages, including MusicBrainz Picard.
Alternatively, the following command can be used to perform a blanket check of all Ubuntu installations installed through Flatpak:
flatpak update
Remove MusicBrainz Picard From Ubuntu 22.04
You can easily uninstall MusicBrainz Picard from your Ubuntu system if you would like to for any reason. But keep in mind that MusicBrainz Picard installs with a number of dependencies. It's advised to use the autoremove command to keep your system clear and organized.
APT Remove Command Method for Ubuntu
Use the following command to uninstall MusicBrainz Picard that was installed through APT:
sudo apt remove picard
You may also want to remove the PPA if you installed MusicBrainz Picard using a PPA and you don't plan to reinstall the program in the future. To delete the Stable and Daily Build PPAs, respectively, use the following commands:
sudo add-apt-repository --remove ppa:musicbrainz-developers/stable -y
sudo add-apt-repository --remove ppa:musicbrainz-developers/daily -y
Flatpak Remove Command Method for Ubuntu
To remove MusicBrainz Picard's Flatpak installation, run the following command:
flatpak uninstall org.musicbrainz.Picard
FAQs to Install MusicBrainz Picard on Ubuntu 22.04
Are there any system requirements for MusicBrainz Picard on Ubuntu 22.04?
MusicBrainz Picard has minimal system requirements, and it should work smoothly on Ubuntu 22.04 without any specific hardware constraints.
Can I install MusicBrainz Picard using a graphical interface?
Yes, you can install MusicBrainz Picard on Ubuntu 22.04 using the Ubuntu Software Center by searching for "Picard" and clicking on the "Install" button.
How can I launch MusicBrainz Picard after installation?
Once installed, you can launch MusicBrainz Picard on Ubuntu 22.04 by searching for "Picard" in the application menu or by typing picard in the terminal.
Does MusicBrainz Picard support multiple languages?
Yes, MusicBrainz Picard supports multiple languages. You can change the language under the "Options" menu, selecting your preferred language.
Can I use MusicBrainz Picard to fix incorrect or missing metadata on my music files?
Absolutely! MusicBrainz Picard is designed for precisely that purpose. It can identify and fix incorrect or missing metadata, ensuring your music files are properly tagged.
Is MusicBrainz Picard compatible with different audio file formats?
Yes, MusicBrainz Picard supports a wide range of audio file formats, including MP3, FLAC, OGG, and more, making it versatile for organizing your music collection.
Does MusicBrainz Picard require an internet connection to function properly?
An internet connection is beneficial for metadata retrieval, but MusicBrainz Picard can still complete basic tagging tasks without one.
Conclusion
We hope this tutorial helped you understand how to install MusicBrainz Picard on Ubuntu 22.04.
If you have any queries, please leave a comment below, and we’ll be happy to respond to them for sure.