
Choose a different version or distribution
Introduction
Before we begin talking about how to install Tomcat 9 on Debian 11 using the apt command, let's briefly understand – What is Tomcat?
Tomcat, commonly referred to as Apache Tomcat, is a container that includes the Jakarta expression, Jakarta servlet, and WebSocket technologies. In addition to these, it also offers a Java execution environment. It is a lightweight open-source program with outstanding features including SSL security.
In this tutorial, you will install Tomcat 9 on Debian 11 using the apt command. We will also address a few FAQs on how to install Tomcat 9 on Debian 11 using the apt command.
Advantages of Tomcat
- Lightweight and Scalable: Apache Tomcat is a lightweight web server and servlet container that can handle heavy traffic and scale applications efficiently.
- Ease of Configuration: Tomcat's straightforward configuration process enables quick setup and deployment of Java web applications.
- Robust Security: It offers built-in security features such as SSL support, authentication, and authorization mechanisms, ensuring secure web application deployment.
- Large Community Support: Tomcat has a vast community that provides continuous support, regular updates, and a wide range of plugins and extensions.
- Compatibility and Portability: Tomcat runs on multiple platforms and is compatible with various operating systems, making it easy to deploy applications across different environments.
How to install Tomcat 9 on Debian 11
Using the ufw command, we must initialize port 8080, which is by default assigned to Tomcat, before installing Tomcat 9 on Debian 11:
sudo ufw allow 8080
Using the following command, the Debian 11 repository can be updated:
sudo apt update
Now that several packages need to be updated, we may do it by running the following command:
sudo apt upgrade -y
Once the package has been upgraded and the packages are up-to-date, we will install the Java package. As we know, Tomcat 9 is developed in Java, thus Java is a necessity for Tomcat 9, so use the following command to install it:
sudo apt install default-jdk
The Java package has already been installed in our case, as we can see from the output, but if it hasn't been, it may be installed using the command mentioned above.
Installation of Tomcat9:
Run the following command to install Tomcat using the apt command:
sudo apt install tomcat9 -y
Following installation, we will add the group by executing the following command:
sudo groupadd tomcat9
We'll add a user to the group after it has been created by executing the following command:
sudo useradd -s /bin/false -g tomcat9 -d /etc/tomcat9 tomcat9
Start the Tomcat 9 service by using the systemctl command after the user has been added to the group:
sudo systemctl start tomcat9
Using the systemctl command, verify the status as follows:
sudo systemctl status tomcat9
So now that the system is up and running, we will give users access to it by customizing Tomcat 9's XML file with the use of nano editor.
sudo nano /etc/tomcat9/tomcat-users.xml
When the file has been opened, copy the following text and replace "itsfoss" with your username and "mypassword" with the password you want to set. Do this above the line that reads "/tomcat-users>" at the end of the file.
<role rolename="admin"/>
<role rolename="admin-gui"/>
<role rolename="manager"/>
<role rolename="manager-gui"/>

<user username="itsfoss" password="mypassword" roles="admin,admin-gui,manager,manager-gui"/>
When finished, use CTRL+S to save the file and CTRL+X to close the editor.
Now use the systemctl command to restart the service:
sudo systemctl restart tomcat9
Now launch the browser, enter the link, and press Go:
http://localhost:8080/
Run the following command to install Tomcat 9's web-manager and host-manager after the output indicates that Tomcat 9 has been installed successfully:
sudo apt install tomcat9-admin
Now, paste the following into your browser to access it:
http://localhost:8080/manager/html
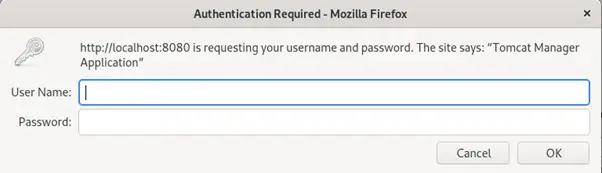
An entry prompt will appear; fill it out with the specified username and password, in this case, "itsfoss" and "mypassword":
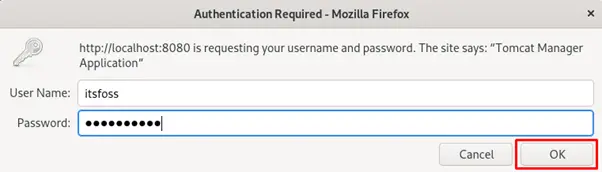
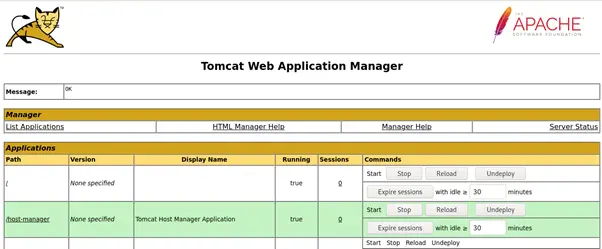
After you clicked OK, the Tomcat web application manager will appear.
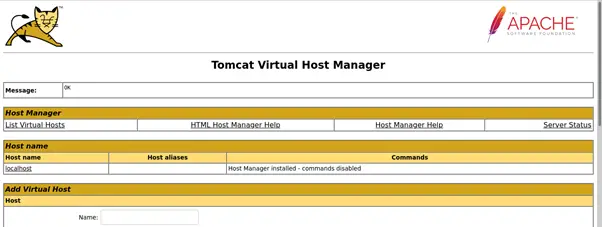
Go to the following URL in your browser if you wish to view Tomcat's virtual host manager:
http://localhost:8080/host-manager/html
Press the OK button after entering the same credentials once more in the prompt screen that displays on the screen.
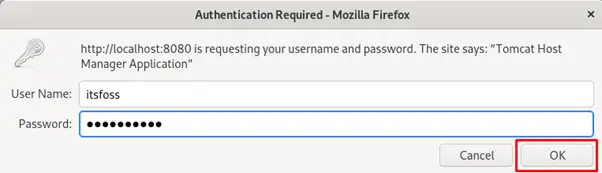
It will launch the Tomcat virtual host manager.
How to Remove Tomcat
Run the following command to uninstall Tomcat 9:
sudo apt remove tomcat9 tomcat9-admin -y
FAQs to Install Tomcat 9 on Debian 11
How do I check if Tomcat is already installed on Debian 11?
Open a terminal and run the command dpkg -l | grep tomcat. If Tomcat is installed, it will display related packages; otherwise, there will be no output.
How can I install Tomcat 9 on Debian 11 using the apt command?
Run the command sudo apt update to update the package index, then sudo apt install tomcat9 to install Tomcat 9 from the Debian repositories.
Where is the Tomcat installation directory on Debian 11?
On Debian, the default installation directory for Tomcat 9 is /usr/share/tomcat9.
How do I start and stop the Tomcat service on Debian 11?
To start the Tomcat service, use sudo systemctl start tomcat9. To stop it, run sudo systemctl stop tomcat9. Use restart instead of start to restart the service.
Can I access the Tomcat manager web interface after installation?
Yes, you can access the Tomcat manager web interface using the URL http://localhost:8080/manager/html after starting the Tomcat service.
How can I change the default port number that Tomcat listens on?
Open the file /etc/tomcat9/server.xml with a text editor, locate the Connector element for the HTTP port (default 8080), and modify the port attribute to the desired port number. Save the file and restart Tomcat.
How do I set up a custom domain name or virtual host in Tomcat 9?
Open the file /etc/tomcat9/server.xml, locate the Host element, and add a new Host element with your desired domain name and configuration. Save the file and restart Tomcat for the changes to take effect.
Conclusion
Every operating system is compatible with Tomcat 9, which is the container used for java applications. In this tutorial, we covered the slightly simpler apt command way for installing Tomcat 9 on Debian 11. We also covered how to configure Tomcat 9 by providing a password so that users may access the web application manager and virtual host manager.
If you have any queries, please leave a comment below, and we’ll be happy to respond to them.
