Choose a different version or distribution
Introduction
Before we begin talking about how to install WordPress on Ubuntu 20.04, let’s briefly understand - What is WordPress?
WordPress is a widely used content management system (CMS) that enables users to create and manage websites easily. It offers a user-friendly interface, customizable themes, and a vast range of plugins, making it suitable for both beginners and experienced developers.
With WordPress, you can build blogs, business websites, e-commerce stores, and more. It is highly versatile, SEO-friendly, and allows for easy content updates. Whether you're a small business owner or a passionate blogger, WordPress empowers you to establish a professional online presence effortlessly.
In this tutorial, you will install WordPress with the LAMP stack (Linux, Apache, MySQL, and PHP) on an Ubuntu 20.04 server. Also, we will answer some FAQs related to WordPress Installation.
Advantages of WordPress
- User-Friendly Interface: WordPress offers an intuitive interface, making it easy for beginners to create and manage websites.
- Customization Options: With a wide range of customizable themes and plugins, WordPress allows you to personalize your site according to your needs.
- SEO-Friendly: WordPress is designed with search engine optimization in mind, helping your website rank higher in search engine results.
- Content Management: Updating and managing content is a breeze with WordPress, allowing you to effortlessly add, edit, and delete pages and posts.
- Versatility: From blogs to e-commerce stores, WordPress accommodates various types of websites, making it suitable for any online venture.
Prerequisites to Install WordPress with LAMP on Ubuntu 20.04
- Make a
sudouser on the server: It is recommended to use a non-root user withsudoprivileges. - Install LAMP stack: Setting up a LAMP stack (Linux, Apache, MySQL, and PHP) meets all of the requirements.
- Site security of SSL: TLS/SSL is the technology that allows anyone to encrypt the traffic from a site so that the connection is secure. The way you set up SSL will depend on whether you have a domain name or not.
- If you have a domain name the simplest way to secure your site is with Let’s Encrypt, which provides complimentary, trusted certificates.
- If you don't have a domain and you are using this configuration for testing or personal use, you can use a self-signed certificate as well. This provides similar encryption, but without domain validation.
Once you're done with the setup, log into the server as a sudo user then continue.
Here are some of the most commonly used features of WordPress:
- Themes: WordPress has a vast library of free and premium themes that can be easily installed and customized to create a unique look and feel for your website.
- Plugins: Plugins are tools that can be added to WordPress to extend its functionality. There are over 50,000 free and premium plugins available on the WordPress repository, which can be used to add features like contact forms, social media integration, SEO optimization, and more.
- Content creation: WordPress allows users to easily create and publish different types of content, including blog posts, pages, and custom post types.
- Media management: WordPress includes a built-in media library where users can upload and manage images, videos, and other media files.
- SEO optimization: WordPress has many built-in SEO features, such as the ability to create custom permalinks, meta descriptions, and title tags, and the option to install SEO plugins.
- User management: WordPress allows website owners to create and manage different user roles, such as administrators, editors, authors, and subscribers, with different levels of access to the website's content.
- E-commerce: WordPress has many e-commerce plugins, such as WooCommerce, which can be used to create and manage online stores.
- Security: WordPress includes several security features, such as two-factor authentication, HTTPS support, and automatic updates, to help keep websites secure from hackers and other security threats.
Step 1 - Create MySQL Database and a WordPress User
The initial step can be called a preparatory one, wherein you have to create a database and a WordPress user for it to use. MySQL is used to store site data and user information by WordPress.
1) Log in to the MySQL root account (administrative) with the help of the following command:
mysql -u root -p
2) After that, you'll be asked for a password for the root account when you install the software.
3) We now have to make a database that will be controlled by WordPress. You can give it any name you like, we'll use WordPress as its name. Use the following command:
CREATE DATABASE wordpress DEFAULT CHARACTER SET utf8 COLLATE utf8_unicode_ci;
4) Now you have to create a separate MySQL user account which will be solely used to operate on the new database. The best idea in this scenario would be to create a function database and accounts. You can use any username for this account while we will use wordpressuser.
5) After that, create an account, set a password, and grant access to the database. The following command would help you execute this task. A strong password is recommended.
CREATE USER 'wordpressuser'@'%' IDENTIFIED WITH mysql_native_password BY 'password';
6) Now, assign the complete access of the database to the wordpressuser:
GRANT ALL ON wordpress.* TO 'wordpressuser'@'%';
6) Now that we have a database and a user account, we need to flush the privileges to register the changes recently made. The following command will help you in doing the same.
FLUSH PRIVILEGES;
7) You can exit the software with the following command.
EXIT;
Step 2 - Installing Additional PHP Extensions
1) We need a minimal number of extensions for PHP to communicate with MySQL to set up the LAMP stack. WordPress and most of its plugins allow additional PHP extensions.
The most prominent PHP extensions for WordPress can be installed using the following commands:
sudo apt update
sudo apt install php-curl php-gd php-mbstring php-xml php-xmlrpc php-soap php-intl php-zip
2) After that, you have to restart Apache to load the new extensions. To install additional plugins, you can use the following command:
sudo systemctl restart apache2
Step 3 - Modifying Apache Configurations to Allow .htaccess Overrides and Rewrites
1) Now, you'll be making a few minor adjustments to the Apache configuration. Based on the prerequisite for the tutorial, you should be having a configuration file for your site in the /etc/apache2/sites-available/ directory. We'll be using /etc/apache2/sites-available/wordpress.conf here, you can use the path according to your configurations.
Additionally, /var/www/wordpress will be used as the root directory of our WordPress install. You can use the web root specified in your own configuration.
000-default.conf default configuration (with /var/www/html as your web root). This shouldn't be a problem till the time you're only going to host one website on this server. If that's not the case, it’s recommended that you split the necessary configuration into logical chunks, one file per site.Enabling .htaccess Overrides
Initially, the .htaccess would be disabled as WordPress and most of its plugins use it for in-directory tweaks to the web server's behavior.
2) Now, open the Apache configuration file:
sudo nano /etc/apache2/sites-available/wordpress.conf
3) To allow .htaccess files, set the AllowOverride directive within a Directory block pointing to the document root. Add the following text inside the VirtualHost block in the configuration file, making sure that you use the right web root directory:
...
<Directory /var/www/wordpress/>
    AllowOverride All
</Directory>
...
4) You have to save and exit once you're done.
Your final configuration will look like this:
<VirtualHost *:80>

        ServerAdmin webmaster@localhost
        DocumentRoot /var/www/wordpress

        <Directory /var/www/wordpress/>
            AllowOverride All
        </Directory>

        ErrorLog ${APACHE_LOG_DIR}/error.log
        CustomLog ${APACHE_LOG_DIR}/access.log combined

</VirtualHost>
Enabling the Rewrite Module
5) Enable mod_rewrite so that the WordPress permalink feature can be utilized.
sudo a2enmod rewrite
Enabling the Changes
6) With the following command, check for any syntax errors:
sudo apache2ctl configtest
7) You'll be able to see a similar output as below:
Output

AH00558: apache2: Could not reliably determine the server's fully qualified domain name, using 127.0.1.1. Set the 'ServerName' directive globally to suppress this message
Syntax OK
8) Add a ServerName directive to the main (global) Apache configuration file at /etc/apache2/apache2.conf for suppressing the top line. Your server’s domain or IP address can be the ServerName . This is just a message and doesn’t affect the functioning of the site. As long as the output contains Syntax OK, you are good to go.
On restarting Apache, these changes will be applied. Use the command below for the same:
sudo systemctl restart apache2
Step 4 - Downloading WordPress
After configuring the server software, you have to download and set up WordPress. The use of the latest version of WordPress is recommended for security reasons.
1) Change to a writable directory and then download the compressed release with the help of the following command.
cd /tmp
curl -O https://wordpress.org/latest.tar.gz
2) To create the WordPress directory structure, extract the compressed file.
tar xzvf latest.tar.gz
3) You need to move these files to document root for the time being. Before that, you can make a dummy .htaccess file for WordPress to use later.
Use the following command to create the dummy file:
touch /tmp/wordpress/.htaccess
4) Copy the sample configuration file to the filename that WordPress reads, using:
cp /tmp/wordpress/wp-config-sample.php /tmp/wordpress/wp-config.php
5) Alternatively, you can create an upgrade directory to prevent WordPress to run into permission issues following an update to its software.
mkdir /tmp/wordpress/wp-content/upgrade
6) After that, you need the contents of your directory into the document root. A dot at the end of the source directory indicates that everything within the directory needs to be copied, including hidden files (like .htaccess)
sudo cp -a /tmp/wordpress/. /var/www/wordpress
Step 5 - Configuring the WordPress Directory
Before the web-based WordPress setup, certain adjustments are to be made in the WordPress directory.
Adjusting the Ownership and Permissions
1) One important task is setting up reasonable file permissions and ownership.
You need to give ownership of all files to the www-data user and group. The Apache webserver runs as this user, and it will need to be able to read and write WordPress files to serve the website and perform automatic updates.
The ownership then needs to be updated with chown:
sudo chown -R www-data:www-data /var/www/wordpress
2) After that, you need to run two find commands to set the right permissions on the WordPress directories and files.
sudo find /var/www/wordpress/ -type d -exec chmod 750 {} \;
sudo find /var/www/wordpress/ -type f -exec chmod 640 {} \;
3) To start with, you'd need a reasonable set of permissions, other plugins and procedures may require additional tweaks.
Setting up the WordPress Configuration File
4) Next, you need to make certain changes to the WordPress configuration file.
You need to start by providing certain secret keys for some security for the installation.WordPress provides a secure generator for such values so that you don't have to take the pain of finding them yourself. These are only used internally, so it won’t affect usability to have complex, secure values in there.
Use the following command to generate a secure value:
curl -s https://api.wordpress.org/secret-key/1.1/salt/
5) You will be able to see unique values like the output below:
Warning!: You need to request unique values each time. DO NOT copy the values shown!
Output

define('AUTH_KEY',         '1jl/vqfs<XhdXoAPz9 DO NOT COPY THESE VALUES c_j{iwqD^<+c9.k<J@4H');
define('SECURE_AUTH_KEY',  'E2N-h2]Dcvp+aS/p7X DO NOT COPY THESE VALUES {Ka(f;rv?Pxf})CgLi-3');
define('LOGGED_IN_KEY',    'W(50,{W^,OPB%PB<JF DO NOT COPY THESE VALUES 2;y&,2m%3]R6DUth[;88');
define('NONCE_KEY',        'll,4UC)7ua+8<!4VM+ DO NOT COPY THESE VALUES #`DXF+[$atzM7 o^-C7g');
define('AUTH_SALT',        'koMrurzOA+|L_lG}kf DO NOT COPY THESE VALUES  07VC*Lj*lD&?3w!BT#-');
define('SECURE_AUTH_SALT', 'p32*p,]z%LZ+pAu:VY DO NOT COPY THESE VALUES C-?y+K0DK_+F|0h{!_xY');
define('LOGGED_IN_SALT',   'i^/G2W7!-1H2OQ+t$3 DO NOT COPY THESE VALUES t6**bRVFSD[Hi])-qS`|');
define('NONCE_SALT',       'Q6]U:K?j4L%Z]}h^q7 DO NOT COPY THESE VALUES 1% ^qUswWgn+6&xqHN&%');
6) These configuration lines can be pasted directly in the configuration file to set secure keys. Now, copy the output you have received.
Next, open the WordPress configuration file.
sudo nano /var/www/wordpress/wp-config.php
7) Now, find the section with dummy values like the ones mentioned below:
. . .

define('AUTH_KEY',         'put your unique phrase here');
define('SECURE_AUTH_KEY',  'put your unique phrase here');
define('LOGGED_IN_KEY',    'put your unique phrase here');
define('NONCE_KEY',        'put your unique phrase here');
define('AUTH_SALT',        'put your unique phrase here');
define('SECURE_AUTH_SALT', 'put your unique phrase here');
define('LOGGED_IN_SALT',   'put your unique phrase here');
define('NONCE_SALT',       'put your unique phrase here');

. . .
8) Remove those lines, now paste the ones you copied from the command line.
. . .

define('AUTH_KEY',         'VALUES COPIED FROM THE COMMAND LINE');
define('SECURE_AUTH_KEY',  'VALUES COPIED FROM THE COMMAND LINE');
define('LOGGED_IN_KEY',    'VALUES COPIED FROM THE COMMAND LINE');
define('NONCE_KEY',        'VALUES COPIED FROM THE COMMAND LINE');
define('AUTH_SALT',        'VALUES COPIED FROM THE COMMAND LINE');
define('SECURE_AUTH_SALT', 'VALUES COPIED FROM THE COMMAND LINE');
define('LOGGED_IN_SALT',   'VALUES COPIED FROM THE COMMAND LINE');
define('NONCE_SALT',       'VALUES COPIED FROM THE COMMAND LINE');

. . .
9) Now, you have to change certain database connection settings at the very beginning of the file. For this, the database name, the database user, and the associated password that was configured within MySQL need to be adjusted.
10) After that, we have set the method that WordPress needs to use to write to the filesystem. The permissions have already been given to the web server, therefore it can write where it needs to. We now can set the filesystem method to "direct". Failure to set this with our current settings would make WordPress ask for FTP credentials when we perform certain actions.
11) The above setting can be added below the database connection settings, or anywhere else in the file:
. . .

define('DB_NAME', 'wordpress');

/** MySQL database username */
define('DB_USER', 'wordpressuser');

/** MySQL database password */
define('DB_PASSWORD', 'password');

. . .

define('FS_METHOD', 'direct');
12) Once the necessary changes have been made, save the file and close it.
13) Now create a soft link of wordpress.conf to sites-enabled directory
ln -s /etc/apache2/sites-available/wordpress.conf /etc/apache2/sites-enabled/
Remove the default page of apache.
sudo rm /etc/apache2/sites-enabled/000-default.conf
sudo systemctl restart apache2
Step 6 - Completing the Installation Through the Web Interface
1) Once the server configuration has been done. You need to proceed with the web-based installation.
Use the command given below to navigate to your server’s domain name or public IP address
https://server_domain_or_IP
2) Choose your preferred language.
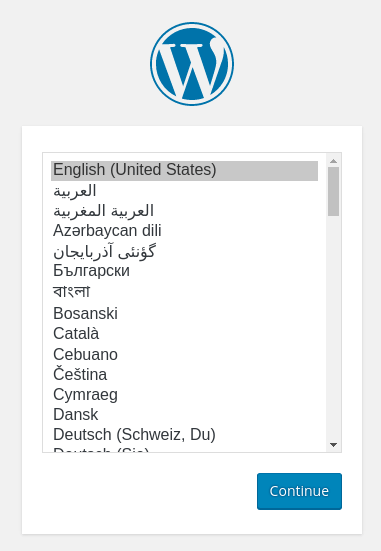
This will reveal the main setup page.
3) Opt for a name for your WordPress site and choose a username (it is recommended that you don't go for something as simple as "admin"). A strong password will be generated automatically, you can choose to save it or create your own password.
Put in your email address, then select whether you'd like to discourage search engines from indexing your site.
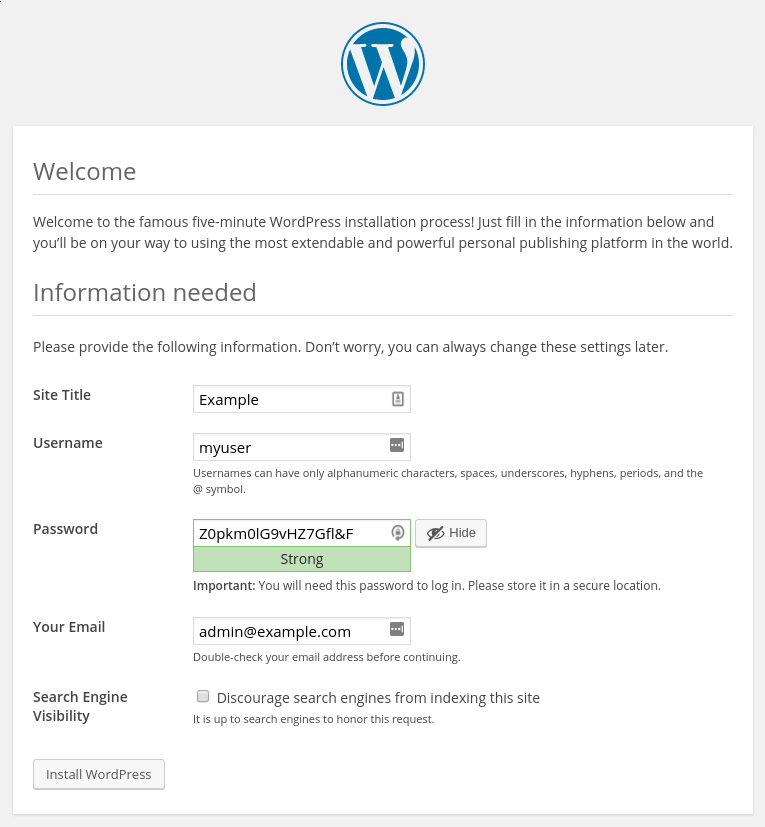
4) On clicking Ahead you'll be prompted to log in.
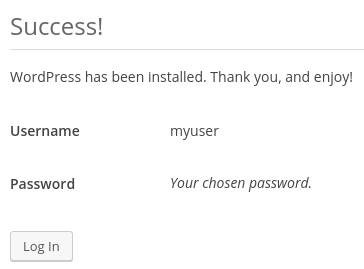
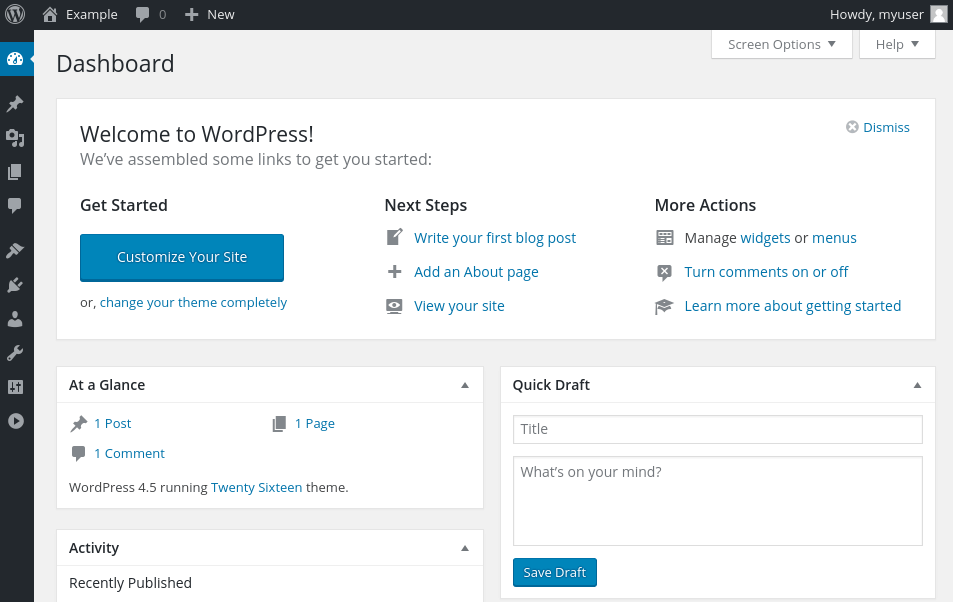
5) After logging in, the WordPress Administration dashboard will be revealed:
FAQ's to Install WordPress with LAMP on Ubuntu 20.04
Why Should I Choose WordPress?
Even for beginners, WordPress is simpler to use. Because of the vast collection of plugins and themes available, it is adaptable, expandable, and search engine friendly. The open-source platform is free to use, share, and change for a variety of applications, unlike other CMSs like Drupal and Joomla.
Is WordPress Free?
Yes, WordPress is a free and open-source CMS. To create a website with it, you will still require hosting and a domain name.
Do I Need to Install WordPress On My Computer?
WordPress doesn't have to be installed on your computer, but it's a terrific tool for learning about and trying out new things before publishing updates to the live version of your website. WordPress must be installed on your hosting server, though.
How to find a good host for your WordPress website?
Any host that supports the requirements for WordPress can be used for hosting your website. If you’re not sure if your host can run WordPress the best thing to do would be to contact them and ask if they meet the requirements for running WordPress. You can find a list of some good hosts here.
How to install using cPanel / cPanel X?
If you want to perform a manual installation using cPanel you can follow the guide on using cPanel.
How do I configure the wp-config.php file?
The wp-config.php file is one of the most important files of your website. It’s located at the root of your WordPress installation and contains most of the website’s configuration details. Editing this file can be done in any plain-text editor. Usually, this isn’t necessary unless you’re installing WordPress manually.
Conclusion
WordPress has been installed and is ready to use! You can choose the permalinks setting for your posts (found in Settings > Permalinks) or select a new theme (Appearance > Themes).
We hope this detailed tutorial helped you understand how to install, configure, and modify WordPress on Ubuntu 20.04 server. To learn more about WordPress, check out the official WordPress documentation.
If you have any queries, please leave a comment below and we’ll be happy to respond to them for sure.