
Introduction
Before we begin talking about how to install Xrdp on CentOS 8, let’s briefly understand - What is Xrdp?
Xrdp is an open-source implementation of the Microsoft Remote Desktop Protocol. RDP allows the user to graphically control the remote system. It even enables the user to log in to the remote machine.
Installing the XRDP server on CentOS 8 allows you to establish remote desktop connections to your CentOS system using the Remote Desktop Protocol (RDP). This convenient feature enables you to access and manage your CentOS machine remotely from a Windows or Linux desktop with an RDP client installed.
In this tutorial, we will walk you through the steps required to install the XRDP server on CentOS 8, allowing you to set up a secure and efficient remote desktop solution.
Step 1- Installing the Desktop Environment
1) The Linux servers do not have an installation of a desktop environment. If the machine with which you are trying to connect does not have GUI, you will need to install it.
The Gnome is the default desktop environment in CentOS 8. To install, run the below command:
sudo dnf groupinstall "Server with GUI"
Depending on the system, downloading as well as installation of Gnome-packages and dependencies may take time.
Step 2- Installing the Xrdp
1) Xrdp is usually available in the EPEL software repository. To enable EPEL on your system, do it by running:
sudo dnf install epel-release
2) After that, install the Xrdp package using the following command:
sudo dnf install xrdp
3) After the installation process is complete. Then, start the Xrdp service by enabling it at boot.
sudo systemctl enable xrdp --now
4) You will now verify that Xrdp is running by.
sudo systemctl status xrdp
You will see the below output:
Output

● xrdp.service - xrdp daemon
   Loaded: loaded (/usr/lib/systemd/system/xrdp.service; enabled; vendor preset: disabled)
   Active: active (running) since Sun 2020-02-02 18:30:43 UTC; 11s ago
  ...
Step 3 - Configuring the Xrdp
1) The location of the configuration files are in /etc/xrdp directory. So, for basic Xrdp-connections, no need to make changes to configuration files. Further, Xrdp uses the default X-Window desktop, which is Gnome.
The main configuration file name is xrdp.ini, divided into sections. It allows you to set global configuration settings like security and listening-addresses. Moreover, creates different xrdp login sessions. After making changes to the configuration file restart the Xrdp service, by:
sudo systemctl restart xrdp
2) Xrdp uses the startwm.sh file to launch the X-session. Then, edit this file to use another X Window desktop.
Step 4 - Configuring the Firewall
1) By-default, Xrdp listens on port 3389 on all the interfaces. You will run a firewall on your CentOS machine. Do it by adding a rule to allow the traffic on Xrdp port.
2) Generally, you will allow access to the Xrdp server only from a specific IP-address, or IP-range. For instance, to allow connections only from the 192.168.1.0/24 range. For this, enter the below command:
sudo firewall-cmd --new-zone=xrdp --permanent
sudo firewall-cmd --zone=xrdp --add-port=3389/tcp --permanent
sudo firewall-cmd --zone=xrdp --add-source=192.168.1.0/24 --permanent
sudo firewall-cmd --reload
3) Also, to allow traffic to port 3389 from anywhere use the following command. Allowing access from anywhere is discouraged for many security reasons.
sudo firewall-cmd --add-port=3389/tcp --permanent
sudo firewall-cmd --reload
4) For high security, you will set-up Xrdp to listen only on localhost. Do it by creating an SSH-tunnel. It will securely forward the traffic from the local-machine on port 3389 to the server on the same port. Further, a secure option is to install the OpenVPN Then, connect it to the Xrdp server via a private network.
Step 5 - Connecting to the Xrdp-server
1) After configuration of the Xrdp server. Next, you will open your local Xrdp client and connect it to the remote CentOS 8 system.
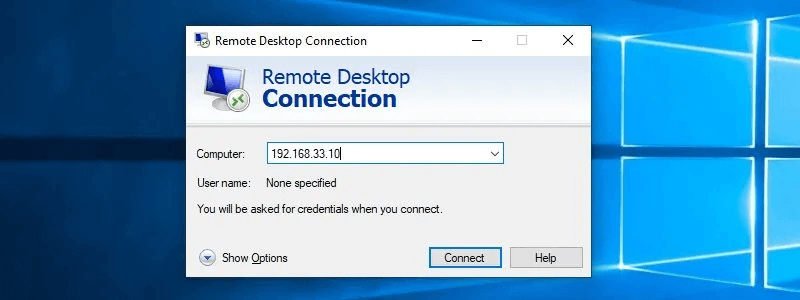
2) The Windows users will use the default RDP-client. After that, type remote in the Windows search bar. Now, click on the Remote Desktop Connection. This will then open up the RDP-client. Also, in the Computer-field, type the remote-server IP address. Next click Connect.
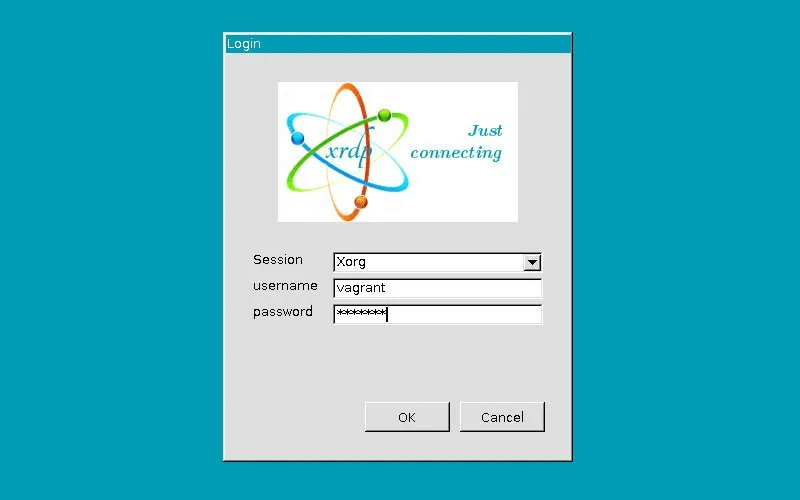
3) Then, on the login screen. You will enter your username and password. Now, click OK.
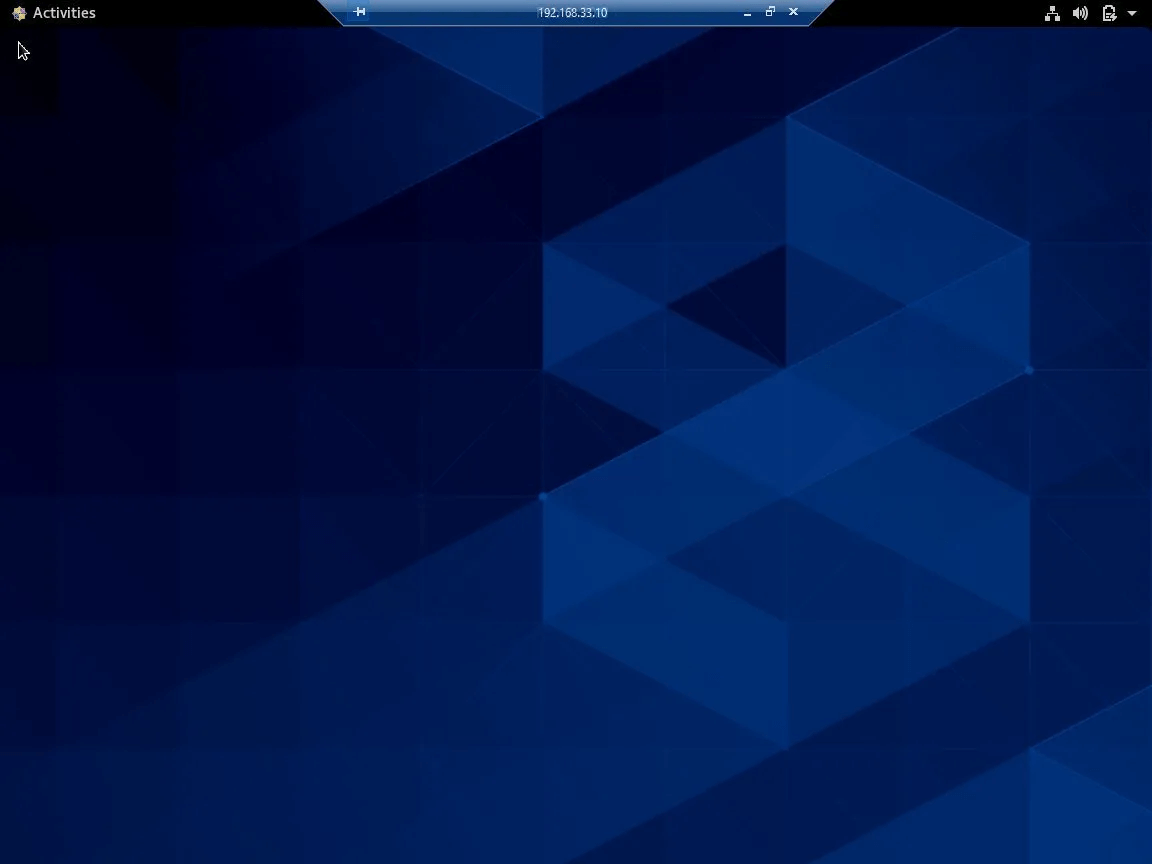
4) After logging in, you will see the default Gnome-desktop. It will look like this:
5) You will be able to interact with the remote-desktop from your local machine. Moreover, If you use macOS, install Microsoft Remote Desktop application from the Mac App Store. The Linux users can use the RDP-client like Remmina or the Vinagre.
Advantages to Install Xrdp Server on CentOS 8
- Remote Access: XRDP allows for seamless remote access to your CentOS system from anywhere, providing flexibility and convenience.
- Multi-user Support: Multiple users can simultaneously log in to the CentOS system through XRDP, enabling collaborative work and efficient resource sharing.
- Secure Connections: By configuring XRDP with SSL encryption, you can ensure secure remote desktop connections, safeguarding sensitive data.
- Compatibility: XRDP is compatible with various RDP clients, making it accessible from different platforms, including Windows and Linux.
- Easy Installation: Installing XRDP on CentOS is a straightforward process using the package manager, enabling quick setup and deployment.
FAQs to Install Xrdp Server on CentOS 8
How do I install XRDP on CentOS 8?
You can install XRDP on CentOS 8 by using the package manager. Simply run the command sudo dnf install xrdp to install XRDP and its dependencies.
Does XRDP work with any RDP client?
Yes, XRDP is compatible with various RDP clients, including Windows' Remote Desktop Connection and Linux's Remmina.
Does XRDP support multiple users logging in concurrently?
Yes, XRDP allows multiple users to log in simultaneously and access the CentOS system using their own user accounts.
How can I configure XRDP to start automatically on system boot?
You can configure XRDP to start automatically by running the command sudo systemctl enable xrdp.
Can I copy and paste files between my local machine and the XRDP session?
Yes, XRDP supports file transfer capabilities, allowing you to easily copy and paste files between your local machine and the remote XRDP session.
How do I troubleshoot XRDP connection issues?
If you experience connection problems, you can check the XRDP logs located in /var/log/xrdp.log and /var/log/xrdp-sesman.log for any error messages or clues.
Can I use a different port for XRDP connections instead of the default 3389?
Yes, you can configure XRDP to listen on a different port by modifying the configuration file /etc/xrdp/xrdp.ini and changing the value of the port directive.
Are there any alternatives to XRDP for remote desktop access on CentOS?
Yes, alternatives to XRDP for remote desktop access on CentOS include VNC (Virtual Network Computing) and No-Machine.
Conclusion
Installing XRDP server on CentOS 8 opens up the convenience of remote desktop access to your CentOS system using the Remote Desktop Protocol (RDP). With XRDP, you can easily manage and control your CentOS machine from a remote location using RDP clients available on various platforms.
By following the installation steps mentioned in the tutorial and configuring XRDP, you can establish secure connections, enable multiple user logins, and even encrypt the RDP traffic for enhanced security. XRDP provides a practical solution for remote administration, file transfer, and efficient collaboration on your CentOS 8 system.
If you have any queries, please leave a comment below and we’ll be happy to respond to them for sure.
